Roasted Baked Rutabaga: A Flavorful Twist on a Classic Comfort Food
Hey there, food lovers! Welcome back to the kitchen! Today, we’re diving into the world of rutabagas with a recipe that’s as comforting as it is creative. If you’ve never cooked with rutabaga before, you’re in for a real treat! It’s like the love child of a turnip and a cabbage, with a slightly sweet, earthy flavor that transforms beautifully when roasted. Plus, this humble vegetable is super nutritious—hello, vitamins!
Let’s talk about comfort food. We all have ‘that dish’ that brings back memories of home-cooked meals. For me, it was always about digging into hearty winter vegetables during chilly nights, sitting around the dining table with my family, sharing stories and laughter. One of my favorites was roasted vegetable medleys, and rutabaga was often the star of the show, giving the dish that sweet, nutty flavor that paired perfectly with everything else on the table.
In our busy lives, it’s easy to overlook simple ingredients like rutabaga. But today, we’re going to elevate this veggie and show you just how easy it can be to create something unforgettable. With a drizzle of olive oil, a sprinkle of spices, and a little patience as it roasts away in your oven, you’ll have a golden and crispy side dish that’s the perfect accompaniment to any main course—or even a fantastic stand-alone snack! Let’s roll up our sleeves and get started on this delicious journey. Trust me; you’ll want to try this!
Personal Story
I remember the first time I roasted rutabaga. I had just moved into my first apartment, excited to start my culinary adventures in my tiny kitchen. That winter, a friend invited me to a potluck, and I wanted to impress everyone with a unique dish. As I browsed the local farmer’s market, my eyes landed on those vibrant, purple-skinned beauties. “What’s more comforting than roasted veggies?” I thought.
So, I bought a couple and went home, armed with a vague idea of what to do. The first roast was a trial by fire, so to speak. I wasn’t too sure what spices would work best, but I kept it simple with olive oil, salt, and garlic powder. When I pulled that tray out of the oven, the aroma wrapped around me like a warm hug. Golden-brown pieces, tender on the inside, and crisp on the outside—I was hooked! That night, I became known at the potluck not just as “the new guy” but as the one who brought the awesome roasted rutabaga. It was a huge hit, sparking conversations and a few recipe requests. That day, I connected food with community, and the rutabaga earned a forever spot in my kitchen repertoire.
Ingredients
Here’s what you need to roast some delightful rutabagas:
-
2 Medium Rutabagas
The star ingredient! Rutabagas have a sweet and earthy flavor that gets even better when roasted. Look for firm, unblemished ones for the best results. Don’t worry if you can’t find rutabagas—you can substitute with turnips or even sweet potatoes in similar quantities. -
2 Tablespoons Olive Oil
This is your trusty flavor enhancer here! Olive oil not only helps the rutabagas caramelize beautifully but also adds a rich, savory flavor. You can swap it for avocado oil or melted butter if you want to switch things up. -
Salt to Taste
A dash of salt enhances all the flavors in your dish. You can use kosher salt or sea salt, depending on what you have on hand. -
Pepper to Taste
Freshly cracked black pepper gives your dish that extra zing. Want to spice things up? Try adding a pinch of cayenne or smoked paprika! -
1 Teaspoon Garlic Powder
Garlic powder brings that lovely aroma and taste without the fuss of chopping fresh garlic. You can swap it out for onion powder if garlic isn’t your thing. -
1 Teaspoon Dried Thyme
Thyme complements the mellow flavors of the rutabaga beautifully. If you prefer fresh herbs, feel free to substitute with a teaspoon of fresh thyme—just chop it finely!
Step-by-Step Instructions
Step 1: Preheat Your Oven
First things first—let’s get that oven preheated to 400°F (200°C). The goal here is to create the perfect roasting environment for our rutabaga, so preheating is crucial!
Step 2: Prep the Rutabagas
With your oven heating up, grab your rutabagas and peel them. The skin can be a bit tough, so don’t be shy with that peeler! Cut them into uniform cubes (around 1-inch pieces). This ensures even cooking, so they all hit that sweet spot of tender and crispy at the same time.
Step 3: Toss ‘Em Up
In a large bowl, combine your rutabaga cubes with the olive oil, salt, pepper, garlic powder, and thyme. Use your hands to toss everything together, making sure each piece is well coated. This part is fun, and I always say a little mess is a sign of a good cook! If you’re feeling adventurous, consider adding a splash of balsamic vinegar or maple syrup for an extra layer of flavor!
Step 4: Spread on a Baking Sheet
Grab a baking sheet and line it with parchment paper or keep it lightly greased to prevent sticking. Spread the seasoned rutabaga cubes evenly across the sheet. Give them some space—crowding them can lead to steaming rather than roasting!
Step 5: Roast, Baby, Roast!
Pop that baking tray in your preheated oven and let them roast for 25-30 minutes. Halfway through, I want you to take a moment to shuffle them around a bit to ensure even cooking. You can also take this time to inhale the delicious aroma wafting from the oven—it’s bliss!
Step 6: Check for Doneness
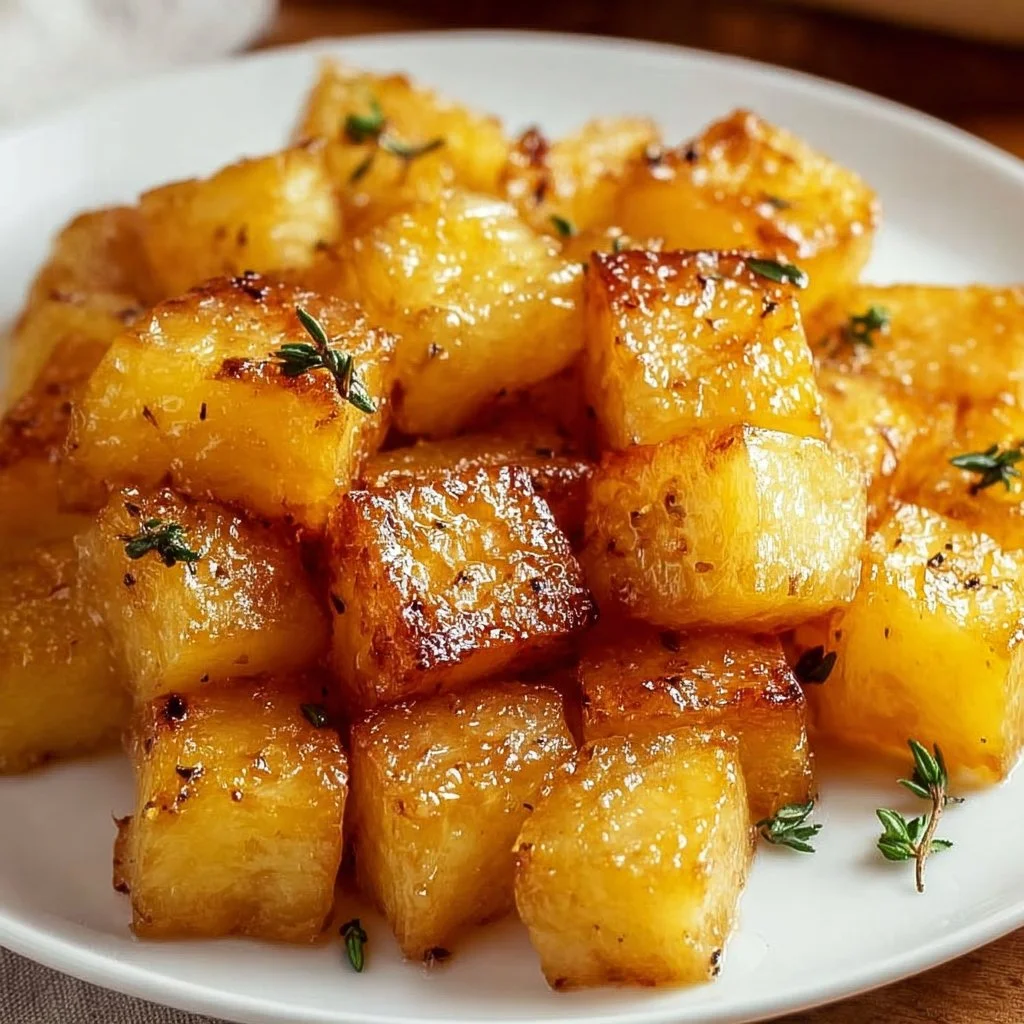
Around the 25-minute mark, take a peek. You’re looking for pieces that are golden brown and fork-tender. If they need a few more minutes, pop them back in and keep an eye on them. Once they’re done, take them out, and let them cool slightly before serving.
Serving Suggestions
Alright, your kitchen is smelling divine, and it’s time to plate! Serve your roasted rutabagas as a glorious side dish—they pair wonderfully with roasted chicken, grilled salmon, or even a hearty vegetarian stew.
For a bit of flair, sprinkle some fresh herbs, like parsley or chives, on top just before serving. If you’re feeling fancy, drizzle a little balsamic glaze over the rutabagas for that touch of elegance. They also make a fantastic base for a warm grain bowl—just throw in some quinoa, veggies, and your protein of choice, and you’re all set for a nourishing meal!
Recipe Variations
-
Sweet & Spicy Roots: Add a pinch of cayenne pepper or chili flakes to your seasoning mix for a kick! The heat beautifully balances the sweetness of the rutabaga.
-
Herb Medley: Swap out the dried thyme for a mix of your favorite herbs like rosemary, oregano, and basil. Fresh herbs all the way; aim for about a tablespoon of chopped fresh herbs.
-
Savory Maple Glaze: Before roasting, drizzle the rutabagas with real maple syrup for a sweet glaze. This works exceptionally well if you’re serving them for a brunch!
-
Parmesan Twist: In the last 5 minutes of roasting, sprinkle some grated Parmesan cheese over the rutabagas for an extra layer of flavor that will make everyone swoon.
-
Asian-Inspired: Toss the rutabagas with soy sauce and sesame oil instead of Olive oil for an Asian twist. Add some sesame seeds right before serving, and you’ve got something special!
Chef’s Notes
When it comes to cooking, evolution is key! This recipe for roasted rutabaga didn’t appear overnight; it’s been tweaked and perfected over years and countless kitchen experiments. I’ve played with spices, tried various cooking methods, and learned what works best through trial and delicious error.
What I love most about cooking is how it brings back memories. Even the funny ones—like the time I forgot to peel the rutabaga completely and ended up with a rather “interesting” texture that turned out to be a hit with friends. Sometimes, our kitchen mishaps lead to incredible new creations!
FAQs and Troubleshooting
-
What if my rutabagas are still hard after roasting?
- Don’t worry! Rutabagas can be a bit stubborn. Just give them a little more time in the oven, checking on them every 5-10 minutes until they reach that tender state.
-
Can I prepare them ahead of time?
- Absolutely! You can peel and chop the rutabagas a day in advance. Just keep them submerged in water in the fridge to prevent browning. When you’re ready to roast, drain them and follow the recipe!
-
How do I store leftover roasted rutabaga?
- Feel free to store leftover rutabagas in an airtight container in the fridge for up to 3 days. Just reheat them in the oven for about 10 minutes to bring back that crispy goodness.
-
Can I freeze roasted rutabaga?
- Yes, but I recommend freezing them before roasting. Once you’ve diced the rutabagas, prepare for freezing by blanching them for a few minutes, letting them cool, then storing them in airtight bags. When you’re ready, roast straight from the freezer—just add a few extra minutes to the cooking time.
Nutritional Info (if applicable)
While nutrition information can vary based on specific quantities and cooking methods, here’s a general breakdown for one serving of roasted rutabaga (about ½ cup):
- Calories: 100–120
- Fat: 4–6g (primarily from olive oil)
- Carbohydrates: 20–25g
- Fiber: 4–5g
- Protein: 2–3g
- Vitamins: High in Vitamin C and a good source of Magnesium and Potassium.
Rutabagas are indeed a powerhouse of nutrition, making them an excellent addition to your meals!
Final Thoughts
And there you have it! Roasted rutabaga—a simple yet effective dish that can bring a burst of flavor and warmth to your kitchen. It’s one of those recipes where you can let your creativity shine by experimenting with spices and flavors, all while enjoying the comforts of home cooking.
Whether you serve them as a side, toss them into a grain bowl, or even snack on them straight from the pan, you’re bound to love this vibrant veggie just as much as I do! Remember, cooking is not only about the food; it’s about creating those moments of joy and connection around the table. So gather your loved ones, whip up some delicious roasted rutabaga, and enjoy every bite!
Let me know how yours turn out; I can’t wait to hear the stories that come from your kitchen! Happy cooking!
Print
Roasted Baked Rutabaga
- Total Time: 45 minutes
- Yield: 4 servings 1x
- Diet: Vegetarian
Description
A flavorful twist on a classic comfort food, roasted rutabaga is a nutritious and delicious side dish that elevates any meal.
Ingredients
- 2 Medium Rutabagas
- 2 Tablespoons Olive Oil
- Salt to Taste
- Pepper to Taste
- 1 Teaspoon Garlic Powder
- 1 Teaspoon Dried Thyme
Instructions
- Preheat your oven to 400°F (200°C).
- Prep the rutabagas by peeling and cutting them into uniform cubes.
- Toss the rutabaga cubes with olive oil, salt, pepper, garlic powder, and thyme in a large bowl.
- Spread the seasoned rutabaga cubes evenly on a lined baking sheet.
- Roast in the oven for 25-30 minutes, stirring halfway through.
- Check for doneness around the 25-minute mark, ensuring they are golden brown and fork-tender.
Notes
Consider adding balsamic vinegar or maple syrup for extra flavor. These rutabagas pair well with a variety of main dishes.
- Prep Time: 15 minutes
- Cook Time: 30 minutes
- Category: Side Dish
- Method: Roasting
- Cuisine: American
Nutrition
- Serving Size: 1 serving
- Calories: 120
- Sugar: 3g
- Sodium: 200mg
- Fat: 5g
- Saturated Fat: 1g
- Unsaturated Fat: 4g
- Trans Fat: 0g
- Carbohydrates: 25g
- Fiber: 5g
- Protein: 3g
- Cholesterol: 0mg
Keywords: roasted rutabaga, side dish, vegetarian recipe, healthy comfort food, winter vegetables


