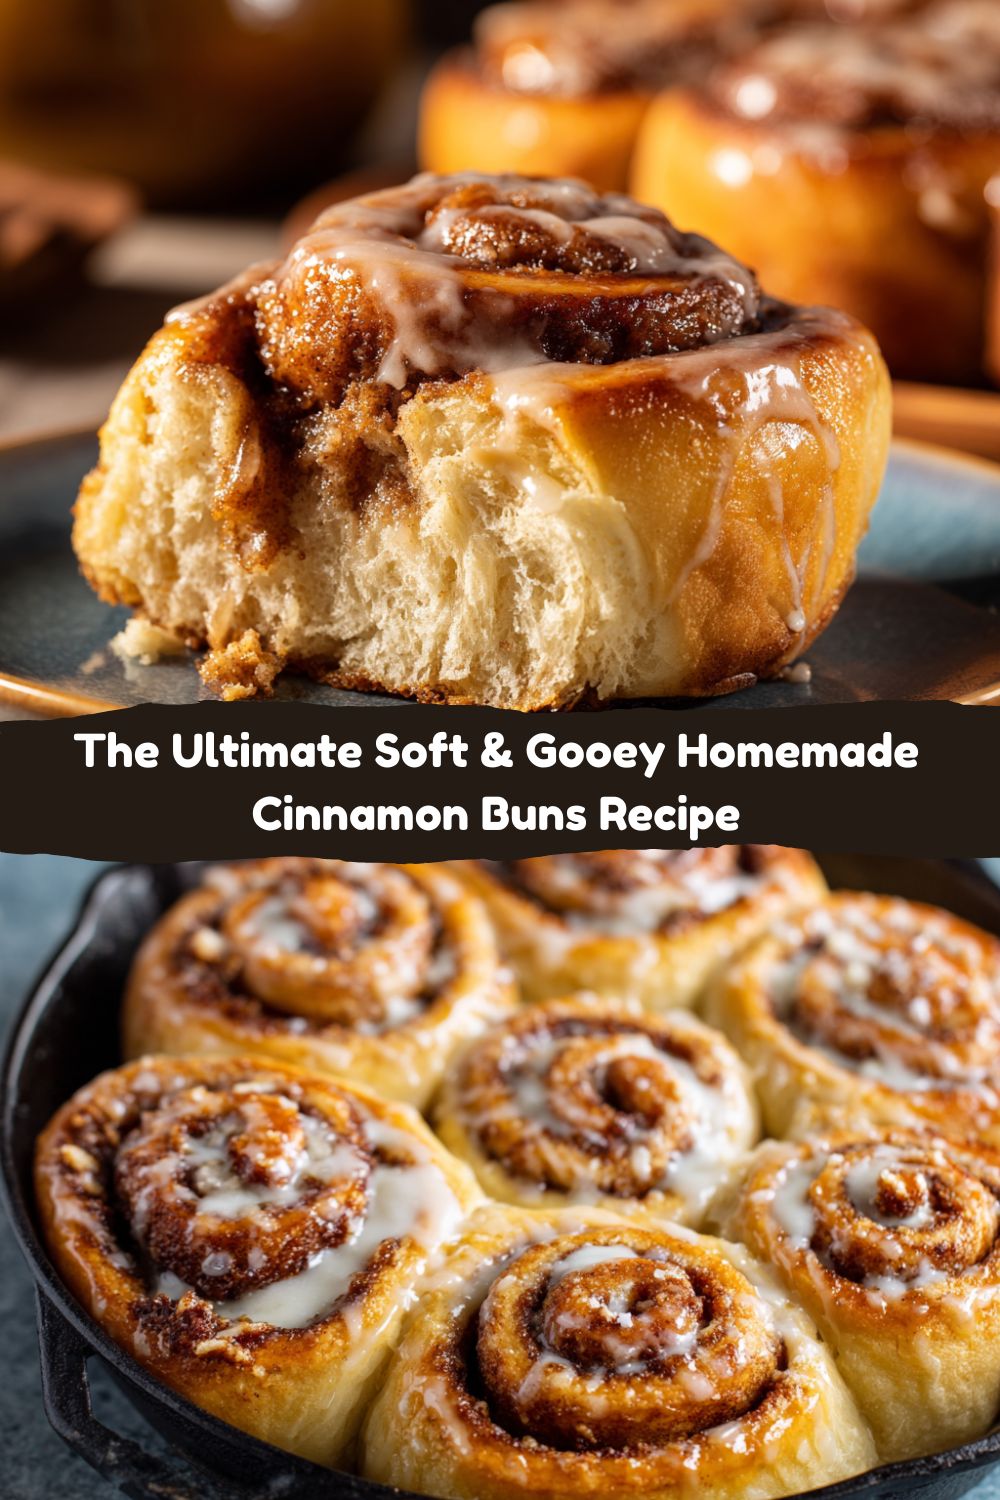
The Irresistible Allure of Homemade Cinnamon Buns
Is there anything in this world that smells more like pure, unadulterated joy than a batch of cinnamon buns baking in the oven? That warm, sweet, spicy aroma that slowly weaves its way through the entire house, promising something truly magical is about to happen. It’s a universal signal for everyone within sniffing distance to gather in the kitchen, plates in hand, hoping to be the first to get a warm, gooey, cream-cheese-glazed spiral straight from the pan. I’m telling you, friends, this isn’t just baking—it’s an experience. It’s a hug in food form.
Now, I know what some of you might be thinking: “Jackson, that’s a yeast dough. That sounds complicated. What if I mess it up?” Let me stop you right there. We’re melting those fears away along with the butter. I’m here to show you that making incredible, bakery-quality cinnamon buns from scratch is not only possible, it’s an absolute blast. It’s a little bit of science, a whole lot of love, and the payoff is a thousand times better than anything you can get from a can. We’re talking about soft, pillowy dough, a cinnamon-sugar filling that caramelizes into gooey perfection, and a tangy, sweet cream cheese glaze that sends the whole thing straight into the stratosphere of deliciousness. So, tie on your apron, put on some good music, and let’s turn your kitchen into the heart of the home. We’re about to cook something awesome together.
The Sticky-Fingered Lessons of My First Batch
My love affair with cinnamon buns started young, and it was anything but graceful. I must have been about ten, standing on a wobbly stool next to my grandma in her sun-drenched kitchen. She was a baking wizard, and I was her eager, if slightly messy, apprentice. She handed me the bowl of yeasty, frothy milk and told me to pour it in. In my excitement, I dumped the entire thing with such force it splashed all over the counter, the floor, and me. I froze, expecting a scolding. She just laughed, her eyes crinkling at the corners. “Well, Jackson,” she said, wiping a blob of dough from my cheek, “looks like the recipe wanted a little extra of you in it. That’s what makes it special.”
That moment stuck with me. My first solo attempt a few years later was… ambitious. I thought I could double the cinnamon “for more flavor.” I ended up creating a volcanic eruption of spicy, dark sugar lava that bubbled over the pan and smoked up the entire kitchen. They were borderline inedible, but my family, being the saints they are, slathered them with extra glaze and ate them anyway. Those early, messy, sometimes-failed attempts taught me the most important lesson I carry into Food Meld today: cooking is supposed to be fun. A little mess, a little experimentation, and a whole lot of heart is the real secret ingredient. These aren’t just pastries; they’re edible memories in the making.
Gathering Your Flavor Arsenal
Here’s everything you’ll need to create this masterpiece. Don’t just think of these as ingredients; think of them as your flavor-building team. I’ve included some of my favorite chef insights and swaps to make this recipe truly yours.
For the Dough:
- 1 cup warm milk (110°F/45°C): This is the wake-up call for our yeast. Pro Tip: Test it on your wrist like baby formula—it should feel warm, not hot. Too hot and you’ll kill the yeast! No whole milk? 2% works great. For a dairy-free version, unsweetened almond or oat milk are fantastic substitutes.
- 2 ¼ tsp active dry yeast: The tiny living organism that makes our dough rise and become fluffy and light. Make sure your yeast isn’t expired for the best rise.
- ½ cup granulated sugar: Food for the yeast and a touch of sweetness for the dough.
- ⅓ cup unsalted butter, melted: For incredible richness and tenderness. Using unsalted lets us control the salt level. Salted butter works in a pinch, just maybe reduce the added salt a tiny bit.
- 2 large eggs: The binding agent that adds structure and a beautiful golden color to our dough. Bring them to room temperature for a smoother dough.
- 4 cups all-purpose flour: The foundation. I like to fluff my flour with a spoon before measuring it into the cup to avoid a dense, dry dough. For a slightly more wholesome twist, you can swap out 1 cup for whole wheat flour.
- 1 tsp salt: The flavor enhancer. It balances the sweetness and strengthens the gluten network. Don’t skip it!
For the Cinnamon-Sugar Filling:
- ¾ cup brown sugar, packed: The deep molasses flavor of brown sugar is non-negotiable for that classic, caramely goo. Dark brown sugar has an even deeper flavor if you’re feeling bold.
- 2 tbsp ground cinnamon: The star of the show! Use the good stuff—fresh, fragrant cinnamon makes a world of difference.
- ⅓ cup unsalted butter, softened: Key Hack: It MUST be softened to room temperature to spread easily without tearing the delicate dough. Not melted!
For the Cream Cheese Glaze:
- 4 oz cream cheese, softened: The tangy backbone of our glaze. Again, softening is crucial for a lump-free experience.
- ¼ cup unsalted butter, softened: For creaminess and a glorious sheen.
- 1 ½ cups powdered sugar: Dissolves instantly for a smooth glaze. Sift it if you have time to avoid any little lumps.
- ½ tsp vanilla extract: The aromatic finishing touch. Pure vanilla extract is always worth it.
- 2–3 tbsp milk: To get the glaze to your perfect drizzling consistency.
The Fun Part: Let’s Build These Buns!
Follow these steps, chat with your dough, and enjoy the process. This is where the magic happens.
- Wake Up the Yeast: In the bowl of your stand mixer (or a large mixing bowl), combine the warm milk and yeast. Give it a quick stir and let it sit for 5-10 minutes. You’re waiting for it to get foamy and fragrant—this is called “proofing” and it tells you your yeast is alive and ready to party! If it doesn’t foam, your yeast might be old or your milk was too hot. Start over to avoid disappointment.
- Build the Dough Base: To the yeasty milk, add the granulated sugar, melted butter, eggs, and salt. Use the paddle attachment to mix until it’s just combined. It might look a little curdled—that’s totally normal!
- Incorporate the Flour: Switch to the dough hook attachment. With the mixer on low, gradually add the flour, one cup at a time, until a shaggy dough forms. Kitchen Confidence Tip: You may not need all 4 cups! Stop adding flour when the dough pulls away from the sides of the bowl but is still slightly tacky to the touch. This is the secret to soft, not tough, buns.
- Knead to Smoothness: Knead on medium-low speed for 5-7 minutes until the dough is smooth, elastic, and springs back slowly when you poke it. If you’re kneading by hand, this will take about 10 minutes on a floured surface. It’s a great arm workout!
- The First Rise: Place the smooth dough in a lightly greased bowl, turn it over to coat, and cover the bowl with plastic wrap or a clean kitchen towel. Find a warm, draft-free spot (like an off oven with the light on) and let it rise for 1 hour, or until doubled in size.
- Roll and Fill: Punch down the risen dough to release the air. Turn it out onto a lightly floured surface and roll it into a 16×12 inch rectangle. Spread the softened butter evenly over the entire surface, leaving a small border around the edges. In a small bowl, mix the brown sugar and cinnamon, then sprinkle it evenly over the butter. Pro Hack: Gently press the sugar mixture into the butter with your hands so it doesn’t all fall out when you roll.
- Roll It Tight: Starting from the long edge closest to you, tightly roll the dough into a log. Pinch the seam closed to seal it. This is your cinnamon bun log!
- Slice into Buns: Using a sharp knife, dental floss, or a bench scraper, cut the log into 12 equal pieces. Floss Trick: Slide a piece of unflavored dental floss under the roll, cross the ends over the top, and pull. It gives you a super clean cut without squashing the roll.
- The Second Rise: Place the cut rolls into a greased 9×13 inch baking dish. Cover them again and let them rise for 30-45 minutes. They will get nice and puffy.
- Bake to Golden Perfection: While the rolls are rising, preheat your oven to 350°F (175°C). Bake the risen rolls for 20-25 minutes, or until they are golden brown on top and the sugary filling is bubbling around the edges.
- Glaze and Devour: While the buns are baking, make the glaze. Beat the softened cream cheese and butter together until smooth. Add the powdered sugar and vanilla, then beat again. Stream in the milk until you reach your desired consistency. Let the buns cool in the pan for about 10 minutes before slathering that glorious glaze all over them. Serve warm and prepare for the compliments to roll in!
How to Serve Up These Spirals of Joy
Presentation is part of the fun! I love serving these right in the baking dish, family-style, placed right in the middle of the table so everyone can dig in. The sight of that gooey, glazed pan is irresistible. For a more plated look, use a spatula to carefully transfer a warm bun to a plate, making sure to drizzle any extra glaze and pan goo over the top. A cold glass of milk, a hot cup of coffee, or a steaming latte are the only accompaniments you need. This is the ultimate centerpiece for a lazy weekend brunch, a holiday morning, or a “just because” treat that turns an ordinary day into something special.
Mix It Up: Creative Cinnamon Bun Twists
The classic is perfect, but playing with flavors is where I live! Here are a few of my favorite ways to mix it up:
- Apple Pie Buns: Sprinkle 1 cup of finely chopped apples (tossed with a tsp of lemon juice) over the cinnamon-sugar layer before rolling.
- Chocolate Hazelnut Swirl: Swap the cinnamon filling for a generous spread of chocolate-hazelnut spread. Thank me later.
- Orange Cardamom: Add the zest of one orange to the dough and ½ tsp of ground cardamom to the filling for a bright, sophisticated twist.
- Maple Bacon Bliss: Crumble 4-5 strips of cooked bacon and sprinkle it over the filling. Then, swap the milk in the glaze for real maple syrup.
- Vegan Friendly: Use plant-based milk and butter, a flax egg (1 tbsp ground flax + 3 tbsp water per egg), and vegan cream cheese. It works like a charm!
Jackson’s Chef’s Notes
This recipe has been my go-to for years, and it’s evolved with every batch. My biggest game-changer was realizing the dough doesn’t need all the flour—a slightly tacky dough makes for the softest, most tender buns. Also, don’t rush the rises! Let the yeast do its thing; that patience is what gives you that beautiful, airy texture.
I also have a confession: I am a firm believer in the “overnight” method. If you want fresh buns in the morning without the work, just complete the recipe through step 9 (placing the sliced buns in the pan). Instead of letting them rise on the counter, cover the pan tightly and pop it in the fridge overnight. The next morning, take them out, let them sit on the counter for 30-60 minutes to come to room temperature and finish rising, then bake as directed. It’s like having a baking fairy!
Your Cinnamon Bun Questions, Answered
Q: My dough didn’t rise. What went wrong?
A: The most common culprits are old/expired yeast or liquid that was too hot and killed the yeast. Always check the expiration date on your yeast and make sure your milk is just warm to the touch, not scalding. Also, ensure your rising spot is warm and draft-free.
Q: My filling all spilled out and burned in the pan!
A: This usually means the roll wasn’t pinched closed tightly enough at the seam, or you might have overfilled it. Make sure to get a good seal on the log, and don’t go overboard with the filling—it expands as it heats! A little spillage is normal and delicious, but a lot can burn.
Q: Can I make the dough in a bread machine?
A: Absolutely! Add the liquid ingredients to the pan first, then the dry, with the yeast going in last on top of the flour. Use the “dough” setting. When the cycle is complete, move to step 6.
Q: How do I store leftovers and reheat them?
A: Store any glazed buns in an airtight container at room temp for a day or in the fridge for up to 3 days. The best way to reheat is in the microwave for 15-20 seconds, or in a 300°F oven for 5-10 minutes until warm. They’re best fresh, but still pretty darn good day two!
Cinnamon Buns
- Total Time: 2 hours 15 minutes
- Yield: 12 Buns 1x
Description
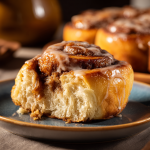
Soft, gooey, and infused with warm cinnamon sugar—these cinnamon buns are what cozy mornings are made of. Whether fresh out of the oven or reheated the next day, they’re pure comfort in every bite. You don’t need a special occasion to enjoy them, just the craving for something sweet and homemade.
Ingredients
For the Dough:
1 cup warm milk (110°F/45°C)
2 ¼ tsp active dry yeast
½ cup granulated sugar
⅓ cup unsalted butter, melted
2 large eggs
4 cups all-purpose flour
1 tsp salt
For the Filling:
¾ cup brown sugar, packed
2 tbsp ground cinnamon
⅓ cup unsalted butter, softened
For the Glaze:
4 oz cream cheese, softened
¼ cup unsalted butter, softened
1 ½ cups powdered sugar
½ tsp vanilla extract
2–3 tbsp milk
Instructions
In a large bowl, mix warm milk and yeast. Let sit 5–10 minutes until foamy.
Add sugar, melted butter, eggs, and salt. Mix in flour gradually until a dough forms.
Knead dough 5–7 minutes until smooth. Cover and let rise 1 hour or until doubled.
Roll dough into a 16×12 inch rectangle. Spread with softened butter, sprinkle with brown sugar and cinnamon.
Roll tightly from the long edge and cut into 12 rolls.
Place rolls in a greased baking dish. Cover and rise 30–45 minutes.
Bake at 350°F (175°C) for 20–25 minutes until golden brown.
Beat glaze ingredients until smooth. Spread over warm buns.
- Prep Time: 20 minutes
- Rise Time: 1.5 hrs
- Cook Time: 25 minutes
Nutrition
- Calories: 370 / Serving
- Sugar: 28g / Serving
- Sodium: 220mg / Serving
- Fat: 15g/ Serving
- Saturated Fat: 9g / Serving
- Carbohydrates: 55g / Serving
- Protein: 6g/ Serving
Nutritional Information (Per Bun)
Prep Time: 20 min | Rise Time: 1.5 hrs | Bake Time: 25 min
Yield: 12 buns
Calories: 370 | Fat: 15g | Saturated Fat: 9g | Carbohydrates: 55g | Sugar: 28g | Protein: 6g | Sodium: 220mg
*Please note: This is an estimate provided by an online nutrition calculator. It will vary based on specific ingredients and portion sizes.
Final Thoughts
At the end of the day, homemade cinnamon buns aren’t just breakfast—they’re a memory in the making. They fill the house with warmth, bring everyone into the kitchen, and remind us that slowing down for something sweet and special is always worth it. Yes, there’s yeast involved, yes, your hands might get a little sticky, but trust me—the payoff is pure, gooey joy.
Whether you stick with the classic or play around with one of the twists (apple pie filling, anyone?), these buns are guaranteed to earn you hero status at the table. And don’t forget—baking is as much about the process as the result. Laugh at the flour on your shirt, embrace the sugar that sneaks onto the counter, and celebrate every imperfect swirl.
So go ahead—roll up that dough, slather on the glaze, and serve up a tray of edible hugs. Because in my book, nothing says “home” quite like the smell of cinnamon buns fresh from the oven.