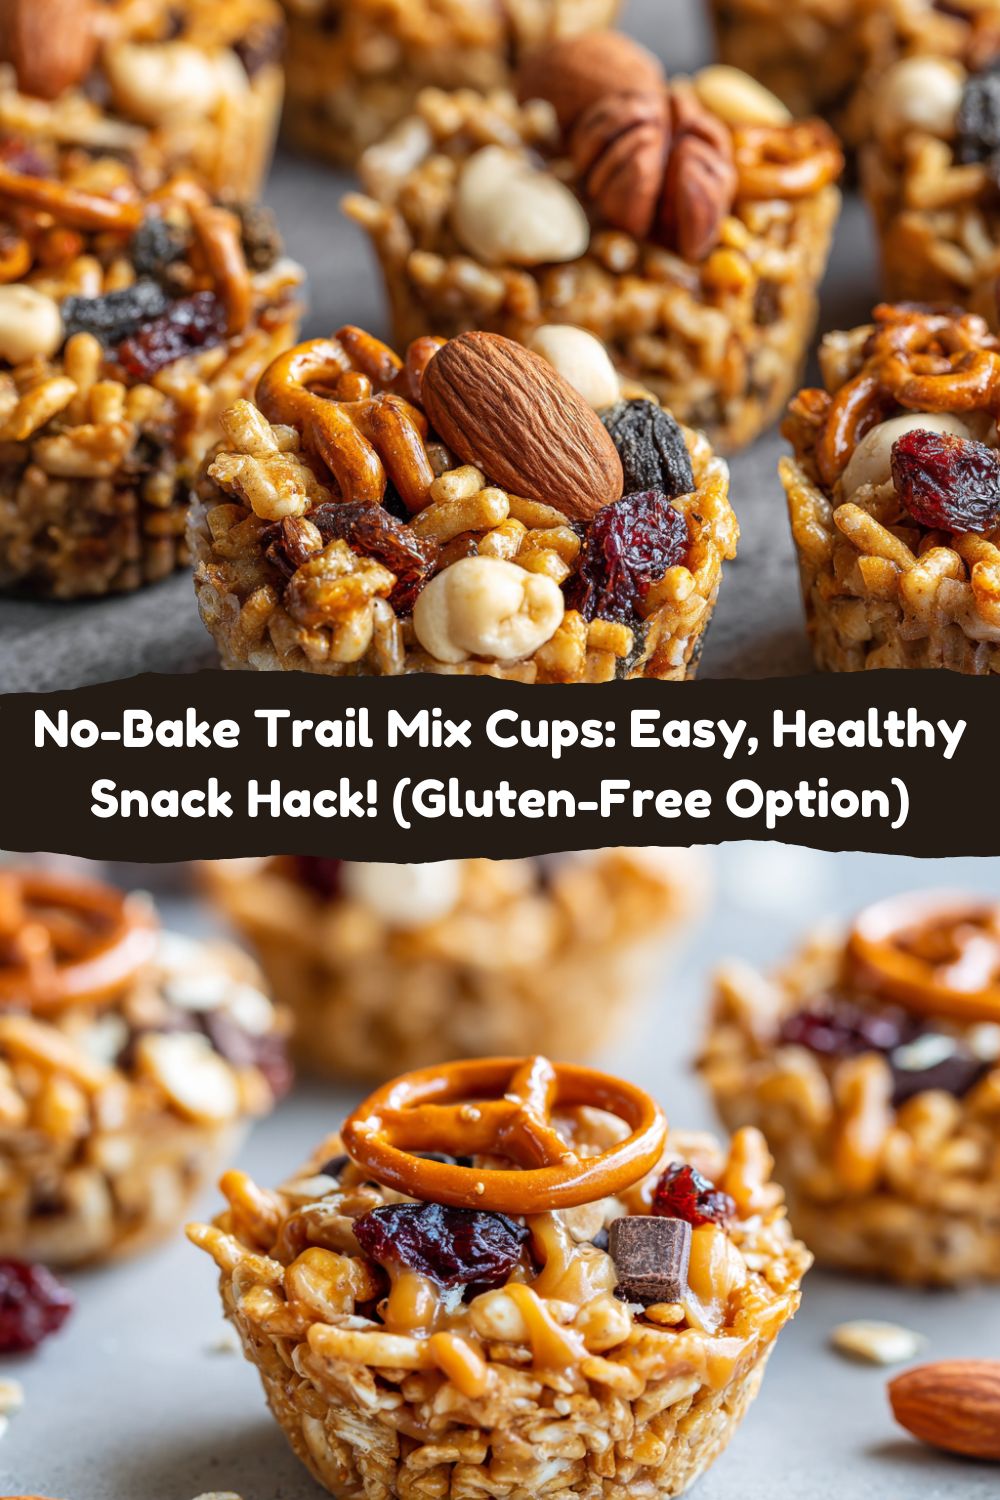
No-Bake Trail Mix Cups: Your New Favorite Crunchy, Chewy Snack Hack
Hey there, snack squad! Jackson here from Food Meld, and I’ve got a confession: sometimes, I just can’t be bothered to turn on the oven. Especially when that afternoon slump hits and I’m craving something crunchy, salty, sweet, and downright satisfying. That’s where these glorious No-Bake Trail Mix Cups swoop in like snack-time superheroes! Imagine everything you adore about that trusty bag of trail mix—crispy cereal, salty pretzels, nutty goodness, and chewy dried fruit—all packed into adorable, poppable cups held together with sticky-sweet peanut butter magic. No baking, no fuss, just pure, uncomplicated deliciousness ready in under an hour (most of which is hands-off chilling!). These little guys are my secret weapon for meal prep Sundays, lunchbox surprises, hiking fuel, and those “Oops, guests are coming in 20 minutes!” moments. They’re naturally sweetened, endlessly customizable, and seriously foolproof. If you can stir and scoop, you’ve got this. So grab your mixing bowl and let’s turn snack time into the highlight of your day!
Trail Mix & Trouble: A Rocky Mountain Revelation
These cups actually have their roots in a slightly… chaotic family camping trip in the Rockies. Picture it: me, age 12, convinced I was a wilderness survival expert. I’d packed my own trail mix—a *very* ambitious blend of peanuts, M&M’s, pretzels, and raisins. Halfway up the trail, my overstuffed bag split open, sending my precious mix cascading down a rocky slope! My dad, ever the pragmatist (and seeing my devastated face), scooped up what he could salvage into a dented camping mug. “Jackson,” he said, pressing it down with his thumb, “sometimes you just gotta pack it in tighter.” That messy, compressed mugful tasted like victory and melted chocolate. Years later, while trying to make a less crumbly snack for my niece’s soccer team, that memory hit me. What if I *intentionally* packed trail mix into a cup? A little nut butter glue, a quick chill… and boom! The No-Bake Trail Mix Cup was born. It turns out, sometimes the best recipes come from salvaging disasters (or preventing them!).
Gather Your Crunch Crew: Ingredients & Swaps
Here’s the beauty squad making these cups shine. Don’t stress if you’re missing something – trail mix is all about improvisation!
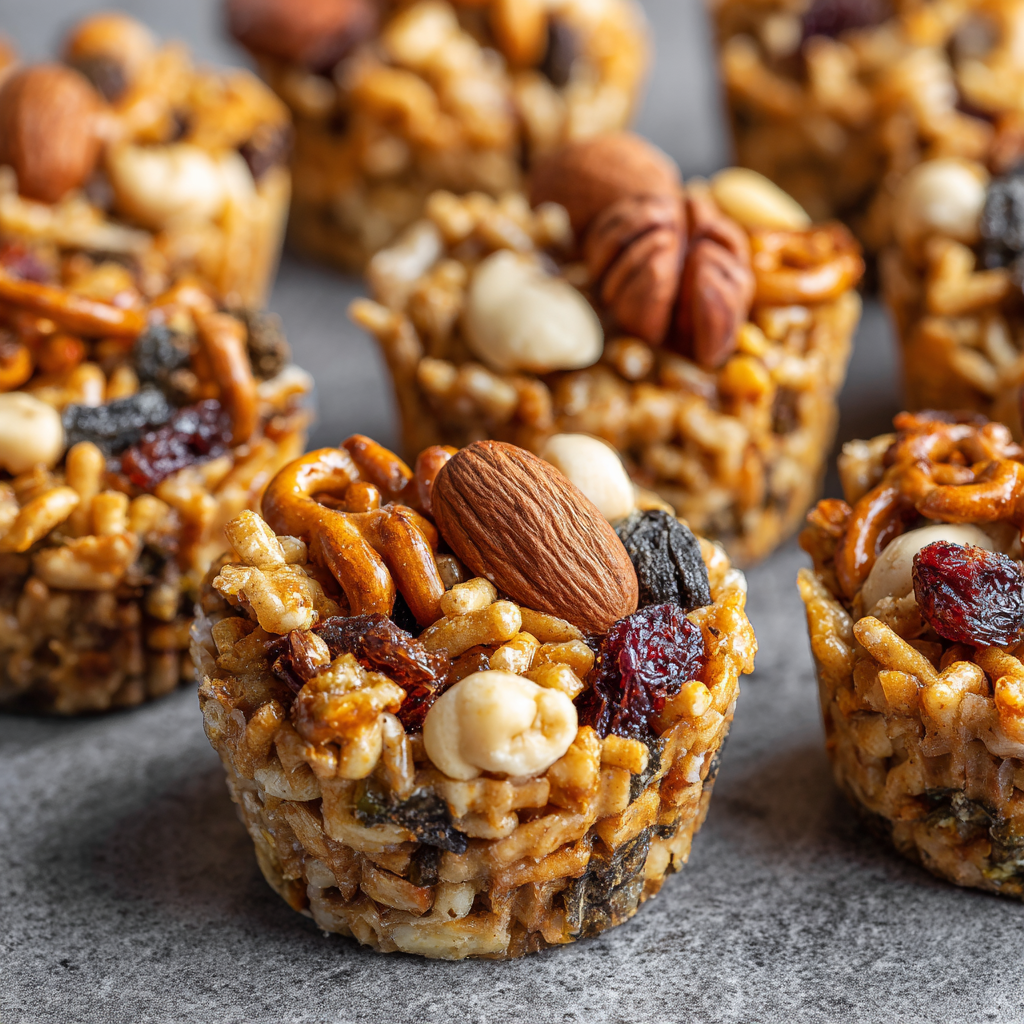
- ½ cup finely crushed pretzels: Salty backbone! Use sticks, twists, or minis. Gluten-free? Swap in crushed gluten-free pretzels or even plain rice cakes. Chef’s Tip: Crush them in a bag with a rolling pin – therapeutic AND functional!
- 1 cup crispy rice cereal (like Rice Krispies): Essential airy crunch! Any plain puffed rice works. Feeling fancy? Try puffed quinoa or millet for a nuttier vibe.
- ½ cup chopped nuts, seeds, or a combo: The heart of trail mix! Almonds, pecans, walnuts, sunflower seeds, pepitas – go wild! Allergy Alert: Use seeds only (sunflower, pumpkin) or omit entirely. Toast them first for mega flavor!
- ¼ cup raisins or chopped dried fruit: Chewy sweetness bursts! Craisins, chopped apricots, diced dates, or even freeze-dried berries work. Pro Move: Soak tougher dried fruit (like apricots) in hot water for 5 mins first to plump them up!
- ½ cup natural peanut, almond, or sunflower butter: The sticky glue! Use drippy, natural nut/seed butter for best binding. Avoid stiff or overly processed kinds. Flavor Twist: Try cashew butter for creaminess or tahini for a savory hint!
- 3 tbsp honey: Natural sweetness & binder! Pure maple syrup or agave nectar work perfectly for a vegan version.
- Pinch of fine salt (omit if nut butter is salted): Balances the sweet! Taste your nut butter first. If it’s unsalted, that pinch is gold.
Let’s Build Some Bite-Sized Bliss: Step-by-Step
Ready for the easiest “cooking” session ever? Let’s do this!
- Prep Your Pan: Line a mini muffin pan with paper liners OR give it a super light spritz of cooking spray. No mini pan? Use a regular muffin pan – you’ll just get fewer, slightly larger cups! Hack: If using liners, a tiny dab of butter on the bottom helps them peel off cleaner later.
- Mix the Dry Dream Team: Grab a large bowl and dump in your crushed pretzels, crispy rice cereal, chopped nuts/seeds, and dried fruit. Give it a good stir with a spatula to make everyone friends. Chef’s Whisper: Doing this now ensures even distribution before the sticky stuff hits!
- Warm the Glue: In a small saucepan over LOW heat, combine your nut/seed butter and honey. Warm it gently, stirring constantly, just until it becomes smooth, runny, and easily pourable (about 2-3 mins). Don’t let it bubble or boil! Watch Out: Overheating can make the nut butter seize up or oil separate. Low and slow is key!
- The Big Merge: Pour the warm, luscious nut butter mixture over your dry ingredients. Immediately start folding and stirring with your spatula. Get in there! You want every single pretzel piece and cereal flake coated in that sticky goodness. Speed is Key: Work quickly before the mixture starts to set!
- Pack & Press: Spoon the mixture into your prepared muffin cups. Don’t be shy – pack it in! Use the back of a small spoon, a measuring teaspoon, or even your clean thumb to press down FIRMLY. This compacting step is crucial for cups that hold together. Fill them nearly to the top. Pro Press: Dampen your spoon/finger slightly to prevent sticking while pressing.
- Chill Out: Pop the whole pan into your fridge. Let those cups chill and solidify for at least 30 minutes. Need rock-solid stability? Give ’em a full hour. Patience Payer: Rushing this step leads to crumbly cups. Set a timer, grab a coffee, you’ve earned it!
- Pop & Enjoy: Once set, gently pop the cups out of the pan or peel off the liners. Admire your handiwork! Store them in an airtight container in the fridge. Final Flourish: For extra pizzazz, drizzle with a little melted chocolate before chilling!
How to Serve These Little Legends
These cups are ready to rock straight from the fridge! Pack them stacked in a bento box for a lunchtime win, pile them onto a plate for a casual party spread, or toss a few into a zip-top bag for instant hiking or road trip fuel. They pair amazingly with a crisp apple, a cold glass of almond milk, or just your smiling face. No fancy plating needed – their rustic charm is part of the appeal!
Mix It Up! Flavor Adventures Await
Don’t stop at the classic! Here’s how to make these cups your own:
- Tropical Escape: Swap pretzels for crushed plain banana chips, use macadamia nuts & chopped dried pineapple/mango, and bind with coconut butter.
- Chocolate Lover’s Dream: Add 2 tbsp cocoa powder to the nut butter while warming, use chopped chocolate chips instead of some dried fruit, and roll set cups in cocoa powder.
- Savory-Sweet Sensation: Use salted peanuts or cashews, add a pinch of smoked paprika or chili powder to the dry mix, and bind with tahini + honey.
- Protein Powerhouse: Stir in 2-3 tbsp of your favorite unflavored collagen peptides or vanilla protein powder into the warm nut butter mixture before combining.
- Nut-Free & Seed-tastic: Use sunflower seed butter, swap nuts for extra seeds (pumpkin, sunflower, hemp hearts), and ensure cereal/pretzels are nut-free.
Jackson’s Kitchen Chronicles: Cup Confessions
These little cups have seen some things! Early versions involved *way* too much honey (think edible hockey pucks) and one infamous batch where I used chunky peanut butter with whole peanuts – let’s just say structural integrity was… optional. Lesson learned: finely chopped nuts and smooth(ish) butter are friends! I also tried skipping the chill time once. ONCE. It became Jackson’s Trail Mix Puddle. Respect the chill! The beauty is how they evolve. My niece loves mini chocolate chips mixed in, my hiking buddy demands extra seeds, and I’m currently obsessed with the smoked paprika twist. They’re the ultimate blank canvas. Make them once, then make them YOURS. That’s the Food Meld spirit!
Your Trail Mix Cup Questions, Answered!
Let’s tackle those snacking hurdles:
- Q: My cups are super crumbly! What did I do wrong?
A: Two likely culprits: 1) Not packing the mixture firmly enough into the cups. Really PRESS it down! 2) The nut butter/honey mixture wasn’t warm enough or runny enough to coat everything thoroughly. Ensure it’s fluid when you mix it in. Adding an extra tablespoon of honey next time can also help. - Q: Can I freeze these for later?
A: Absolutely! They freeze like a dream. Place the set cups in a single layer on a baking sheet to freeze solid (about 1 hour), then transfer to an airtight freezer bag or container. They’ll keep for up to 2 months. Thaw in the fridge or at room temp for 15-20 mins. - Q: Help! My nut butter mixture got super thick and clumpy when I heated it.
A: Sounds like it got too hot, too fast. Next time, keep the heat very low and stir constantly. If it happens, remove it from the heat immediately and whisk vigorously. A tiny splash of neutral oil (like avocado or melted coconut oil) whisked in can sometimes help smooth it back out. - Q: Can I use regular sugar instead of honey?
A: I wouldn’t recommend granulated sugar here. It won’t dissolve properly in the nut butter and won’t bind the cups. Stick with liquid sweeteners like honey, maple syrup, or agave for the best texture and binding power.
Nutritional Nibbles (Approximate, per cup, makes 12)
- Calories: ~120
- Protein: 3g
- Carbohydrates: 12g
- Fat: 7g
- Prep Time: 10 min
- Chill Time: 30 min
- Makes: 12 mini cups
Note: Values can vary significantly based on specific ingredients/brands and exact quantities used.
Print
No-Bake Trail Mix Cups
- Total Time: 40 minutes
- Yield: 12 1x
Description
Snack time just got an upgrade! These no-bake trail mix cups are crunchy, nutty, chewy, and naturally sweet—everything you love about trail mix, molded into perfect little bites. Great for meal prep, school snacks, or mid-hike fuel!
Ingredients
½ cup finely crushed pretzels
1 cup crispy rice cereal (like Rice Krispies)
½ cup chopped nuts, seeds, or a combo
¼ cup raisins or chopped dried fruit
½ cup natural peanut, almond, or sunflower butter
3 tbsp honey
Pinch of fine salt (omit if nut butter is salted)
Instructions
Line a mini muffin pan with paper liners or lightly grease.
In a large bowl, mix pretzels, cereal, nuts/seeds, and dried fruit.
In a small saucepan over low heat, stir nut butter and honey until smooth and combined.
Pour the warm mixture over the dry ingredients and stir until fully coated.
Spoon into muffin cups and press firmly to pack.
Chill in the fridge for at least 30 minutes until set.
- Prep Time: 10 minutes
- Chill Time: 30 minutes
Nutrition
- Calories: 120/serving
- Fat: 7g/serving
- Carbohydrates: 12g/serving
- Protein: 3g/serving
Final Thoughts: Big Joy in Little Cups
At the end of the day, these No-Bake Trail Mix Cups are more than just a tidy little treat—they’re a love letter to snackers everywhere. They’re for the kid in you who still picks out the M&M’s first, for the grown-up hustling between Zoom calls, and for the hikers, lunch-packers, and late-night grazers who just want something real and good without firing up the oven.
They’re sweet but not too sweet, crunchy with a little chew, customizable to your cravings, and just messy enough to feel homemade. Whether you make ’em for the week or demolish half the batch while “cleaning the kitchen,” I promise these cups will earn a spot in your permanent snack rotation.
So here’s your permission slip to mix boldly, press firmly, and chill out—literally and figuratively. Your snack game just leveled up, and honestly? I’m proud of you.
Until the next bite,
– Jackson, your snack architect from Food Meld


