
For When You Need a Little Sweet, Golden Magic
Hey friends, Jackson here. Let me paint you a picture: It’s 4 PM on a Tuesday. You get a text. “Hey, we’re stopping by in an hour!” The panic sets in. What do you serve? What do you have? You rifle through the pantry and the freezer, and all you see is a box of puff pastry and a few almost-finished jars of jam.
My friend, this is not a moment for panic. This is a moment for a kitchen victory lap. Because with just those two humble ingredients, you are about to create a dessert that looks like you spent all day in a fancy French patisserie. I’m talking about these unbelievably easy, impossibly flaky, and joyfully fruity Jam Puff Pastry Tarts.
This is the kind of recipe that lives in your back pocket. It’s your secret weapon for impromptu brunches, last-minute dessert needs, or just when you deserve a little sweet treat without a mountain of dishes. We’re taking store-bought puff pastry (no shame in that game!) and transforming it into golden, buttery canvases for your favorite jam. With a few simple chef tricks and some fun twists, we’re going to make them unforgettable. So, preheat that oven, grab that jam, and let’s turn a simple Tuesday into a “you’ve gotta try this” moment.
The Tart That Started It All
This recipe takes me straight back to my grandma’s kitchen in Georgia. She wasn’t one for elaborate, multi-layer cakes, but she was a wizard with what she had. Her version of these tarts was even simpler—she’d use leftover biscuit dough, roll it thin, dollop on her homemade muscadine jam, and fold it over into a little hand pie.
I can still remember the smell—that sweet, syrupy jam bubbling out and caramelizing at the edges, mixing with the scent of hot, flaky pastry. She’d let me press the edges with a fork, my small hands carefully sealing in the fruity goodness. It was my first real “aha!” moment in the kitchen: that something so simple could bring so much joy. These tarts are my nod to her—a little more refined in shape, but holding onto that same spirit of making something magical out of simple, comforting ingredients. Every time I pull a batch out of the oven, that memory comes right back with them.
Gathering Your Flavor Arsenal
Here’s the beautiful part: you only need a handful of things. This recipe makes a big batch (36 tarts!) because, trust me, they disappear fast. But you can easily halve it if you’re cooking for a smaller crew.
- 4 sheets store-bought puff pastry, thawed: This is our MVP. Look for the all-butter kind if you can find it—the flavor is incomparable. The key is to let it thaw slowly in the fridge overnight, or on the counter for about 30-40 minutes. If it’s too warm, it becomes a sticky mess. We want it pliable but still cold.
- 1 cup jam (mix flavors like raspberry, apricot, or fig): This is where you get to play! I love using a mix for a vibrant platter. Pro Chef Tip: If your jam is super thick or chunky, warm it for 10 seconds in the microwave and give it a stir. This makes it easier to spread and prevents you from tearing the delicate pastry.
- 1 egg, beaten (for egg wash): Don’t skip this! The egg wash is what gives our tarts that gorgeous, professional-looking golden-brown shine. A little beaten egg and a splash of water or milk is all you need.
- Flour, for dusting: Just a light sprinkle to keep our pastry from sticking to the counter. No one wants a beautiful tart stuck to the workspace!
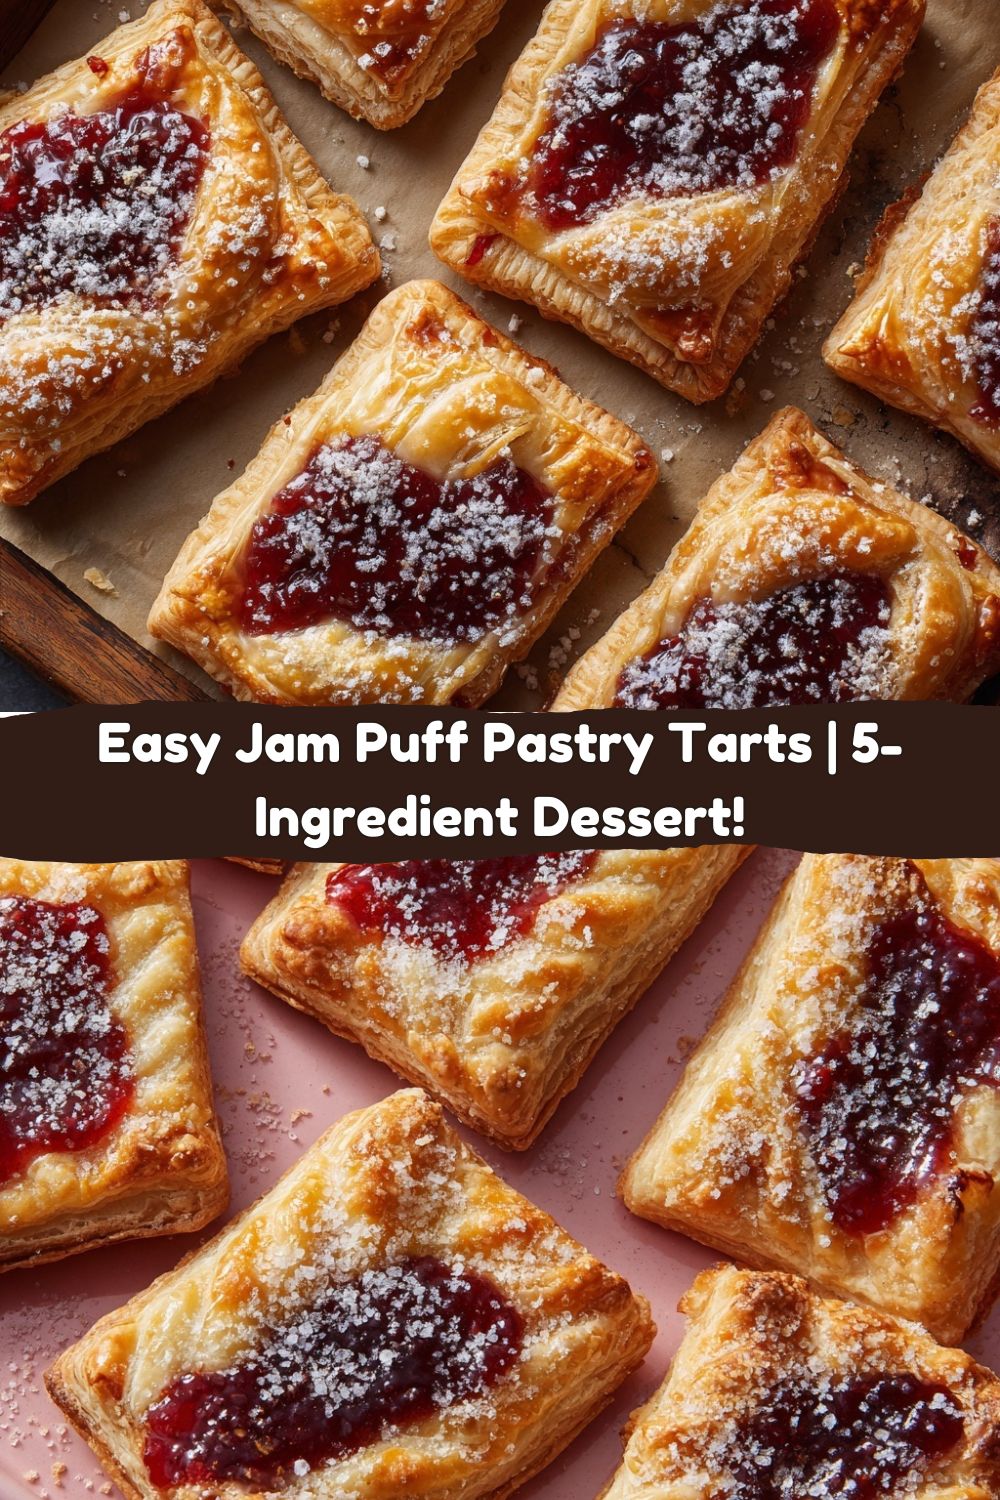
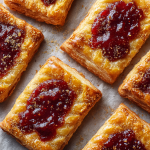
- Raw or turbinado sugar, for topping: This is my secret weapon for texture. That coarse sugar doesn’t fully melt, so it gives you this incredible, sparkling crunch with every bite. It’s a tiny detail that makes a huge difference.
Let’s Build Some Beautiful Tarts
Ready to see some magic happen? Follow these steps, and you’ll be a puff pastry pro in no time.
- Preheat & Prep: Crank your oven to 400°F (200°C). This high heat is crucial for that epic puff! Line your baking sheets with parchment paper. This isn’t just for easy cleanup; it prevents the bottoms from burning and ensures an even bake. Chef Hack: If you have a pizza stone, pop it in the oven now. Baking your tarts on a preheated surface gives you an extra-crispy bottom crust.
- Roll & Cut: On a lightly floured surface, gently roll out your first sheet of puff pastry. We’re not trying to make it paper-thin, just evening it out. Using a sharp knife or a pizza cutter, slice the sheet into 9 equal rectangles. Repeat with the remaining sheets. You should have 36 little pastry canvases ready for art. Chef Hack: Don’t have a ruler? No problem. Just eyeball it! Rustic is charming. You can also use a round cookie cutter for classic tart shapes.
- Score & Prick (The Most Important Step!): Use the tip of your knife to lightly score a border about ¼-inch from the edge of each rectangle. Don’t cut all the way through! Then, take a fork and vigorously prick the center of the tart (inside the border) all over. This is called “docking,” and it’s our secret weapon against the center puffing up like a pillow. We want the edges to puff up around a neat, jam-filled well.
- Jam It Up: Now for the fun part! Place about 1 teaspoon of your prepared jam right in the center of each tart. The biggest rookie mistake here is overfilling. I know it’s tempting, but too much jam will bubble over and burn on your baking sheet, creating a sticky mess and potentially making your tart soggy. Less is more!
- Shine & Sparkle: Use a pastry brush to gently brush the scored edges of each tart with the egg wash. This is what will make them turn a beautiful golden brown. Then, generously sprinkle that gorgeous turbinado sugar over the egg-washed edges. You’ll get that sweet, crunchy contrast we’re after.
- Bake to Golden Perfection: Slide those baking sheets into your hot oven and bake for 15-18 minutes. You’re looking for the pastry to be deeply puffed and a rich, golden brown. The jam should be bubbling happily. Ovens can vary, so keep an eye on them after the 12-minute mark. Chef Hack: For extra-even baking, rotate your baking sheets halfway through.
- Cool & Drizzle (Optional): Let the tarts cool on the baking sheet for at least 5-10 minutes. They are molten-lava hot straight out of the oven! If you’re using the optional vanilla glaze (just mix ½ cup powdered sugar with a tablespoon of milk and a few drops of vanilla extract), now’s the time to drizzle it over the slightly warm tarts. You can also top with a little fresh mint or a dusting of powdered sugar for that final “wow” factor.
How to Serve These Showstoppers
Presentation is part of the fun! I love piling these tarts high on a big wooden board or a tiered cake stand. The mix of different jam colors—deep red raspberry, sunny orange apricot, dark purple fig—creates a stunning visual effect that screams “I’m a professional baker,” even though we know the truth.
These are incredibly versatile. Serve them warm with a scoop of vanilla bean ice cream for a decadent dessert. They’re a star at a brunch buffet next to savory quiches and crispy bacon. Or, package them up in cute little boxes tied with baker’s twine for the most delicious homemade gift. They’re perfect for tea parties, baby showers, or just because. No matter how you serve them, be prepared to hand out the recipe.
Mix It Up & Make It Yours!
The basic recipe is a blank slate for your creativity. Here are a few of my favorite twists to keep things exciting:
- The Creamy Surprise: Before adding the jam, spread a tiny ½ teaspoon of softened cream cheese, mascarpone, or even Nutella inside the scored border. This adds a rich, creamy layer that cuts through the sweetness of the jam beautifully.
- Citrus Zing: Add a sprinkle of fresh lemon or orange zest over the jam right before baking. The bright, aromatic oils from the zest will wake up the entire flavor profile.
- Savory-Sweet Switch-Up: Swap the jam for a high-quality chutney (like mango or peach) and top with a crumble of goat cheese or sharp cheddar. You’ve just entered the world of incredible appetizers.
- Frangipane Fancy: Feeling ambitious? Mix ½ cup of almond flour with 2 tablespoons of sugar and an egg white to make a quick frangipane. Spread a thin layer under the jam for a truly bakery-worthy treat.
- Fresh Fruit Finale: After baking and while the tarts are still warm, top them with fresh berries that correspond to your jam flavor. It adds a fresh, juicy element and makes them look even more stunning.
A Few Thoughts From My Kitchen
I’ve made these tarts more times than I can count, and they’ve evolved a bit over the years. I used to be so precious about making them all perfectly uniform, but now I love the rustic, free-form look. It feels more homemade and full of love.
One time, I was filming a video for the blog and I was so busy chatting to the camera that I completely forgot to score the borders. The result? They puffed up into hilarious, jam-filled pillows. They were a mess, but you know what? They still tasted incredible. It was a great reminder that cooking is about the joy and the flavor, not just perfection. So don’t stress. Have fun with it!
Your Questions, Answered
Q: My jam bubbled over and made a huge mess! What did I do wrong?
A: Ah, the classic jam spill! This almost always means you overfilled them. Remember, just one level teaspoon is plenty. Also, make sure you pricked the center well with a fork to give the steam an escape route. If a little spillage happens, no worries—it still tastes great!
Q: Can I make these ahead of time?
A: Absolutely! You can assemble the tarts up to the point of baking, then freeze them solid on the baking sheet before transferring to a freezer bag. When you’re ready, bake them straight from the freezer, adding just 2-3 extra minutes to the baking time. So convenient!
Q: My pastry didn’t puff up much. Why?
A: The most common culprit is the pastry getting too warm before it hit the oven. Puff pastry needs to start cold so the butter layers steam and create lift. Make sure your pastry is thawed but still chilly, and don’t handle it too much with warm hands. Also, check your oven temperature with a thermometer—it might be running cool.
Q: What’s the best jam to use?
A> I prefer jams with less seeds and chunks for a smoother look, but use what you love! Apricot, raspberry, strawberry, and blackberry are all classics. A fig jam with a little thyme is a more sophisticated, grown-up option that’s always a hit.
Jam Puff Pastry Tarts
- Total Time: 45 minutes
- Yield: 26 Tarts 1x
Description
Perfect for brunch, tea parties, or a last-minute sweet fix, these Jam Puff Pastry Tarts bake up in minutes with just a handful of ingredients. We’ve doubled the batch and added some fun twists for extra flair!
Ingredients
4 sheets store-bought puff pastry, thawed
1 cup jam (mix flavors like raspberry, apricot, or fig)
1 egg, beaten (for egg wash)
Flour, for dusting
Raw or turbinado sugar, for topping
Optional Twists:
Add ½ tsp cream cheese or Nutella under the jam for richness
Sprinkle with lemon zest before baking
Drizzle with vanilla glaze after baking (powdered sugar + milk + vanilla)
Instructions
Preheat oven to 400°F (200°C). Line baking sheets with parchment.
Lightly flour your surface and roll out puff pastry. Cut each sheet into 9 rectangles (36 total).
Score a border around each rectangle and prick the centers with a fork (crucial to prevent over-puffing).
Add 1 tsp jam to center of each tart. (Don’t overfill!)
Brush edges with egg wash and sprinkle with turbinado sugar.
Bake for 15–18 minutes, until puffed and golden. Cool slightly.
Optional: Drizzle with glaze and top with fresh mint or a dusting of powdered sugar.
- Prep Time: 15 minutes
- Thaw Time: 15 mins
- Cook Time: 15 minutes
Nutrition
- Calories: 100 / Tart
- Sugar: 5g / Tart
- Fat: 6g / Tart
- Carbohydrates: 11g / Tart
- Protein: 1g / Tart
Nutritional Info (Because Knowledge is Power!)
Okay, let’s keep it real—this is a dessert, and we’re here for a good time. But it’s always good to know what you’re enjoying. This is a rough estimate per tart (and will vary based on your specific ingredients):
- Calories: ~100
- Fat: 6g
- Carbohydrates: 11g
- Sugar: 5g
- Protein: 1g
Remember, these are meant to be a delightful little bite. The beauty of making them small is that you can savor one (or two!) without overdoing it. They’re the perfect portion of sweet satisfaction.
You’ve Got This!
And there you have it. From a potential kitchen crisis to a guaranteed crowd-pleaser, all in under an hour. This recipe is a testament to what I truly believe: that incredible food doesn’t have to be complicated. It’s about using a few good ingredients, adding a dash of creativity and a whole lot of heart.
I hope these Jam Puff Pastry Tarts become a go-to in your kitchen, just like they are in mine and my grandma’s. They’re proof that the best recipes are the ones that bring people together, create a little joy, and leave everyone asking for more.
So, tell me, what jam combinations did you try? Did you add a creamy layer or a citrus zing? Share your creations with me over on Instagram by tagging @FoodMeld—I love seeing your kitchen wins! Now go on, cook something awesome. Talk soon!
— Jackson


