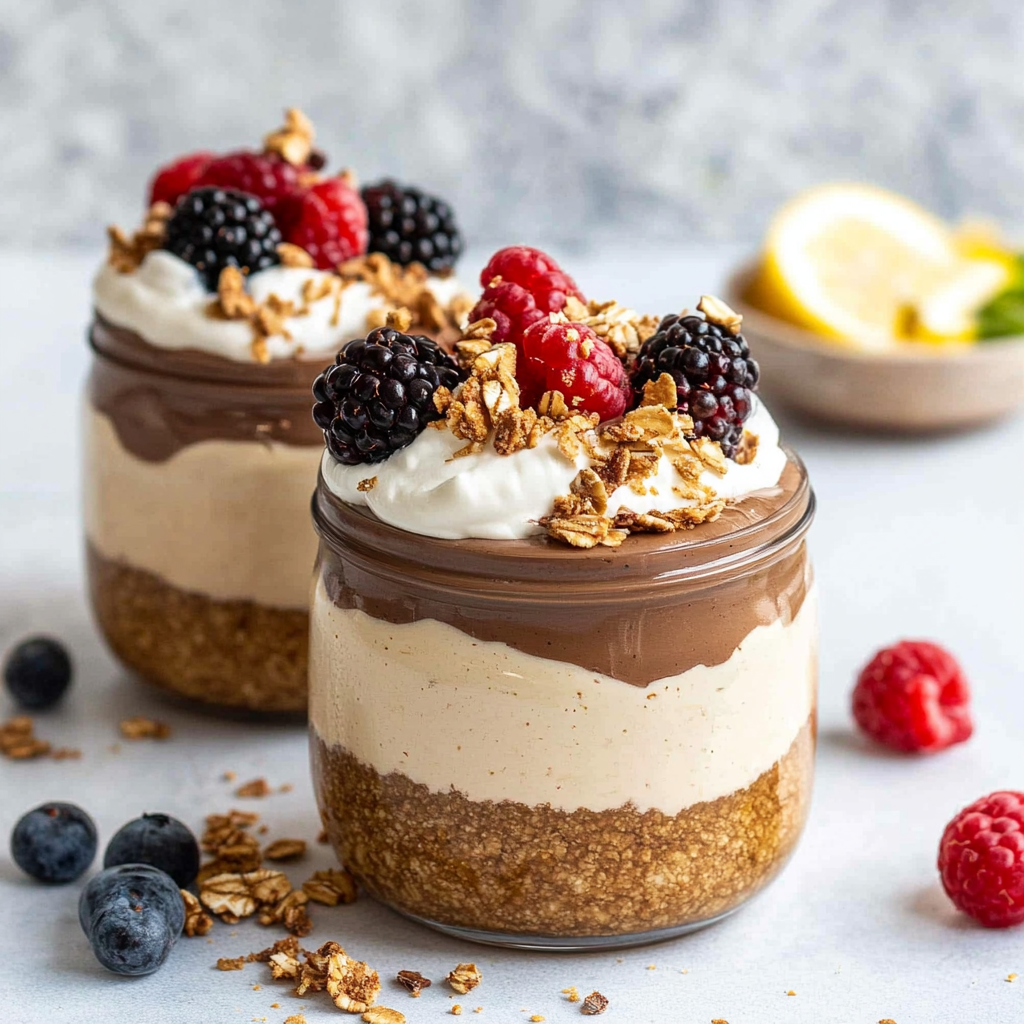
🍰 High Protein Cheesecake Jars: Sweet, Guilt-Free Magic in a Jar!
Hey there, fellow foodies! Let’s talk about that moment when your sweet tooth screams for attention, but your fitness goals whisper, “Don’t you dare.” Sound familiar? That’s where these High Protein Cheesecake Jars swoop in like dessert superheroes. Creamy, dreamy, and packed with protein, they’re the ultimate hack for craving-crushing without the guilt. And guess what? They’re so easy, you’ll wonder why you ever bothered with complicated desserts.
Picture this: It’s my niece’s 10th birthday brunch, and I’m tasked with bringing a dessert that pleases both sugar-craving kids and health-conscious adults. Cue the panic. But then—lightbulb moment! What if I transformed classic cheesecake into a protein-packed, no-bake wonder? Skeptical? So was everyone else… until they took that first spoonful. The room went silent (a rare feat with a dozen 10-year-olds), followed by a chorus of “Wait, this is HEALTHY?!” Mission accomplished. 🏆
These jars are your new best friend. They’re portable, meal-prep friendly, and customizable to your mood—berry blast today, chocolate chaos tomorrow. Plus, they’re ready in 10 minutes (plus chilling time, but who’s counting?). Let’s dive in!
👩🍳 The Birthday Brunch That Started It All
Let me set the scene: My kitchen looked like a tornado hit a health food store. Protein powder dusted the counter, Greek yogurt tubs were stacked like Jenga, and my blender was working overtime. My niece, Lily, had declared she wanted a “princess dessert” for her birthday—pink, pretty, and definitely not “weird healthy stuff.” Challenge accepted.
I whipped up the first test batch, using cottage cheese (shhh, don’t tell her) blended into oblivion until it rivaled ricotta. Layer by layer, I built these jewel-toned jars: crumbly oat crust, velvety filling, and a crown of fresh strawberries. The real test? When Lily’s BFF, Emma—a self-proclaimed “cheesecake connoisseur”—took a bite and said, “This is BETTER than Cheesecake Factory.” Mic drop. 🎤
Now, these jars are my go-to for potlucks, post-gym snacks, and midnight cravings. They’ve even survived my brother’s “I only eat meat” phase. Moral of the story? Never underestimate the power of a dessert that’s secretly good for you.
📝 What You’ll Need (+ Why It Works!)
Makes 2 jars (Double or triple as needed—trust me, you’ll want to.)
Crust
- 1/4 cup oat flour or crushed graham crackers – Oat flour keeps it gluten-free, but grahams give that classic cheesecake vibe. Pro tip: Blitz oats in your blender if you’re out of flour!
- 1 tbsp melted coconut oil or butter – Coconut oil adds a subtle tropical note, but butter? Pure nostalgia.
- 1 tsp honey or maple syrup – Just enough to make the crust cling together without sugar overload.
Filling
- 1/2 cup plain Greek yogurt – The protein MVP! For extra tang, use Icelandic skyr.
- 1/2 cup cottage cheese or cream cheese – Cottage cheese = stealth protein. Blend it smooth—no one will know!
- 1 scoop vanilla protein powder – Whey works best for texture, but vegan powders rock too. Just avoid ones with a chalky rep.
- 1–2 tbsp honey or sugar-free sweetener – Adjust to your sweetness squad. Liquid stevia? Go for it.
- 1/2 tsp vanilla extract – The Beyoncé of flavor enhancers. Always vanilla.
- Optional: Lemon zest – A citrusy wink to cut through the richness.
Toppings
- Fresh berries, granola, dark chocolate chips, nut butter drizzle – The “choose your own adventure” section!
👩🍳 Let’s Build Some Jars! (Step-by-Step)
- Crush & Press: Mix crust ingredients in a bowl until it resembles wet sand. Divide between jars and press firmly with a spoon (or your fingers—no judgment). Chef hack: Use the bottom of a shot glass for a perfectly compact crust!
- Blend ‘Til Dreamy: Throw all filling ingredients into a blender. Whip it on high for 60 seconds. Scrape down sides. Repeat until smoother than a jazz playlist. Watch out: Undermixed cottage cheese = surprise curdles. Not cute.
- Layer & Chill: Pour filling over crusts, leaving room for toppings. Tap jars gently to release air bubbles. Chill for 1 hour (or freeze for 20 mins if impatient). Pro tip: Place jars on a flat shelf—no one wants a lopsided cheesecake!
- Top It Off: Add toppings right before serving. Granola stays crunchier that way. Drizzle nut butter artfully, like Jackson Pollock with a sweet tooth.
🎨 Serving Vibes
Presentation is key! Layer berries against the glass for Insta-worthy stripes. Dust with cinnamon or cocoa for drama. Serving to guests? Add mint leaves—it’s like a tiny salad on your dessert, right? Pair with espresso for a “fancy café” moment or crumble a protein bar on top for extra crunch.
✨ Mix It Up! 5 Delicious Twists
- Chocolate Lover: Add 1 tbsp cocoa powder to filling + chocolate crust (crushed Oreo Thins!).
- PB&J: Swirl sugar-free jam into filling and top with peanut butter.
- Tropical Escape: Use coconut yogurt, mango chunks, and toasted coconut flakes.
- Vegan Magic: Swap yogurt for coconut cream and use plant-based protein powder.
- Pumpkin Spice: Add 2 tbsp pumpkin puree + pumpkin pie spice. Basic? Maybe. Delicious? Absolutely.
👩🍳 Chef’s Confidential
True story: The first time I made these, I forgot the sweetener. My brother took one bite and said, “Tastes like gym socks.” Lesson learned! Now, I taste the filling pre-chill—vanilla mellows as it sets. Also, these jars have survived three cross-country flights (TSA side-eye included). Pack toppings separately, and you’ve got vacation dessert sorted. 🧳
❓ FAQs: Your Questions, Answered
Q: Can I use flavored yogurt?
A: Sure! Just adjust sweetener—some flavored yogurts are sugar bombs.
Q: Why is my filling runny?
A: Did you blend the cottage cheese enough? Or maybe your protein powder’s too absorbent. Add a sprinkle of xanthan gum or chill longer.
Q: How long do these keep?
A: 4 days in the fridge. Freeze for up to a month (thaw overnight).
Q: Can I skip the crust?
A: Absolutely! Just layer filling with fruit for a parfait situation.
📊 Nutrition Per Jar (Because You’re Curious!)
Calories: 280 | Protein: 28g | Carbs: 22g | Sugar: 8g (with honey) | Fat: 10g
Print
High Protein Cheesecake Jars
- Total Time: 1 hour 20 mins
- Yield: 2 jars
Ingredients
Crust:
• 1/4 cup oat flour or crushed graham crackers
• 1 tbsp melted coconut oil or butter
• 1 tsp honey or maple syrup
Filling:
• 1/2 cup plain Greek yogurt
• 1/2 cup cottage cheese or cream cheese (blended smooth)
• 1 scoop vanilla protein powder
• 1–2 tbsp honey or sugar-free sweetener
• 1/2 tsp vanilla extract
• Optional: lemon zest for brightness
Toppings:
• Fresh berries, granola, dark chocolate chips, or nut butter drizzle
Instructions
Mix crust ingredients and press into the bottoms of two small jars.
Blend all filling ingredients until silky and smooth.
Spoon filling over the crust.
Chill for at least 1 hour to set.
Top with your favorite extras and enjoy!
- Prep Time: 20 mins
- Cook Time: 1 hour
Nutrition
- Calories: 280 per jar
- Sugar: 8g per jar
- Fat: 10g per jar
- Carbohydrates: 22g per jar
- Protein: 28g per jar
🍓 Final Thoughts: Dessert Goals, Reimagined
At the end of a long day—or hey, even right in the middle of one—these High Protein Cheesecake Jars are proof that you can have it all: flavor, nutrition, and zero guilt. They’re the dessert (or breakfast, we don’t judge) that meets you where you are—hungry, busy, and still craving something a little special.
Each jar is a celebration of balance. Creamy and indulgent, yet secretly loaded with protein. Pretty enough to serve at brunch, but easy enough to whip up in your sweats. Whether you’re meal prepping for the week, making a kid-approved treat, or just need a 10-minute fix after dinner, this recipe always comes through.
So go ahead—layer your heart out, top with joy, and let these jars be your little secret weapon in the kitchen. Because dessert should never be about restriction. It should be about satisfaction, celebration, and maybe a few extra sprinkles.
There you have it, friends—your ticket to dessert heaven without the guilt. Now go forth and jar-ify! 🥄✨