Let’s Break the Lunch Rut with Flavor-Packed Grilled Chicken Wraps
Raise your hand if you’ve ever stared into the fridge at lunchtime, hoping something delicious would magically assemble itself. 🙋♂️ Yeah, me too. That midday meal can be a real creativity killer. You want something satisfying, something that feels like a treat, but you don’t want to spend an hour making it or end up in a carb-coma for the rest of the afternoon. Sound familiar?
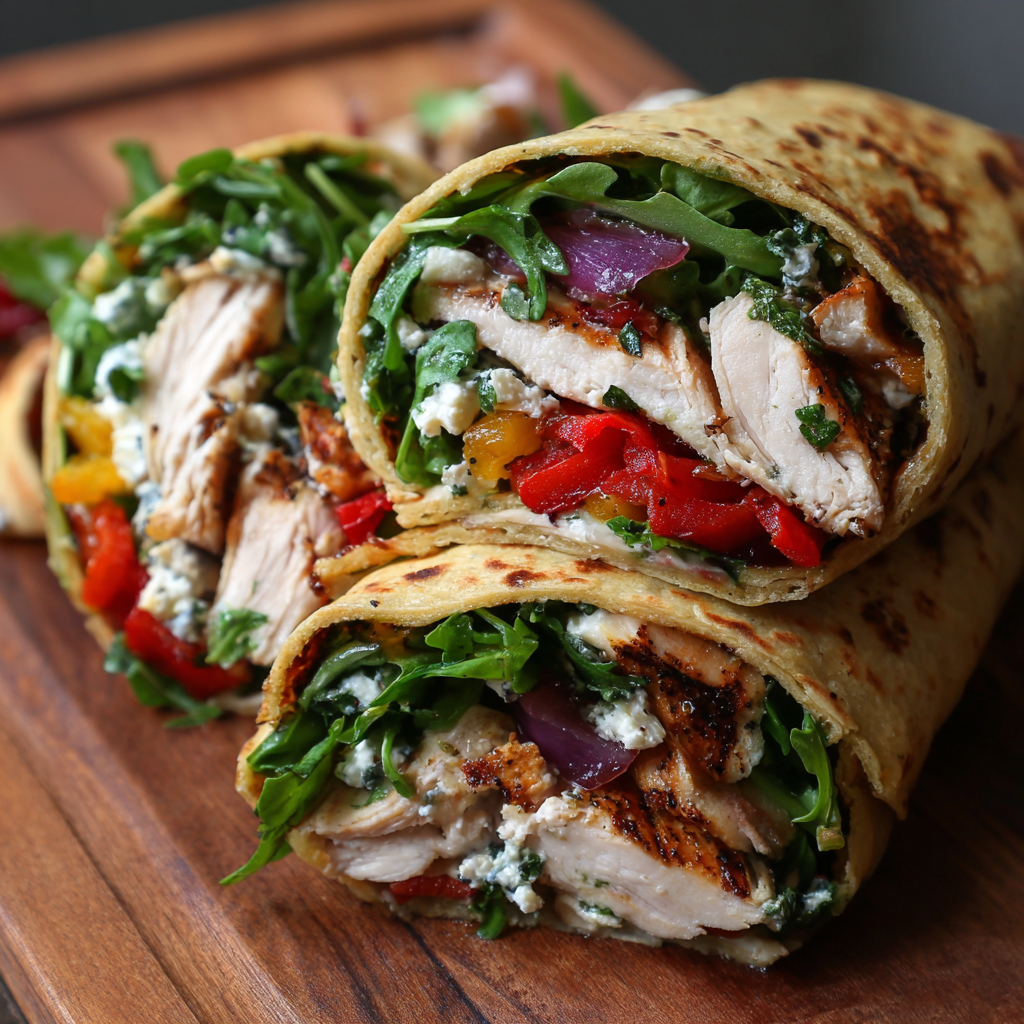
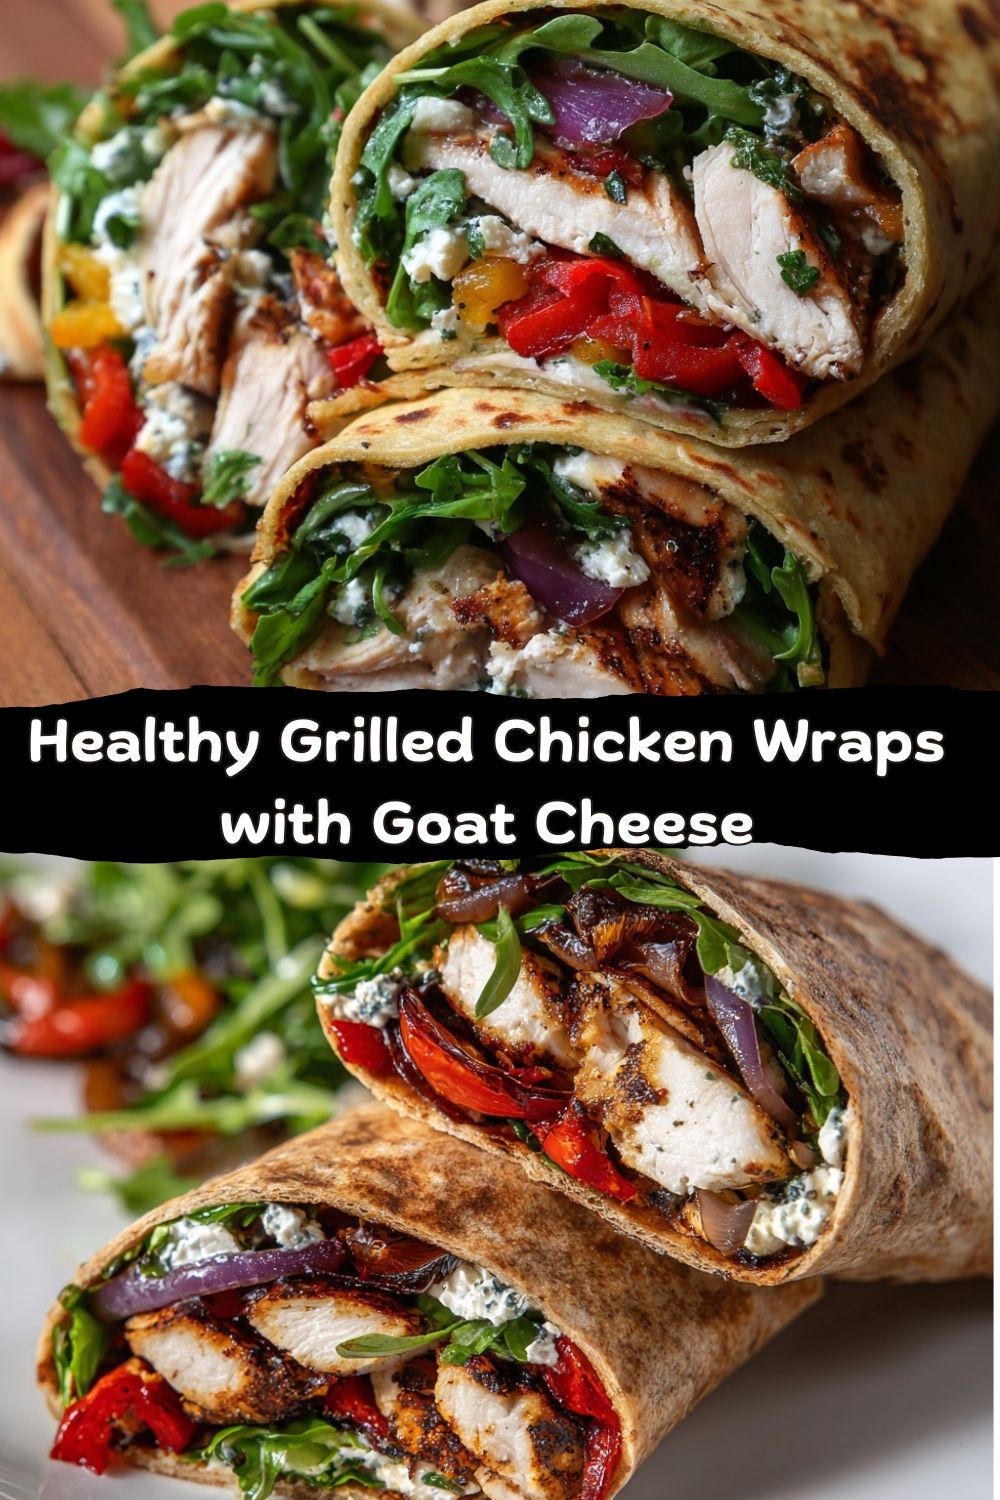
Well, my friend, I’m about to hand you the ultimate solution. Forget sad desk salads and boring sandwiches. We’re making Grilled Chicken Wraps that are anything but basic. We’re talking juicy chicken, tangy goat cheese, and a pile of sweet, balsamic-kissed veggies, all hugged by a wholesome almond flour wrap and finished with a zesty kick of lemony arugula. This isn’t just lunch; it’s a flavor experience.
This recipe is the heart of what Food Meld is all about. It’s got those comforting, familiar elements (hello, chicken wrap!) but we’re turning up the volume with a few creative twists. It’s balanced, it’s beautiful, and I promise it comes together faster than you can decide what to watch while you eat. I test every recipe in my own kitchen until it’s absolutely foolproof and bursting with taste, and this one is a total crowd-pleaser. So, let’s ditch the lunchtime blues and cook something awesome, together.
The Backyard BBQ That Inspired It All
This wrap recipe always takes me back to one of those perfect, lazy summer Sundays. My buddies and I had fired up the grill—the classic move—and we had a mountain of grilled chicken and veggies. As the sun started to dip, we were all just picking at leftovers, stacking bits of chicken and charred peppers on slices of bread. It was tasty, but it was missing… something.
Then, my friend Mia, who’s a total flavor genius, grabbed the bottle of balsamic glaze from my fridge and drizzled it over her plate. Game. Changer. That sweet, tangy punch against the smoky grilled flavors was unreal. We started crumbling the last of the goat cheese from a cheese board over the top, and it was like a lightbulb went off. All these amazing elements were just hanging out, waiting to be put together.
The next day, faced with the leftovers, I grabbed a wrap, piled everything in, and gave it a quick toast in a pan. That first bite was the “you’ve gotta try this” moment I live for. It was the effortless, delicious spirit of that backyard hangout, packed into one handheld, mess-free package. This recipe is my love letter to that unplanned, perfectly melded meal.
Gathering Your Flavor Arsenal
Here’s everything you’ll need to make two seriously satisfying wraps. Don’t just think of these as ingredients; think of them as your flavor team, each playing a crucial role.
- 2 Almond Flour Tortillas: These are our MVP base. They’re pliable, slightly nutty, and hold everything together without getting soggy. Chef’s Insight: Look for ones with clean ingredients. No almond flour wraps? A whole wheat or spinach tortilla works great, or you can use large lettuce leaves for a fresh, low-carb option.
- 1/2 cup Cooked Chicken Breast, sliced: The hearty, protein-packed star. I love using leftovers from a simply seasoned grilled or roasted chicken. Chef’s Hack: Short on time? A high-quality rotisserie chicken is your best friend here. Just shred it up!
- 1/4 cup Goat Cheese (crumbled): Our creamy, tangy secret weapon. It melts just enough when the wrap is toasted. Substitution Tip: If goat cheese isn’t your thing, try feta for a saltier punch or a whipped cream cheese for pure creaminess.
- 1/2 cup Arugula: This isn’t just filler! Arugula adds a fantastic peppery bite that cuts through the richness. Baby spinach is a milder swap if you prefer.
- 1/4 Red Bell Pepper, thinly sliced: For sweetness and crunch. Yellow or orange peppers work just as beautifully.
- 1/4 Red Onion, thinly sliced: They mellow and sweeten when cooked, adding a deep, savory backbone. Don’t skip ’em!
- For the Arugula Dressing: 1 tsp Olive Oil, 1 tsp Lemon Juice, Pinch of Salt. This simple trio wakes up the greens and adds a bright, fresh layer.
- For the Sautéed Veggies: 1 tsp Balsamic Vinegar, Dash of Coconut Sugar. This is the magic glaze! The balsamic reduces into a sticky-sweet coating, and the tiny bit of coconut sugar helps it caramelize. Chef’s Insight: You can use honey or maple syrup instead of coconut sugar. The goal is just a hint of sweetness to balance the vinegar’s acidity.
Let’s Build Some Deliciousness: Your Step-by-Step Guide
Okay, team. Let’s roll up our sleeves (literally) and make some magic. This comes together in a flash, so get your pan ready and let’s go!
- Wake Up Those Greens. In a small bowl, toss your arugula with the teaspoon of olive oil, lemon juice, and pinch of salt. Use your hands—get in there! This little step seasons the greens perfectly so every bite of the wrap has that zesty flavor. Set this aside while you work on the other components. Chef’s Tip: Doing this first lets the flavors mingle. It’s like letting the arugula marinate in its own little dressing.
- Create the Balsamic Veggie Magic. Heat a non-stick skillet or pan over medium heat. No need to add oil first! Add your sliced bell pepper and red onion directly to the pan. Let them cook for 2-3 minutes until they just start to soften. Now, pour in the teaspoon of balsamic vinegar and add that dash of coconut sugar. Stir everything together. You’ll hear it sizzle and smell that incredible sweet-vinegary aroma. Cook for another 3-4 minutes, stirring occasionally, until the veggies are soft and glazed in that dark, delicious balsamic reduction. Transfer them to a plate. Chef’s Hack: Don’t overcrowd the pan! If the veggies are piled on top of each other, they’ll steam instead of getting those nice caramelized edges.
- Warm Your Wraps. Using the same pan (why wash more dishes?), warm your almond flour tortillas for about 30-60 seconds per side over medium-low heat. You just want them pliable and maybe with a few light golden spots. Watch them closely! They can go from warm to crispy quickly. Set them on your work surface.
- The Assembly Line. Time to build! On the lower third of each warm tortilla, spread half of the goat cheese. This acts as a tasty glue. Next, layer on the sliced chicken, followed by the glorious balsamic veggies. Top it all off with a generous handful of your dressed, peppery arugula. Pro-Tip: Leave about an inch border on the sides and at the bottom. Overfilling is the number one cause of wrap-bursts. We want a tight, secure roll.
- The Perfect Roll & Toast. Fold the sides of the tortilla in over the filling. Then, starting from the bottom, roll it up tightly away from you, tucking the filling in as you go. Place the seam-side down back in your pan (you can give it a quick wipe first) over medium heat. Toast for 1-2 minutes per side, until the outside is beautifully golden and crispy and you can see the cheese inside is getting melty. Chef’s Secret: That final toasting seals the deal. It fuses everything together and transforms the wrap from assembled to *chef’s kiss* incredible.
How to Serve It Like a Pro
You’ve crafted a masterpiece—now let’s show it off! Presentation is half the fun.
For the full experience, slice your toasted wrap in half on a sharp diagonal. Those gorgeous layers of chicken, pink veggies, green arugula, and creamy cheese look incredible peeking out from the crispy wrap. Plate it up with a simple side: a handful of sweet potato fries, a light cucumber salad, or just some crispy carrot sticks and hummus for dipping.
If you’re packing this for lunch (awesome choice!), let it cool completely before wrapping it tightly in parchment paper or foil. The toasted exterior holds up really well. You can eat it at room temperature or give it a quick 30-second zap in the microwave to re-melt the cheese slightly. It’s the kind of lunch that’ll make your coworkers seriously jealous.
Make It Yours: 5 Tasty Twists
The beauty of a wrap is its flexibility. Here’s how to run with this recipe and make it your own signature dish.
- Mediterranean Vibe: Swap the goat cheese for a sun-dried tomato pesto spread. Use grilled zucchini and eggplant for the veggies, and add a few kalamata olives. Finish with fresh herbs like oregano or dill.
- Sweet & Smoky Swap: Use chopped barbecued chicken instead of plain grilled. Add a smear of barbecue sauce inside the wrap, and use cheddar cheese. Sauté the peppers and onions without balsamic, and add a handful of corn kernels to the veggie mix.
- Keep It Veggie: For a meatless version, ditch the chicken and use roasted chickpeas or crispy pan-fried tofu strips. Marinate them in a little balsamic glaze before cooking for extra flavor.
- Berry Bright: In the summer, add a handful of fresh strawberries or raspberries to the arugula mix. The berries with the balsamic veggies and goat cheese is an unexpectedly amazing sweet-savory combo.
- Spice It Up: Add a layer of sliced jalapeño or a drizzle of sriracha mayo inside the wrap before rolling. Use a pepper jack cheese instead of goat cheese for a real kick.
Jackson’s Kitchen Notes
This recipe has evolved so much since that first backyard experiment. I started out using regular wraps, but fell in love with the sturdy, grain-free texture of almond flour ones—they toast up like a dream. I also learned the hard way that adding the dressed arugula after cooking the veggies is key; if you mix it all together, the arugula wilts into nothing.
One of my favorite kitchen memories is trying to teach my nephew how to roll his first wrap. He put enough filling in for three wraps, naturally. It was a glorious, messy explosion of cheese and veggies when he tried to take a bite, and we laughed until we cried. The lesson? Don’t overstuff, but do have fun. Even the messy ones still taste amazing.
Your Questions, Answered
Q: My wrap keeps falling apart when I roll it! Help!
A: The most common culprit is overfilling. Be generous but sensible. Also, make sure your tortilla is warm—it’s way more flexible. And that final toasting in the pan really helps seal the seam shut.
Q: Can I make these ahead of time for meal prep?
A: Absolutely! Prep the components separately. Store cooked chicken, glazed veggies (once cooled), dressed arugula, and cheese in their own containers in the fridge for up to 3 days. Assemble and toast your wrap fresh each day for the best texture. You can also assemble them the night before, wrap tightly, and toast in the morning.
Q: I don’t have balsamic vinegar. What can I use?
A> A good substitute is a mix of 3/4 tsp red wine vinegar with 1/4 tsp honey or maple syrup. You won’t get the exact same deep color, but you’ll get that sweet-tangy flavor profile.
Q: The goat cheese is a bit strong for my taste. What else works?
A> No problem! Cream cheese (whipped is easiest to spread), feta, ricotta, or even a mild shredded mozzarella would be delicious. Pick your favorite creamy or melty element.
Fueling Your Day (The Good Stuff!)
I’m not a dietitian, but I love knowing that what I’m eating is nourishing and makes me feel good. This wrap is a fantastic balance of macronutrients, making it a satisfying meal that powers you through your day without the slump.
Each wrap (approx.) packs around 350-400 calories, with a solid 25g of protein from the chicken and goat cheese to keep you full. The carbs are on the lower side (15-20g), mostly from the fibrous veggies and almond flour wrap, and you’re getting a good amount of healthy fats (20g) from the nuts in the wrap, olive oil, and cheese. Plus, with 3-4g of fiber, it’s great for digestion. It’s a meal that tastes indulgent but is actually packed with wholesome, real-food ingredients.
Your New Go-To Lunch, unlocked.
And there you have it—your ticket out of the lunchtime boring zone. This wrap is proof that “healthy” and “incredibly flavorful” can absolutely be the same thing. It’s got texture, it’s got tang, it’s got creaminess, and it all comes together in your pan in about 15 minutes.
I hope this recipe becomes one of your kitchen staples, the kind you tweak and make your own. Maybe it’ll be the center of your own backyard BBQ story one day. That’s what cooking is all about for me: creating those little moments of joy, one delicious bite at a time.
Did you try it? Did you add your own twist? I’d love to hear about it! Tag me @FoodMeld or drop a comment on the blog. Now, go enjoy every single bite of that awesome wrap you just made. You earned it.
Until next time, keep melding those flavors,
Jackson


