
Let’s Bake Some Holiday Magic: Chocolate Peppermint Bread
Hey friends, Jackson from Food Meld here! Is there anything better than the smell of something chocolatey baking in the oven on a crisp day? Now, imagine that warm, rich scent mingling with the cool, festive vibe of peppermint. That’s the kind of kitchen alchemy we’re diving into today. This isn’t just any quick bread; this is a Chocolate Peppermint Bread that’s about to become your new holiday superstar. We’re talking incredibly moist, deeply chocolatey, and infused with that cool, cheerful peppermint kick that just screams celebration. It’s the perfect cross between your favorite decadent chocolate cake and the magic of a candy cane. Best part? It’s ridiculously easy to make. No fancy skills required—just a couple of bowls, a whisk, and that “let’s do this” energy. Whether you’re gifting it to neighbors, serving it at your holiday brunch, or just cozying up on the couch with a slice and a giant mug of hot cocoa, this loaf is your ticket to flavor town. So, preheat that oven, and let’s cook something awesome together.
A Sweet (and Slightly Sticky) Christmas Memory
This recipe takes me right back to my grandma’s kitchen, circa 1998. The rule was always that we couldn’t open presents until after breakfast, which felt like an eternity. To keep us busy—and out of the living room—my mom would put my sister and me on candy cane crushing duty for whatever dessert she was making. We’d take those red-and-white stripes, wrap them in a kitchen towel, and go to town on the floor with a rolling pin. It was chaotic, it was loud, and red peppermint dust got absolutely everywhere. But it’s one of my fondest, most vivid holiday memories. The smell of peppermint filling the air, the anticipation, the teamwork. This bread captures that exact feeling for me. It’s that joyful, festive chaos, transformed into something deliciously warm and comforting. Every time I fold those crushed candy canes into the batter, I’m right back there on that linoleum floor, full of excitement and surrounded by family. That’s the power of food, right? It’s not just fuel; it’s a time machine.
Gathering Your Flavor Arsenal
Here’s the lineup! This is where the magic starts. I’ve included some of my favorite chef insights and swaps to make this recipe truly yours.
- 1¾ cups all-purpose flour: The trusty foundation of our loaf. For a slightly denser, richer crumb, you can swap in a cup-for-cup gluten-free blend.
- ½ cup unsweetened cocoa powder: Use a good quality one! This is our main chocolate flavor, so don’t skimp. Dutch-process works great here.
- 1 teaspoon baking soda & ½ teaspoon baking powder: Our dynamic leavening duo. They work together to give this bread its perfect rise and tender texture.
- ½ teaspoon salt: Crucial for balancing all that sweetness and making the chocolate flavor pop. Trust me, don’t leave it out.
- ¾ cup granulated sugar & ½ cup brown sugar: The white sugar gives sweetness, while the brown sugar adds a hint of molasses and helps keep the bread super moist.
- 2 large eggs: They should be at room temperature to blend into the batter smoothly. If you forgot to take them out, just place them in a bowl of warm water for 5 minutes.
- ½ cup vegetable oil: My go-to for moisture. It creates a more tender crumb than butter would in this particular recipe. Melted coconut oil works too for a subtle twist.
- 1 teaspoon vanilla extract & 1 teaspoon peppermint extract: The flavor heart and soul! The vanilla enhances the chocolate, and the peppermint brings the holiday cheer. A little goes a long way!
- 1 cup buttermilk: The secret weapon for an unbelievably tender, moist crumb. Chef Hack: No buttermilk? No problem. Mix 1 cup of regular milk with 1 tablespoon of lemon juice or white vinegar. Let it sit for 5 minutes until it curdles. Good to go!
- ½ cup mini chocolate chips: Because more chocolate is always the answer. The minis distribute throughout the batter better than regular-sized chips.
- ¼ cup crushed candy canes (plus more for topping): The festive crunch! I use a zip-top bag and a rolling pin. It’s therapeutic.
Let’s Get Baking: The Step-by-Step Lowdown
Alright, team, let’s fire up the oven and make some magic. Follow these steps, and you’ll be a hero.
Step 1: Preheat your oven to 350°F (175°C). This is the sweet spot for quick breads—it bakes the inside perfectly without burning the outside. Grease a 9×5-inch loaf pan and line it with parchment paper, leaving some overhang on the two long sides. This little hack is a game-changer—it creates a sling so you can lift the entire loaf out after baking. No more stuck corners or messy flipping!
Step 2: In a medium bowl, grab your whisk and combine the flour, cocoa powder, baking soda, baking powder, and salt. Whisk it really well. This isn’t just mixing; you’re aerating the dry ingredients and making sure those leaveners are evenly distributed. No one wants a bite of just baking soda! Set this bowl aside.
Step 3: In a large bowl, combine the eggs, granulated sugar, brown sugar, oil, vanilla extract, and peppermint extract. Use that whisk again and beat it until it’s smooth and everything is fully incorporated. It’ll look a little shiny and thick. Now, pour in the buttermilk and whisk until the mixture is smooth. It might look a little curdled at first, but keep whisking—it will come together beautifully.
Step 4: Here’s the key to a tender loaf: don’t overmix! Add your dry ingredients to the wet ingredients in two or three batches, gently folding with a spatula until the flour streaks just disappear. A few lumps are totally fine. Overmixing develops gluten and leads to a tough, dense bread, and we are not about that life.
Step 5: Now for the fun part! Gently fold in the mini chocolate chips and the ¼ cup of crushed candy canes. You’ll see those festive red streaks start to swirl through the dark batter. It’s a beautiful thing.
Step 6: Pour the beautiful, thick batter into your prepared loaf pan and use the spatula to smooth the top. For an extra-pro touch, give the pan a little tap on the counter to release any big air bubbles.
Step 7: Slide it into the preheated oven and bake for 50-60 minutes. Now, ovens can be sneaky, so start checking at the 50-minute mark. The bread is done when a toothpick or a thin knife inserted into the center comes out with just a few moist crumbs attached. If you hit wet batter, give it more time. If it comes out completely clean, it’s probably done, but be careful not to overbake!
Step 8: Let the loaf cool in the pan on a wire rack for 10 minutes. This allows it to set up so it doesn’t fall apart. Then, use those parchment paper slings to carefully lift it out of the pan and let it cool completely on the rack. I know, the wait is the hardest part, but slicing into a warm loaf can make it gummy. Let it cool for the best texture!
How to Serve This Festive Masterpiece
Okay, the loaf is cooled. Now, let’s make it look as incredible as it tastes. I’m a firm believer that we eat with our eyes first!
The simplest and most stunning way to finish this is with a quick drizzle. Melt a handful of dark or semi-sweet chocolate chips with a tiny splash of coconut oil (it makes it shiny and helps it set) in the microwave, stirring every 15 seconds. Drizzle it artfully (or abstractly—no rules here!) over the cooled loaf. Immediately sprinkle on another tablespoon or two of those crushed candy canes. The red and white on the dark chocolate looks absolutely magical.
Slice it thick and serve it on a festive plate. This bread is a star all on its own, but it also loves company. A glass of cold milk is a classic pairing. For the adults, a rich, bold coffee or even a peppermint mocha latte takes it to the next level. And if you’re feeling extra, a scoop of vanilla bean ice cream alongside a warm slice turns this bread into an unforgettable holiday dessert. Breakfast? Dessert? A snack? It fits every role perfectly.
Make It Your Own: Creative Twists & Swaps
This recipe is a fantastic canvas. Play with it! Here are a few of my favorite ways to mix it up.
- Peppermint Bark Version: Fold in ½ cup of chopped white chocolate along with the chocolate chips. The white chocolate marries the chocolate and peppermint flavors perfectly, just like the classic holiday candy.
- Mint Chocolate Chip: Swap the peppermint extract for 1 teaspoon of pure mint extract. It gives a cooler, smoother mint flavor that’s reminiscent of your favorite ice cream.
- Double Chocolate Crunch: Instead of (or in addition to!) the candy cane sprinkle on top, finish the chocolate drizzle with a handful of crunchy chocolate pearls or even crushed-up malt balls for a different kind of texture surprise.
- Gluten-Free & Dairy-Free Friendly: This recipe is wonderfully adaptable. Use a 1:1 gluten-free flour blend and ensure your cocoa powder is GF. For dairy-free, use the milk + lemon juice hack with your favorite non-dairy milk (almond or oat work great) and use dairy-free chocolate chips.
- Bundt Pan Glory: Feel like making a bigger statement? Double the recipe and bake it in a greased and floured 10-cup Bundt pan. Start checking for doneness around 55-60 minutes. It makes a stunning centerpiece for a holiday table.
Jackson’s Chef Notes & Kitchen Stories
This recipe has evolved a bit from my first test batch. The first time I made it, I got a little overzealous with the peppermint extract. I learned quickly that it’s potent stuff! A full teaspoon is the perfect amount to be present but not taste like toothpaste. Another funny learning moment: I once tried to mix the candy canes in with the dry ingredients to distribute them more. Big mistake. The red dye bled everywhere and turned the entire loaf a faint, pinkish-gray color. It tasted fine, but it looked… suspicious. Folding them in at the very last second is the way to go for those perfect red and white streaks. This loaf keeps incredibly well, too. Wrapped tightly in plastic wrap, it stays moist for days—if it lasts that long!
FAQs: Your Questions, Answered
Q: My candy canes sank to the bottom of the loaf. What happened?
A: This is a common issue with any mix-in! To prevent this, you can toss your crushed candy canes (and chocolate chips) in a tablespoon of the measured flour before folding them in. The light coating helps them “float” in the batter instead of sinking.
Q: Can I use milk instead of buttermilk?
A: I really don’t recommend it. The acidity in buttermilk is crucial for reacting with the baking soda, which gives the bread its lift and tender texture. The easy substitute (1 cup milk + 1 tbsp lemon juice/vinegar) works perfectly, though!
Q: The top of my bread is cracking. Is that normal?
A: Absolutely! A crack down the center of a quick bread is a sign of a good rise. It’s totally normal and even desirable. We’re going to cover it with delicious chocolate drizzle anyway, so no worries at all.
Q: How do I store this, and can I freeze it?
A: Once completely cool, store it wrapped tightly in plastic wrap at room temperature for up to 4 days. It freezes beautifully! Wrap the whole loaf or individual slices tightly in plastic wrap and then in foil. Freeze for up to 3 months. Thaw at room temperature.

Chocolate Peppermint Bread
- Total Time: 1 hour 10 minutes
- Yield: 10–12 slices 1x
Description
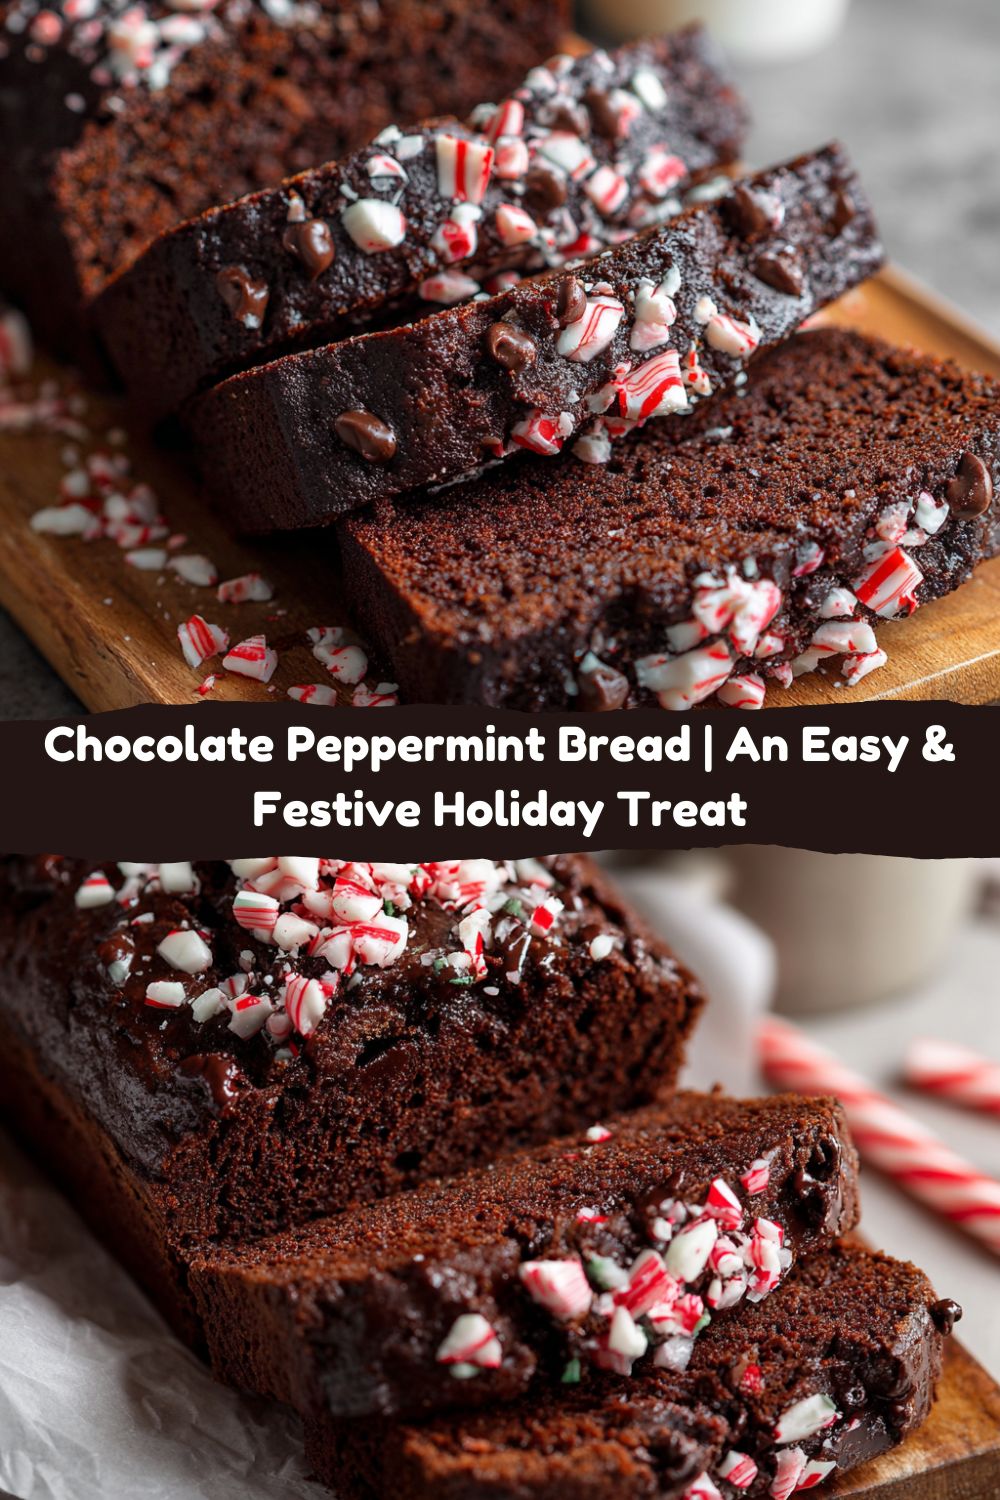
This Chocolate Peppermint Bread is rich, moist, and full of cool holiday flavor. A decadent chocolate loaf infused with peppermint extract and finished with crushed candy canes—it’s festive, simple to make, and perfect for gifting or cozying up with a slice and a cup of cocoa. Think chocolate cake meets candy cane magic.
Ingredients
1¾ cups all-purpose flour
½ cup unsweetened cocoa powder
1 teaspoon baking soda
½ teaspoon baking powder
½ teaspoon salt
¾ cup granulated sugar
½ cup brown sugar
2 large eggs
½ cup vegetable oil
1 teaspoon vanilla extract
1 teaspoon peppermint extract
1 cup buttermilk
½ cup mini chocolate chips
¼ cup crushed candy canes (plus more for topping)
Instructions
Preheat oven to 350°F (175°C). Grease and line a 9×5-inch loaf pan with parchment paper.
In a medium bowl, whisk together flour, cocoa powder, baking soda, baking powder, and salt.
In a large bowl, beat together eggs, sugars, oil, vanilla, and peppermint extract. Stir in buttermilk.
Gradually add the dry ingredients to the wet, stirring until just combined. Fold in chocolate chips and crushed candy canes.
Pour batter into prepared loaf pan and smooth the top.
Bake for 50–60 minutes, or until a toothpick inserted in the center comes out clean.
Cool in pan for 10 minutes, then transfer to a wire rack.
Optional: Drizzle with melted chocolate and sprinkle with more crushed candy canes before serving.
- Prep Time: 15 minutes
- Cook Time: 55 minutes
Nutrition
- Calories: 320 / Slice
- Sugar: 29g / Slice
- Fat: 15g / Slice
- Carbohydrates: 45g / Slice
- Protein: 5g / Slice
Nutritional Information*
Okay, let’s be real: this is a holiday treat, meant to be enjoyed and savored! But I know many of you like to have a general idea, so here’s a rough breakdown per slice (assuming 12 slices). This includes the optional chocolate drizzle.
- Calories: ~320
- Fat: 15g
- Carbohydrates: 45g
- Sugar: 29g
- Protein: 5g
*Please note: This is an estimate generated using a nutritional calculator. Actual values will vary based on specific ingredients used and any substitutions made.
Final Thoughts
And there you have it, my friends—my ultimate Chocolate Peppermint Bread. This recipe is more than just a list of ingredients; it’s a bundle of holiday joy, a spark for making new memories, and a seriously delicious way to treat yourself and your people. I hope this loaf brings as much warmth and happiness to your kitchen as it does to mine. Remember, cooking is supposed to be fun. Don’t stress about perfection. If the drizzle is messy or the crack is big, it all tastes the same: incredible. So put on some holiday tunes, crush those candy canes with gusto, and bake something unforgettable. I’d love to see your creations! Tag me @FoodMeld on social media so I can share in the fun. Until next time, happy baking!
Jackson


