High-Protein Apple Cheesecake Jars: A Sweet Escape with a Healthy Twist
Hey there, fellow food lovers! Jackson Walker here, and today I am utterly excited to take you on a delightful culinary journey that ends with a fabulous dessert – High-Protein Apple Cheesecake Jars! If you think that healthy desserts don’t exist or that they can’t be as enjoyable as their indulgent counterparts, I’m here to prove you wrong. Trust me, these jars are an absolute game-changer. They’re creamy, dreamy, and packed with protein, making them a guilt-free treat perfect for any time of day.
Introduction
Desserts can sometimes feel like the enemy of our health goals, but what if I told you that you could have your cake and eat it too? That’s where these delightful High-Protein Apple Cheesecake Jars come in. They balance the indulgences of cheesecake with the nutritious qualities of lean protein and seasonal fruits, creating a symphony of flavors that will make you want to dive right in.
What I love about these cheesecake jars is not just how delicious they are, but how simple they are to whip up. All you need is a few wholesome ingredients and a couple of jars (or any cute containers you have on hand). In under an hour, you can transform a handful of basics into a delicious dessert that will have your friends and family asking for more. And trust me, the freedom to layer flavors and toppings means that the creativity is limitless.
Each layer of these cheesecake jars will remind you of all the cozy autumn days spent indulging in warm apple desserts, tinged with just the right amount of spice. Plus, by using high-protein ingredients like Greek yogurt or cottage cheese, you’ll be filling your body with goodness, which is always a win!
So, grab your mixers and let’s dive into this cooking adventure! The kitchen will be filled with scents that evoke nostalgia as we layer sweet apples, rich protein, and a buttery crust that will make you feel like you’re sitting in your grandma’s kitchen. Let’s make some magic together!
Personal Story
I still remember the first time I tasted apple cheesecake. I must have been ten years old, just a curious kid sprawled out on my grandma’s kitchen floor, watching her work her magic. The smell of buttery crust filled the air, while my grandma patiently peeled apples, humming softly to herself. It was an afternoon steeped in love, warmth, and good food, and I couldn’t wait to devour whatever she was creating.
When she pulled out that apple cheesecake, I was entranced. The creamy texture, the spices that danced on my tongue, and the sweet-tart apples were simply unforgettable. It’s moments like these that fuel my passion for cooking and sharing flavors with others. That experience inspired this recipe! Fast forward to today, and I’ve given her classic dessert a healthy twist, bringing that same joy to my kitchen and to yours.
Ingredients
Let’s break down what you’ll need to create these delightful High-Protein Apple Cheesecake Jars:
- 2 cups of Greek yogurt: Thick and creamy, Greek yogurt adds a protein boost and a slight tang that perfectly mimics traditional cream cheese. If you prefer a non-dairy option, check out almond or coconut yogurt.
- 1 cup of cottage cheese: Another protein powerhouse, cottage cheese brings a nice creaminess to the jars. The curds blend beautifully, but feel free to blend it for a smoother texture!
- 1 teaspoon of vanilla extract: This ingredient is key in rounding off flavors and enhancing that dessert-like taste.
- 2–3 medium apples: You can use any variety you like, but I recommend Granny Smith or Honeycrisp for their balance of sweetness and tartness.
- 1 tablespoon of cinnamon and 1/2 teaspoon of nutmeg: Warm spices that evoke cozy memories and pair beautifully with apples.
- 2 tablespoons of honey or maple syrup: Sweeten to taste while keeping things natural. These alternatives add a layer of flavor you simply can’t beat!
- 1 cup of graham cracker crumbs (or alternative): This will serve as the base for your crust. If gluten-free, try almond flour or crushed oats for a similar crunch.
- 4 tablespoons of melted butter: This binds the crust together for that ideal crumbly texture. Coconut oil is a great dairy-free replacement if you prefer.
- Optional toppings: Think chopped nuts, extra sliced apples, or a dollop of whipped cream for that extra touch of indulgence.
Remember, each ingredient plays a role in shaping the flavor, so choose the best quality you can.
Step-by-Step Instructions
Ready? Let’s get to the fun part: assembling our delicious jars!
-
Prepare Your Crust
- In a mixing bowl, combine the graham cracker crumbs and melted butter. (Tip: If you want to flavor your crust, add a teaspoon of cinnamon!)
- Mix until the crumbs are evenly coated. You want it to feel like wet sand – you should be able to squeeze it together without it crumbling apart.
- Press about two tablespoons of the mixture into the bottom of each jar. (Chef hack: Use the back of a spoon or a shot glass to really pack it down!)
-
Make the Apple Filling
- Peel, core, and chop your apples into small cubes. Aim for uniform pieces for even cooking.
- Toss them in a bowl with cinnamon, nutmeg, and honey or maple syrup. Let these beauties sit for about 10 minutes to release their juicy goodness.
- Finally, in a skillet over medium heat, sauté the apples for 5–7 minutes until they soften and become fragrant. This step intensifies their flavor and brings out that warm, cozy vibe.
-
Whip Up the Cheesecake Base
- In another bowl, combine the Greek yogurt, cottage cheese, and vanilla extract. Use a hand mixer or blender to blend until smooth—this is the cheat code for turning cottage cheese into creamy goodness.
- Add a little sweetener if you’d like—it’s all about your taste preferences here!
-
Layer Your Ingredients
- Start by spooning a layer of the cheesecake mixture into each jar (about a third full).
- Add a layer of the sautéed apple mixture on top.
- Repeat the layers until you fill the jars, finishing off with a spoonful of the cheesecake base. (Pro tip: Reserve some cooked apples for topping to make it visually appealing!)
-
Chill and Serve
- Cover the jars with lids or plastic wrap and place them in the refrigerator for at least 2 hours, or ideally overnight for maximum flavor melding.
-
Serve with Toppings
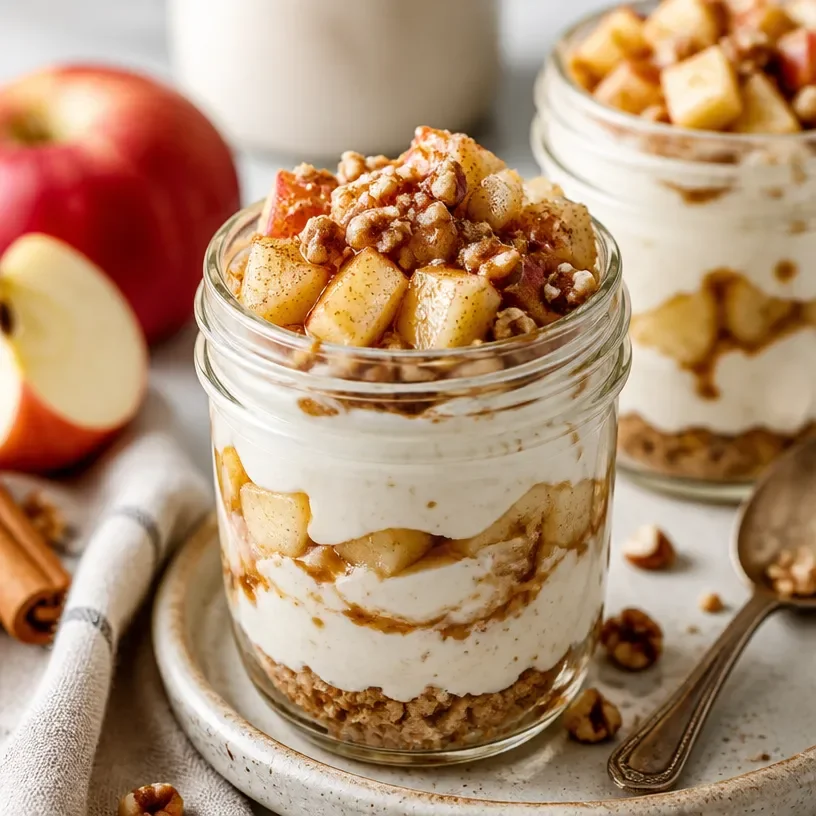
- Just before serving, top your cheesecake jars with the reserved apple mixture, a sprinkle of nuts, or a dollop of whipped cream. Now isn’t that a show-stopper?
Serving Suggestions
These High-Protein Apple Cheesecake Jars not only look beautiful—a veritable feast for the eyes—but they also pack a punch of flavor. Serve them in clear glass jars to show off the gorgeous layers. A sprinkle of cinnamon and a drizzle of honey on top adds that final touch of decadence.
Consider placing them on a rustic wooden board alongside some sliced apples or even a scoop of high-protein ice cream on the side. It’s all about turning your dessert into an experience!
Recipe Variations
Feeling adventurous? Here are some creative twists and variations you can try with these cheesecake jars:
-
Berry Version: Swap the apple filling for mixed berries, especially in the summer months. Strawberries and blueberries with a hint of lemon zest are a delightful combo.
-
Pumpkin Spice: In the fall, add pumpkin puree to the cheesecake mixture and incorporate pumpkin spice for a delicious seasonal twist.
-
Chocolate Delight: Add cocoa powder to the cheesecake layer for a chocolatey richness, and top with sliced bananas and a drizzle of chocolate syrup. Oh, yes!
-
Nutty Crunch: Experiment with different nuts (like pecans or walnuts) mixed into the crust or as toppings for an added crunch.
-
Dairy-Free Delight: Use non-dairy yogurts and cream cheese alternatives to make this dessert accessible for those with dietary restrictions.
Chef’s Notes
As I reflect on the evolution of this recipe, I can’t help but chuckle at how far I’ve come in the culinary world. There was a time when I was convinced dessert was off-limits if you wanted to eat healthy. The idea of a “healthy cheesecake” seemed almost comical! But here I am, transforming a classic into a nutritious indulgence while still keeping all the glory of flavor intact. Each jar we create now is truly a celebration, forcing the age-old clichés about healthy eating into the backseat.
Cooking is an adventure, and I encourage you to make this recipe your own! Tweak the layers, play with the ingredients, and share your creations with the ones you love. You never know what delightful surprises await in your own kitchen!
FAQs and Troubleshooting
Q: Can I make these jars ahead of time?
A: Absolutely! These can be prepped up to two days in advance. Just keep them in the refrigerator, and they’ll be fresh and ready to go!
Q: What can I use instead of Greek yogurt?
A: If you’re not a fan of Greek yogurt, cottage cheese works great, or non-dairy alternatives like almond yogurt.
Q: Is it okay to use frozen apples?
A: While fresh apples are best for texture, you can absolutely use frozen apples. Just remember to thaw and drain them first to avoid excess moisture.
Q: Can I omit the crust?
A: Of course! If you want a lighter option, you can just layer the cheesecake filling and apples without a crust. Garnish with nuts or seeds for added texture.
Nutritional Info
These High-Protein Apple Cheesecake Jars aren’t just delicious; they’re also packed with nutritional benefits:
- Calories: Approximately 200-250 per jar, depending on topping choices.
- Protein: Around 15-20g per serving, thanks to the Greek yogurt and cottage cheese.
- Fiber: Apples provide a good bit of fiber, aiding digestion and keeping you fuller longer.
- Vitamins & Minerals: Packed with vitamins A and C from the apples, plus calcium and probiotics from the yogurt.
These jars are a splendid way to satisfy your sweet tooth while keeping your nutrition on track.
Final Thoughts
And there you have it, friends—High-Protein Apple Cheesecake Jars that are not just a treat but a celebration of flavor and creativity! Each bite is a reminder that we can enjoy dessert without compromising our health goals.
Whether you’re enjoying these as an afternoon pick-me-up, a post-dinner delight, or even a breakfast treat, you’ll find joy in the layers you’ve crafted. So don your aprons, gather your loved ones, and let’s keep the passion for flavorful, comforting food alive.
If you try this recipe, share your creations with us at Food Meld! I love seeing how you personalize each dish, and I’m always here to help you mix things up in the kitchen. Until our next culinary adventure, let’s keep cooking up something awesome!
Print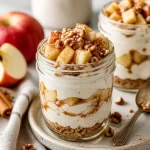
High-Protein Apple Cheesecake Jars
- Total Time: 125 minutes
- Yield: 4 servings 1x
- Diet: High-Protein
Description
Delightful High-Protein Apple Cheesecake Jars that balance indulgence and nutrition with creamy layers of cheesecake and spiced apples.
Ingredients
- 2 cups of Greek yogurt
- 1 cup of cottage cheese
- 1 teaspoon of vanilla extract
- 2–3 medium apples, chopped
- 1 tablespoon of cinnamon
- 1/2 teaspoon of nutmeg
- 2 tablespoons of honey or maple syrup
- 1 cup of graham cracker crumbs (or alternative)
- 4 tablespoons of melted butter
- Optional toppings: chopped nuts, extra sliced apples, whipped cream
Instructions
- Combine the graham cracker crumbs and melted butter in a mixing bowl. Mix until evenly coated.
- Press about two tablespoons of the mixture into the bottom of each jar.
- Peel, core, and chop your apples into small cubes.
- Toss them with cinnamon, nutmeg, and honey or maple syrup, then let sit for 10 minutes.
- Sauté the apples in a skillet over medium heat for 5–7 minutes until softened.
- Combine Greek yogurt, cottage cheese, and vanilla extract in another bowl and blend until smooth.
- Spoon a layer of the cheesecake mixture into each jar, then add a layer of sautéed apples.
- Repeat the layers until jars are filled.
- Cover the jars and chill in the refrigerator for at least 2 hours.
- Serve with reserved apple mixture and toppings.
Notes
These jars can be prepped up to two days in advance. Feel free to customize toppings as desired.
- Prep Time: 15 minutes
- Cook Time: 10 minutes
- Category: Dessert
- Method: No-Bake
- Cuisine: American
Nutrition
- Serving Size: 1 jar
- Calories: 225
- Sugar: 12g
- Sodium: 250mg
- Fat: 9g
- Saturated Fat: 4g
- Unsaturated Fat: 5g
- Trans Fat: 0g
- Carbohydrates: 27g
- Fiber: 3g
- Protein: 18g
- Cholesterol: 20mg
Keywords: cheesecake, dessert, high-protein, healthy dessert, apple dessert