Indulge in Flavor: Protein Pistachio Rose Cheesecake
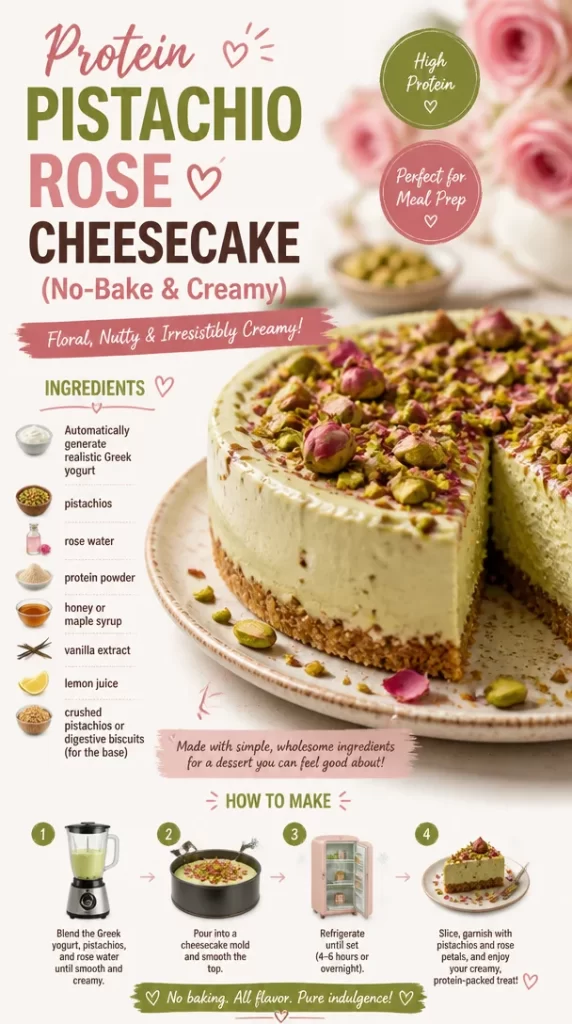
When it comes to desserts, I believe there should never be a compromise on flavor or nutrition—especially if you’re trying to indulge in a little something sweet while keeping things on the healthier side. Today, I’m inviting you to make a delicious and decadent Protein Pistachio Rose Cheesecake that’s not only scrumptious, but also packed with nutrients! This dessert takes your typical cheesecake and elevates it with a little twist that’ll have your taste buds soaring!
Picture this: a creamy and velvety cheesecake that melts in your mouth, with the buttery crunch of pistachios mingling with floral notes of rose water. As the luscious textures and flavors come together, each bite transports you to a far-off land filled with warm sunsets and laughter. Whether you’re serving this for a special occasion or treating yourself after a long week, I promise you won’t want to skip out on this delight.
I was first introduced to the magic of rosewater and pistachios during a trip to a little Mediterranean café that my friends and I stumbled upon one summer afternoon. The waiter brought out a plate of sweets beautifully adorned with crushed pistachios and a delicate drizzle of syrup flavored with rose. From that first bite, I was smitten. How could two simple ingredients create such an enchanting experience? That day sparked my passion for experimenting with bold flavors, leading me straight to the kitchen, where I crafted this unforgettable cheesecake.
Are you ready to whip up some magic in your kitchen? Let’s dive in!
Ingredients
To create this dreamy Protein Pistachio Rose Cheesecake, here’s what you’ll need:
-
1 cup ground pistachios
These are the real stars of the dessert! They’ll not only add texture and flavor but also pack a protein punch. Feel free to swap them out with almonds or walnuts if you’re feeling adventurous. -
2 cups Greek yogurt
The base of your cheesecake! Using Greek yogurt gives this dessert a creamy texture while boosting its protein content. If you’re after a dairy-free option, look for coconut yogurt or a nut-based alternative. -
1/2 cup honey or maple syrup
You can add even more flavor to your sweetener by using infused honey! If you need it to be vegan, maple syrup is a fantastic and flavorful substitute. -
2 teaspoons rose water
This is the magical ingredient that brings that lovely floral aroma to life. Be sure to use high-quality rose water for the best flavor. If you’ve got a nut allergy, try adding vanilla extract instead for a different twist. -
1 teaspoon vanilla extract
Always a flavor enhancer! This will help round out the sweetness and keep everything balanced. Feel free to use vanilla bean paste if you have it on hand for a gourmet touch. -
1/4 teaspoon salt
Balance is key in desserts. A pinch of salt will heighten the sweetness and make the flavors pop! -
Optional: crushed pistachios for garnish
For those gorgeous finishing touches! You know we eat with our eyes first, so don’t skimp on the garnish!
As you gather your ingredients, take a moment to look for the freshest pistachios and highest-quality rose water. Great ingredients make all the difference in the final flavor, and it’s the little details that spark those unforgettable moments at the table!
Step-by-Step Instructions
Now that you’ve got your ingredients ready, let’s start whipping up this cheesecake!
-
Preheat the oven to 350°F (175°C)
Before diving in, preheating is crucial! An evenly heated oven means an evenly baked cheesecake—no one likes a soggy bottom! -
Prepare Your Crust (optional)
If you’re a crust lover, you can use a store-bought graham cracker base or make a simple one using crushed pistachios and a little coconut oil. Just mix them together and press the mixture into the bottom of a springform pan. Bake for about 10 minutes, then let it cool. Otherwise, skip ahead to the filling! -
Mix the Filling
In a large bowl, combine your Greek yogurt, honey (or maple syrup), rose water, vanilla extract, and salt. Using a whisk or electric mixer, blend everything until smooth and creamy. Pro Tip: Use room temperature yogurt for the best blending results! -
Add the Ground Pistachios
Slowly fold in the ground pistachios into the yogurt mixture. Mix just until combined so the pistachios are evenly distributed without losing all that lovely air you just whipped into the yogurt! -
Pour into the Prepared Pan
If you went with the crust, pour your filling over it gently. If you’re keeping it crustless, just pour directly into the springform pan. Don’t leave any deliciousness behind! Scrape the sides with a spatula. -
Bake
Place your springform pan in the preheated oven and bake for about 25–30 minutes. You’ll know it’s done when the edges look set but the center has a slight jiggle—think of it as a dance party in the oven! -
Cool Down
Once baked, turn off the oven and let the cheesecake sit inside for an additional 10 minutes. This gentle cooling helps prevent cracks on the surface. After that, allow it to cool to room temperature and then refrigerate for at least 4 hours, or overnight for best results. -
Garnish and Serve
When you’re ready to dig in, carefully remove the cheesecake from the springform pan. Sprinkle with additional crushed pistachios and drizzle a tiny bit of honey on top if you like things extra sweet.
Serving Suggestions
This Protein Pistachio Rose Cheesecake shines when plated beautifully! You can serve it on a lovely wooden cutting board adorned with fresh fruits like raspberries or figs—beautiful pops of color and flavor. A dollop of Greek yogurt or coconut whipped cream on the side adds a touch of elegance, and don’t forget a sprinkle of rose petals for a romantic presentation.
For entertaining, slice it into generous wedges and serve it with aromatic tea or coffee. Your guests will be raving about this dessert long after the last bite.
Recipe Variations
Variety is the spice of life—let’s give your cheesecake some twists!
-
Chocolate Drizzle
Melt some dark chocolate and drizzle it on top before adding the pistachios. What’s better than chocolate and pistachios? It’s divine! -
Fruity Explosion
Add a layer of fresh fruit jam or compote (think raspberry or even passionfruit!) on top of your cheesecake before serving for a sweet surprise. -
Citrus Burst
Add the zest of a lemon or orange to the filling for a citrusy zing that complements the rose beautifully. -
Nut Butter Swirl
For added richness, swirl in your favorite nut butter (like almond or cashew) into the filling before baking. -
Sugar-Free Option
Swap the honey or maple syrup with a stevia or monk fruit sweetener if you’re looking to reduce sugar. Just be sure to adjust quantities according to your desired level of sweetness!
Chef’s Notes
I love experimenting in the kitchen, and this cheesecake is a beautiful example of how recipes can evolve. Originally, I made it with cream cheese and heavy cream, but after attempting a healthier version with Greek yogurt, I was hooked! The wonderful surprise was just how creamy and satisfying it became, plus it made portion control a tad easier. Remember, cooking—and baking—is all about having fun and making it your own. Don’t be afraid to substitute, create, and adapt as you please!
FAQs and Troubleshooting
-
Why is my cheesecake cracked?
It’s often a temperature issue! A sudden change in temperature can create that dreaded crack. Letting it cool gradually in the oven helps combat this. Additionally, make sure not to overmix the filling. -
Can I freeze the cheesecake?
Absolutely! Just wrap it tightly in plastic wrap and foil before freezing. To serve, let it thaw in the fridge overnight. You may need to touch up the garnish once it’s defrosted! -
What if it’s too sweet?
Ease up on the sweetener next time, or balance it with a touch of yogurt or lemon juice for acidity. -
How do I store leftovers?
Keep it covered in the fridge for up to 5 days. Enjoy the next day’s slice with a hot cup of your favorite tea!
Nutritional Info
This Protein Pistachio Rose Cheesecake is a deliciously indulgent treat, but it’s also nourishing. With Greek yogurt as a core ingredient, each slice is packed with protein, healthy fats, and a decent amount of calcium! Here’s an approximate breakdown:
- Calories: 200
- Protein: 10g
- Carbohydrates: 25g (includes natural sugars)
- Fats: 8g
- Fiber: 2g
Keep in mind that swapping ingredients will affect the nutritional content, so play around and find what suits you best!
Final Thoughts
Cooking should be a joyful and creative process, and this Protein Pistachio Rose Cheesecake embodies that spirit perfectly! From its rich flavors to its beautiful presentation, this dessert is sure to leave you and your loved ones in awe. As you experiment with your own variations, remember that the kitchen is your canvas—enjoy the process, and don’t hesitate to sprinkle a little magic into every bite!
So, what are you waiting for? Roll up those sleeves, gather your ingredients, and start your culinary adventure with me. I can’t wait to hear about your cheesecake creations! Welcome to Food Meld, where flavors meet fun—let’s cook something awesome together!
Print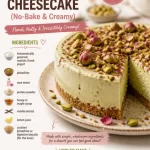
Protein Pistachio Rose Cheesecake
- Total Time: 45 minutes
- Yield: 8 servings 1x
- Diet: Health-conscious
Description
A creamy and decadent cheesecake combined with the delightful flavors of pistachios and rose water, perfect for indulgence without compromise on nutrition.
Ingredients
- 1 cup ground pistachios
- 2 cups Greek yogurt
- 1/2 cup honey or maple syrup
- 2 teaspoons rose water
- 1 teaspoon vanilla extract
- 1/4 teaspoon salt
- Optional: crushed pistachios for garnish
Instructions
- Preheat the oven to 350°F (175°C).
- Prepare Your Crust (optional).
- Mix the Filling.
- Add the Ground Pistachios.
- Pour into the Prepared Pan.
- Bake for about 25–30 minutes.
- Cool Down in the oven for an additional 10 minutes.
- Garnish and Serve.
Notes
Using high-quality rose water will enhance the flavor. Feel free to experiment with different types of nuts or sweeteners.
- Prep Time: 15 minutes
- Cook Time: 30 minutes
- Category: Dessert
- Method: Baking
- Cuisine: Mediterranean
Nutrition
- Serving Size: 1 slice
- Calories: 200
- Sugar: 15g
- Sodium: 90mg
- Fat: 8g
- Saturated Fat: 1g
- Unsaturated Fat: 7g
- Trans Fat: 0g
- Carbohydrates: 25g
- Fiber: 2g
- Protein: 10g
- Cholesterol: 5mg
Keywords: cheesecake, pistachio, rose water, dessert, healthy dessert