Cherry Bomb Cheesecake Cups: A Sweet Delight for Your Taste Buds
Hey there, food lovers! I’m Jackson Walker, and if you’re like me, you know that life calls for little sweet indulgences now and then. Today, I’m excited to take you on a tasty adventure as we whip up some Cherry Bomb Cheesecake Cups. Trust me; these are not just any cheesecake cups; they’re a delicious explosion of flavor and nostalgia in every bite. Get ready to impress your friends and family with these easy-to-make treats that are as fun to eat as they are to make!
The Cherry on Top: A Personal Story
You know, the first time I made cheesecake cups, it was a bit of an accident. I was trying to bake an elaborate cheesecake for a family gathering, but let’s just say my oven had other plans! Instead of the perfect cheesecake, I was left with a jiggly mess. Disheartened but determined not to waste my ingredients, I decided to improvise. I pulled out some cute little cups and layered the cheesecake filling, cherries, and graham cracker crumbs, creating something totally unexpected.
To my surprise—and everyone else’s delight—the cups were a massive hit! Seeing the smiles on my family’s faces as they devoured my “mistake” reminded me that cooking is all about being creative and having fun in the kitchen. Ever since that day, cherry cheesecake cups have become a staple in my dessert repertoire, and now they can be a delicious staple in yours as well!
Ingredients
Here’s what you’ll need for these delightful Cherry Bomb Cheesecake Cups:
- 8 oz cream cheese: The star of the show! It creates the smooth, creamy texture of the cheesecake. If you want a lighter option, you can use Neufchâtel cheese instead.
- 1/2 cup powdered sugar: Sweetens the filling without grittiness. For a healthier alternative, you can use coconut sugar or agave syrup, just adjust the quantity to taste.
- 1 tsp vanilla extract: This adds a lovely aromatic flavor that enhances the cheesecake. Homemade vanilla extract works wonders if you have it!
- 1 cup whipped cream: Light and airy, it gives the cheesecake a fluffy texture. Go for store-bought for convenience, or whip up some fresh cream at home. Remember, if you’re using milk alternatives, they may not whip as well!
- 1 cup graham cracker crumbs: These add a delightful crunch and act as a crust. If you want a gluten-free option, crushed almonds or oats can make a great substitute.
- 1 cups fresh cherries: These bring a sweet-tart burst of flavor. You can swap them out for berries, peaches, or even canned cherries in a pinch.
Step-by-Step Instructions
Alright, let’s roll up those sleeves and get to cooking! Follow these steps carefully, and feel free to sprinkle in your own flair along the way:
- Prep your cherries: Start by washing and pitting your cherries. It’s best to use fresh ones, but if you’re craving this recipe in the off-season, go ahead and grab frozen cherries. Just make sure to thaw and drain them first!
- Make the cheesecake filling: In a mixing bowl, beat together the softened cream cheese and powdered sugar until smooth. This can take about 2-3 minutes. Don’t rush this part! The smoother the mixture, the better your cheesecake cups will turn out.
- Add vanilla and whipped cream: Once your cream cheese mixture is smooth, add in the vanilla extract. Carefully fold in the whipped cream until combined. This will make your cheesecake filling light and airy. Don’t overmix; we want it fluffy and delicious!
- Graham cracker crust: Now, in another bowl, combine the graham cracker crumbs with a little melted butter (about 2 tablespoons). Mix until it resembles wet sand. This will help the crumbs stick together. If it’s too dry, add a bit more melted butter.
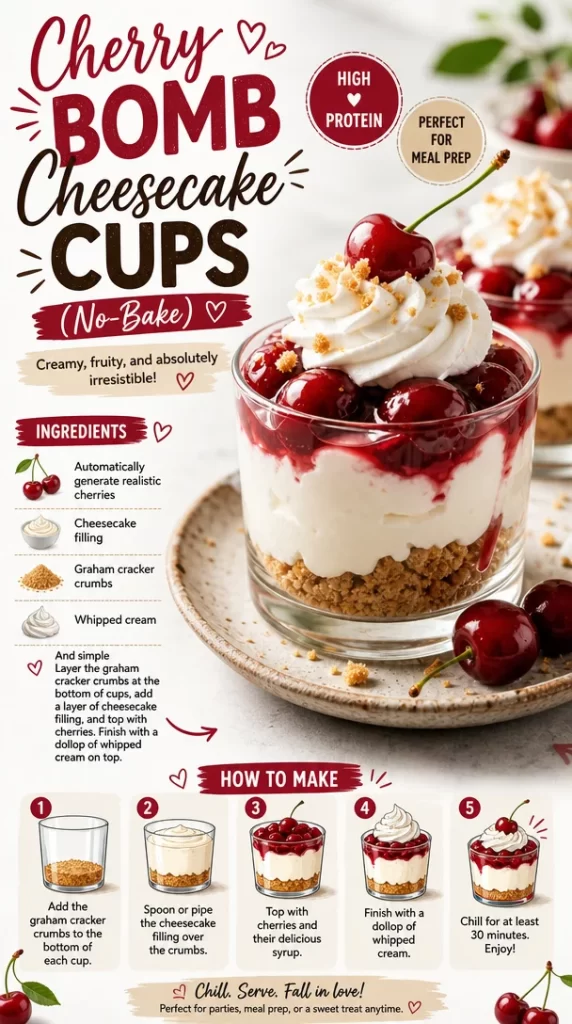
- Layer it up: Grab your dessert cups or jars. Start by spooning in about 2 tablespoons of the graham cracker mixture as the base. Then, add a generous layer of the cheesecake filling on top—roughly 3 tablespoons. Finish with a layer of cherries on top. You can keep layering until you reach the rim of the cup, but I recommend sticking to two or three layers to keep it manageable.
- Chill to perfection: Pop your cheesecake cups in the fridge for at least an hour to let everything set. Trust me; the wait will be worth it!
- Serve with a flourish: When you’re ready to serve, top each cup with extra whipped cream and some fresh cherries for that stunning presentation. You know, a little cherry garnish can make all the difference!
Remember, this is your kitchen playground! Don’t be afraid to add your twist or adjust the layers to your liking!
Serving Suggestions
Now that your Cherry Bomb Cheesecake Cups are chilling, it’s worth considering how to serve these beauties. Here are a few ideas:
- Individual Dessert Cups: These are perfect for any gathering and add a personal touch. Just set them out on a beautiful platter with some fresh mint leaves for a pop of color.
- Family Style: If you’re feeling generous, you can create one large cheesecake in a rounded dish and serve slices! Ideal for birthdays or family functions where everyone can grab a piece.
- Philanthropic Flair: Got some friends coming over? Serve your cheesecake cups in mason jars tied with twine for a charming, rustic vibe. A thoughtful little note on each jar can elevate the experience!
Recipe Variations
Let’s get creative! Here are some fun ideas to switch up your Cherry Bomb Cheesecake Cups:
- Tropical Twist: Swap out the cherries for crushed pineapple and add a hint of coconut milk to the filling for a beach-themed dessert!
- Chocolate Lovers: Mix in some cocoa powder to the cheesecake filling and top with chocolate shavings for a delicious chocolate cheesecake vibe.
- Nutty Delight: Stir in some crushed nuts into the graham cracker crust for an added crunch, or even make a pecan crust for an upscale option.
- Seasonal Swaps: Use different fruits based on the season. Raspberries, strawberries, or even fall-spiced apples can fit in beautifully!
- Vegan Version: You can make this recipe vegan-friendly by using dairy-free cream cheese, coconut whipped cream, and crushed almond biscuits for the crust.
Chef’s Notes
In my journey of culinary experimentation, I realized that cooking is all about making memories and igniting joy. These Cherry Bomb Cheesecake Cups have evolved over the years, transitioning from a simple household staple to a show-stopper that’s graced tables at family reunions, barbeques, and even summertime weddings. Each time I make them, I’m reminded that cooking mishaps can lead to beautiful creations. And just like cooking, life is all about adjusting, experimenting, and savoring those special moments!
FAQs and Troubleshooting
- What can I do if my cheesecake filling is too runny?
- If your filling isn’t thickening up, ensure your cream cheese is well whipped. Try adding a bit more powdered sugar, or refrigerate it longer to firm up.
- How do I prevent my cheesecake cups from being too sweet?
- Adjust the sugar to your taste! You can reduce it slightly, and the cherries will add natural sweetness. Remember, they need to balance flavors!
- Can I freeze these cheesecake cups?
- Absolutely! They freeze well. Just ensure they’re sealed properly to prevent freezer burn. Let them thaw in the fridge before serving.
- What’s the best way to store leftover cups?
- Keep them in an airtight container in the fridge for up to 3 days. They’re ideal for meal prep or a sweet treat on-the-go!
Nutritional Info
Now, while I believe in indulging, I also think about balance in our meals. Here’s a rough nutritional breakdown per serving based on traditional ingredients:
- Calories: Approximately 280-300 per serving
- Fat: 18g (mostly from cream cheese and whipped cream)
- Carbohydrates: 25g (from sugar and graham cracker crust)
- Protein: 4g (from cream cheese and whipped cream)
Feel free to adjust for your dietary needs, and remember that moderation is key!
Final Thoughts
So there you have it, folks—my beloved Cherry Bomb Cheesecake Cups! Whether you’re treating yourself after a long day or hosting the ultimate dessert table, these cups are sure to leave a lasting impression. Cooking with love and creativity can transform any ingredient into something magical. I hope you have as much fun making and sharing these delights as I do. Remember, every kitchen adventure is a chance to create memories, share laughs, and, most importantly, enjoy every delicious bite. Let’s get cooking, and may your culinary journey be filled with joy and flavor!
Print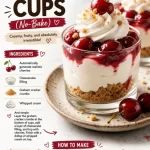
Cherry Bomb Cheesecake Cups
- Total Time: 60 minutes
- Yield: 4 servings 1x
- Diet: Vegetarian
Description
Delicious and fun Cherry Bomb Cheesecake Cups filled with creamy cheesecake and fresh cherries, perfect for any gathering.
Ingredients
- 8 oz cream cheese
- 1/2 cup powdered sugar
- 1 tsp vanilla extract
- 1 cup whipped cream
- 1 cup graham cracker crumbs
- 1 cup fresh cherries
Instructions
- Prep your cherries: Start by washing and pitting your cherries.
- Make the cheesecake filling: In a mixing bowl, beat together the softened cream cheese and powdered sugar until smooth.
- Add vanilla and whipped cream: Once your mixture is smooth, add in the vanilla extract and fold in the whipped cream.
- Combine graham cracker crust: In another bowl, mix the graham cracker crumbs with melted butter until it resembles wet sand.
- Layer it up: Spoon in graham cracker mixture as the base, then add cheesecake filling and layer with cherries.
- Chill to perfection: Pop your cheesecake cups in the fridge for at least an hour.
- Serve with a flourish: Top each cup with extra whipped cream and fresh cherries before serving.
Notes
Feel free to customize your layers or add your own twist to the recipe!
- Prep Time: 20 minutes
- Cook Time: 0 minutes
- Category: Dessert
- Method: No-Cook
- Cuisine: American
Nutrition
- Serving Size: 1 cup
- Calories: 300
- Sugar: 15g
- Sodium: 150mg
- Fat: 18g
- Saturated Fat: 10g
- Unsaturated Fat: 8g
- Trans Fat: 0g
- Carbohydrates: 25g
- Fiber: 1g
- Protein: 4g
- Cholesterol: 40mg
Keywords: cheesecake, dessert, cherries, sweet, easy recipe