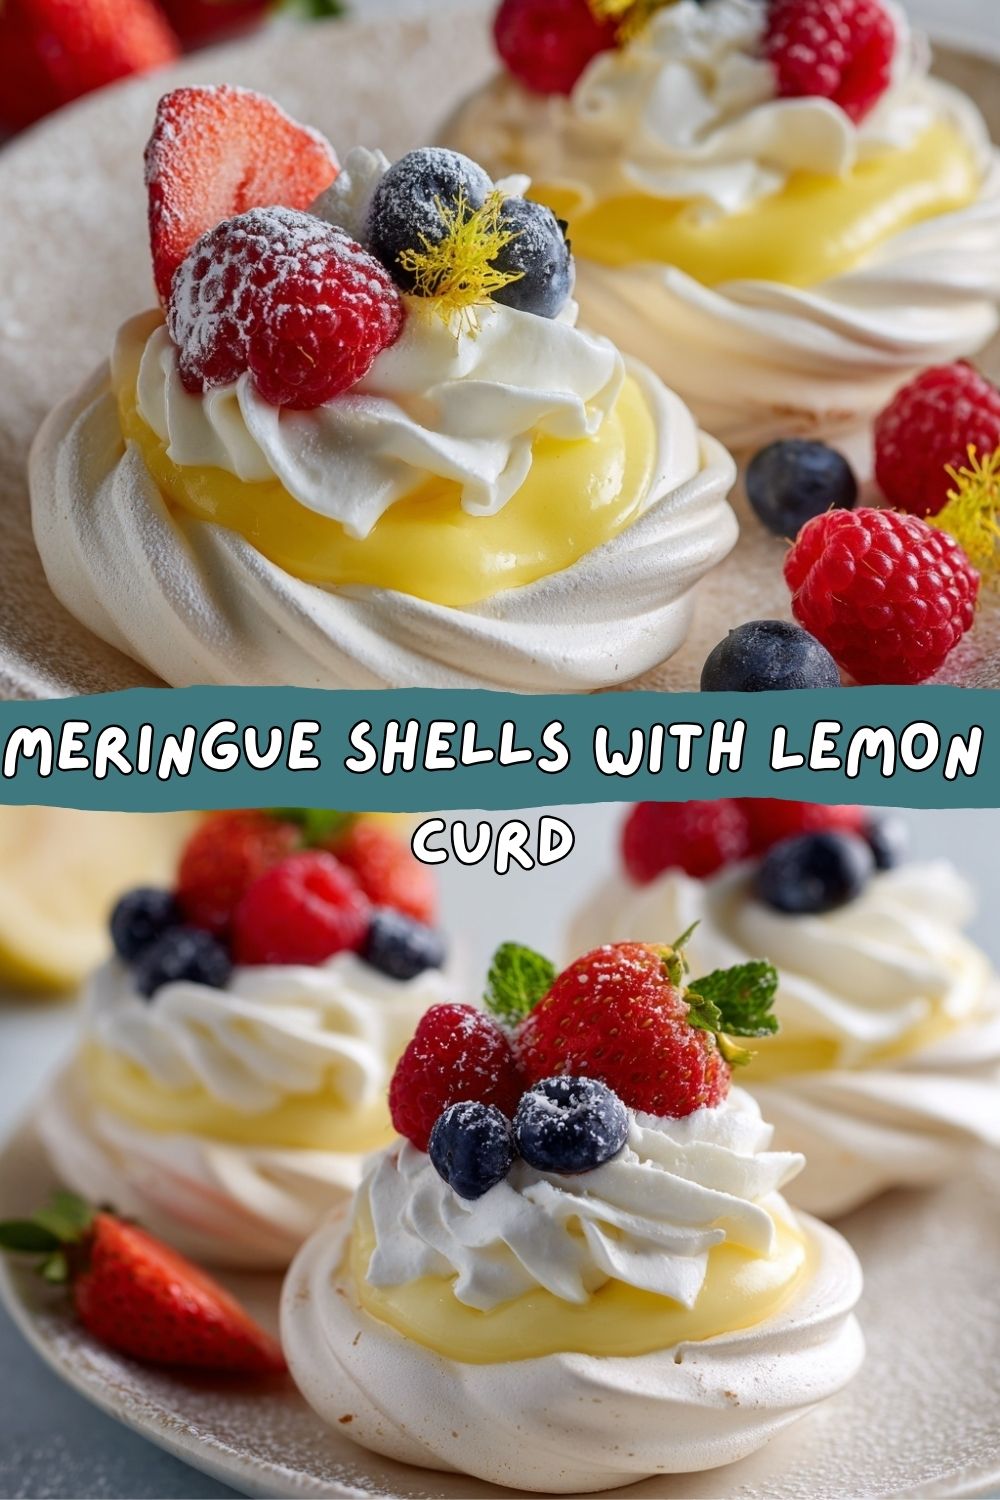
Meringue Shells with Lemon Curd: Your Ticket to Cloud Nine
Hey there, Food Meld family! Jackson here. Let’s talk about a dessert that feels like pure magic. You know the kind—the one that makes everyone at the table go completely silent, forks paused mid-air, eyes wide, followed by that collective, contented sigh. That’s the power of a perfectly made Meringue Shell cradling a pool of sunshine-bright lemon curd. This isn’t just a sweet treat; it’s an experience. It’s the crunch of a delicate, crisp exterior giving way to a soft, marshmallow-y center, all balanced by the zingy, creamy, perfectly tart embrace of homemade lemon curd.
I get it—the word “meringue” can sound intimidating. Visions of deflated egg whites and weeping sugar might pop into your head. But trust me, we’re going to bust those myths wide open. I’m here to show you that this elegant, show-stopping dessert is absolutely within your reach. It’s about technique, not mystery, and I’ll walk you through every single step. And that lemon curd? It’s simpler than you think, and the flavor of making it from scratch—the real, vibrant tang of fresh lemons—will ruin you for anything store-bought forever. It’s a flavor meld of the highest order: the sweet, the crisp, the tart, and the fresh, all coming together on one spoon. So, tie on your apron, grab your whisk (or your stand mixer!), and let’s turn some simple ingredients into something unforgettable. Ready to cook something awesome? Let’s go.
The “Eureka!” Moment in Granny’s Kitchen
This recipe takes me straight back to my Granny’s linoleum-floored kitchen, a place that always smelled like sugar and possibility. She was a wizard with egg whites. One Easter, she decided I was finally old enough to learn the “secret” to her famous meringues. I remember standing on a step-stool, watching those glossy white peaks form like mountain ranges in her old, butter-yellow mixing bowl. “Patience, Jackson,” she’d say. “You can’t rush a cloud.”
The magic moment came when she pulled the tray from the oven. Not golden, not brown, but these pristine, snow-white nests that looked almost too delicate to touch. Then, she spooned in her lemon curd, which she always called “sunshine in a jar.” That first bite was my culinary eureka moment. The contrast wasn’t just tasty; it was *textural poetry*. The shatter of the shell, the pillowy interior, the velvety curd—it was a symphony. She winked and said, “See? Fancy don’t have to be difficult.” That lesson—that elegance is born from simple, good ingredients handled with care and a dash of fun—is the heart of everything I do at Food Meld. Every time I make these, I’m right back in that kitchen, and I hope this recipe creates a little bit of that magic in yours.
Gathering Your Flavor Arsenal
Here’s the beautiful part: the ingredient list is short and sweet. But each one plays a starring role. Let’s break it down.
For the Meringue Shells:
- 4 large egg whites, at room temperature: This is non-negotiable. Room temp whites whip up higher and stiffer, creating that stable cloud we need. Chef’s Hack: Separate your eggs when they’re cold (it’s easier!), then let the whites sit in a bowl on the counter for 30 minutes.
- 1 cup granulated sugar: Superfine sugar is fantastic here as it dissolves faster, but regular granulated works perfectly. We’ll add it slowly so it melts into the egg whites, creating that glossy, stable meringue.
- ¼ teaspoon cream of tartar: Our stability superstar! This acidic powder helps the egg whites hold their structure and prevents weeping. No cream of tartar? A tiny pinch of salt or a few drops of lemon juice can work in a pinch.
- 1 teaspoon pure vanilla extract: This adds a beautiful warmth and depth that takes the meringue from “just sweet” to “complexly delicious.” For a fun twist, try almond extract!
For the Lemon Curd:
- ½ cup fresh lemon juice (about 3-4 lemons): Please, for the love of flavor, use fresh lemons! The bottled stuff just won’t give you that bright, sunny punch. Roll your lemons on the counter before juicing to get the most juice out.
- ¾ cup granulated sugar: Balances the intense tartness of the lemon. You can adjust this slightly to your taste—love it tart? Use ⅔ cup.
- 3 large egg yolks: The rich, velvety heart of the curd. Save those whites for another batch of meringues!
- ¼ cup (½ stick) unsalted butter, cubed: Added off the heat, this gives the curd its luxurious, silky-smooth texture and rounds out the sharp edges of the lemon.
For Topping & Serving:
- Whipped Cream: Lightly sweetened, it’s the perfect fluffy cloud on top.
- Fresh Berries: Strawberries, blueberries, raspberries—choose your favorite! They add a juicy, fresh pop that cuts through the sweetness.
Let’s Build Some Edible Clouds: Your Step-by-Step Guide
Okay, team. Here’s where the fun happens. Read through once, then let’s get cooking.
Step 1: Prep Like a Pro. First, preheat your oven to a low 225°F (110°C). This is a “low and slow” situation—we’re drying the meringues, not baking them quickly. Line two baking sheets with parchment paper. Pro Tip: Dab a little meringue under the corners of the parchment to glue it to the sheet so it doesn’t slide around while you’re piping.
Step 2: The Great Whisk. In the impeccably clean bowl of your stand mixer (or a large metal bowl if using a hand mixer), add your room-temp egg whites and cream of tartar. Start on medium-low until foamy, then crank it up to medium-high. Beat until you get soft peaks—this is when the peaks flop over gently when you lift the beater. Now, with the mixer running, start adding your sugar, one tablespoon at a time. I mean it—slow and steady! This ensures the sugar dissolves completely and gives you a stiff, glossy meringue that won’t deflate. Once all the sugar is in, keep beating until you have stiff, glossy peaks. This means when you lift the beater, the peak stands straight up. Beat in the vanilla right at the end.
Step 3: Shape Your Nests. You can spoon the meringue, but piping gives you the prettiest, most uniform nests. Fit a large piping bag with a wide round tip or a star tip. Fill the bag and pipe 3-4 inch circles on your prepared sheets, building up the edges to form a well in the center. No piping bag? A spoon and a little swirl motion works beautifully! Just make that little indentation for the curd to call home.
Step 4: The Patient Bake. Place the trays in the oven and bake for 1 hour. DO NOT open the oven door. After the hour, turn the oven OFF. Leave the meringues in the closed, turned-off oven for at least another hour, or preferably until they are completely cool. This gradual cooling is the secret to the perfect crisp texture without cracking.
Step 5: Sunshine in a Pot (Lemon Curd). While the meringues cool, make the curd. In a small, heavy-bottomed saucepan, whisk together the lemon juice, sugar, and egg yolks. Cook over LOW heat, whisking constantly. I’m not kidding about the constant whisking—we don’t want scrambled eggs! Cook until the mixture thickens enough to coat the back of a spoon (about 10-15 minutes). Remove from heat and whisk in the cubed butter until it’s fully melted and the curd is smooth. Strain it through a fine-mesh sieve into a bowl to catch any bits of cooked egg—this guarantees silkiness. Press plastic wrap directly onto the surface of the curd (to prevent a skin) and chill until set, about 1-2 hours.
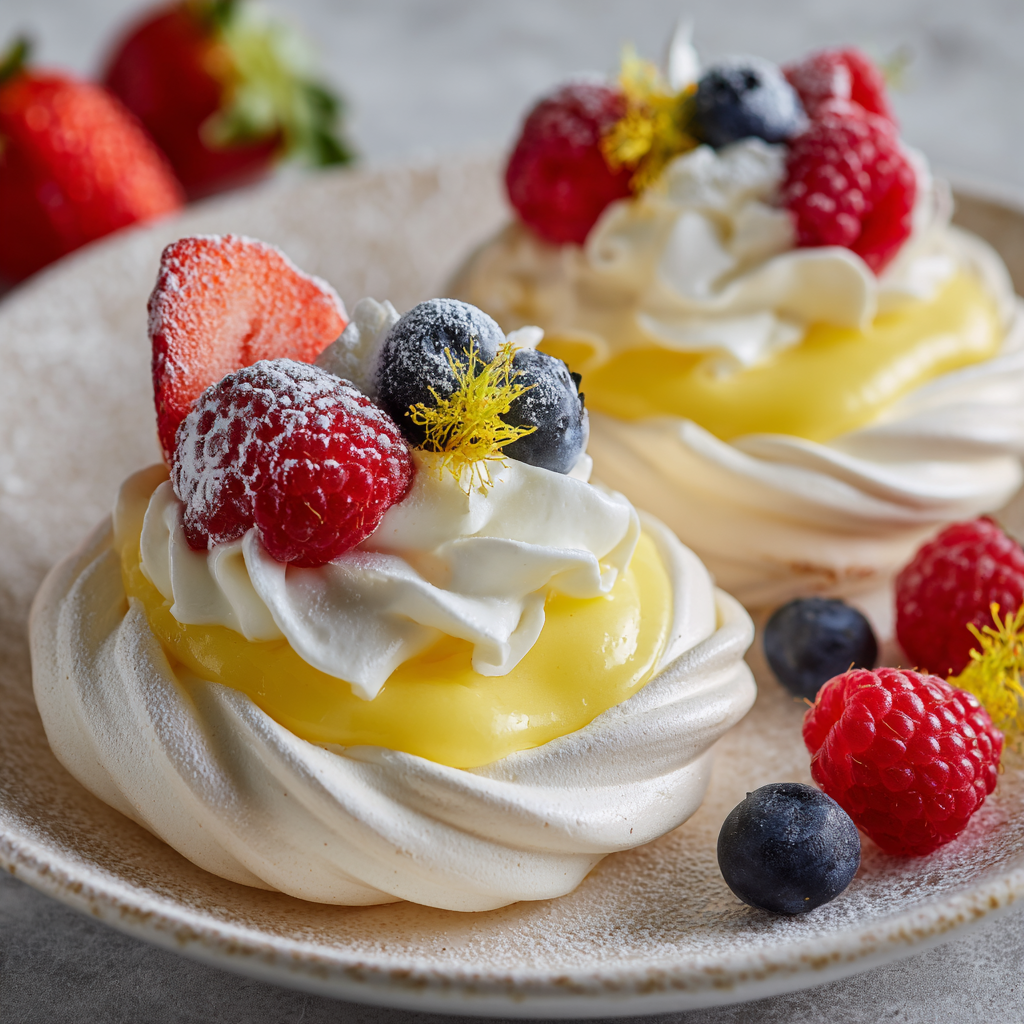
Plating Your Masterpiece
This is where you get to be an artist! Once your meringue shells are cool and your curd is chilled, it’s assembly time. Gently lift a shell and place it on a serving plate. Spoon a generous dollop of that glorious yellow lemon curd into the well. Top with a fluffy pillow of freshly whipped cream. Now, crown it all with a handful of vibrant, fresh berries. The color contrast is everything—the white, the yellow, the reds and blues. It’s a spring garden on a plate.
Serve these immediately after assembling for the best texture contrast. I love serving them on a big platter for a family-style dessert or plating them individually for a dinner party—it instantly elevates the whole meal. A little mint leaf on top? Chef’s kiss.
Make It Yours: Fun Flavor Twists
The classic is perfect, but why not play? Here are a few of my favorite “what if we tried this?” spins:
- Berry Curd Swap: Swap the lemon juice for fresh raspberry or passionfruit puree for a different kind of tart, pink or tropical wonder.
- Chocolate-Dipped Rims: Once the meringues are cool, gently dip the outer edges in melted dark or white chocolate. Let it set before filling. Elegance level: maximum.
- Toasted Coconut: Fold ½ cup of finely shredded unsweetened coconut into the meringue before piping. It toasts as it bakes and adds an incredible flavor and texture.
- “Lemon Meringue Pie” Style: For a deconstructed pie, make a quick no-bake cheesecake filling (cream cheese, a little sugar, vanilla) to layer under the lemon curd in the shell.
- Dairy-Free/Vegan: Use aquafaba (the liquid from a can of chickpeas) instead of egg whites! For the curd, use a trusted vegan lemon curd recipe with cornstarch and coconut oil.
Jackson’s Kitchen Confidential
This recipe has seen some evolution in my kitchen. I once, in a hurry, tried to speed up the meringue drying by cracking the oven door. Big mistake. They all cracked and went chewy. Lesson learned: patience is the most important ingredient. I’ve also learned that a rainy, humid day is a meringue’s nemesis—they can turn sticky. Save this for a dry day if you can! And about that leftover egg yolk from the meringue? Don’t you dare toss it! That’s the start of a killer carbonara, a rich pastry cream, or simply scrambled into your morning eggs. Waste not, want not, as Granny would say.
Your Questions, Answered
Q: My meringue is runny and won’t form stiff peaks. What went wrong?
A: The most common culprits are: 1) A speck of egg yolk or fat in the whites (even a little grease in the bowl). Ensure everything is spotlessly clean. 2) The eggs weren’t room temperature. 3) You added the sugar too quickly. Start over with fresh, clean, room-temp whites!
Q: Can I make these ahead of time?
A: Absolutely! The cooled meringue shells (unstuffed) store beautifully in an airtight container at room temperature for 2-3 days. The lemon curd can be made up to 5 days ahead and kept in the fridge. Assemble just before serving so the shells stay crisp.
Q: My lemon curd turned lumpy. Can I fix it?
A> You might have cooked it too hot/fast. But don’t panic! Strain it *vigorously* through a fine-mesh sieve—this will catch any cooked egg bits. If it’s still too thin after chilling, you can gently re-warm it and whisk in a cornstarch slurry (1 tsp cornstarch + 1 tbsp cold water) until thickened.
Q: Why did my meringues turn beige or brown?
A: Your oven was likely too hot, even if it said 225°F. Ovens can run hot. Try an oven thermometer to check accuracy. The goal is pure white, dried meringues, not colored ones.
A Note on Nutrition (Approximate)
While this is a celebratory dessert, it’s helpful to know what you’re enjoying. These estimates are for one filled meringue shell (with a moderate amount of curd and without whipped cream/berry toppings).
- Calories: ~210
- Carbohydrates: 38g (primarily from the sugar, which is necessary for meringue structure)
- Protein: 3g (thank you, egg whites and yolks!)
- Fat: 6g
- Saturated Fat: 3.5g
- Sugars: 34g
- Sodium: 45mg
Remember, this is a treat meant to be savored. The beauty is in the balance—the airy meringue, the bright, vitamin C-rich lemon, and the fresh fruit on top make it feel light and celebratory.
You Did It! Now, Share the Joy.
And there you have it! You’ve just created a dessert that looks like it came from a fancy patisserie but was born right in your own kitchen. That feeling of pulling those perfect, snowy white shells from the oven? That pride when the lemon curd sets up silky and smooth? That’s the Food Meld magic. It’s about embracing the process, having a little fun, and ending up with something truly special to share.
I hope this recipe becomes a new favorite in your home, a showstopper for your next gathering, or even a fun weekend project. Remember, cooking is an adventure. So if your first nest isn’t perfect, who cares? It’s still going to taste incredible. Now, go grab a spoon, dig into that crisp, sweet, tart masterpiece, and enjoy every single bite. Thanks for cooking with me today. Until next time, keep melding those flavors!
Jackson


