No-Bake Oreo Pie with Oreo Crust and Creamy Filling
Hey friends, Jackson here from Food Meld. Let’s be real for a second: have you ever met a person who didn’t light up at the sight of an Oreo? I haven’t. There’s just something magical about that crisp chocolate cookie hugging that sweet cream filling. Now, imagine taking that iconic flavor and turning it into a cool, creamy, impossibly easy no-bake pie. That’s the kind of kitchen magic I live for.
This isn’t just a dessert; it’s a mood-lifter, a crowd-pleaser, and a certified weeknight hero. We’re talking about a buttery Oreo crust that shatters with every bite, filled with a cloud-like, cream-cheese-sweetened filling that’s absolutely loaded with more chunks of those famous cookies. It’s rich but not heavy, indulgent but shockingly simple to make. The best part? Your oven gets to take a nap. All you need is a bowl, a spoon, and a little patience while it chills (okay, a lot of patience—waiting is the hardest part!).
Whether you’re dodging the summer heat, need a last-minute showstopper for a potluck, or just deserve a seriously awesome treat, this Oreo Pie has your back. It looks like you spent hours, but it comes together in about 15 minutes of active time. So, grab your favorite apron (or don’t—things might get deliciously messy), and let’s turn a package of cookies into pure, unadulterated dessert joy.
The Midnight Snack That Started It All
This recipe always takes me back to my college days. My roommate, Sam, and I had a… let’s call it a “healthy” obsession with Oreos. One sweltering night, our AC was busted, and the last thing we wanted was to turn on the oven. But we had a serious sugar craving and a near-empty pantry. We had a sleeve of Oreos, some leftover cream cheese from bagels, and a tub of whipped topping that was hanging on for dear life in the freezer.
In a stroke of hot, hungry genius, we smashed the cookies with a can of beans (we were fresh out of rolling pins, okay?), mixed them with melted margarine, and pressed it into a tin foil-lined bowl. We whipped the cream cheese and topping together, stirred in more cookie chunks, and plopped it all in the freezer. An hour later, we were eating this glorious, messy, frozen concoction straight from the bowl with two spoons. It was a beautiful disaster. This pie is the elegant, grown-up (but just as fun) version of that midnight invention. It proves that the best recipes often come from a little necessity and a whole lot of “what if we tried this?”
What You’ll Need
Here’s your grocery list for happiness. I’ve added my quick chef insights and swaps so you can make this pie your own.
- For the Legendary Crust:
- 24 Oreo cookies: You’ll use the whole cookie—cream filling and all! That filling helps bind the crust and adds extra sweetness. Chef’s Insight: A food processor makes “finely crushed” a 10-second job. No processor? A zip-top bag and a rolling pin (or that can of beans!) work great for therapeutic cookie-smashing.
- 1/4 cup (56g) unsalted butter, melted: This is the glue. Unsalted lets you control the saltiness. Pro Swap: If you only have salted butter, it’s totally fine—just know your crust will have a slight salty kick, which is amazing with the sweet filling.
- For the Dreamy Filling:
- 8 oz (227g) full-fat cream cheese, softened: Full-fat is non-negotiable here for the right creamy, stable texture. Leave it on the counter for a good hour before you start. Chef’s Tip: To soften quickly, microwave the sealed block for 10-15 seconds MAX.
- 1/2 cup (100g) granulated sugar: Sweetens and helps stabilize the filling. You can use confectioners’ sugar if you prefer; it dissolves even faster.
- 2 cups (475ml) whipped topping (like Cool Whip), thawed: The secret to that light, fluffy texture. Reader Q Solved: Yes, you can use an equal amount of freshly whipped heavy cream sweetened with a tablespoon of that sugar. Just whip it to stiff peaks first!
- 12 Oreo cookies, roughly crushed: The star of the show inside the filling! I like bigger chunks for awesome texture. Pulse them a few times in the processor or give them a rough chop with a knife.
- For the Garnish (Go Big or Go Home!):
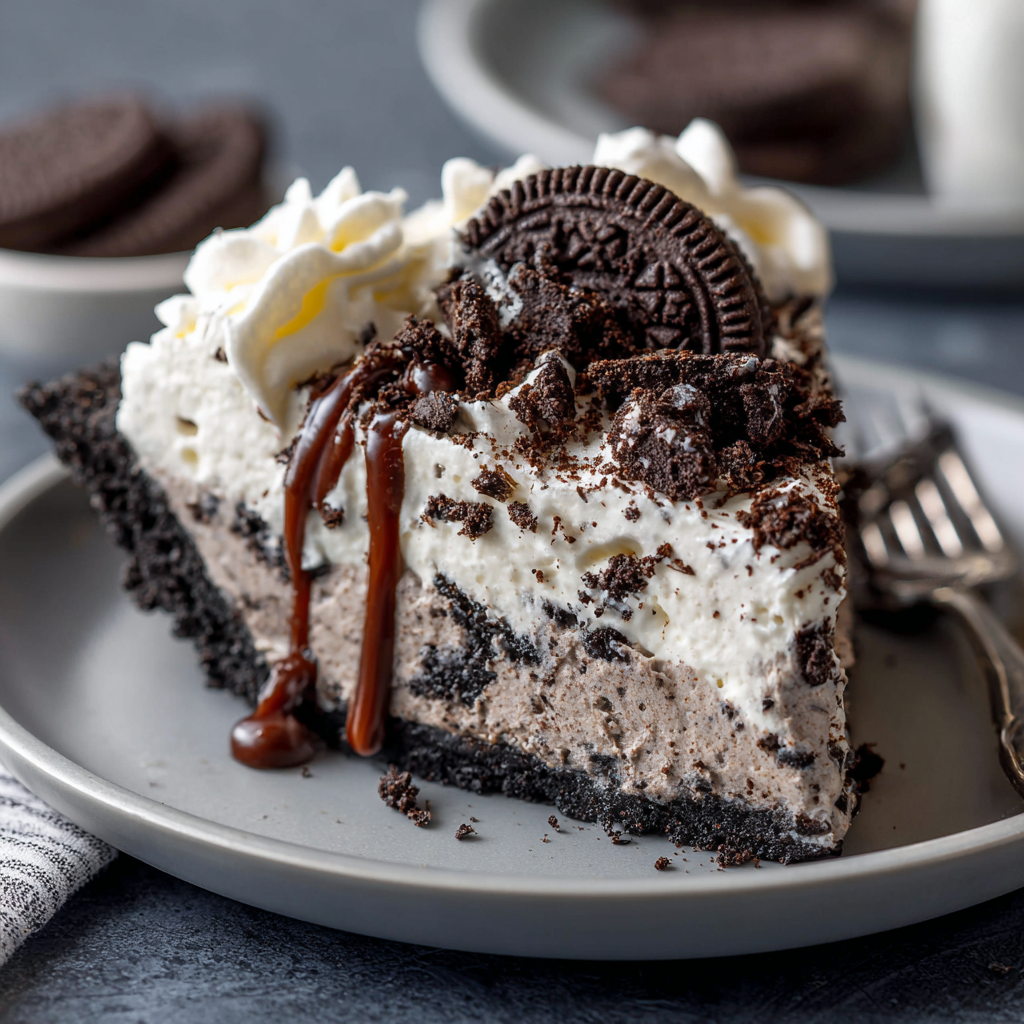
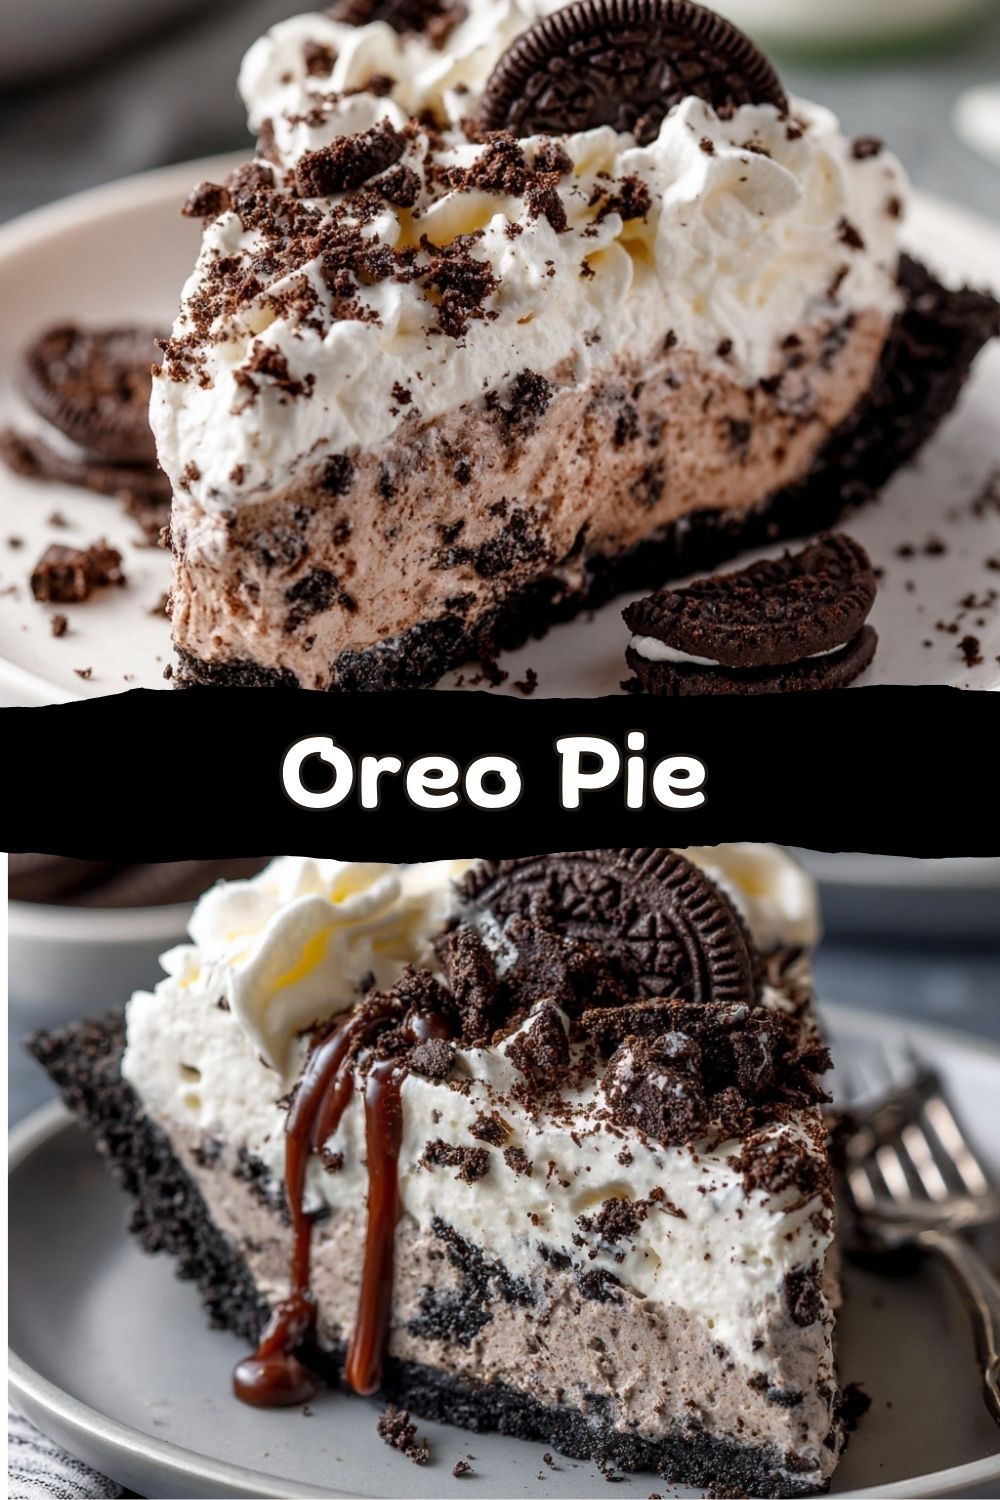
- More whipped topping, extra crushed Oreos, or even halved cookies perched on top. A drizzle of hot fudge or caramel takes it to another level entirely.
Let’s Build This Dream Pie: Step-by-Step
Ready? This is the fun part. I’ll walk you through each step with my favorite little hacks to ensure perfection.
- Conquer the Crust: Blitz your 24 Oreos into fine crumbs. Drizzle in the melted butter and mix until it looks like dark, damp sand. Pour this glorious mixture into a standard 9-inch pie dish. My Best Hack: Use the bottom of a flat glass or measuring cup to press the crumbs firmly and evenly up the sides and into the bottom. This gives you a solid, sliceable base. Pop it in the fridge to set up while you make the filling.
- Whip Up the Filling: In a large bowl, beat your softened cream cheese with the sugar. Use an electric mixer or stand mixer for about 2 minutes. We want it smooth, lump-free, and slightly fluffy. Scrape down the bowl! This is crucial for no cream cheese lumps. Now, grab a spatula. We’re switching gears. Add about 1 cup of the thawed whipped topping to the cream cheese mix and gently fold it in. This lightens the dense cream cheese. Once incorporated, fold in the remaining whipped topping until just combined.
- The Grand Finale—Cookie Chunks: Sprinkle your roughly crushed Oreos over the fluffy filling. Now, fold them in with a gentle hand. You want to distribute them evenly without deflating all that air you just incorporated. A few white streaks are okay!
- Assemble & Chill (The Test of Willpower): Pull your crust from the fridge. Spoon the filling into the crust and smooth the top with your spatula. Get it nice and pretty. Now, the most important step: cover it and refrigerate for at least 4 hours, but overnight is absolute gold. Overnight chilling firms everything up perfectly, making slicing clean and dreamy. I know it’s hard to wait. Distract yourself. Watch a movie. Do not, I repeat, do not sneak a spoonful yet!
How to Serve This Masterpiece
Presentation is part of the fun! For clean slices, dip your knife in hot water and wipe it dry between each cut. It glides right through. I love serving this on a simple white plate with a dollop of extra whipped topping, a sprinkle of fine Oreo crumbs, and maybe one perfect cookie half standing tall on the side. It’s a stunning contrast. For a party, you can even make individual mini pies in mason jars or muffin tins—just reduce the chill time to about 2 hours. Pair it with a cold glass of milk, a hot coffee, or just your eager taste buds. It’s a self-contained celebration.
Mix It Up! Your Pie, Your Rules
Got an idea? Run with it! Here are some of my favorite twists on the classic:
- Mint Chocolate Chip: Use Mint Oreos for both the crust and the chunks in the filling. Add 1/4 teaspoon of peppermint extract to the filling for an extra refreshing kick. Garnish with chocolate shavings.
- Peanut Butter Paradise: Swirl 1/3 cup of creamy peanut butter into the filling after you fold in the whipped topping. Use Peanut Butter Oreos if you can find them, or just add chopped Reese’s Cups along with the cookie chunks.
- Cookies & Cream Cheesecake: Add one more 8-oz block of softened cream cheese and an extra 1/4 cup of sugar. The result is a denser, richer, more cheesecake-like texture that’s utterly decadent.
- Fruity Twist: Gently fold in 1 cup of fresh raspberries or sliced strawberries with the cookie chunks. The tart fruit cuts through the sweetness beautifully.
- Dairy-Free/Vegan: Use your favorite vegan cream cheese and plant-based butter. Oreos are famously vegan in many countries (check your label!), and coconut whipped topping is a perfect substitute for Cool Whip.
Jackson’s Chef Notes & Kitchen Confessions
Over the years, this pie has been my trusty plus-one to more gatherings than I can count. It’s evolved from that haphazard college experiment to this polished recipe, but the soul is the same: pure, uncomplicated joy. One time, I was bringing it to a BBQ and forgot to chill it long enough. I had to serve it more like a “Oreo Pie Dip” with graham crackers—and guess what? People went nuts for it! So don’t stress. Even the “mistakes” are delicious.
My biggest lesson? Patience with the chilling time is your best ingredient. Also, tasting the filling before it goes in the crust is not only allowed, it’s highly encouraged. You’re the chef! Adjust the sugar if you want, add a splash of vanilla—make it yours. That’s what Food Meld is all about.
FAQs & Saving Your Pie from Disaster
- Q: My crust is too crumbly and falls apart when I slice it. What happened?
A: You likely needed a bit more butter or didn’t press it firmly enough. The mixture should hold together when you pinch it. If it’s already made, just serve it with a spoon—it’ll taste just as amazing! Next time, add melted butter by the teaspoon until the consistency is right. - Q: Can I freeze Oreo Pie?
A: Absolutely! Wrap it tightly and freeze for up to a month. It turns into a fantastic frozen icebox pie. Let it sit at room temp for 10-15 minutes before slicing for a slightly softer bite. - Q: Why is my filling lumpy?
A: That’s almost always from cream cheese that wasn’t soft enough. Make sure it’s truly room temperature. If you have small lumps, you can try pressing the finished filling through a mesh sieve—a bit of a hassle, but it works. - Q: I don’t have a pie dish. Can I use something else?
A: A 9-inch springform pan works wonderfully for a taller pie. You can also use a 9×9 square baking dish for “Oreo Pie Bars.” Just press the crust into the bottom and proceed as directed.
Nutritional Info (Because We’re Curious!)
Okay, let’s keep it real—this is a treat, through and through. Based on 8 slices (and tryin’ to be reasonable with that serving size!), here’s the approximate breakdown per slice: Calories: ~380, Carbohydrates: 32g, Sugar: 22g, Fat: 24g, Protein: 3.5g, Sodium: 180mg.
Remember, these are estimates. Using low-fat cream cheese or sugar substitutes will change the numbers. My philosophy? Enjoy a slice of something awesome like this pie, savor every single bite, and balance it out with all the other good stuff you eat. Life’s too short not to enjoy the cookies-and-cream moments.
Your New Go-To Dessert Awaits
And there you have it—the complete guide to the creamiest, dreamiest, most satisfying no-bake dessert in your future. This Oreo Pie is more than a recipe; it’s a guaranteed smile-maker. It proves that you don’t need fancy techniques or all day in the kitchen to create something truly memorable and delicious.
So, what are you waiting for? Grab those Oreos, clear a spot in your fridge, and get ready for the compliments to roll in. I want to see your creations! Tag me @FoodMeld when you make it so I can celebrate with you. Now go on, make a mess, have fun, and let’s cook something awesome together. Until next time, friends—keep melding those flavors!
Jackson 🥧


