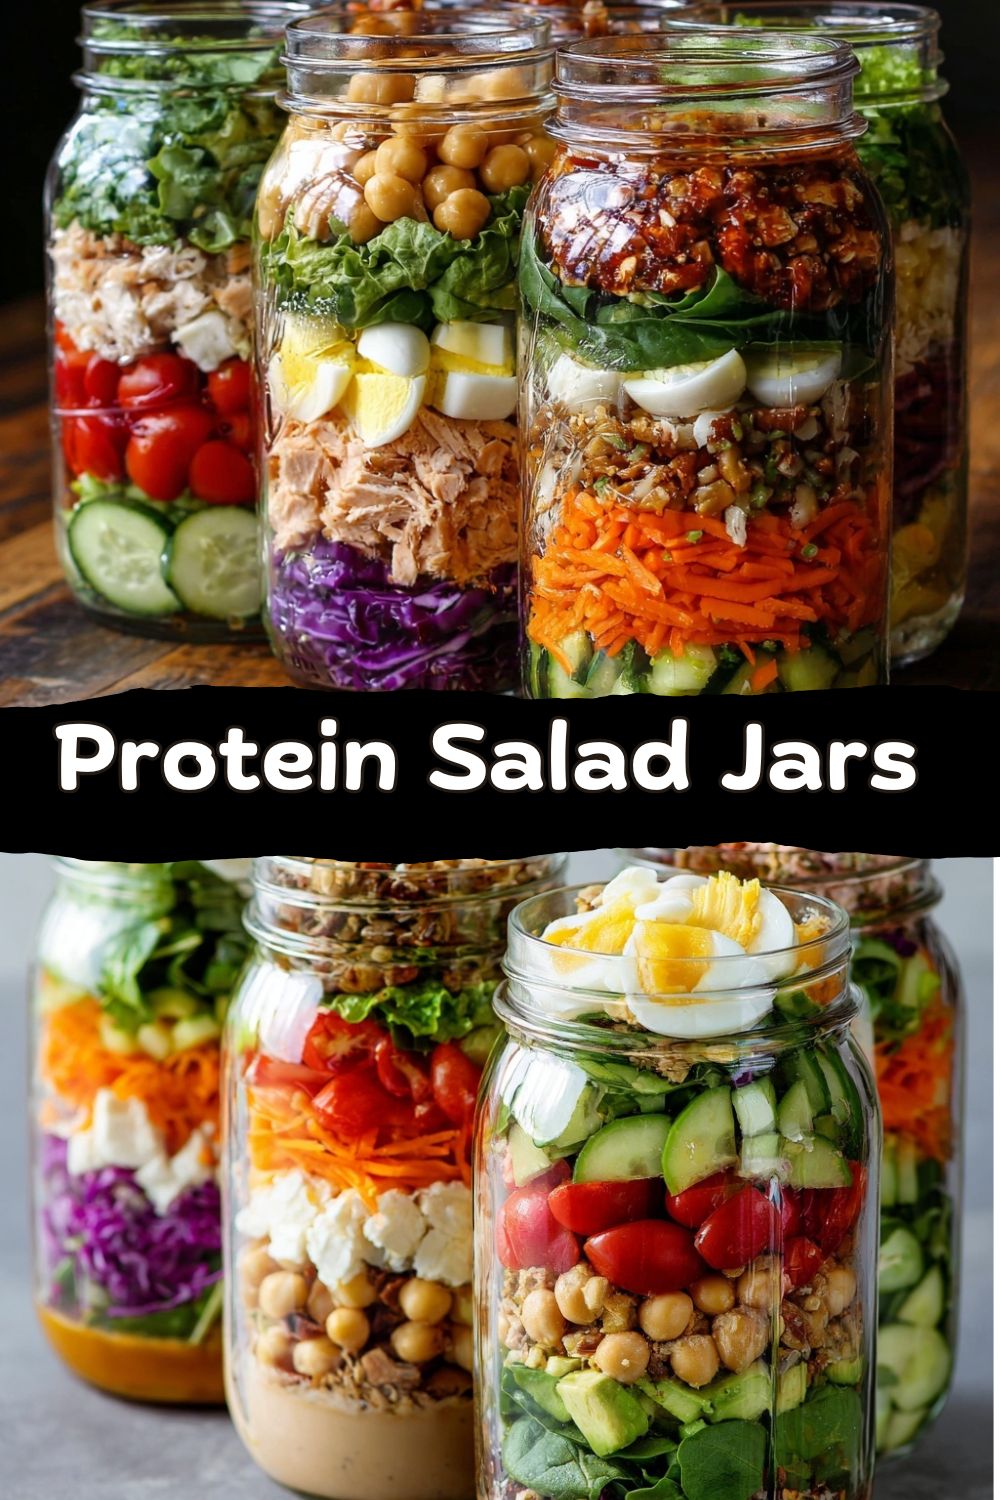
Protein Salad Jars: Your Secret Weapon for Effortless, Flavor-Packed Lunches
Hey there, foodie friend! Jackson here. Let’s get real for a second. How many times have you stared into the fridge at lunchtime, willing something healthy and exciting to magically appear, only to settle for… well, something that’s neither? Or maybe you’ve packed a sad salad in a container, only to find it’s a soggy, wilted mess by the time you’re ready to eat? I’ve been there. In the middle of recipe testing, filming, and just *living*, lunch can become an afterthought. That’s exactly why I became obsessed with the beautiful, brilliant science of the Protein Salad Jar.
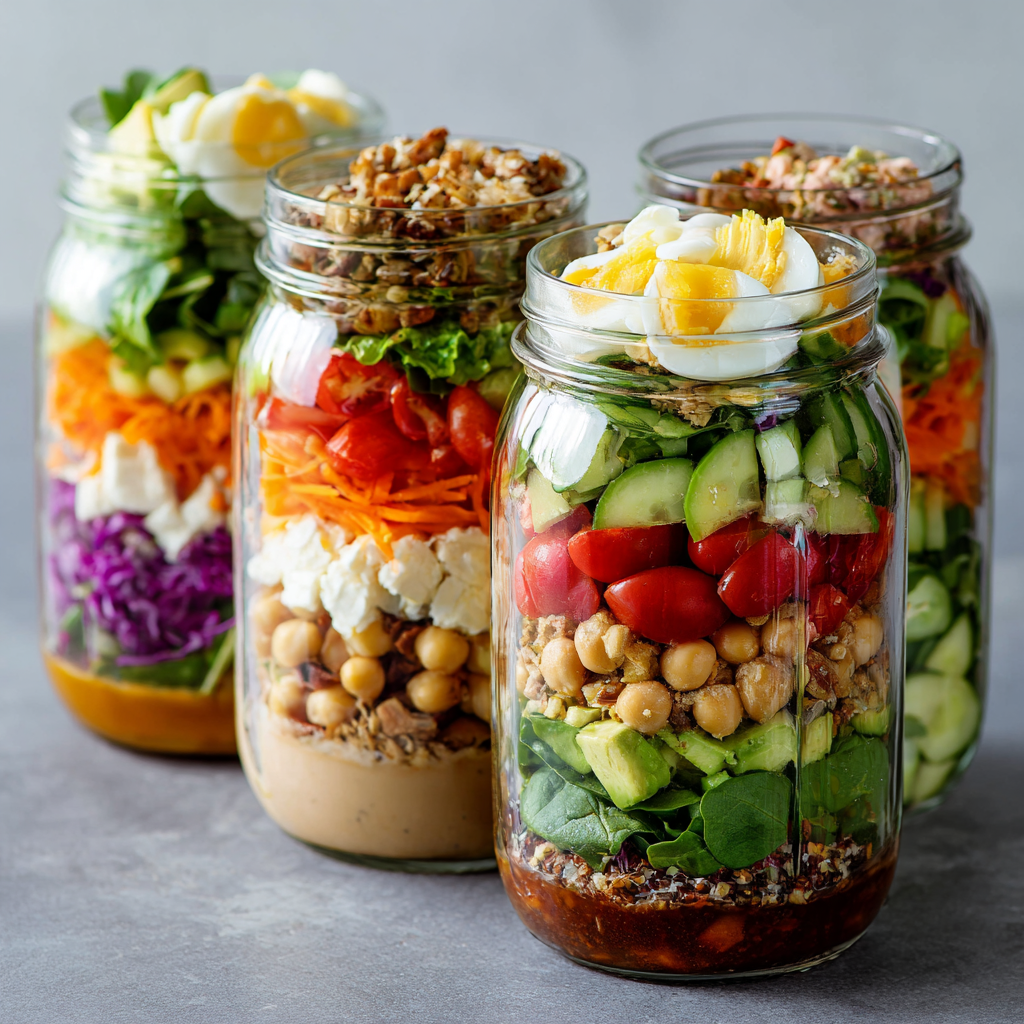
This isn’t just tossing greens in a jar. This is strategic, flavor-forward engineering. We’re building a parfait of deliciousness, layer by purposeful layer, to create a grab-and-go meal that’s still crisp, vibrant, and packed with fuel when you need it most. It’s my ultimate hack for eating well on a busy schedule, and I’m so excited to walk you through it. Think of these jars as your personal lunchtime insurance policy—a guarantee that something awesome is waiting for you. We’re talking bold flavors, satisfying textures, and the kind of creative freedom that makes healthy eating something you actually *look forward to*. So, grab four quart-sized jars, and let’s turn “meal prep” from a chore into the most fun you’ll have on a Sunday afternoon. Ready to build something awesome?
The Lunchbox Revelation: Where It All Started
My love for layered food in jars? It honestly goes way back. Picture a 10-year-old me, wrestling with a flimsy plastic lunchbox. My mom, a genius of practicality, would pack my lunch in a specific order: a little container of dressing at the bottom, then chunks of grilled chicken, then the “sturdy stuff” like carrots and celery, and finally, the lettuce, carefully tucked into its own baggie. At lunch, I’d do the grand assembly on my cafeteria tray. It was a ritual! That crunchy first bite was everything. Fast forward to my first kitchen job, prepping for a hectic cafe service. We’d pre-mix dressings in the bottom of deli containers, stack ingredients, and have perfect side salads ready to shake and plate in seconds. It was efficiency meets flavor.
Those two experiences—the homemade care and the professional hustle—totally “melded” in my brain (see what I did there?). The Protein Salad Jar is that idea, perfected. It takes the nostalgic, thoughtful packing of my mom and combines it with the smart, make-ahead strategy of a pro kitchen. It’s about respecting each ingredient enough to give it its own space, so when it’s finally time to eat, everything sings together in harmony. It’s a little bit of love, packed in glass, ready for whatever your day throws at you.
Gathering Your Flavor Builders: The Protein Jar Blueprint
Here’s the beautiful part: this is less of a rigid recipe and more of a foolproof formula. Once you know the rules, you can play by your own! This blueprint makes 4 quart-sized jars, ready to fuel your week. I’m listing my go-to combo, but with tons of notes so you can make it yours.
- For the Dressing (The Flavor Foundation):
- ½ cup Greek yogurt – My base for creaminess and a protein boost. It clings to every leaf beautifully.
- 2 tbsp olive oil – For richness and to loosen up the yogurt.
- 1 tbsp lemon juice & 1 tbsp red wine vinegar – The double acid punch! Lemon for brightness, vinegar for tang. Fresh lime works too.
- 1 tsp Dijon mustard – The secret weapon for emulsification and a subtle depth. Trust me on this.
- 1 small garlic clove, minced – Because garlic makes everything better. Use ¼ tsp garlic powder in a pinch.
- ¼ tsp each of dried dill, salt, and black pepper – The simple, classic seasoning trio. Fresh dill is incredible if you have it.
- Chef’s Insight: Whisk this all together in a bowl first. Taste it! Adjust with more lemon, salt, or herbs. Want it thinner? A splash of water or milk does the trick.
- For the Protein Layer (The Muscle):
- 2 cups cooked, shredded chicken breast – I use a store-bought rotisserie chicken for ultimate ease. Canned tuna (drained well), chickpeas, black beans, or chopped hard-boiled eggs are fantastic swaps.
- For the Crunch & Color (The Veggie Carnival):
- 1 cup halved cherry tomatoes – Bursts of sweetness. Grape tomatoes hold up even better.
- 1 cup diced English cucumber – Less seeds, more crunch. No need to peel!
- 1 cup shredded carrots – For color and a hint of earthiness. Buy pre-shredded to save time.
- 1 cup diced yellow bell pepper – Sweet and crisp. Red or orange are great too.
- For the Hearty Base (Optional, but Recommended):
- 1 cup cooked and cooled quinoa – My whole-grain of choice here—it’s fluffy, protein-packed, and soaks up dressing perfectly. Farro or brown rice are stellar too.
- For the Green Crown (The Fresh Finish):
- 4 cups packed baby spinach or mixed greens – Spinach is tender but sturdy. Kale is a powerhouse that won’t wilt; just give it a little massage first!
- To Add Day-Of (The Grand Finale):
- 1 avocado, sliced – Add this right before eating for perfect creaminess.
- ¼ cup sunflower seeds or chopped almonds – For that essential, satisfying crunch. Keep ’em separate in a tiny baggie if you’re prepping days ahead.
Building Your Jars: The Layer-by-Layer Lowdown
This is where the magic happens. The order is non-negotiable—it’s what keeps everything in pristine condition. Follow these steps, and you’ll be a jar-salad architect in no time.
- Mix Your Dressing: In a medium bowl, whisk together all the dressing ingredients until smooth and creamy. Give it a taste—this is your chance to be the boss. Need more zip? Add vinegar. More herbiness? Throw in some chopped fresh parsley. Set it aside.Chef’s Hack: I sometimes make a double batch of this dressing and keep it in a squeeze bottle in the fridge. It’s a game-changer for quick salads all week!
- Start with the Bottom Layer – The Dressing: Divide your creamy yogurt dressing evenly among the four jars. You want about 2-3 tablespoons in each. This lives at the very bottom, far away from your delicate greens.Why it works: Liquid at the bottom creates a barrier. When you shake the jar to eat, the dressing coats everything evenly from the bottom up, instead of weighing down the greens from the top.
- Add Your Protein: Now, pile that shredded chicken (or your protein of choice) right on top of the dressing. Let it get cozy down there. The protein will start marinating in the dressing, making it even more flavorful by day two or three.Pro Tip: If using a wetter protein like canned beans, give them a good rinse and pat dry with a paper towel first to avoid diluting your dressing.
- Layer in the Firm Veggies: Time for the crunch parade! Add your cucumbers, carrots, and bell peppers. The key is to use vegetables that are relatively low in moisture and can handle hanging out near the dressing. Avoid adding super watery veggies (like raw zucchini) here.Keep it Pretty: I like to alternate colors for a fun, striped effect when you look through the glass. It just makes me happy!
- Spoon in the Grains (If Using): Add a fluffy layer of cooked quinoa. This acts as a protective barrier between the wetter layers below and the greens above. It’s like a delicious, edible sponge.
- Pack the Greens Tight: Finally, take a big handful of your spinach or greens and really pack them into the top of the jar. I mean, press them down gently but firmly. This creates a tight seal that helps keep air (and sogginess) out. Fill it right to the brim!Key Move: Make sure the greens are completely dry after washing. A salad spinner is your best friend here. Any extra water is the enemy of crispness.
- Seal and Store: Screw the lids on tightly. Pop them in the fridge, and give yourself a high-five. You’ve just prepped lunches for the next four days.
- The Grand Shake & Serve: When hunger strikes, grab a jar! You have two options: 1) The Shake: Tighten the lid and give it a vigorous shake until everything is combined. Eat right out of the jar. 2) The Plate-Up: Dump the entire contents into a large bowl. This lets you add your final toppings (avocado, nuts, seeds) and mix gently with a fork. Both are perfect.
How to Serve Your Masterpiece
Honestly, cracking open one of these jars at your desk or kitchen counter feels like a little victory. For the full experience, I love the “dump-and-style” method. Grab a big, wide bowl—we eat with our eyes first, right? Invert the jar over the bowl and let the gorgeous layers tumble out. The dressing will naturally be on top now, ready to be tossed through. This is your moment to add those fresh, day-of toppings: arrange those creamy avocado slices on the side, sprinkle over the crunchy seeds or nuts, and maybe even add a crack of fresh black pepper or a pinch of flaky sea salt. If I’m at home, I might even warm up a piece of crusty bread on the side for the ultimate satisfying lunch. It’s a meal that looks like you fussed, but you and I know the secret: it was all about the smart layering.
Mix It Up! 5 Creative Twists on the Formula
The fun begins once you master the method. Here are some of my favorite themed jar salads to keep things exciting:
- The “Greek Goddess”: Dressing: Lemon-Oregano Vinaigrette. Protein: Chickpeas. Veggies: Diced cucumber, cherry tomatoes, red onion, Kalamata olives. Grain: Orzo pasta. Greens: Romaine. Toppings: Crumbled feta and a pepperoncini.
- The “Southwest Fiesta”: Dressing: Lime & Cilantro Ranch. Protein: Shredded salsa chicken or black beans. Veggies: Corn, black beans, red bell pepper, red onion. Grain: Cilantro-lime rice or quinoa. Greens: Chopped romaine. Toppings: Tortilla strips, diced avocado, and a sprinkle of cheddar.
- The “Asian-Inspired Crunch”: Dressing: Ginger-Sesame Soy Vinaigrette. Protein: Edamame or shredded pork. Veggies: Shredded purple cabbage, snap peas, shredded carrots, sliced radish. Grain: Soba noodles or quinoa. Greens: Chopped Napa cabbage or spinach. Toppings: Chopped peanuts and cilantro.
- The “Everything but the Kitchen Sink (Vegan)”: Dressing: Creamy Tahini-Lemon. Protein: Crispy baked tofu cubes or lentils. Veggies: Roasted sweet potato, broccoli, sunflower sprouts. Grain: Farro. Greens: Massaged kale. Toppings: Pepitas and a drizzle of hot sauce.
- The “Classic Cobb”: Dressing: Simple Red Wine Vinaigrette. Protein: Chopped hard-boiled eggs and turkey bacon bits. Veggies: Cherry tomatoes, diced cucumber, a little red onion. Greens: Chopped romaine. *Toppings (Add day-of):* Diced avocado, blue cheese crumbles. Skip the grain for a lower-carb option.
Jackson’s Kitchen Notes & Stories
I’ll never forget the first time I tried to put avocado IN the jar for the whole week. Big mistake. By Wednesday, I had a jar of sad, brown guacamole salad. Lesson learned: some ingredients demand last-minute glory. That’s how the “add day-of” category was born. Over time, I’ve also learned that the tighter you pack the greens, the better they keep. It seems counterintuitive, but a little pressure keeps them perky. These jars have also been my ultimate recipe-testing playground. Got a new dressing I’m obsessed with? Into the jar! Found a fun grain at the store? Let’s see how it layers. They’ve traveled with me on road trips, been my backstage fuel during long photoshoot days, and saved me more times than I can count. They’re more than just lunch; they’re a reliable, delicious habit.
Your Questions, Answered
- Q: How long do these salad jars actually last in the fridge?A: With the proper layering and dry greens, they are fantastic for up to 4 days. I find the sweet spot for peak crispness is days 2 and 3. Always use your best judgment—if anything looks or smells off, toss it.
- Q: My greens still get a little soggy. What am I doing wrong?A: The two most common culprits are: 1) Not drying greens enough. Spin them like there’s no tomorrow! 2) Using veggies with high water content in lower layers. Avoid things like raw mushrooms or zucchini. Stick to the crunchier veggies listed. Also, ensure your dressing layer isn’t overflowing into the upper layers when you add the protein.
- Q: Can I use a different size jar?
Yes—you can absolutely use a different size jar! The method stays the same, only the portions change.
-
Pint jars (16 oz): Great for lighter lunches or side salads. Use less dressing and skip the grain layer if space is tight.
-
Quart jars (32 oz): Ideal for full meals—this is my go-to size for protein-packed lunches that actually keep you full.
-
Wide-mouth jars: Non-negotiable in my book. Easier to layer, easier to eat from, and much easier to clean.
The key isn’t the jar size—it’s respecting the layering order.
Why Protein Salad Jars Actually Work (When Other Meal Prep Fails)
Let’s call it what it is: most meal prep fails because it ignores texture. These jars succeed because they protect it.
Here’s why they’re a total game-changer:
-
Crisp greens stay crisp because they never touch dressing until you’re ready
-
Protein absorbs flavor instead of drying out
-
You use less dressing but get more coverage
-
Everything travels well—no leaks, no mush, no sad lunches
-
Decision fatigue disappears because lunch is already handled
It’s not just convenient—it’s liberating.
A Quick Nutrition Snapshot (Because Fuel Matters)
This will vary based on your protein, grains, and dressing, but here’s a rough estimate per quart-sized jar using chicken, quinoa, Greek-yogurt dressing, and veggies:
-
Calories: ~450–500
-
Protein: 35–40g
-
Carbohydrates: ~30–35g
-
Fat: ~18–22g
-
Fiber: ~6–8g
Balanced, filling, and energizing—exactly what a midday meal should be.
The Final Shake
Protein Salad Jars aren’t just a recipe—they’re a system. A smart one. They remove the guesswork, the stress, and the “what am I going to eat?” spiral that hits every weekday around noon.
Once you build your first batch, something shifts. You open the fridge and feel prepared. You eat better without trying harder. You stop settling for leftovers that don’t excite you.
And honestly? There’s something deeply satisfying about unscrewing that lid, shaking the jar, and knowing you took care of yourself ahead of time.
So build the jars. Stack them proudly in your fridge. Mix flavors, swap proteins, play with textures.
Lunch just became the easiest win of your day.
Until next time—
keep it simple, keep it strategic, and keep having fun in the kitchen.
— Jackson 🥗✨


