
Warm Oven, Warmer Memories: The Joy of Homemade Crusty Bread
Hey there, friend. Jackson here. Pull up a stool. You ever walk past a real-deal bakery first thing in the morning? That moment when you push open the door and get absolutely punched in the face with the smell of warm yeast and toasted wheat? It’s a kind of magic. For the longest time, I thought that magic was locked behind those doors, a secret kept by bakers with forearms like Popeye and a mysterious starter named Bubbles.
I’d bring home a loaf, tear off a steaming chunk, and sigh. “How do they DO this?” I thought it was complicated. I assumed it took years of training, fancy equipment, and a gentle, nurturing touch I just didn’t possess. My early attempts were… well, let’s call them “doorstop adjacent.” Dense, sad little bricks that had more in common with a paperweight than something you’d want to slather with butter.
Then I discovered the no-knead method, and friends, my entire kitchen universe exploded. This recipe is my white whale, my kitchen MVP, the one I make when I want the house to smell like a hug and I need to feel like a wizard without actually doing much work. It’s the ultimate “what if we tried this?” success story. What if we let time do all the heavy lifting? What if the only real skill required was patience (and not burning yourself on a Dutch oven)?
This isn’t just bread; it’s a revelation. A golden-brown, crackly-skinned, impossibly airy revelation that you make with four humble ingredients and a whole lot of “trust the process.” It’s the centerpiece of a simple soup dinner, the star of a cheese board, the vehicle for the world’s best avocado smash. It’s proof that the most unforgettable kitchen moments aren’t about complexity—they’re about transforming the simple into the spectacular. So, tie on your apron, clear your schedule for tomorrow (the waiting is the hardest part!), and let’s bake something that’ll make your entire home smell like victory. Welcome to the magic. Let’s cook something awesome.
The Loaf That Started It All: A Kitchen Confidence Boost
My “aha!” moment with this bread happened during what I now call The Great Snowpacalypse. We’re talking two feet of snow, the grocery store shelves picked cleaner than a turkey carcass after Thanksgiving, and a serious craving for something comforting. All I had was flour, yeast, salt, and water. And a whole lot of nervous energy.
I remember mixing it all together in my biggest, chipped blue bowl—the dough looked like a shaggy, lumpy mess. I remember my skepticism as I draped a kitchen towel over it and shoved it in a cool corner. “18 hours? Yeah, right. Nothing’s gonna happen.” I went to bed dreaming of fluffy loaves, but expecting a science experiment gone wrong.
The next morning, I tiptoed into the kitchen like it was Christmas. I peeled back that towel… and gasped. The bowl was full of life! Bubbles dotted the surface, and the dough had risen into a soft, jiggly cloud. It smelled earthy and alive. That feeling—the shock that my four-ingredient gloop had transformed into something so beautiful and promising—was pure kitchen joy. I was hooked. Baking that first successful loaf in my grandma’s old cast-iron pot felt like unlocking a superpower. It wasn’t just food; it was a lesson in patience, a dose of self-reliance, and the start of my lifelong love affair with letting dough do its own beautiful thing. Now, every time I make it, I think of that snowy day and smile. It’s my edible reminder that the best things often just need a little time and a lot of trust.
Gathering Your Flavor Arsenal: It’s All About the Four Pillars
Here’s the beautiful part: the ingredient list is shorter than a grocery list for a hermit. But each one plays a starring role. Let’s geek out for a second on why they matter.
- 3 cups (360g) All-Purpose Flour: The workhorse. I use good ol’ unbleached all-purpose for its reliable protein content (that’s what builds gluten, our structure). Chef’s Insight: If you want a slightly chewier, more artisan crumb, swap in 1 cup of bread flour. It has more protein, giving you those gorgeous, irregular holes.
- 1½ teaspoons Sea Salt or Kosher Salt: This isn’t just for taste. Salt tightens the gluten structure, giving the loaf strength and a better crust. Sub Tip: If using fine table salt, reduce to 1 teaspoon, as it’s denser. Always mix it with the flour before adding yeast to avoid direct contact.
- ½ teaspoon Instant Yeast (also called Rapid-Rise or Bread Machine Yeast): The tiny, mighty engine. The long, slow rise with just a pinch of yeast is the secret to the incredible flavor and open crumb. Chef’s Hack: If you only have active dry yeast, it works! Just use the same amount. No need to proof it first in this recipe.
- 1½ cups (350ml) Warm Water: The catalyst. “Warm” means baby-bottle warm, around 100°F (38°C). If it’s too hot, it’ll kill the yeast; too cold, and things just move slower. Pro Move: I often use 1 cup warm water and ½ cup of ice-cold water. The mix seems to excite the yeast just right.
Let’s Get Baking: Your Foolproof Roadmap to Glory
Ready? This is where the “easy” part really shines. We’re not bakers today; we’re conductors, guiding the process. Read through once, then let’s dive in.
- The Shaggy Mix: In your biggest bowl, whisk the flour, salt, and yeast together. Pour in the warm water. Now, grab a sturdy wooden spoon or silicone spatula and stir until there are no dry patches of flour left. It will be a sticky, rough, lumpy, and frankly, kinda ugly dough. This is perfect. This is what you want. My mantra here: “Embrace the shag!” Don’t over-mix. Just bring it together.
- The Long, Luxurious Rest (The Hardest Step): Cover the bowl tightly with plastic wrap, a beeswax wrap, or a clean, damp kitchen towel. Tuck it away in a draft-free spot on your counter. Now, walk away. For 12 to 18 hours. Overnight is classic. The dough will bubble, rise, double, and become beautifully aerated. The top will be dotted with little holes. This slow fermentation is where the complex, slightly tangy flavor develops. Chef’s Check: If your kitchen is very cold (below 68°F/20°C), it might need the full 18. Trust the bubbles, not just the clock.
- Heat is Everything – Preheat Like a Pro: At least 30 minutes before your dough is ready, place your Dutch oven (or heavy, oven-safe pot with a tight-fitting lid) into your cold oven. Turn the oven to 450°F (230°C). Let the pot heat up WITH the oven. This super-hot pot is our makeshift bakery oven, creating instant steam for that epic crust.
- Gentle Shaping – No Kneading Required!: When your pot is nearly heated, pour the risen dough onto a well-floured surface. It will be loose and bubbly. With floured hands, gently fold the edges of the dough into the center, rotating it, to form a loose ball. This isn’t kneading; it’s just tucking. Place it seam-side down on a piece of parchment paper. Let it rest while the pot finishes heating (about 20-30 mins). Hot Tip: The parchment paper is your lifeline for safely lowering the dough into the scorching pot.
- The Big Bake – Part One (Steamy!): Carefully pull the hot pot out of the oven. Using the parchment paper as a sling, lift your dough ball and lower it into the pot. Put the lid on, and get it back in the oven, fast! Bake with the lid ON for 30 minutes. This traps steam, allowing the loaf to rise to its maximum height and start forming that gorgeous crust.
- The Big Bake – Part Two (Golden!): After 30 minutes, remove the lid (behold the risen loaf!). Your bread will be pale and matte. Return it to the oven, uncovered, for another 10-15 minutes. This is where the magic happens—the crust deepens into a rich, crackly, golden-brown masterpiece.
- The Cruelest Wait: Use the parchment sling to lift the bread onto a wire cooling rack. Now… you must wait. I know. It smells divine. But slicing into it too soon will turn that beautiful, steamy interior gummy. Let it cool completely, at least an hour. Use this time to make some herbed olive oil or simmer a soup. The anticipation makes it taste even better.
Breaking Bread: How to Serve Your Masterpiece
Okay, it’s cooled. The moment of truth! Grab your serrated bread knife—a smooth blade will squish it—and listen for that iconic *crackle-crunch* as you slice. The inside should be open, airy, and slightly chewy.
My favorite way to serve it is rustic and simple: tear off chunks and pile them in a napkin-lined basket. For dipping, I mix good olive oil with a pinch of flaky salt, cracked black pepper, and a dash of smoked paprika or dried herbs. It’s also the ultimate soup companion—imagine dunking a piece into a bowl of creamy tomato bisque or a hearty beef stew. For a next-level snack, toast a slice, rub it with a cut garlic clove while still warm, drizzle with oil, and top with ripe tomatoes and basil. Pure summer on a plate. Honestly, it’s so good, you might just stand over the cutting board and eat it plain. No judgment here.
Make It Your Own: 5 Flavorful Twists
Once you’ve mastered the basic loaf, the “what if” fun begins. Here are a few of my favorite ways to mix it up:
- Everything But The… Bread: After the initial mix, fold in 2 tablespoons of “Everything Bagel” seasoning. The onion, garlic, sesame, and poppy seeds bake right into the crust for insane flavor in every bite.
- Rosemary & Sea Salt Focaccia-Style: After the long rest, don’t shape it into a ball. Instead, pour the dough directly into a well-oiled, preheated 9×13 baking pan. Dimple it with your fingers, drizzle with olive oil, and press in fresh rosemary leaves and coarse sea salt. Bake uncovered at 425°F for 20-25 minutes.
- Whole Wheat Heartiness: Substitute 1 cup of the all-purpose flour with whole wheat flour. You’ll get a nuttier flavor, denser crumb, and a wholesome upgrade. Add a tablespoon of honey to the water for a touch of sweetness that pairs beautifully.
- Kalamata Olive & Thyme: Drain and chop ¾ cup of kalamata olives. Fold them into the dough along with a tablespoon of fresh thyme leaves during the initial mix. The salty, briny pops of olive are unbelievable.
- Cheesy Pull-Apart Rolls: After the long rest, turn the dough onto a floured surface and pat it into a rectangle. Sprinkle with 1 cup of shredded sharp cheddar and gruyere. Roll it up like a jelly roll, slice into 8 rounds, and place them in a greased cake pan. Let rise 1 hour, then bake at 375°F for 25-30 mins until golden and cheesy.
Jackson’s Kitchen Notes: The Evolution of a Loaf
This recipe has been my kitchen constant for years, and it’s evolved with every bake. I’ve learned that a splash of beer in place of some of the water adds a malty depth. I’ve forgotten about the dough for a full 24 hours (whoops!) and it turned out even more flavorful and tangy, almost sourdough-like. My biggest “duh” moment was realizing I could use the same dough to make two smaller loaves in smaller pots, perfect for gifting to a neighbor. The parchment paper sling was a game-changer after a few… let’s call them “dough-dropping incidents” with my metal tongs. The beauty is in its flexibility. It’s a recipe that forgives, adapts, and consistently delivers joy. Don’t be afraid to play with it. It’s just flour, water, and time—and you’re the boss of all three.
Your Questions, Answered: Bread Therapy Session
Q: My dough didn’t rise much during the 12-18 hours. What went wrong?
A: The usual suspects are water that was too hot (yeast murder) or a kitchen that was too cold. Yeast is sleepy below 68°F. Next time, try placing the covered bowl in your (turned-off) oven with just the light on—it creates the perfect warm, draft-free environment.
Q: I don’t have a Dutch oven. Can I still make this?
A: Absolutely! Any heavy, oven-safe pot with a tight-fitting lid works (cast iron, ceramic, enameled metal). You can also use a baking sheet: place a shallow pan on the bottom rack of the oven while preheating. When you put your shaped loaf (on a parchment-lined sheet) on the middle rack, toss a cup of ice cubes into the hot pan below to create steam. Cover the loaf loosely with a large, inverted metal bowl for the first 20 minutes of baking.
Q: Why is my bread so dense and gummy inside?
A> Two main reasons: 1) You didn’t let it cool completely before slicing. That steam needs to redistribute! 2) Your oven might be running cool. Invest in an inexpensive oven thermometer to check. Also, ensure you’re using the right flour—low-protein cake flour won’t develop enough gluten structure.
Q: Can I speed up the rise time?
A: You can, but you’ll sacrifice flavor and texture. Using 1 teaspoon of yeast and letting it rise for 4-6 hours in a warm spot will give you bread, but it won’t have the same complex flavor or open, holey crumb. The long, slow fermentation is the non-negotiable soul of this recipe.

Easy Crusty Bread Recipe : Bakery-Style at Home
- Total Time: 13 hours
- Yield: 10 Slices 1x
Description
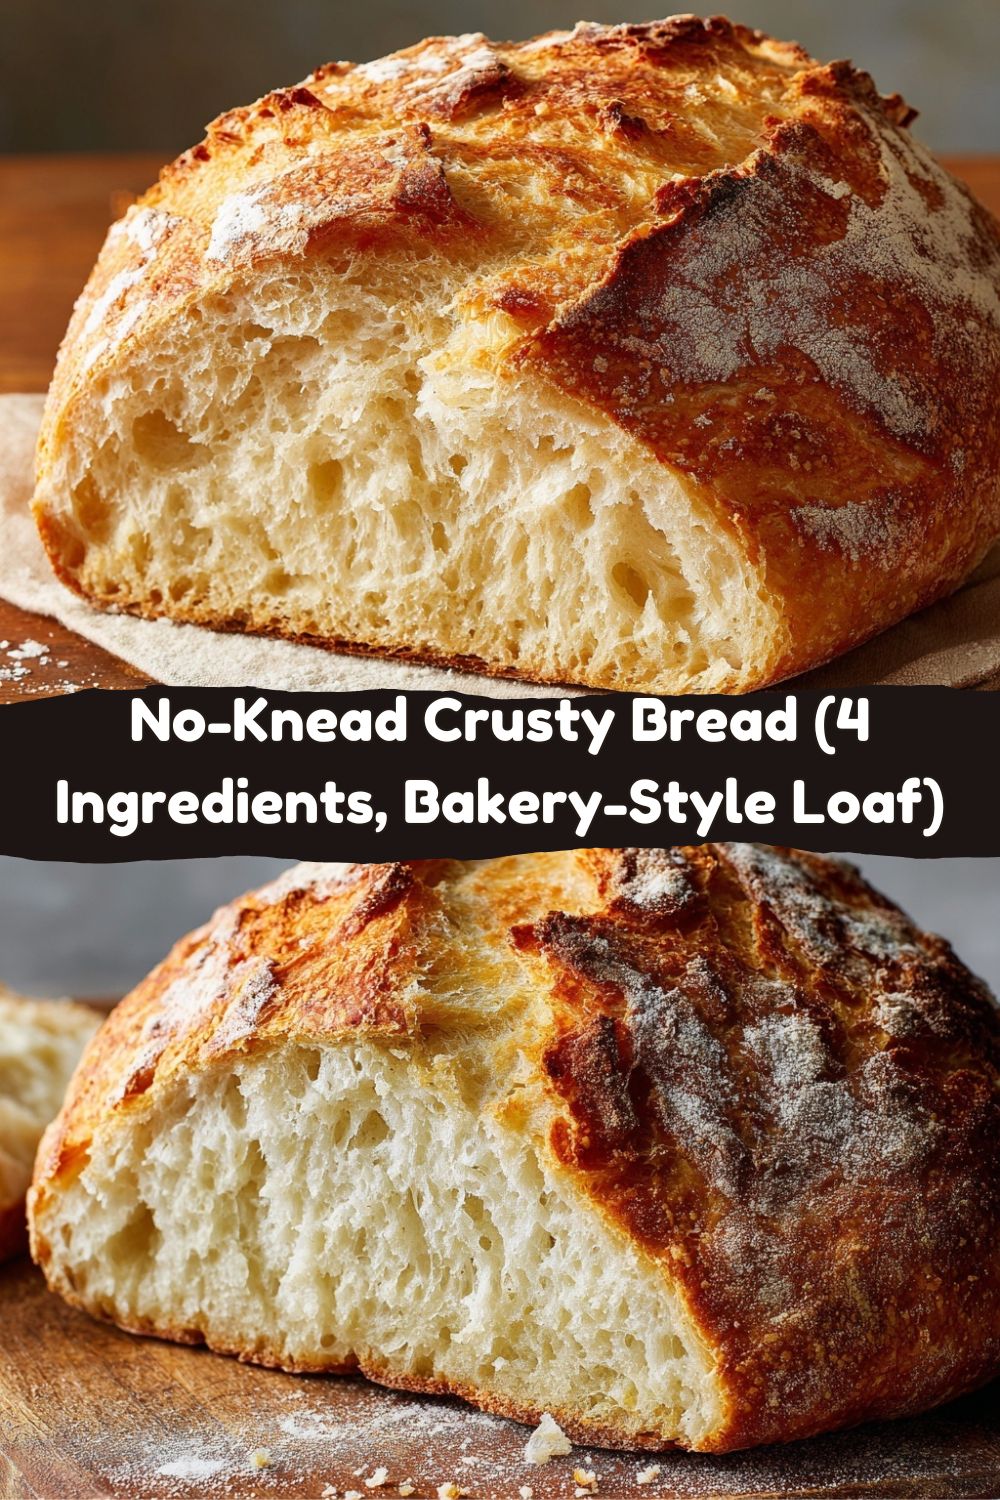
Craving that golden, crackly crust with a soft, airy center? This no-knead crusty bread brings bakery-style magic to your kitchen—no fancy tools or skills needed. Whether you’re dipping it in olive oil or pairing it with soup, this loaf delivers big flavor with minimal effort.
Ingredients
3 cups all-purpose flour
1½ teaspoons salt
½ teaspoon instant yeast
1½ cups warm water (not hot)
Instructions
In a large bowl, mix flour, salt, and yeast. Add warm water and stir until a shaggy dough forms.
Cover the bowl with plastic wrap or a towel and let it rest at room temperature for 12 to 18 hours (overnight works best).
Preheat your oven to 450°F (230°C). Place a Dutch oven (or heavy pot with lid) inside to heat for 30 minutes.
Meanwhile, turn the dough onto a floured surface, shape it gently into a ball, and let it rest while the pot heats.
Carefully place the dough into the hot pot, cover with lid, and bake for 30 minutes.
Remove the lid and bake for an additional 10–15 minutes until the crust is deeply golden.
Let it cool on a wire rack before slicing.
- Prep Time: 5 minutes
- Rest Time: 12–18 hours
- Cook Time: 40–45 minutes
Nutrition
- Calories: 150 / Slice
- Fat: 0.5g / Slice
- Carbohydrates: 30g / Slice
- Fiber: 1g / Slice
- Protein: 4g / Slice
Nutritional Information (Per Slice, approx. 1/10th of loaf)
Let’s keep it real: this is bread, a beautiful, simple carbohydrate meant to be enjoyed as part of a joyful meal. Here’s a basic breakdown, but remember, the best part is what you’re not getting: no preservatives, no additives, just pure, honest ingredients.
- Calories: ~150
- Carbohydrates: 30g
- Protein: 4g
- Fat: 0.5g
- Fiber: 1g
Note: These values are estimates and can vary based on specific ingredient brands and precise slice size. The beauty of homemade is knowing exactly what’s in your food.
Final Thoughts: You’re a Baker Now
Look at you. You’ve taken four of the humblest ingredients on earth and turned them into something that crackles, steams, and smells like a memory in the making. That’s no small thing.
This loaf isn’t about perfection or precision—it’s about trust. Trusting time. Trusting yeast. Trusting yourself enough to walk away and let something simple become extraordinary. The first time you tear into that crust and hear the snap, the first time you swipe warm bread through olive oil or butter and think, I made this, something shifts. You stop seeing bread as a product and start seeing it as a process. A ritual. A gift you can give yourself and the people you love.
So bake it on a quiet Sunday. Bake it on a snowy day. Bake it just because your kitchen needs to smell like comfort. And when someone asks where you bought that incredible loaf, you get to smile and say, “Oh… I made it.”
That’s real kitchen magic.
Until next time,
keep trusting the process and cooking something awesome,
Jackson


