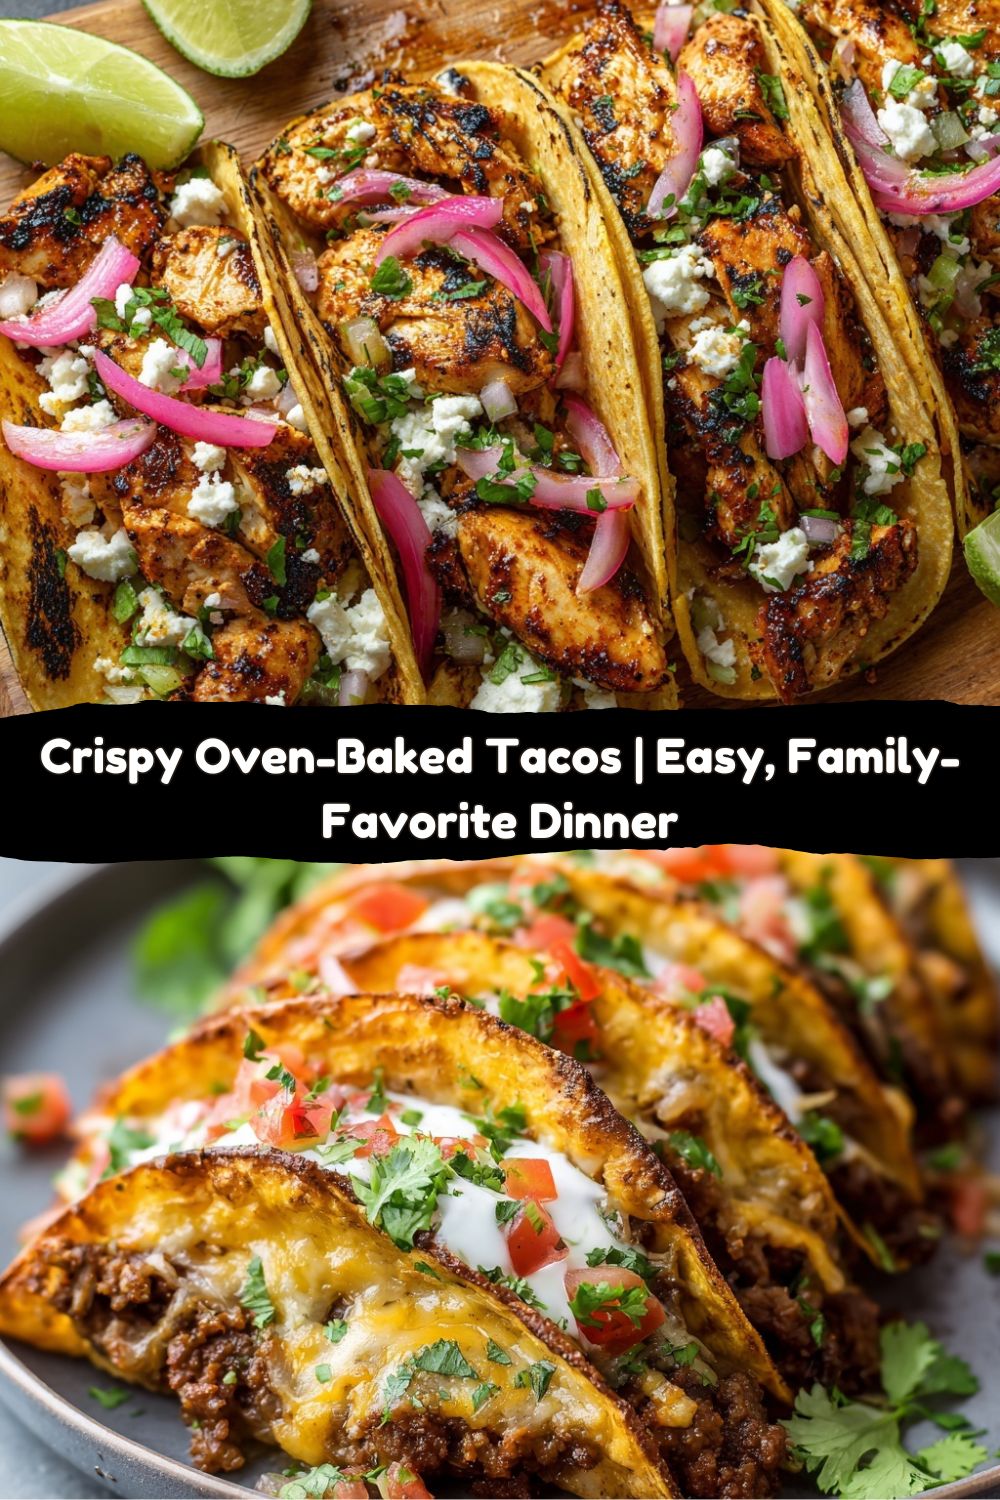
Forget Soggy Shells: Let’s Make the Best Oven-Baked Tacos Ever
Hey friends, Jackson from Food Meld here. Let’s talk about a universal truth: Taco Night is the best night of the week. But you know what can totally derail that good-vibe train? The dreaded soggy taco shell. You know the one. You’ve lovingly prepared all your toppings, your filling is simmering with flavor, and then—bam. You take one bite and the whole thing falls apart in your hands, leaving you with a plate that looks more like a taco salad gone wrong.
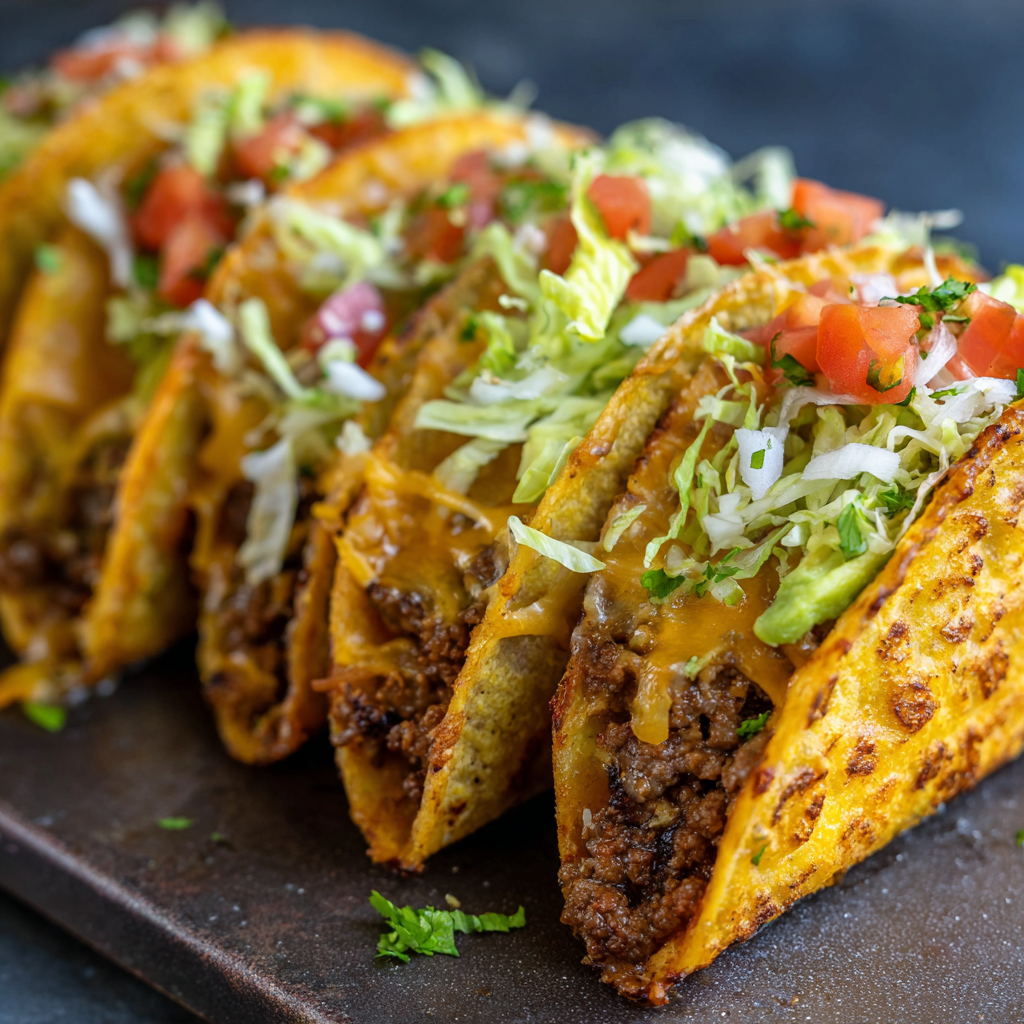
Well, my friends, I’m here to introduce you to your new taco night superhero: the Oven-Baked Taco. This isn’t just another recipe; it’s a game-changer. We’re taking simple corn tortillas, stuffing them with a boldly spiced, saucy beef filling, loading them up with cheese, and letting the oven work its magic. The result? A tray full of glorious, crispy-edged, cheesy, structurally-sound tacos that are perfect for feeding a crowd, pleasing picky kids, and maximizing your fun-to-cleanup ratio.
This is the kind of recipe that lives in your back pocket for busy weeknights, last-minute game-day gatherings, or anytime you need a guaranteed win. It’s simple, real, and packed with the kind of flavor that makes everyone ask, “Okay, what’s your secret?” Spoiler alert: the secret is having more fun in the kitchen. So, preheat that oven, grab your favorite skillet, and let’s cook something awesome together.
The Messy, Magical Origin of My Oven-Baked Tacos
This recipe was born out of pure, beautiful kitchen chaos. Picture this: It was my nephew’s 7th birthday, and I was put in charge of the “fun food.” My grand plan was a massive taco bar. I had it all—until I realized my genius plan to keep the taco shells warm in the oven had backfired spectacularly. They went from crisp to cardboard in minutes, and a few ambitious kids decided to build their own “taco towers,” leading to a cascade of filling and tears.
In a moment of pure “what if we tried this?” energy, I looked at the soft corn tortillas on the counter, the simmering beef in my trusty cast-iron skillet, and a whole lot of shredded cheese. I thought, “Why not just assemble these guys and let them get happy together in the oven?” I propped them up in a baking dish, shoved them in, and crossed my fingers. Twelve minutes later, I pulled out a tray of the most perfect, golden, crispy tacos I’d ever seen. They were a smash hit. The kids devoured them without a single spill, and the adults were fighting over the last one. That messy, magical moment is now a core Food Meld memory, and it’s the reason I believe the best recipes often come from happy accidents.
Gathering Your Flavor Arsenal
Here’s everything you’ll need to create this crispy, cheesy masterpiece. Don’t stress if you’re missing something—I’ve included my favorite swaps and chef insights to make this recipe your own.
For the Taco Meat:
- 1 lb lean ground beef (96/4): The lean stuff is my go-to because it creates less grease, giving us a cleaner, crispier final taco. If you use a higher fat content, just drain it well after browning! Chef Insight: You can easily swap this for ground turkey, chicken, or a plant-based ground “meat” with fantastic results.
- 1 medium yellow onion (200g), diced: This is our flavor foundation. The sweet, savory notes from the onion are a must. No yellow onion? A white or red onion will work in a pinch.
- 5 cloves garlic (25g), minced: Because more garlic is always the answer. This adds a deep, aromatic punch that makes the filling unforgettable.
- 2 tsp paprika: This gives a sweet, earthy base note and a beautiful red color. Smoked paprika would be an incredible twist here!
- ½ tsp kosher salt (or ¼ tsp table salt): We season in layers. Start with this, and you can always adjust at the end.
- ½ tsp black pepper: A simple but essential background note.
- ½ tsp ground cumin: The soul of so many great Tex-Mex and global dishes. That warm, nutty flavor is non-negotiable for me.
- ½ tsp crushed chipotle pepper: This is our “bold” move! It brings a subtle, smoky heat that’s so much more interesting than a generic chili powder. Substitution Tip: If you’re sensitive to heat, use a mild chili powder or even a dash of smoked paprika instead.
- ½ cup (120g) enchilada sauce: This is the SECRET WEAPON! Instead of water or tomato sauce, the enchilada sauce adds a complex, tangy, and slightly spicy moisture that binds the filling and makes it incredibly flavorful. I’m a fan of the Trader Joe’s brand, but your favorite red enchilada sauce will work perfectly.
For the Oven Tacos & Assembly:
- 15 extra thin corn tortillas (e.g., Mission brand): The “extra thin” style is key! They get super crispy in the oven without becoming tough. Flour tortillas will work, but they’ll be softer and more foldable than crispy.
- 1 cup (112g) finely shredded mozzarella: Yes, mozzarella! Its superb melting qualities create that iconic cheese-pull. The mild flavor lets the other spices shine.
- ½ cup (56g) finely shredded reduced-fat cheddar: We’re bringing in the cheddar for its classic, sharp flavor. Using reduced-fat helps keep things from getting too greasy. Chef Insight: Always shred your own cheese! Pre-shredded bags contain anti-caking agents that prevent it from melting as smoothly.
- Optional Add-ons: This is where the party starts! Think fresh chopped cilantro, diced tomatoes or a vibrant salsa, creamy avocado or guacamole, a cool dollop of sour cream or Greek yogurt, and plenty of lime wedges for a bright, zesty finish.
Let’s Build Some Taco Magic: Your Step-by-Step Guide
Follow these steps, and you’ll be a taco-baking pro in no time. I’ve sprinkled in my favorite chef hacks to make the process even smoother.
- Preheat and Prep: Fire up your oven to 400°F (200°C). Take a large baking dish or a rimmed baking sheet and give it a very light coating of cooking spray or a quick brush of oil. This guarantees a non-stick experience and helps the bottoms get golden. Chef Hack: Lining the pan with parchment paper makes cleanup an absolute dream.
- Create the Flavor-Packed Filling: Grab a large skillet (my cast iron is my best friend for this) and place it over medium heat. Add your ground beef and cook it, breaking it up with your spoon, until it’s beautifully browned. Now, toss in those diced onions and minced garlic. Sauté for about 5-6 minutes, until the onions have softened and the whole kitchen smells incredible. This is where we build our flavor base! Now, stir in all those gorgeous spices—the paprika, cumin, chipotle, salt, and pepper. Let them toast for just 30 seconds to wake them up. Finally, pour in that secret weapon, the enchilada sauce. Let the whole mixture simmer for about 5 minutes, until it’s thickened slightly. Give it a taste and adjust the seasoning if needed—this is your kitchen, after all!
- The Tortilla Warm-Up (Don’t Skip This!): This is the most crucial step for preventing torn tortillas. You need to make them pliable. The easiest way is to wrap a stack of 5 tortillas in a damp paper towel and microwave them for 20-30 seconds. You can also quickly heat them one by one over a gas flame for a few seconds per side if you’re feeling fancy. They should be soft and flexible, not hot and cooked.
- The Fun Part: Assembly Line Time! Take a warmed tortilla. Spoon a generous couple of tablespoons of the beef mixture into the center, then top with a good pinch of both the mozzarella and cheddar cheeses. The cheese acts as delicious glue, helping to hold the taco together. Now, gently fold it in half—it’s okay if some filling peeks out. Stand it up in your prepared baking dish, pressing it snugly against the side. Repeat with all your tortillas, packing them in tightly so they support each other as they bake. They should look like a happy, hungry crowd waiting for the show to start.
- Bake to Crispy Perfection: Slide your tray of future deliciousness into the hot oven. Bake them uncovered for 12-15 minutes. You’re looking for crispy, golden-brown edges and that glorious, bubbly, melted cheese. Keep an eye on them after the 10-minute mark, as all ovens have their own personalities!
- The Grand Finale: Carefully remove the baking dish from the oven (it’s hot!). Let the tacos rest for just a minute or two—this lets the cheese set a little so they’re easier to handle. Then, use a spatula to transfer them to plates.
Serving Up the Good Times
Presentation is part of the fun! I love serving these oven-baked tacos right on the baking tray (placed on a trivet, of course) for a casual, family-style feast. Let everyone dig in and build their own perfect bite.
Set up a topping bar with all your favorites. I recommend small bowls of:
- Fresh & Bright: Diced tomatoes, thinly sliced radishes, and a big handful of fresh cilantro.
- Creamy & Cool: A bowl of sour cream (or Greek yogurt for a tangy protein boost) and a big dollop of guacamole.
- Zesty & Spicy: Your favorite salsa, some pickled jalapeños for a kick, and plenty of lime wedges for squeezing over everything.
The contrast of the hot, crispy taco with the cool, creamy toppings is what makes this dish truly unforgettable. It’s a textural party in your mouth!
Mix It Up! Your Taco, Your Rules
The beauty of this recipe is its versatility. Once you’ve mastered the basic method, the world is your taco oyster. Here are a few of my favorite twists:
- Buffalo Chicken Twist: Swap the beef for shredded cooked chicken. Use the enchilada sauce, but also stir in ¼ cup of buffalo sauce. Use a Monterey Jack and blue cheese crumble mix for the cheese. Top with celery sticks and ranch dressing. Trust me on this one.
- Black Bean & Sweet Potato (Veggie Power!): A fantastic vegetarian option. Replace the meat with one can of black beans (rinsed and drained) and about 1 ½ cups of roasted, diced sweet potato. The spices work perfectly with this combo.
- Breakfast-for-Dinner Tacos: Fill the tortillas with scrambled eggs, cooked breakfast sausage, and a mix of cheddar and pepper jack cheese. Bake as directed and serve with a side of salsa. The ultimate brinner.
- “Taco Pizza” Style: Don’t fold them! Lay the softened tortillas flat on the baking sheet, top with the meat mixture and cheese, and bake for 8-10 minutes until crisp. Then add cold toppings like shredded lettuce and diced tomato for amazing taco tostadas.
Chef’s Notes: A Few Parting Wisdom Nuggets
This recipe has evolved so much since that first chaotic birthday party. I’ve learned that the brand of tortilla really does matter for the perfect crisp-to-pliability ratio, and Mission’s extra thin corn tortillas are my gold standard. I also used to mix the cheeses into the meat, but I found that layering the meat and then the cheese separately creates a much better texture and melt.
One of my favorite kitchen stories is the time I was testing a batch and got a work call right as I was taking them out of the oven. I got so distracted that I left the tray on the stovetop for a good 20 minutes. You know what? They were still deliciously crisp! The structure held up amazingly well, proving this is also a great “make-ahead” option for parties. Just assemble the tray, cover it, and pop it in the fridge until you’re ready to bake. Easy.
FAQs & Taco Troubleshooting
Got a question? I’ve probably got an answer. Here are the ones I hear most often.
Q: My tortillas cracked when I folded them. What did I do wrong?
A: You almost certainly skipped the crucial warming step! Cold corn tortillas are brittle. You MUST warm them up (in the microwave with a damp paper towel or over a flame) to make them soft and pliable before filling and folding. This is non-negotiable for taco success.
Q: Can I make these ahead of time?
A: Absolutely! You can assemble the entire tray of tacos, cover it tightly with plastic wrap, and refrigerate it for up to 24 hours before you need to bake them. You might need to add 1-2 extra minutes to the baking time since you’re starting with a cold tray.
Q: The bottoms of my tacos are a bit soft. How can I get them crispier?
A: Great question! For an extra-crispy bottom, make sure you’re using a light-colored metal baking sheet (dark pans can over-brown bottoms) and give it a good spray with oil. You can also try placing the tray on a lower oven rack for the last 3-4 minutes of baking to really focus the heat on the bottom.
Q: Can I freeze oven-baked tacos?
A: You can! I recommend freezing them after they are fully baked and cooled. Place them in a single layer on a parchment-lined sheet to freeze solid, then transfer to a freezer bag. To reheat, bake them straight from the freezer at 375°F for about 10-12 minutes, until hot and crispy.
Nutritional Info (Because Knowledge is Power!)
Here’s a rough breakdown for one taco, without any additional toppings. Remember, this is an estimate and can vary based on your specific ingredients.
- Calories: 190
- Protein: 14g
- Carbohydrates: 12g
- Fat: 9g
- Fiber: 2g
- Sodium: 270mg
This is a really well-balanced meal! You’re getting a solid dose of protein from the lean beef and cheese, and the corn tortillas provide a source of whole grains and a bit of fiber. To make it even lighter, you can use ground turkey, load up on fresh veggie toppings, or use a light sour cream alternative. It’s all about making it work for you and your family.
Final Thoughts: From Chaos to Crispy Perfection
And there you have it, my friends—the ultimate solution to soggy taco heartbreak! These Oven-Baked Tacos are the perfect blend of bold flavor, crispy texture, and pure fun. They’re everything you love about Taco Night, made easier, neater, and, honestly, way more delicious.
I love recipes like this because they’re real-life proof that comfort food doesn’t have to be complicated. You can pull this off on a busy Tuesday, for a weekend party, or when you just want to feed your crew something that’ll make them grin from ear to ear. The golden edges, the gooey melted cheese, the sturdy shell that actually holds up—it’s the little wins that make dinner special.
So next time you’re tempted to reach for takeout, remember this recipe. It’s quick, it’s satisfying, and it’ll make your kitchen smell like a fiesta. Gather your crew, pass around the toppings, and make memories—one crispy taco at a time.


