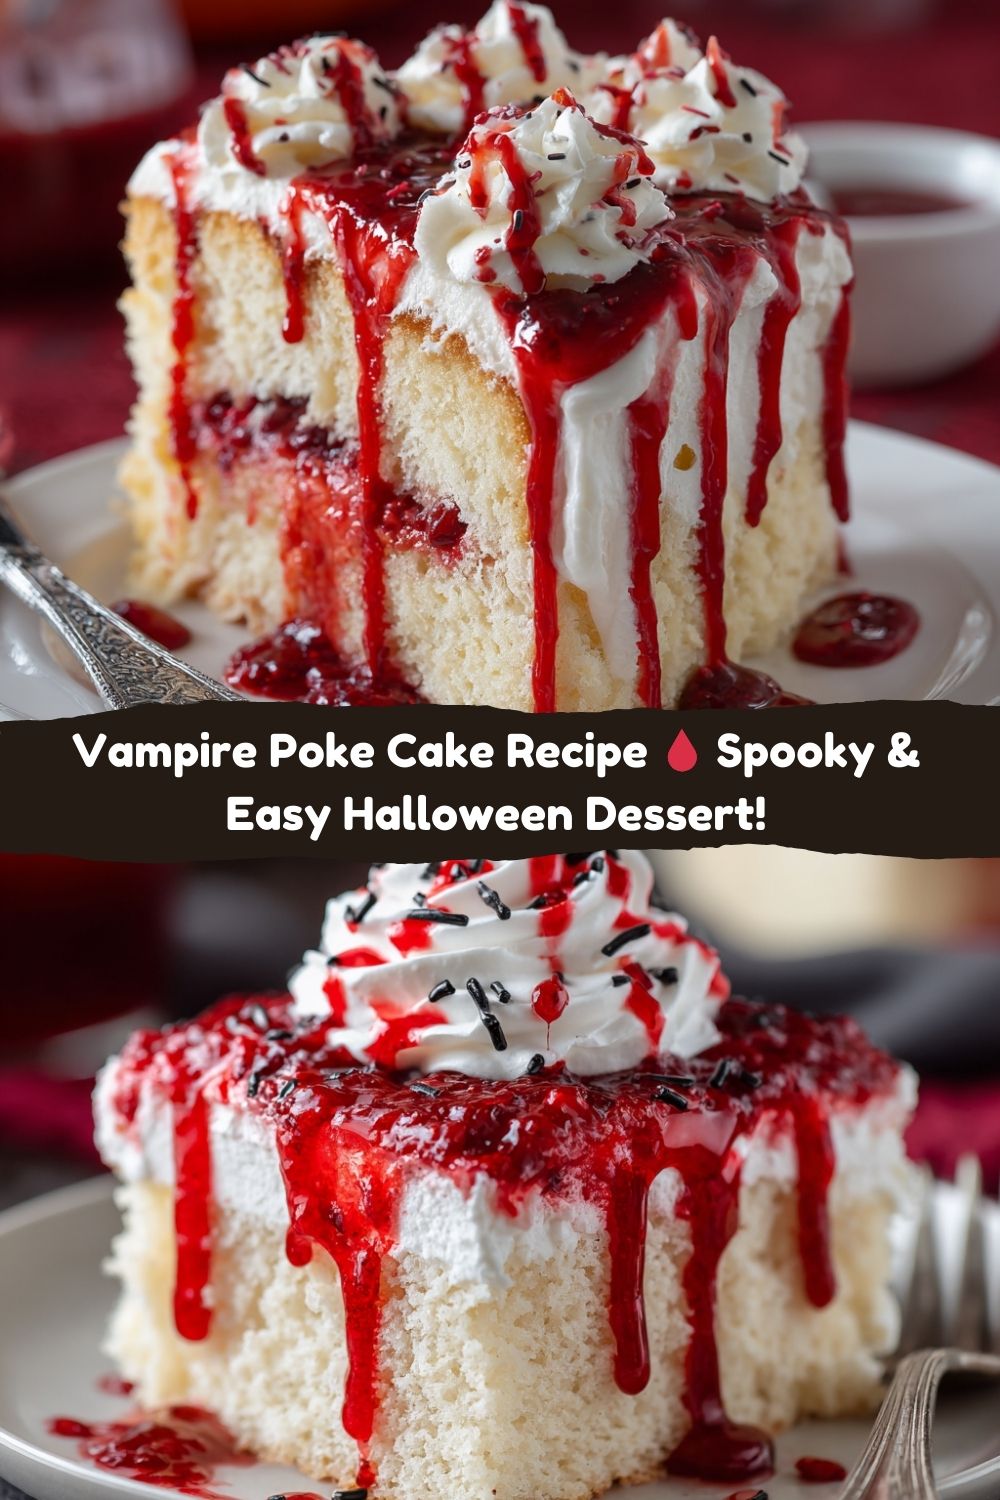
Vampire Poke Cake: Your Spooktacular, Deliciously Bloody Showstopper! 🩸🍰
Hey there, kitchen rebels! Jackson Walker from Food Meld here. Ready to ditch the boring desserts and whip up something that’ll have your crew screaming… for seconds? Picture this: a fluffy white cake, oozing with blood-red raspberry surprise, topped with a cloud of whipped cream and dramatic drips that look straight out of a vampire’s dream dinner. This Vampire Poke Cake isn’t just dessert; it’s an edible adventure, perfect for Halloween bashes, horror movie marathons, or anytime you crave a little deliciously dark fun. It’s bold, it’s comforting, and boy, does it pack a flavor punch with that sweet-tart raspberry “blood” against the vanilla cake. The best part? It’s ridiculously easy. We’re talking box-mix simple, but with a creative twist that makes it unforgettable. No fancy skills needed – just a wooden spoon, a playful spirit, and maybe a fake fang or two for vibes. So, grab your apron (the messier, the better!), crank up some spooky tunes, and let’s turn your kitchen into a lab where flavor meets fun. Trust me, this cake is a guaranteed crowd-pleaser – it’s the kind of recipe that makes people ask, “How’d you DO that?” before they’ve even swallowed their first bite. Let’s get hauntingly delicious!
That Time My Vampire Cake Stole the Show (And Almost Got Me Excommunicated)
This recipe always takes me back to my niece Sadie’s 10th birthday. She was deep into her “spooky but cute” phase – think glittery bats and pink vampire fangs. I wanted to make her a cake that matched her vibe: playful but with serious drama. Enter the Vampire Poke Cake prototype. I remember testing it late the night before, the kitchen lit only by the oven light. When I poured that crimson raspberry jam into the holes, watching it seep down like… well, you know… I knew it was special. The next day? Total bedlam (the good kind!). Kids were wide-eyed, poking the “blood,” adults were sneaking extra slices. But the real kicker? My very proper Aunt Mildred. She took one look, gasped dramatically, and declared, “Jackson Walker, that is positively ghoulish!” Then she quietly asked for a *second* piece, whispering, “But don’t tell the ladies at bridge.” That’s when I knew this cake had that Food Meld magic: bold enough to surprise, comforting enough to bring even Aunt Mildred back for more. It’s been a Halloween staple ever since, a reminder that food’s meant to be fun, memorable, and maybe just a tiny bit mischievous.
Gather Your Ghoulish Goods: Ingredients & Chef Secrets
Here’s the loot you need to raid from your pantry. Don’t sweat substitutions – cooking’s an adventure, not a rulebook!
- 1 box white cake mix – The trusty base! (Chef’s Tip: Go for a “moist” or “deluxe” version if available. The extra pudding in the mix helps hold up against the juicy filling!)
- Ingredients as listed on the box – Usually eggs, oil, water. (Insider Hack: Use melted butter instead of oil for a richer flavor. Substitute milk for water if you’re feeling fancy!)
- Red gel food coloring (optional) – For extra drama IN the cake! (Why Gel? It’s super concentrated, so you get vibrant red without thinning the batter. Liquid works in a pinch, but you’ll need more.)
- 1 cup seedless raspberry or strawberry jam – The glorious “blood”! (Substitution Station: Raspberry gives a tart kick, strawberry is sweeter. Apricot jam + red coloring works too! Need smoother “blood”? Blitz the jam in a blender first.)
- 2–3 Tbsp water – To thin the jam. (Chef’s Note: Start with 1 Tbsp! You want it pourable, not runny. Warm jam thins easier than cold.)
- 1 Tbsp red liquid food coloring – For that deep, vampire-worthy crimson. (Pro Insight: Gel coloring works here too, but liquid blends easier into the jam.)
- 1 tub (8 oz) whipped topping, thawed – Our fluffy “skin” layer. (Cool Swap: Homemade whipped cream is divine! Just whip 1.5 cups cold heavy cream + 1/4 cup powdered sugar + 1 tsp vanilla until stiff peaks form.)
- Optional: Red gel icing or more jam for drizzling – Extra gore factor! (Hack: Thin extra jam with a tiny bit of corn syrup for a glossy, drizzle-ready consistency.)
- Candy fangs, sprinkles, or edible glitter – The fun finishing touches! (Get Creative: Plastic spiders, red sprinkles as “clots,” or even shaved white chocolate as “bone” shards!)
Unleash the Vampire: Step-by-Step Baking Magic
Ready to create your edible masterpiece? Let’s do this! Grab your 9×13-inch pan and channel your inner mad scientist.
- Bake the Base: Preheat your oven according to the cake mix box. Prepare the batter exactly as directed. (Feeling Bold? Stir in 10-15 drops of red GEL food coloring now for a subtly eerie pink cake interior!) Pour into your greased 9×13 pan and bake until golden and a toothpick comes out clean (usually 28-32 mins, but trust the box & your oven). (Pro Tip: Resist opening the oven door too early! Sudden temp drops can cause sinking.)
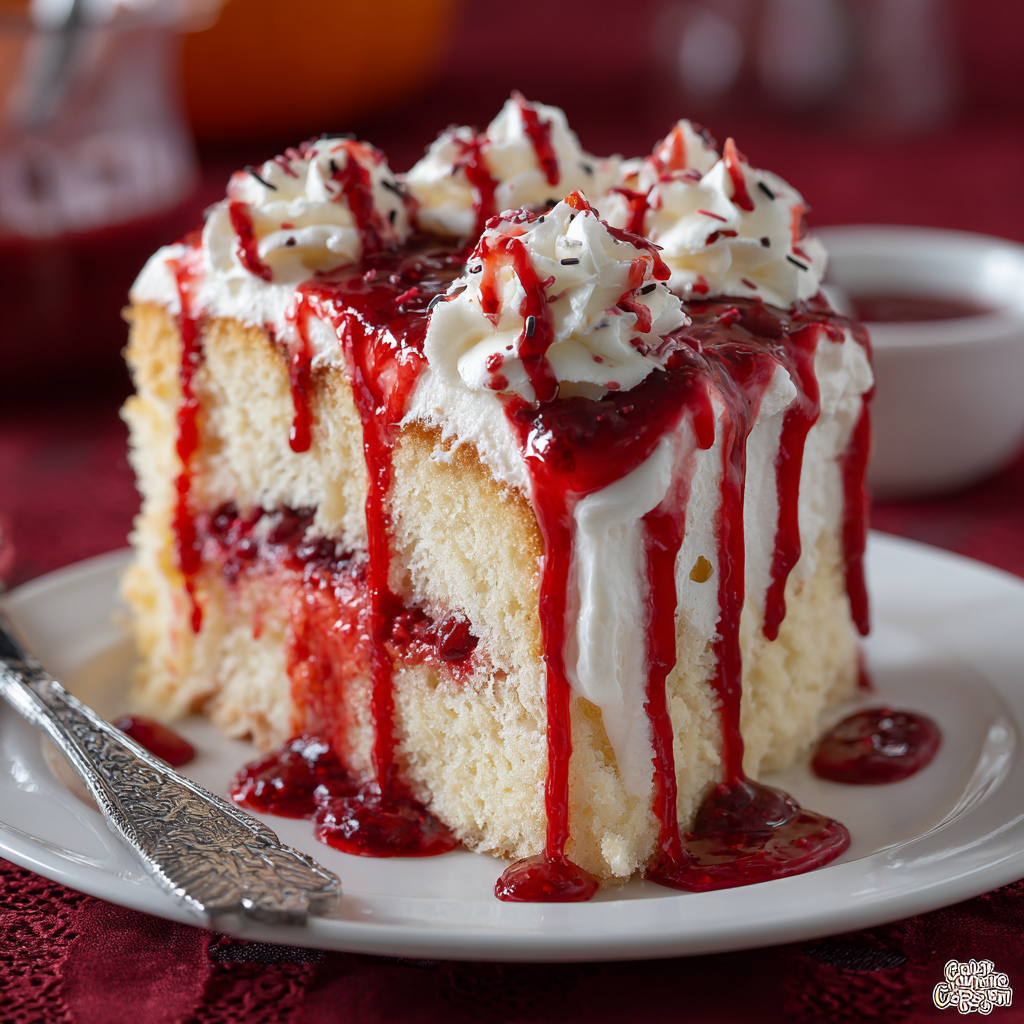
- Cool & Poke Like a Pro: Let the cake cool in the pan for 10-15 minutes – it needs to be warm enough to absorb the “blood” but cool enough not to melt the whipped topping later. Now, grab the handle of a wooden spoon. (Why Wooden Spoon? The rounded end makes perfect, clean holes without tearing!) Poke holes all over the cake, about 1 inch apart and going almost to the bottom. Don’t be shy – more holes = more “blood” pockets!
- Brew the “Blood”: While the cake’s warm, mix your jam, 1 Tbsp red food coloring, and 1 Tbsp water in a small bowl. Stir vigorously until smooth and pourable. (Consistency Check: It should drizzle off the spoon easily. Too thick? Add another 1/2 Tbsp water. Too thin? Oops, maybe add a touch more jam!)
- Feed the Vampire: Slowly spoon or pour the “blood” mixture over the warm cake, aiming for the holes. Use the back of the spoon to gently nudge it into any reluctant holes. (Watch the Magic: Seeing that red seep down is SO satisfying! Cover the entire surface evenly.) Let the cake sit like this until it’s COMPLETELY cool (patience, grasshopper – about 1 hour). This lets the “blood” fully absorb.
- Frost the “Skin”: Once the cake is cool, spread the thawed whipped topping evenly over the top. (Smooth Operator Tip: Use an offset spatula dipped in hot water for super smooth, professional-looking “skin.”) Be gentle to avoid mixing the topping with the jam underneath.
- Add the Gore-y Details: Time for the fun! Drizzle lines of extra red gel icing or slightly thinned jam across the white topping to look like dripping blood. (Artistic Flair: Use a spoon or piping bag with a tiny hole cut in the corner. Swirls and drips down the sides are encouraged!) Scatter on candy fangs, spooky sprinkles, or edible glitter. (Final Chef Hack: Add decorations JUST before serving so fangs don’t dissolve and sprinkles stay crunchy!)
Serve with Screams (of Delight!)
This cake is all about the drama! Present it right in the pan for a casual, creepy vibe, or carefully transfer slices to individual plates. For maximum “wow,” dim the lights and serve it by candlelight during your Halloween party or horror movie night. Pair it with a glass of deep red fruit punch (“vampire wine”) or a strong cup of coffee to balance the sweetness. A plastic knife shaped like a dagger? Highly recommended for serving! Remember, the surprise is inside – watch your guests’ faces light up when they cut into it and reveal the hidden “blood” pockets.
Mix It Up: Vampire Cake Evolutions!
Don’t let the vampires have all the fun! Here’s how to adapt this beast:
- Chocolate Coffin Twist: Use devil’s food cake mix instead of white. Fill with cherry pie filling (less straining needed!) mixed with red coloring. Top with chocolate whipped cream or ganache “dirt.”
- Berry Haunt: Swap the raspberry jam for mixed berry, blackberry, or even cranberry sauce (smooth it out first!) for a different tart “blood” flavor. Adjust coloring as needed.
- Dairy-Free Bite: Use a vegan cake mix or your favorite plant-based recipe. For the topping, use chilled coconut cream whipped with powdered sugar instead of dairy whipped topping.
- Zombie Green: Swap red for green! Use lime jelly or kiwi jam mixed with green food coloring for a “toxic” or zombie-inspired version. Decorate with gummy worms!
- Boozy Bite: Adults only! Add 1-2 Tbsp of Chambord (raspberry liqueur) or a little red wine to the jam filling. Soak the cake holes with a bit of syrup first for extra kick.
Jackson’s Kitchen Confessions: The Evolution of the Bite
This cake has seen some things, y’all! The very first time I made it, I got *way* too enthusiastic with the poking and nearly turned the cake into Swiss cheese rubble. Lesson learned: gentle but firm jabs! I also learned the hard way that pouring hot jam onto a hot cake makes it disappear *too* fast – you want those distinct pockets, not a soggy mess. Cooling is non-negotiable! The whipped topping vs. homemade cream debate rages in my kitchen. The topping holds up better if the cake sits out, but fresh cream tastes sublime. My compromise? If I’m serving it immediately, homemade cream all the way. For parties where it sits, the tub’s my friend. The best evolution? The decorations! One year, I used those plastic vampire teeth as fangs… until my nephew tried to eat one. Candy fangs only now! This recipe’s a testament to Food Meld’s spirit: start simple, embrace the mess, learn from the oops moments, and always, ALWAYS prioritize flavor and fun. It’s not about perfection; it’s about the unforgettable experience.
Vampire Cake SOS: Your Questions, Bitten!
Got fang-related fears? Don’t worry, I’ve got you covered:
- Q: Can I make this ahead of time?
A: Absolutely! Bake and poke the cake, add the “blood,” and let it cool completely. Cover TIGHTLY with plastic wrap (press it onto the surface) and refrigerate for up to 24 hours. Add the whipped topping and decorations right before serving to keep everything looking fresh and spooky. - Q: My “blood” sank to the bottom! Help!
A: This usually means the cake was too hot when you poured the jam, or the jam was too thin. Next time, ensure the cake is just warm (10-15 mins out of the oven), not piping hot. Also, thicken your jam mixture slightly (use less water or simmer it for a minute to reduce). It should be pourable, but not watery. - Q: Can I use homemade cake instead of a box mix?
A: You bet! Use your favorite white or yellow cake recipe baked in a 9×13 pan. Just make sure it’s a sturdy cake – super light angel food might collapse. The poke method works beautifully with from-scratch too! - Q: The whipped topping is melting/sliding off! Disaster?
A: Stay calm! This usually means the cake underneath wasn’t fully cooled. Pop the whole thing back in the fridge for 30 mins to firm up. If it’s a warm room, keep the cake chilled until right before serving. Using stabilized whipped cream (add 1 tsp cornstarch whipped with the cream) or the tub topping helps prevent this.
Vampire Poke Cake
- Total Time: ~1 hour
- Yield: 12 - 16 1x
Description
Sink your teeth into this spooky showstopper! A fluffy white cake oozing with blood-red raspberry filling, topped with creamy whipped frosting and dramatic “bloody” drizzles. Every slice is a deliciously haunting surprise—perfect for Halloween parties or horror movie nights!
Ingredients
For the cake:
1 box white cake mix
Ingredients as listed on the box (usually eggs, oil, water)
Red gel food coloring (optional, for extra drama)
For the “blood” filling:
1 cup seedless raspberry or strawberry jam
2–3 Tbsp water (to thin, if needed)
1 Tbsp red food coloring (for deeper color)
Topping:
1 tub (8 oz) whipped topping, thawed
Optional: red gel icing or more jam for drizzling
Candy fangs, sprinkles, or edible glitter for decoration
Instructions
Bake the cake according to box instructions in a 9×13-inch pan. Let cool for 10–15 minutes.
Use the handle of a wooden spoon to poke holes all over the cake.
In a small bowl, mix jam, water, and red food coloring until pourable. Spoon or pour into the holes.
Let cake cool completely, then spread whipped topping over the top.
Drizzle with extra jam or red gel for a bloody effect.
Decorate with candy fangs, sprinkles, or anything spooky!
- Prep Time: 15 minutes
- Cook Time: 30 minutes
Nutrition
- Calories: 230 / Slice
- Sugar: 20g / Slice
- Fat: 9g / Slice
- Carbohydrates: 35g / Slice
- Protein: 2g / Slice
Bite-Sized Nutrition (Approx. per slice)
Calories: 230 | Fat: 9g | Carbs: 35g | Protein: 2g | Sugar: 20g
(Remember: This is an estimate based on specific brands. Treat yo’ self – it’s a party cake!)
🧛 Final Thoughts: A Cake That Bites Back
The Vampire Poke Cake isn’t just dessert — it’s a performance piece. From the fluffy vanilla base to those dramatic “blood” pockets and whipped cream topping, it’s the kind of cake that makes Halloween unforgettable. It’s spooky enough to thrill the kids, cheeky enough to amuse the adults, and easy enough that you can throw it together without stress before a party.
Like all great Food Meld recipes, it’s about more than flavor — it’s about fun, surprise, and a little kitchen mischief. So don’t worry if your jam drips unevenly or your whipped topping swirls aren’t perfect. In fact, the messier it looks, the more deliciously eerie it becomes. Slice it at the table, watch jaws drop, and enjoy the laughter that follows. That’s the real magic.
Happy haunting & happy baking,
– Jackson @ Food Meld


