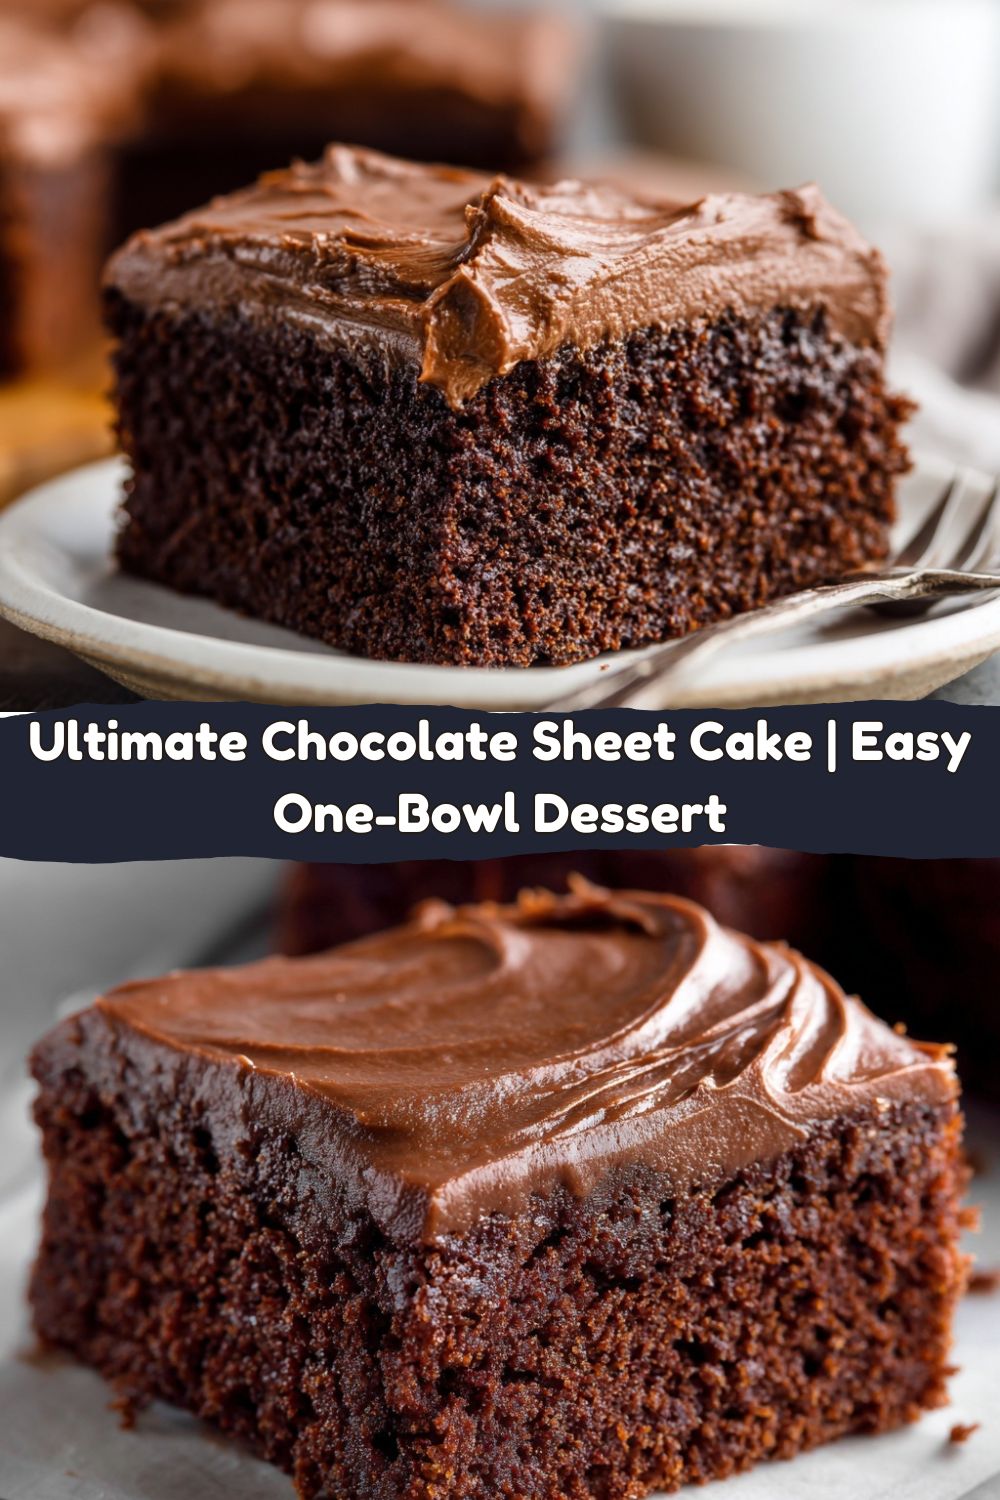
The Ultimate Chocolate Sheet Cake: Your New Go-To Party Hero
Hey friends, Jackson from Food Meld here. Let’s talk about a universal truth: life is just better with a piece of incredible chocolate cake sitting on your counter. The kind that calls your name from the kitchen, the one you sneak a sliver of every time you walk past. I’m not talking about a fussy, five-layer masterpiece that demands a whole afternoon and a sink full of dishes. Nope. I’m talking about the humble, the glorious, the downright perfect Chocolate Sheet Cake.
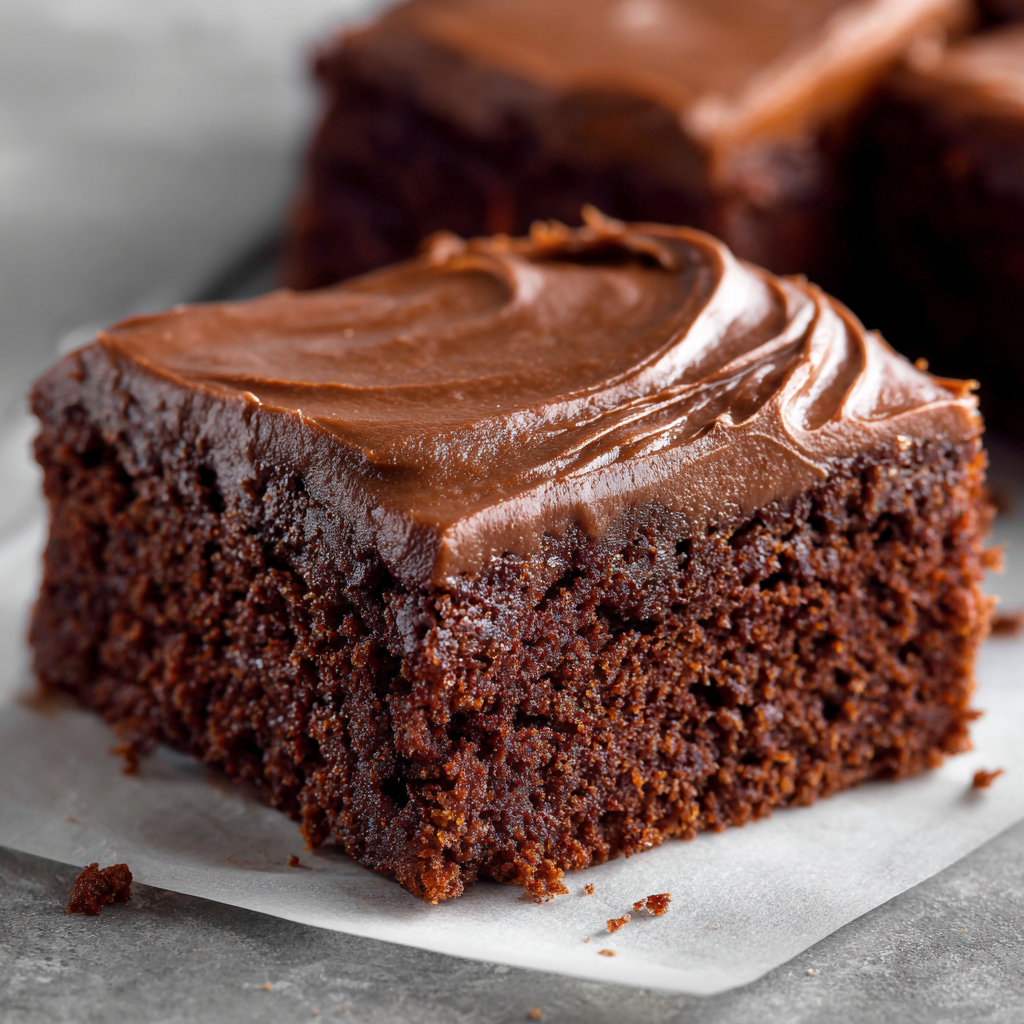
This isn’t just any cake. This is the cake of potlucks, birthday parties, “I-need-a-win” Tuesdays, and “you guys were amazing, thank you” gatherings. It’s the cake that looks like you fussed, but secretly comes together in one bowl with a whisk and a whole lot of heart. It’s moist, deeply chocolatey, and topped with a fudgy frosting that seeps right into the warm crumb, creating something that’s truly more than the sum of its parts.
If you’ve ever been intimidated by baking, let this recipe be your gateway. It’s forgiving, it’s fast, and it’s designed to make you look like a kitchen rockstar. We’re making magic today, the Food Meld way: bold flavor, comforting vibes, and a whole lot of “you’ve gotta try this” energy. So, tie on that apron, grab your biggest bowl, and let’s cook something awesome together.
Grandma’s Kitchen & The Cake That Started It All
This recipe takes me right back to my Grandma Walker’s kitchen in Georgia. The air was always thick with the smell of something good—simmering greens, fresh biscuits, or, on the very best days, her famous chocolate sheet cake. She called it her “emergency cake,” because it could be mixed, baked, and frosted in the time it took for unexpected guests to finish their sweet tea on the porch.
I remember standing on a wobbly stool, watching her pour that shockingly thin batter into her trusty, well-loved pan. “Don’t you fret, Jack,” she’d say, seeing my doubtful look. “That hot water works the magic. It’s gonna be the lightest, most tender cake you ever did eat.” And she was always right. The moment she’d pour that warm, glossy frosting over the hot cake, the whole kitchen would smell like a chocolate factory. The sizzle it made was the sound of pure promise. We’d have to wait for it to cool, but that first warm, nutty, fudgy square was a bite of pure, uncomplicated joy. It’s that feeling—that simple, shared happiness—that I want to bring to your kitchen today.
Gathering Your A-Team: The Ingredients
One of the best things about this cake is that you probably have most of this in your pantry right now. No fancy, hard-to-find stuff here. Just simple ingredients coming together to create something spectacular.
For the Cake:
- 2 cups all-purpose flour: The sturdy foundation of our cake. No need to sift it first, just give it a good fluff with a whisk in the bowl.
- 2 cups granulated sugar: Sweetness, of course, but it also helps create that beautifully tender crumb.
- ½ cup unsweetened cocoa powder: This is where the deep chocolate flavor comes from! I use regular, natural cocoa powder for that classic, almost nostalgic taste.
- 1 tablespoon baking soda: Not a typo! A full tablespoon gives this cake its incredible lift and open texture. It reacts with the cocoa and buttermilk to make it super light.
- 1 teaspoon salt: Crucial. Salt is the flavor booster that makes the chocolate taste richer and less one-note. Don’t you dare skip it.
- 2 large eggs: They bring structure and richness to the party. Let them sit out for 15 minutes to come to room temp if you can—they’ll incorporate into the batter more smoothly.
- 1 cup buttermilk: The secret weapon for a melt-in-your-mouth texture. The acidity tenderizes the gluten and reacts with the baking soda. Chef’s Swap: No buttermilk? No sweat! Add 1 tablespoon of white vinegar or lemon juice to a liquid measuring cup, then fill it with milk to the 1-cup line. Stir and let it sit for 5 minutes until it curdles slightly. Boom, homemade buttermilk.
- 1 cup hot water: This is the “Meld” magic! The hot water “blooms” the cocoa powder, intensifying its flavor, and it thins the batter for an unbelievably moist cake. Trust the process!
- ⅔ cup vegetable oil: Oil keeps this cake incredibly moist for days, far better than butter would in this specific recipe. I use canola or a neutral vegetable oil.
- 1 teaspoon vanilla extract: The supporting actor that makes the chocolate star shine even brighter.
For That “Can’t-Stop-Eating-It” Frosting:
- ½ cup unsalted butter: We’re melting it down to create a pourable, fudgy glaze.
- 2 tablespoons unsweetened cocoa powder: More chocolatey goodness, melting right into the butter.
- 5 tablespoons milk: Whole milk is best for creaminess, but any milk you have will work.
- 1 teaspoon vanilla extract: A must for balancing the sweetness.
- 3½ cups powdered sugar, sifted: Sifting is non-negotiable here, friends. It prevents lumps and gives us that silky-smooth, glossy finish.
- Optional: chopped pecans or walnuts: I’m a Southern boy, so I’m team pecans all the way. They add a wonderful crunch and toasted flavor.
Let’s Build Some Magic: The Step-by-Step
Ready? This is where the fun begins. It’s a simple process, but I’ve packed it with my favorite chef hacks to guarantee your success.
- Preheat and Prep. Fire up your oven to 350°F (175°C). Now, take your 11×15-inch sheet pan (sometimes called a half-sheet pan) and give it a really good coating with butter or non-stick spray. Then, dust it lightly with flour, tapping out the excess. This ensures your cake will release like a dream. Pro-Tip: For super-easy cleanup, you can line the bottom with a sheet of parchment paper after greasing.
- Combine the Dry Goods. Grab your largest mixing bowl. I’m talking BIG. Add the flour, sugar, cocoa powder, baking soda, and salt. Now, take a whisk and give it a really good, 30-second whisking. You’re not just mixing; you’re aerating the flour and making sure the baking soda and salt are evenly distributed. No one wants a bite of just baking soda!
- Mix the Wet Team. In a separate, medium-sized bowl, whisk together the eggs, buttermilk, vegetable oil, and vanilla extract. Whisk it until it’s a smooth, homogenous, slightly pale yellow liquid.
- The Big Meld. Pour your wet ingredients right into the center of the dry ingredients. Using your whisk (or a spatula), gently stir until you have a thick, fudgy-looking batter. It will be thick and a bit tough to stir—that’s totally normal! Don’t overmix; just get it mostly combined.
- Work the Hot Water Magic. Now, slowly pour in the hot water. I mean it—start with a slow stream while you stir. Watch as the batter transforms from a thick paste into a thin, soupy liquid. This is exactly what you want! It seems weird, but this is the key to a super-hydrated and moist cake. Stir just until it’s smooth and no streaks of flour remain.
- Bake to Perfection. Carefully pour the thin batter into your prepared pan. It will spread out evenly on its own. Slide it into the preheated oven and set your timer for 20 minutes. Chef’s Secret: Do not open the oven door before 20 minutes! The cake needs that steady heat to rise properly. At the 20-minute mark, check for doneness. A toothpick inserted into the center should come out with a few moist crumbs clinging to it, not wet batter. It might need another 2-5 minutes, but start checking early to avoid over-baking.
- Frosting Time (The Best Part). While the cake is baking, make the frosting. This is a “warm frosting for a warm cake” situation, and it’s a game-changer. In a medium saucepan over medium heat, melt the butter. Whisk in the 2 tablespoons of cocoa powder until it’s smooth and smells toasty. Then, whisk in the milk and vanilla. Take it off the heat. Now, gradually whisk in the sifted powdered sugar. You’ll have a gorgeous, glossy, pourable frosting. If it seems too thick, add a teaspoon of milk. Too thin? A bit more powdered sugar.
- The Grand Finale. As soon as the cake comes out of the oven, place the pan on a wire rack and immediately pour the warm frosting over the hot cake. Use an offset spatula or the back of a spoon to spread it evenly to the edges. The heat from the cake will help the frosting set into a fudgy, glossy layer. If you’re using nuts, sprinkle them on right now so they stick.
- The Hardest Part: Wait. I know, I know. The smell is intoxicating. But you have to let this beauty cool completely in the pan. This allows the structure to set and the frosting to firm up. It’s worth the wait, I promise. Cutting into a warm sheet cake is a messy (albeit delicious) affair.
How to Serve This Masterpiece
This cake is a star all on its own, but a little presentation flair never hurts. For a classic potluck look, just slice it right in the pan into generous squares. It’s the ultimate shareable dessert.
If I’m serving it for a more special occasion at home, I love to elevate it just a touch. I’ll slide a slice onto a simple white plate and add a few fresh raspberries and a sprig of mint on the side. The bright, tart pop of the berry against the rich chocolate is a match made in heaven. A little dollop of freshly whipped cream or a scoop of high-quality vanilla bean ice cream turns it into a decadent restaurant-style dessert. And a little secret? A tiny sprinkle of flaky sea salt on top just before serving takes the entire flavor profile to a whole new level. Trust me on that one.
Make It Your Own: Fun Recipe Variations
Once you’ve mastered the base recipe, the “what if we tried this?” energy can take over. Here are a few of my favorite twists:
- Mexican Chocolate Twist: Add 1 teaspoon of cinnamon and a tiny pinch of cayenne pepper to the dry ingredients. The warmth is incredible.
- Peanut Butter Lover’s Dream: Swirl ½ cup of warm peanut butter into the frosting before you pour it over the cake. Or, sprinkle chopped Reese’s cups on top with the nuts.
- Mocha Madness: Replace the hot water in the cake with hot, strongly brewed coffee. The coffee doesn’t make it taste like coffee; it just makes the chocolate flavor deeper and more complex.
- Cookies & Cream: After frosting, crush up a bunch of Oreo cookies and sprinkle them liberally over the top.
- Dairy-Free & Vegan-Friendly: Use a flax egg (1 tbsp ground flax + 3 tbsp water per egg) for the eggs, vegan buttermilk (plant-based milk + vinegar), and a plant-based butter and milk in the frosting. It works like a charm!
Jackson’s Chef’s Notes & Kitchen Stories
This recipe has been with me for years, and it’s evolved in tiny ways. I once, in a distracted moment, used melted butter instead of oil. The cake was denser but still delicious—a happy accident that taught me why oil is key here. I’ve also learned that the brand of cocoa powder can make a difference. If you really want to treat yourself, seek out a high-quality Dutch-processed cocoa for an even richer, darker chocolate experience.
The most common “mistake” I see? People doubting the thin batter. I’ve had friends text me pictures saying, “Is this right?!” Every single time, I tell them to have faith. Pour it in the pan. The magic happens in the oven. This cake has never let me down, and it won’t let you down either.
FAQs & Quick Troubleshooting
Q: My frosting was grainy. What happened?
A: This almost always means the powdered sugar wasn’t sifted. Those tiny lumps don’t fully dissolve in the warm frosting. No worries, it will still taste amazing! For a perfectly smooth finish next time, never skip the sifting. A fine-mesh strainer works perfectly.
Q: Can I bake this in a 9×13 pan?
A: You can, but the baking time will be longer—closer to 30-35 minutes. The cake will also be thicker. Just keep a close eye on it and test with a toothpick until it comes out with moist crumbs.
Q: Why pour frosting on a hot cake?
A: Two reasons! First, it creates this amazing fudgy layer where the frosting soaks slightly into the top of the cake. Second, it means zero fuss—you don’t have to wait for the cake to cool to frost it. It’s a brilliant one-pan wonder from start to finish.
Q: My cake is very dense. What went wrong?
A: This usually points to over-mixing the batter after adding the flour. Once you add the flour, you just want to mix until the ingredients are combined. Over-mixing develops the gluten in the flour, leading to a tougher, denser crumb.

Ultimate Chocolate Sheet Cake : Moist, Rich & Crowd‑Approved
- Total Time: 40 minutes
- Yield: 20–24 squares 1x
Description
This chocolate sheet cake is your go-to recipe when you need something irresistibly chocolatey, ridiculously moist, and perfect for feeding a crowd. Topped with a silky cocoa frosting, it’s everything a homemade dessert should be — easy, nostalgic, and always a hit. Bake it once and watch it disappear.
Ingredients
For the Cake:
2 cups all-purpose flour
2 cups granulated sugar
½ cup unsweetened cocoa powder
1 tablespoon baking soda
1 teaspoon salt
2 large eggs
1 cup buttermilk (or milk + 1 tbsp vinegar)
1 cup hot water
⅔ cup vegetable oil
1 teaspoon vanilla extract
For the Frosting:
½ cup unsalted butter
2 tablespoons unsweetened cocoa powder
5 tablespoons milk
1 teaspoon vanilla extract
3½ cups powdered sugar, sifted
Optional: chopped pecans or walnuts for topping
Instructions
Preheat oven to 350°F (175°C). Grease and flour a 11×15-inch sheet pan.
In a large bowl, whisk together flour, sugar, cocoa powder, baking soda, and salt.
In another bowl, whisk eggs, buttermilk, oil, and vanilla. Combine with dry ingredients.
Stir in hot water gradually until the batter is smooth and thin.
Pour into the pan and bake for 20–22 minutes, or until a toothpick comes out with a few moist crumbs.
While the cake bakes, melt butter in a saucepan. Stir in cocoa, then milk and vanilla. Remove from heat and whisk in powdered sugar until smooth.
Pour warm frosting over the hot cake and spread evenly. Top with nuts if desired.
Let it cool completely in the pan before slicing.
- Prep Time: 15 minutes
- Cook Time: 20 minutes
Nutrition
- Calories: 280-300 / Square
- Fat: 12g / Square
- Carbohydrates: 38g / Square
- Protein: 3g / Square
Quick Nutritional Info
Okay, let’s be real—this is a celebration dessert! But here’s a general breakdown per serving (based on 24 squares) so you can enjoy it mindfully:
- Calories: ~280-300
- Fat: 12g
- Carbohydrates: 38g
- Protein: 3g
Remember, these are estimates and can vary based on the specific ingredients you use. This cake is a treat, so savor every single bite! It stores beautifully covered at room temperature for 2 days, or in the fridge for up to 5 days. I think it’s actually even better the next day.
Final Thoughts from My Kitchen to Yours
And there you have it—The Ultimate Chocolate Sheet Cake, the cake that has carried me through birthdays, breakups, victories, and those slow, quiet evenings when all you really want is something warm and sweet waiting for you on the counter. This recipe has lived in my family for generations, and every time I make it, I feel connected to all the people who stirred this batter before me—my grandma with her well-worn wooden spoon, my mom making sure no one touched the cake before dinner, and now me, handing it off to you.
What I love most is how uncomplicated it is. No piping bags. No leveling layers. No fancy tools. Just honest ingredients, a whisk, a pan, and the kind of magic that only happens when chocolate, heat, and a little intention meet in the middle. It’s the kind of dessert that brings people to the kitchen like moths to a porch light—drawn in by the smell, the nostalgia, and the promise of that first fudgy bite.
So whether you’re baking this for a crowd, for your family, or just for yourself (which I fully endorse), I hope it brings the same joy into your home that it’s brought into mine. I hope it becomes your emergency cake, your celebration cake, your “hey, everything’s gonna be okay” cake.
And when you slice into it—still slightly warm, the frosting set just enough to cling to your fork—I hope you take a moment and truly enjoy it. Food is meant to be shared, savored, and remembered. This cake does all three.
— Jackson


