Turkey and Cheese Sliders: Your New Secret Weapon for Feeding a Happy Crowd
Hey friends, Jackson here from Food Meld. Let’s talk about one of life’s great kitchen truths: the best recipes aren’t always the fanciest. Sometimes, they’re the ones that get everyone grinning, leaning over the pan, and asking “are there any more?” before you’ve even had a chance to grab one yourself. That’s the magic of these Turkey and Cheese Sliders. They’re not just a recipe; they’re a vibe.
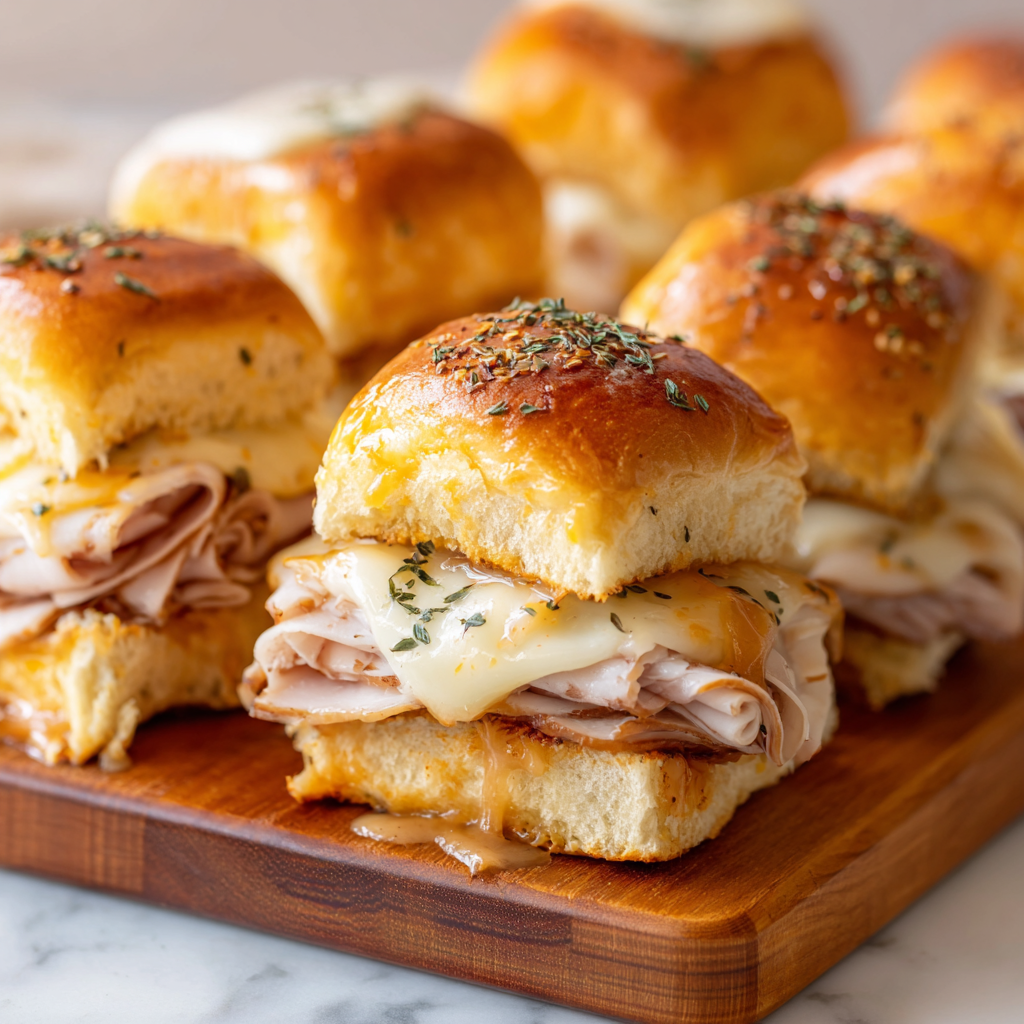
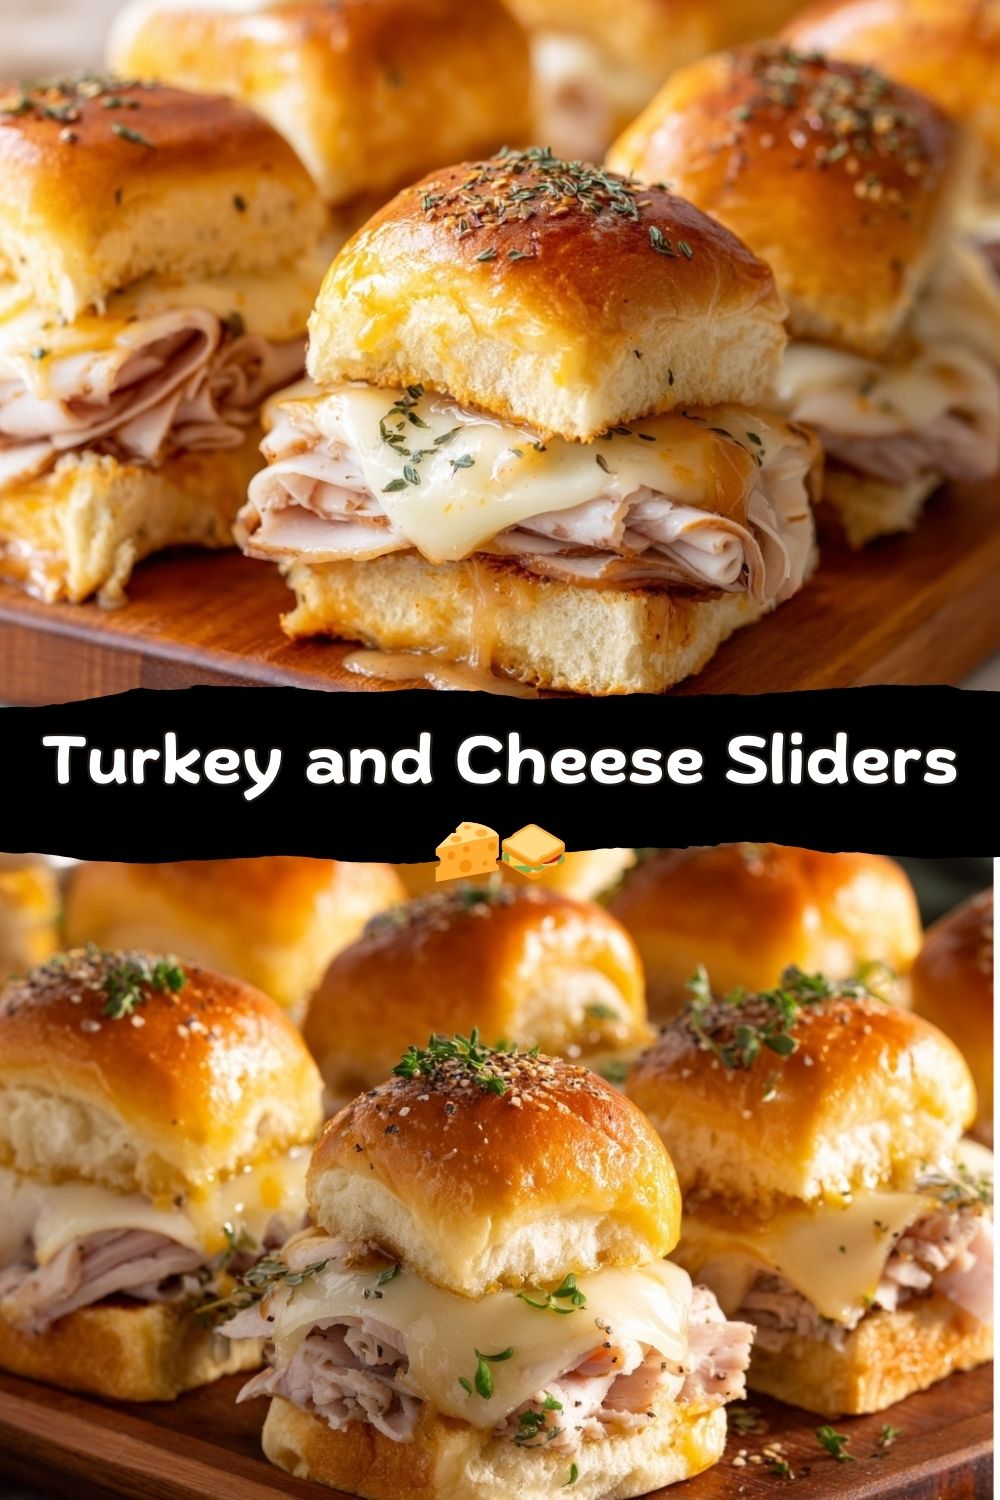
Imagine this: soft, sweet slider buns hugging layers of savory deli turkey and not one, but *two* kinds of oozy, melty cheese. The whole situation gets a generous bath in a garlic-herb butter glaze that soaks into every nook and cranny, baking into a golden, fragrant masterpiece. You pull them out of the oven, and the cheese is stretching, the butter is bubbling, and your kitchen smells like a party already started.
The best part? You’re about 30 minutes and one baking dish away from this glory. Whether you’re staring down a hungry family on a Tuesday, prepping for the big game, or need a surefire hit for a holiday potluck, this is your playbook. It’s comfort food with a capital C, and it’s built for sharing (though I won’t judge if you keep the pan to yourself). So, let’s ditch the intimidation and cook something awesome, simple, and packed with those unforgettable flavors I’m always chasing. Ready? Let’s make these legendary sliders.
The Slider That Started It All: A Football Sunday Tradition
My love for these sliders isn’t just about taste—it’s wrapped up in memory. Growing up, my mom was the undisputed Queen of Feeding a Pack. And on football Sundays, her kingdom was the kitchen counter, littered with chips, dip, and one legendary, foil-covered pan.
She’d assemble these humble turkey and cheese stacks with the focus of a surgeon, but the real show was the butter glaze. She’d whisk it in this little Pyrex measuring cup I swear she’s had since the ‘80s, and the smell of melting butter and garlic powder would cut through the noise of the game. That was our dinner bell. Me, my dad, my uncles—we’d swarm that pan like locusts, burning our fingers because we couldn’t wait. It wasn’t gourmet; it was *great*. It was the taste of togetherness, of easy joy, and of my mom knowing exactly how to make a simple afternoon feel special. That’s the energy I try to bring to every recipe here at Food Meld. It’s the “what if we tried this?” spirit, but it’s rooted in that same, solid, delicious truth: food is love, and sometimes love comes on a slider bun.
Gathering Your Flavor Arsenal: What You’ll Need
Here’s the beautiful part: the ingredient list is short, sweet, and probably already in your kitchen or a quick grocery trip away. Let’s break it down like we’re prepping together on the counter.
- 12 slider buns or Hawaiian rolls: This is your foundation. I’m a Hawaiian roll loyalist—their slight sweetness and super-soft texture are the perfect contrast to the savory filling. Chef’s Insight: Don’t separate the rolls! We’re keeping the sheet intact for easy assembly. It’s a game-changer.
- ¾ lb sliced deli turkey: Go for a good-quality oven-roasted or smoked turkey from the deli counter. It has better flavor and texture than the pre-packaged stuff. Sub Tip: Rotisserie chicken, ham, or even roast beef are fantastic swaps here. Make it yours!
- 6–8 slices Swiss, cheddar, or provolone cheese: I love using two kinds! I usually do Swiss for its nutty melt and sharp cheddar for a flavor punch. Chef’s Insight: Provolone is a killer melter too. Don’t be shy with the cheese—this is the glue (literally and deliciously) that holds it all together.
- 4 tbsp unsalted butter, melted: The heart of our magic glaze. Unsalted lets you control the seasoning. Sub Tip: Ghee or a high-quality olive oil can work in a pinch, but butter delivers that classic, rich flavor we’re after.
- 1 tbsp Dijon mustard: Our secret weapon! It adds a subtle tang and depth that cuts through the richness. Sub Tip: Yellow mustard works, or for a sweeter note, try a honey mustard.
- ½ tsp garlic powder: It distributes flavor more evenly than fresh garlic in the glaze. Trust me on this one.
- 1 tsp dried parsley or poppy seeds (optional): This is for looks and a tiny textural pop. The parsley gives a fresh, herby finish, while poppy seeds are the classic “everything bagel” vibe. Totally optional, but fun!
Building Your Slider Masterpiece: Step-by-Step
Okay, team. Let’s get our hands dirty (or, more accurately, buttery). This process is so simple it feels like a hack. Preheat that oven to 350°F (175°C) and grab a 9×13 baking dish. Line it with foil or parchment for the world’s easiest cleanup. You’ll thank yourself later.
- Prep the Bun Canvas: Take your whole sheet of slider buns and, without separating them, use a long serrated bread knife to slice the entire block in half horizontally. You should have one giant “top” and one giant “bottom.” Place the bottom half, cut-side up, in your prepared baking dish. Pro Tip: If your buns are super thick, you can gently scoop out a little of the insides from the top and bottom to make more room for filling—but it’s not necessary!
- Layer Up the Goodness: Now for the fun part. Layer your turkey evenly over the bottom buns. I like to do a slight fold or ruffle with each slice for texture. Next, blanket the turkey with your cheese slices. Overlap them slightly to ensure every bite is cheesy. Gently place the top bun half back on like a delicious lid.
- Create the Liquid Gold Glaze: In a small bowl or liquid measuring cup, whisk together the melted butter, Dijon mustard, garlic powder, and your optional parsley or poppy seeds. This mixture is fragrant, savory, and the key to next-level flavor. Give it a taste—it should make you nod enthusiastically.
- The Buttery Baptism: Here’s my favorite chef hack: Pour about half of the butter glaze slowly over the top buns, letting it soak in. Then, using a pastry brush or spoon, carefully lift the top bun and pour or brush some of the remaining glaze *directly onto the bottom layer of turkey and cheese*. This infuses flavor right into the heart of the sandwich. Finally, brush the rest over the top. Don’t waste a drop!
- Bake to Melty Perfection: Cover the whole dish tightly with aluminum foil. This steams the sliders, melting the cheese perfectly and warming everything through without drying out. Bake covered for 15 minutes. Then, remove the foil and bake for another 5-7 minutes, just until the tops are that perfect, golden brown. Your kitchen will smell incredible.
- The Grand Finale: Pull the pan out (use oven mitts!). Let it sit for just 2-3 minutes—this lets the cheese set a tiny bit so they slice cleanly. Then, using a sharp knife, slice along the original roll lines to separate your sliders. Serve them right from the warm pan, and watch them vanish.
How to Serve These Bad Boys: Beyond the Baking Dish
Presentation is part of the fun! You can absolutely serve them straight from the pan (it’s rustic and inviting), but if you want to dress them up a bit, here are my go-to moves:
The Platter Pile: Use a big wooden board or platter. Pile the warm, sliced sliders in the center, maybe with a little extra sprinkle of fresh herbs (chives or parsley are gorgeous) for color. Tuck some cornichons, pepperoncini, or a bowl of whole-grain mustard on the side for dipping.
Keep ‘Em Warm: If you’re serving over a longer period (like during a game), pop the whole baking dish into a “warm” oven (about 200°F) covered with foil. They’ll stay perfect for up to an hour.
What to Serve With Them: These sliders are the star, but they play well with others! For a full spread, pair them with:
- A big, crunchy vegetable salad with a tangy vinaigrette to cut the richness.
- A bowl of tomato soup or roasted red pepper soup for classic dunking.
- For a party: potato chips, a creamy coleslaw, and some baked beans. It’s a full backyard BBQ on a platter!
Mix It Up! 5 Flavor Twists to Make It Your Own
The basic recipe is a masterpiece, but my “what if we tried this?” energy can’t be contained. Here are some of my favorite ways to twist these sliders:
- The “Everything” Slider: Swap the turkey for pastrami or corned beef, use Swiss cheese, and add a thin layer of tangy sauerkraut and Thousand Island dressing before baking. It’s a Reuben in slider form!
- Buffalo Chicken Swap: Use shredded rotisserie chicken tossed in buffalo sauce instead of turkey. Layer with blue cheese crumbles and mozzarella. Use a butter glaze with a dash of hot sauce mixed in. Unreal.
- Italian Deli Dream: Layer sliced ham, salami, and pepperoni with provolone cheese. Add a few spoonfuls of chopped pepperoncini or a drizzle of Italian dressing under the cheese before baking.
- Veggie-Lover’s Delight: Sauté sliced mushrooms, bell peppers, and onions until soft. Use them as the main layer with spinach and mozzarella or goat cheese. A perfect meatless option.
- Sweet & Savory Glaze: Add 1 tablespoon of brown sugar and ½ teaspoon of onion powder to the butter glaze. It creates a sweet, sticky, irresistible topping that’s next-level good.
Jackson’s Chef Notes: Stories from the Slider Lab
This recipe has seen some things in my kitchen. I’ve made it for Super Bowl parties where it was gone before the first quarter ended. I’ve made it for my neighbors as a “welcome to the street” gift (it works better than a fruit basket). And I’ve definitely made it for myself on a lazy Sunday, eating two straight from the pan while standing at the counter—no judgment zone here.
The biggest evolution? The butter hack. I used to just brush it on top, but one day I thought, “What if we get this flavor in the middle too?” Lifting that top bun and buttering the insides was a revelation. It’s those little tweaks that take a good recipe and make it a Food Meld staple. Also, a confession: I have, on more than one occasion, forgotten the Dijon in the glaze. They’re still delicious, but that mustard adds a subtle background note that you’ll miss if it’s gone. Don’t be like forgetful Jackson. Put the Dijon in.
Slider FAQs: Your Questions, Answered
Q: Can I make these ahead of time?
A: Absolutely! Assemble the sliders completely (through step 4, including the butter glaze), cover tightly with foil, and refrigerate for up to 24 hours. When ready, bake straight from the fridge, adding about 5-7 extra minutes to the covered baking time.
Q: My buns got a bit soggy. What happened?
A: This usually means there was a little too much butter glaze, or it wasn’t baked uncovered long enough at the end. The final uncovered bake is crucial for crisping up the top. Next time, ensure your oven is fully preheated and don’t skip that last 5-7 minutes of open baking.
Q: Can I use different cheese?
A> Please do! Mozzarella for maximum stretch, pepper jack for a kick, gouda for smokiness. Just be mindful that very hard cheeses (like parmesan) won’t melt the same way. A blend is always a great idea.
Q: How do I store and reheat leftovers?
A> They’re best fresh, but leftovers can be stored in an airtight container in the fridge for 2-3 days. Reheat in a 350°F oven, covered in foil, for about 10 minutes, or in the microwave for 30-45 seconds until warm. The oven will keep the buns nicer.
Nutritional Info (Because We’re All About Balance!)
Hey, I’m all about indulging in flavor, but I also believe in knowing what’s on your plate. Here’s a rough breakdown per slider (based on 12 sliders, using Swiss cheese and Hawaiian rolls). Remember, these are estimates and can vary based on your specific ingredient brands and swaps.
- Calories: ~230
- Protein: 12g (A solid hit to keep you full!)
- Carbohydrates: 18g
- Fat: 12g
- Fiber: 1g
- Sodium: ~440mg
To lighten it up slightly, you can use low-fat turkey, reduced-fat cheese, and brush with a little less butter glaze. But honestly, for a treat or party food, I say enjoy the real deal version—it’s all about that melty, buttery experience.