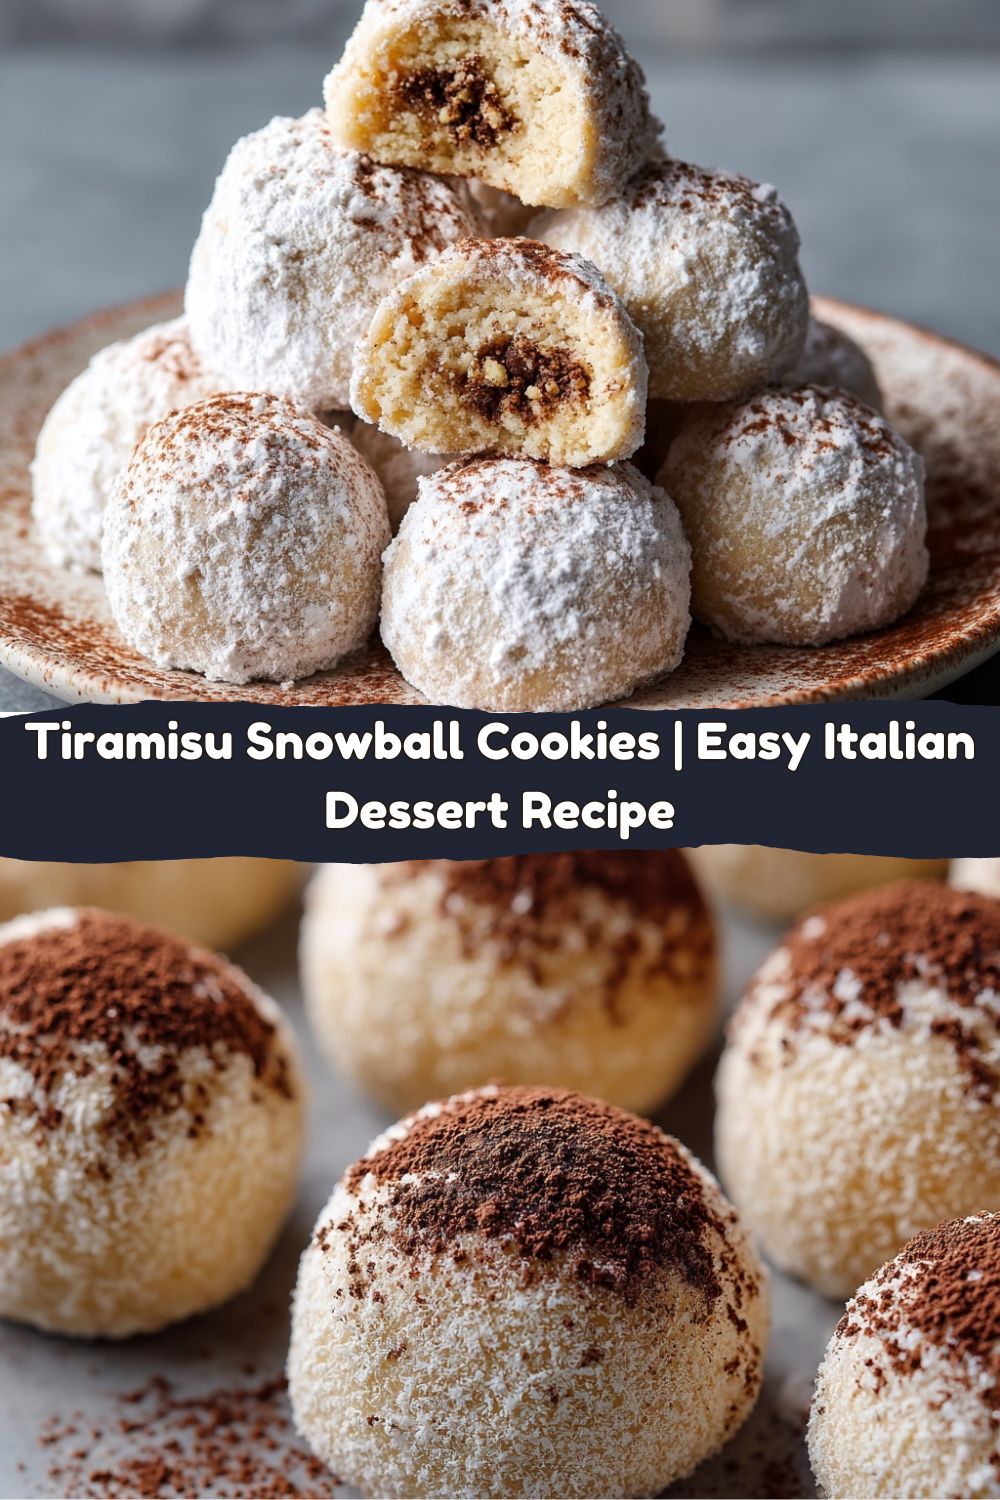
Tiramisu Snowball Cookies: Your New Favorite Coffee Break
Hey friends, Jackson here from Food Meld. Let’s be real for a second: have you ever met a dessert more universally loved than tiramisu? That perfect, dreamy layers of coffee-soaked ladyfingers, sweet mascarpone, and a dusting of cocoa powder… it’s a masterpiece. But sometimes, you don’t have time to build a whole layered dessert. Sometimes, you just want a cookie. A really, really good cookie that you can grab with one hand while your other hand is wrapped around a mug of coffee.
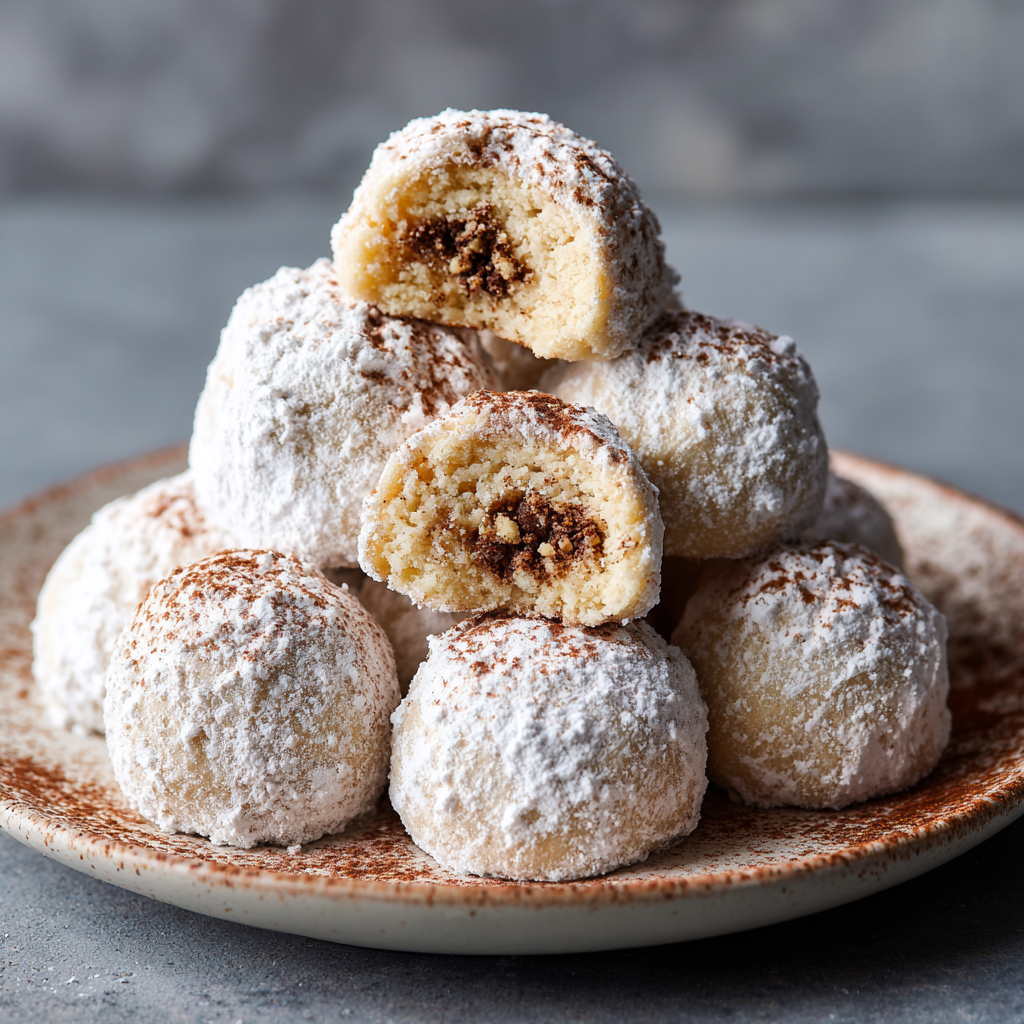
That’s exactly the “what if we tried this?” moment that led me to create these Tiramisu Snowball Cookies. Imagine all the soul-warming, coffee-kissed flavor of tiramisu, packed into a soft, buttery, melt-in-your-mouth cookie. They’re like little snowballs of pure bliss, and they are dangerously easy to eat. We’re taking the classic snowball cookie (you know, the ones your grandma might have made) and giving it a full-on Italian coffee shop glow-up.
These cookies are my go-to for holiday cookie swaps, cozy weekend baking projects, or when I need to impress guests without breaking a sweat. They look elegant dusted in powdered sugar and cocoa, but the process is straightforward, fun, and yes, a little messy—just how I like it. So, preheat your oven, and let’s turn that classic dessert into a bite-sized adventure you’re going to absolutely love.
The Tiramisu That Started It All
My love affair with tiramisu started a little later than you might think. I didn’t grow up with it; I discovered it in my early twenties at this tiny, family-run Italian spot tucked away on a side street. The owner, a robust man named Giovanni, would bring it out himself, setting the plate down with a quiet, “You try.” It was love at first bite. The textures, the balance of bitter and sweet, the creaminess… it was a flavor revelation.
But the real memory that sticks with me is the first time I tried to make it myself. I was so determined to get those perfect, neat layers. I carefully brewed the espresso, whipped the mascarpone, and delicately dipped the ladyfingers. I was feeling pretty proud of myself… until I went to take the first glorious bite and realized I’d accidentally used salt instead of sugar in the mascarpone mixture. It was… an experience. A very, very savory tiramisu. We laughed about it for weeks, and it taught me a fantastic lesson: even kitchen fails make for great stories, and the pursuit of a great flavor is always worth it. These cookies are my way of capturing that tiramisu magic in a no-fuss, no-layer, impossible-to-mess-up form. Consider them foolproof tiramisu, my friends.
Gathering Your Flavor Arsenal
Here’s the lineup for our tiramisu cookie triumph. Don’t just think of these as ingredients; think of them as the building blocks of flavor. I’ve got some quick chef insights and swaps for you, so you can make these your own.
- 1 cup (226 g) unsalted butter, softened: This is the heart of our meltaway cookie. It creates that tender, crumbly texture. Chef’s Insight: “Softened” means cool to the touch but able to hold a thumbprint easily. Don’t melt it! We want to cream it, not make soup.
- ½ cup (100 g) icing sugar (confectioners’ sugar): This goes right into the dough for a fine, smooth crumb. Its super-fine texture is key—granulated sugar would make the cookies gritty.
- 120 g mascarpone cheese, softened: The star of the tiramisu show! It adds a subtle tang and incredible richness. Substitution Tip: In a pinch, full-fat cream cheese can work, but mascarpone’s mild, buttery flavor is truly what we’re after.
- 1 tsp vanilla extract: The warm, aromatic backbone that makes everything taste more… well, like itself. It rounds out the coffee flavor beautifully.
- 3 tsp instant coffee powder, dissolved in 4 tsp hot water: This is our flavor power-up. Dissolving it first ensures every single bite has a consistent, robust coffee kick. Chef’s Insight: Use a good-quality instant espresso for an even deeper flavor. This is not the time to be shy!
- 3 cups (300 g) all-purpose flour: The structure of our cookie. We’re using the scoop-and-level method here to avoid a dry dough.
- ½ cup (50 g) crushed ladyfinger biscuits (savoiardi): This is the “meld” magic! Adding crushed ladyfingers directly into the dough reinforces that authentic tiramisu texture and flavor. Substitution Tip: No ladyfingers? Graham cracker crumbs are a fantastic stand-in.
- ½ tsp salt: The flavor enhancer. It makes the butter richer and the coffee pop. Never skip the salt in sweets!
- 1 cup icing sugar (for rolling) & 1 tbsp cocoa powder (for dusting): This double-dusting is what gives our snowballs their signature “tiramisu” look and the final hit of chocolatey goodness.
Let’s Build These Bites of Bliss: A Step-by-Step Guide
Alright, team, let’s get our hands dirty. This is where the fun happens. Follow these steps, and you’ll have a kitchen that smells like an Italian café in no time.
- Preheat and Prep: Fire up your oven to 350°F (175°C). Line your baking sheets with parchment paper. Chef’s Hack: This isn’t just for non-stick purposes; it also helps the bottoms of our delicate cookies bake evenly without browning too much. No parchment? A silicone baking mat works wonders.
- The Creaming Station: In a large bowl, cream together your softened butter and that ½ cup of icing sugar. We’re not just mixing here; we’re creaming. Beat it with a hand mixer or stand mixer for a good 2-3 minutes until it’s light, pale, and fluffy. This step incorporates air, which is the secret to a tender cookie. Watch for it: You’ll know it’s ready when the texture looks almost like a fluffy buttercream.
- Incorporate the Wet Team: Now, mix in your softened mascarpone, vanilla, and that potent dissolved coffee mixture. Scrape down the sides of the bowl to make sure everything is getting to know each other. The dough might look a little curdled at this point—don’t panic! That’s just the mascarpone doing its thing. It will all come together in the next step.
- Bring in the Dry Crew: Add your flour, crushed ladyfingers, and salt right into the bowl. Now, switch to a low speed and mix just until the flour disappears and a soft dough forms. Do not overmix! Overworking the dough is the enemy of a tender, melt-in-your-mouth texture. We want to be gentle from here on out.
- The Chill Factor: Pop the bowl of dough into the fridge for 15-20 minutes. This is a non-negotiable power move. Why we chill: It firms up the butter and mascarpone, making the dough much easier to handle and roll. It also prevents the cookies from spreading too much in the oven.
- Scoop and Roll: Using a small cookie scoop or a tablespoon, portion out the dough and roll it into smooth, 1-inch balls. Place them about 2 inches apart on your prepared baking sheets. They don’t spread a ton, but they need their personal space for even baking.
- Bake to Perfection: Slide those trays into your preheated oven and bake for 11-13 minutes. You’re looking for the bottoms to be just lightly golden. The tops should still look pale and feel soft to the touch. Chef’s Secret: They continue to cook on the hot tray out of the oven, so under-baking slightly is your key to ultimate softness.
- The First Snowfall (Sugar Roll): Here’s the fun part. Let the cookies cool on the baking sheet for just 2-3 minutes—until they’re cool enough to handle but still warm. Pour your remaining cup of icing sugar into a shallow bowl and gently roll each warm cookie in it. This first coat creates a beautiful, slightly melty sugary crust.
- The Final Tiramisu Touch: Let the cookies cool completely on a wire rack. Once they’re totally cool, it’s time for the grand finale. Give them a second roll in the icing sugar for that super-snowy look, and then dust them lightly with the cocoa powder using a fine-mesh sieve. Pro Tip: The cocoa is just for dusting; a heavy hand can make it bitter. A light, elegant shower is all you need.
How to Serve These Showstoppers
Presentation is part of the fun! I love piling these cookies high on a rustic wooden board or a vintage cake stand. They look incredible when they’re all dusted and stacked. For the full tiramisu experience, serve them with a steaming cup of strong black coffee or a frothy cappuccino. The bitter notes of the coffee cut through the sweetness of the cookie perfectly.
These are also a fantastic dessert for a dinner party. Plate two or three cookies alongside a small scoop of vanilla bean ice cream or a dollop of lightly sweetened whipped cream. It takes the whole “deconstructed tiramisu” vibe to the next level. Honestly, they’re so good they don’t need any accompaniment, but a little extra flair never hurt anybody!
Mix It Up! Creative Twists on the Classic
You know I love a good recipe variation. Once you’ve mastered the base, feel free to get creative and make it yours. Here are a few of my favorite twists:
- Boozy Bliss: Add a tablespoon of coffee liqueur (like Kahlúa) or marsala wine to the wet ingredients for an authentic, grown-up kick.
- Chocolate Chip Tiramisu: Fold in ½ cup of mini chocolate chips into the dough along with the flour. Because chocolate and coffee are a match made in heaven.
- Nutty Professor: Replace the crushed ladyfingers with an equal amount of very finely ground almonds or hazelnuts. This adds a wonderful toasty flavor and a different kind of texture.
- Cinnamon Spice: Add a pinch of cinnamon or even a dash of nutmeg to the dough. It adds a warm, cozy dimension that pairs amazingly with the coffee.
- Gluten-Free Swap: You can easily make these gluten-free! Use a 1:1 gluten-free all-purpose flour blend and ensure your ladyfingers (or substitute with gluten-free graham crackers) are certified GF.
Jackson’s Kitchen Notes & Stories
This recipe has evolved in my kitchen more times than I can count. The first batch I ever made was good, but they were missing that “tiramisu” punch. That’s when I had the idea to crush the ladyfingers right into the dough. It was a total game-changer, adding that specific texture and flavor that makes you go, “Oh, THIS is tiramisu!”
A funny story: I once brought a huge tin of these to a friend’s potluck. I’d labeled them carefully, but someone thought the cocoa powder was dirt and tried to brush it all off before eating one! We still laugh about the “dirty snowball” incident. Moral of the story: the cocoa dusting is a feature, not a bug! Embrace the mess and the flavor.
Your Questions, Answered!
I’ve made these cookies a zillion times, and I’ve heard all your questions. Here are the answers to the most common ones.
Q: My dough is really soft and sticky, even after chilling. What do I do?
A: No worries! This can happen if your kitchen is warm. Just pop it back in the fridge for another 10-15 minutes. You can also lightly dust your hands with flour or icing sugar to prevent sticking when you roll the balls.
Q: Why do I need to roll them in powdered sugar twice?
A> The first roll while warm creates a thin, slightly translucent glaze as the sugar melts. The second roll, once cool, gives you that classic, bright white, snowy coating that looks so pretty against the cocoa. It’s all about texture and appearance!
Q: Can I freeze these cookies?
A> Absolutely! They freeze like a dream. You can freeze the baked and fully cooled cookies in an airtight container for up to 3 months. You can also freeze the unbaked dough balls on a tray, then transfer to a bag. Bake from frozen, adding 1-2 minutes to the baking time. Thaw and re-roll in sugar and cocoa before serving.
Q: My cookies came out dry and crumbly. What happened?
A> This usually means the dough was overmixed after adding the flour, or the cookies were baked a minute or two too long. Remember, we mix just until combined, and we pull them out when the bottoms are *just* golden and the tops are still soft.
Nutritional Information (For Your Info!)
Hey, we’re all about balance here at Food Meld! I believe in enjoying delicious food mindfully. Here’s a rough nutritional breakdown per cookie (assuming the recipe makes about 34 cookies). This is just an estimate, as ingredients can vary.
- Calories: 127
- Carbohydrates: 15g
- Fat: 7g
- Sugar: 6g
- Protein: 1g
Remember, these are treats! They’re made with real, quality ingredients like butter and mascarpone, which is what makes them so wonderfully satisfying. Enjoy one (or three!) with your coffee, savor every bite, and don’t sweat the small stuff. Life’s too short not to eat the cookie.
Let’s Cook Something Awesome Together
And there you have it! Your new secret weapon for cookie season, coffee breaks, and any time you need a little bite of comfort. These Tiramisu Snowball Cookies are proof that you don’t need fancy techniques or a whole day in the kitchen to make something truly unforgettable. They’re fun, they’re flavorful, and they’re packed with that “you’ve gotta try this” energy I love so much.
I hope you love making (and devouring) these as much as I do. If you give them a try, I’d be absolutely thrilled if you tagged me @FoodMeld on social media so I can see your beautiful creations! Now, get in that kitchen, turn up some good music, and let’s bake a memory. Until next time, friends!
– Jackson


