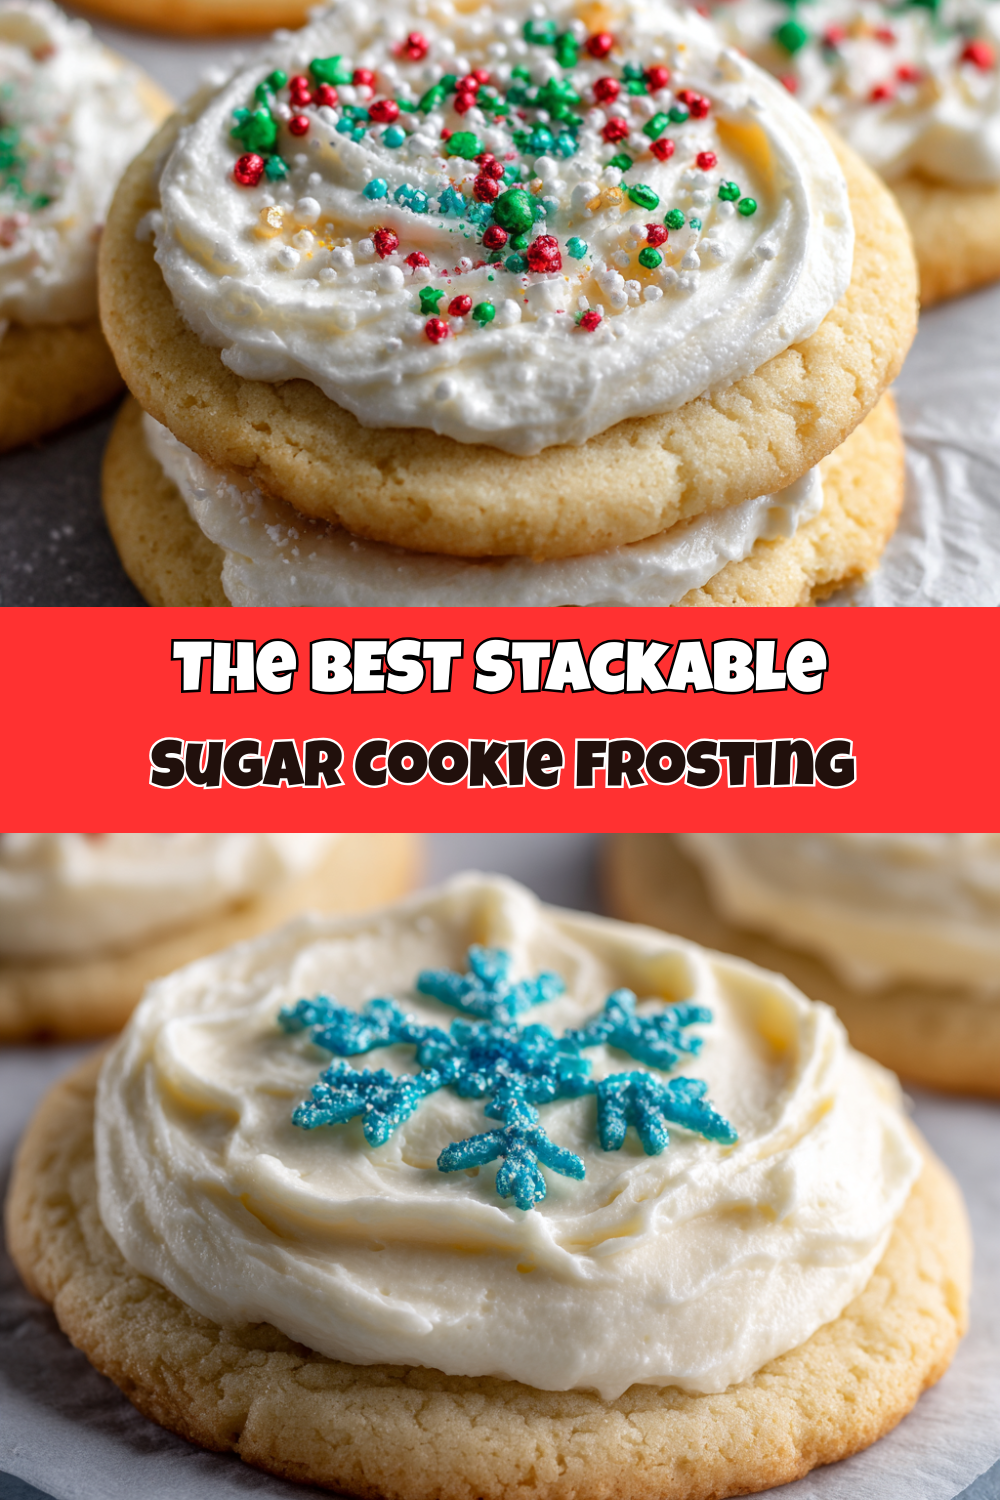
Your New Go-To Sugar Cookie Frosting: Stack ‘Em High!
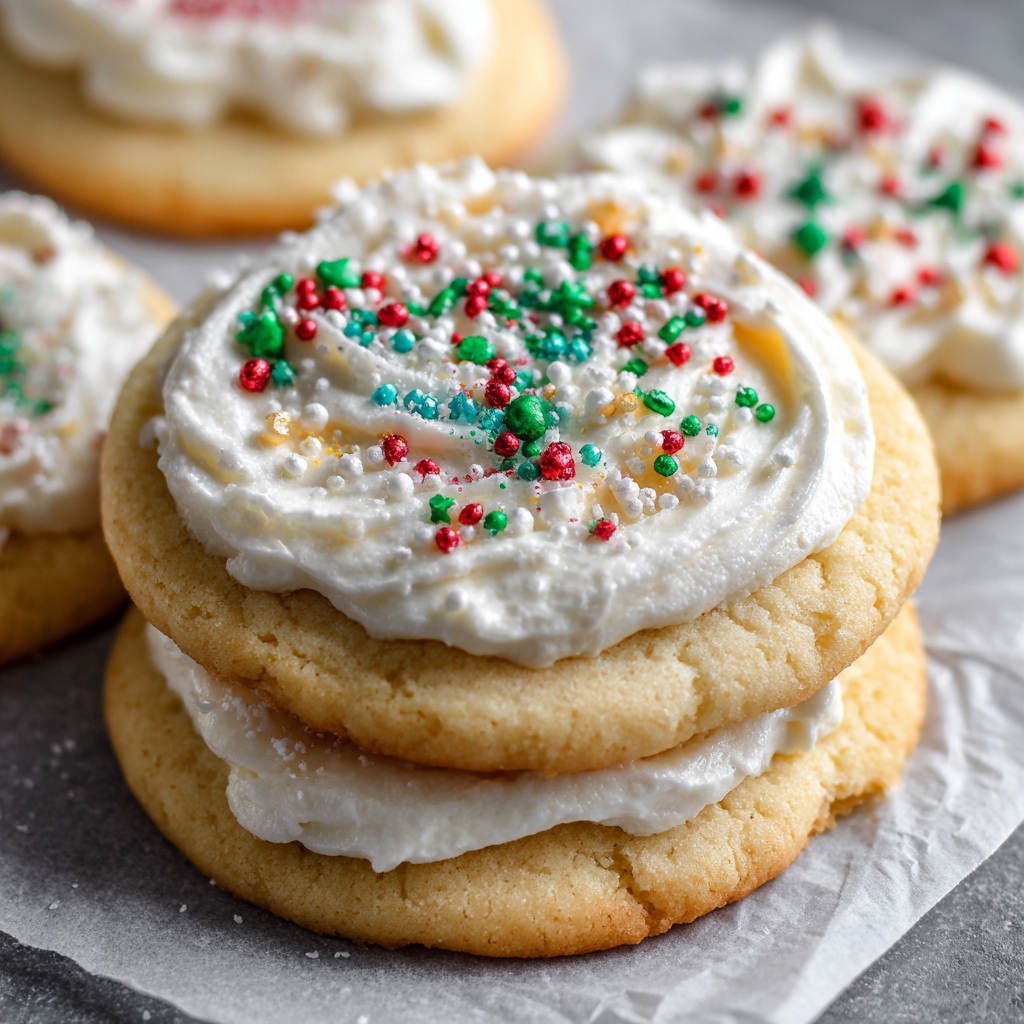
Hey there, Food Meld family! Jackson here. Let’s talk about one of life’s simple, sweet joys: a perfectly frosted sugar cookie. You know the ones. They’re soft, buttery canvases just begging for a layer of creamy, dreamy frosting that’s sweet but not *too* sweet, and holds its own when you stack those cookies up for a party platter or pack them into a gift box for someone special.
But if you’ve ever been in the kitchen, spatula in hand, and watched your beautiful frosting turn into a melty, messy puddle or—worse—a crumbly, sugary disaster, you know the struggle is real. I’ve been there. I’ve had more than my fair share of “frosting fails” that looked more like abstract art than the beautiful designs I had in my head. That’s why I became a man on a mission: to create a frosting recipe that’s not only stupid-easy to make and incredibly delicious but is also the MVP of cookie decorating—the Stacking Champion.
This isn’t just any frosting; this is our secret weapon. It’s a vanilla-flavored, cloud-like spread that glides onto your cooled cookies like a dream, holds any color you throw at it, and then sets to a smooth, firm finish that won’t stick to parchment paper or the cookie on top of it. We’re saying goodbye to smudged Santas and hello to pristine, picture-perfect cookies that are as fun to make as they are to eat. So, grab your mixer (or even just a sturdy spoon and some elbow grease), and let’s whip up a batch of this unforgettable, stack-friendly sugar cookie frosting together.
The Icing on the (Life) Lesson
This recipe takes me right back to my grandma’s kitchen in Georgia. Every Christmas, she’d bake what felt like a thousand sugar cookies, and it was my job to “decorate” them. I’m using that term loosely because what I was really doing was creating technicolor blobs with sprinkles buried so deep you needed a mining license to find them. Her frosting was always this simple, glossy white stuff that set up firm. I never thought much about it until I tried to replicate it years later and failed miserably. My buttercream was a delicious, melting mess.
I called her, and she just laughed that warm, knowing grandma laugh. “Sugar,” she said, “butter’s for eatin’, shortening’s for decoratin’. You want ‘em to look pretty and stack up nice, you gotta use the stuff that holds its shape.” It was a total lightbulb moment. She wasn’t a trained pastry chef; she was just a practical Southern woman who knew how to get the job done right. That little piece of wisdom, that “what if we tried this?” moment, is the heart of this recipe. It’s a tribute to her no-fuss, brilliant approach to cooking—maximize flavor and function without overcomplicating things. Every time I make this frosting, I think of her and those messy, wonderful afternoons that taught me cooking is about more than food; it’s about the memories you make while you’re making it.
Gathering Your Frosting Arsenal
This is where the magic starts, folks. The beauty of this recipe is in its simplicity. You only need a handful of pantry staples to create something truly awesome. Here’s the breakdown:
- ½ cup vegetable shortening: This is the star of the show and our secret weapon for stackable frosting. Shortening is 100% fat (unlike butter, which has water and milk solids), so it creates a stable, firm frosting that won’t melt at room temperature and gives you that super smooth, crumb-free surface that’s perfect for decorating. Chef’s Insight: For the best results, I highly recommend using a high-quality shortening like Crisco. It’s flavor-neutral, which makes it the perfect base for our vanilla flavor and any food coloring we add.
- 4 cups confectioners’ sugar (aka powdered sugar): The body of our frosting. It dissolves instantly, giving us that signature smooth texture. Pro Tip: Always sift your powdered sugar! I know it’s an extra step, but it’s the #1 way to prevent lumpy frosting. Trust me on this one.
- 5 tablespoons milk (plus more as needed): Our liquid component to bring it all together. Whole milk will give you the creamiest result, but 2% or even non-dairy milks like almond or oat work perfectly fine. The key is to add it slowly—we can always add more, but we can’t take it out!
- 1 teaspoon vanilla extract: The flavor bomb! A good quality pure vanilla extract makes all the difference here, infusing the whole batch with that warm, classic, bakery-style flavor. This is where you shouldn’t skimp.
- Food coloring (optional): This is where we get to play! Chef’s Hack: For the most vibrant colors without messing with the frosting’s consistency, use gel food coloring instead of liquid drops. The gels are highly concentrated, so you need less, and they won’t thin out your masterpiece.
Let’s Make Some Magic: Step-by-Step
Ready to mix it up? This process is so simple and satisfying. Let’s do this.
- Cream the Shortening: In a large mixing bowl, beat the ½ cup of vegetable shortening on medium speed for about 1-2 minutes until it’s light, fluffy, and creamy. You’re aerating it, which is the first step to getting that dreamy, spreadable texture. If you’re using a stand mixer, the paddle attachment is perfect for this job.
- Gradually Add the Sugar: Here’s where we avoid a powdered sugar snowstorm in the kitchen! With the mixer on low speed, gradually add the sifted confectioners’ sugar, about one cup at a time. Let each cup incorporate fully before adding the next. Once it’s all in, it will look dry and crumbly—that’s totally normal. You’re on the right track.
- Incorporate Vanilla & Milk: Now, add your 1 teaspoon of vanilla extract. Then, with the mixer still on low, begin adding the milk, one tablespoon at a time. Watch closely! After about 4 tablespoons, stop and scrape down the sides of the bowl. Turn the mixer to medium-high and beat for another minute. This is where you check your consistency. You’re looking for a spreadable, smooth, and creamy texture. If it’s still too thick, add that fifth tablespoon of milk (or even a teaspoon more if needed). The goal is a frosting that holds its shape when you scoop it but is soft enough to spread easily without tearing your cookies.
- Tint (Time to Play!): If you’re adding color, now’s the time! Dip a toothpick into your gel food coloring and swirl it into the frosting. Fold it in gently with a spatula at first to avoid splatters, then you can use your mixer on low to fully incorporate the color. Remember, you can always add more color, but you can’t take it away, so start with a little!
- Frost & Set: Using an offset spatula or a butter knife, spread a generous layer of frosting onto your completely cooled sugar cookies. This is non-negotiable—warm cookies will melt your frosting! Let the frosted cookies sit at room temperature for a few hours (usually 2-4) until the surface is completely dry and firm to the touch. Then, stack them high with confidence!
How to Serve Up These Sweet Creations
You’ve made these beautiful cookies—now let’s show them off! Presentation is part of the fun.
For a classic look, arrange them on a simple white or wooden platter. The contrast makes the colors pop. If you’re going for a holiday vibe, a festive plate or a tiered stand always wows a crowd. These cookies are sturdy enough to stand up on their own on a vertical stand, which is great for saving table space at a party.
This frosting is also the absolute best for gift-giving. Because it sets so firm, you can carefully layer them in a cookie tin or a cardboard gift box between layers of parchment paper. They’ll travel beautifully and arrive looking just as perfect as when you packed them. It’s the ultimate “I-made-this-for-you” gift that actually survives the journey.
Mix It Up: Creative Twists & Swaps
Once you’ve mastered the base recipe, the world is your oyster! Here are a few of my favorite ways to play with the formula:
- Almond Bakery Bliss: Swap the vanilla extract for ¼ teaspoon of almond extract. It gives that classic, nostalgic “bakery cookie” flavor that is just irresistible.
- Citrus Zing: For a bright, sunny twist, substitute the vanilla and milk with an equal amount of fresh lemon juice and add a teaspoon of lemon zest. Perfect for spring and summer cookies!
- Rich Chocolate Version: Replace ½ cup of the powdered sugar with ½ cup of unsweetened cocoa powder (sifted, of course!) for a delicious chocolate frosting.
- Sparkle & Shine: Stir in a pinch of edible glitter or luster dust after mixing for cookies that literally sparkle. You can also sprinkle them with sanding sugar or nonpareils right after frosting, before it sets.
- Dairy-Free/Different Consistency: Any non-dairy milk works wonderfully here. For a drizzle-style icing (great for detailed piping), add more milk, one teaspoon at a time, until it reaches a thinner consistency. To thicken it for more intricate piping work, add a bit more powdered sugar.
Jackson’s Chef Notes
This recipe has evolved in my kitchen over countless cookie-baking weekends. I once tried to rush the process and added all the milk at once. Let’s just say I ended up with a sugary soup and had to start over—a classic “don’t do what I did” moment! Patience with the liquid is key.
The other thing I learned is that this frosting is incredibly forgiving. If you accidentally add too much milk and it gets thin, just beat in a little more powdered sugar. If it’s too thick, another tiny splash of milk will fix it. You’re in control. It’s a testament to the idea that the best recipes aren’t fussy; they’re flexible and built for real life in a real kitchen, where a little mess is just part of the fun.
Frosting FAQs: Your Questions, Answered
Q: Can I use butter instead of shortening?
A: You can, but it will change the final product. Butter will give you a richer, more buttery flavor, but the frosting will be much softer and will not set firm for stacking. It also has a tendency to develop a slight crust and can yellow your white or pastel colors. For stackable, firm, pure-white frosting, shortening is the undisputed champ.
Q: My frosting is too thin/runny! How can I fix it?
A> No worries, this is an easy fix! Simply beat in more sifted confectioners’ sugar, a quarter cup at a time, until it thickens up to your desired spreadable consistency.
Q: My frosting is too thick and difficult to spread. Help!
A> This is also a simple fix. Just add more milk, one teaspoon at a time, beating well after each addition, until it reaches a smooth and spreadable texture.
Q: How long does it take for the frosting to fully set?
A> It typically takes 2-4 hours at room temperature to set to a firm, dry-to-the-touch finish. The time can vary based on the humidity in your kitchen. You’ll know it’s ready when you can gently touch the surface without any frosting sticking to your finger.
Sugar Cookie Frosting
- Total Time: 10 minutes
- Yield: 3 Cups 1x
Description
This classic sugar cookie frosting is soft, creamy, and perfectly spreadable—yet it sets firm enough for stacking, gifting, or storing. Made with shortening instead of butter, it resists melting and has a smooth, glossy finish. Simple to mix, easy to tint with food coloring, and just sweet enough—this is a go-to for holiday cookie decorating.
Ingredients
½ cup vegetable shortening
4 cups confectioners’ sugar
5 tablespoons milk (add more as needed for consistency)
1 teaspoon vanilla extract (or almond for variation)
Food coloring (optional)
Instructions
In a large bowl, beat shortening until creamy.
Gradually mix in confectioners’ sugar.
Add vanilla and milk, 1 tablespoon at a time, until desired consistency is reached—spreadable but not runny.
Tint with food coloring if desired.
.
Spread onto cooled cookies. Let set at room temp for a few hours until firm to the touch.
Tips & Twists:
Add ¼ tsp almond extract for a bakery-style flavor
Mix in edible glitter or shimmer dust for sparkle
Use gel food coloring for vibrant hues without thinning the frosting
Thin with more milk for drizzle-style icing, or thicken with extra sugar for piping
- Prep Time: 10 minutes
Nutrition
- Calories: 90 per 1 tbsp
- Sugar: 14g per 1 tbsp
- Sodium: 2mg per 1 tbsp
- Fat: 3g per 1 tbsp
- Carbohydrates: 15g per 1 tbsp
Nutritional Information*
*This is provided as an estimate based on the ingredients used and standard nutritional calculation databases. It will vary if you change ingredients.
Per Serving (1 tablespoon, approx.):
Calories: 90 | Total Fat: 3g | Saturated Fat: 0.8g | Trans Fat: 0g | Cholesterol: 0mg | Sodium: 2mg | Total Carbohydrates: 15g | Dietary Fiber: 0g | Sugars: 14g | Protein: 0g
Remember, this is a treat meant to be enjoyed in moderation as part of a balanced diet! The joy and fun of baking and sharing are calorie-free.
Your Next “You’ve Gotta Try This” Moment Awaits
And there you have it, friends—my ultimate, no-fail, stack-friendly sugar cookie frosting. This recipe is a game-changer, and I hope it becomes a trusted staple in your baking repertoire just like it is in mine. It’s proof that you don’t need fancy ingredients or complicated techniques to create something truly special and delicious in your own kitchen.
So, what are you waiting for? Whip up a batch of sugar cookies, put on some good music, and get decorating. Make a mess, laugh about it, and create some awesome food—and even better memories. I can’t wait to see what you create! Tag me @FoodMeld on Instagram so I can see your beautiful, stackable cookie masterpieces.
Until next time, keep mixing it up and enjoying every bite.
Cheers,
Jackson


