Garlicky, Cheesy, and So Satisfying: The Stuffed Portobello That Will Steal Dinner
Hey friends, Jackson here from Food Meld. Let’s be real for a second. How many times have you stared into the fridge on a Tuesday night, willing something delicious and *actually exciting* to materialize? You want comfort. You want flavor. But you also want something that feels a little bit special, without requiring a PhD in culinary arts or a sink full of every pot you own.
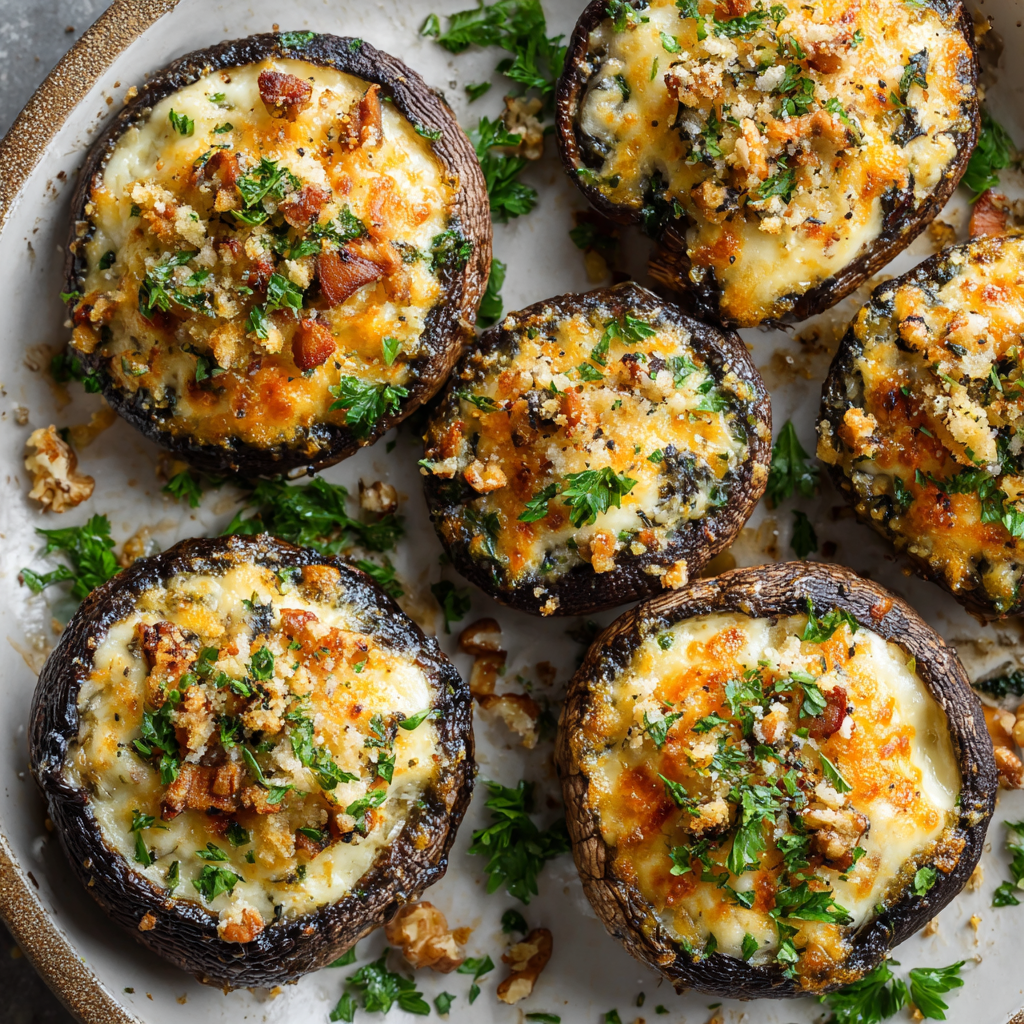
I’m telling you, I’ve been there more times than I can count. And that’s exactly why these Stuffed Portobello Caps are my secret weapon. They are the glorious, garlicky, cheesy answer to the “what’s for dinner?” blues. Think of them as a flavor party in a fungi package—juicy, meaty mushrooms roasted until tender, cradling a creamy, bubbly, insanely good filling that hits all the right notes.
This isn’t just another side dish. This is a showstopper that’s deceptively simple. It’s perfect for the vegetarian at the table, an impressive starter for your next get-together, or a hearty main that will have everyone asking, “You made this?!” with that tone of happy disbelief we all love. It’s my kind of cooking: bold, comforting, packed with a creative twist (hello, three-cheese meld!), and 100% achievable. So, tie on that apron, grab your favorite mixing bowl, and let’s turn those humble mushrooms into the most memorable part of your meal. Welcome to flavor town, population: you and these incredible stuffed portobellos.
The “Secret Ingredient” That Isn’t in the Bowl
This recipe always takes me back to my Grandma Walker’s sun-drenched kitchen in Georgia. She was the queen of making something spectacular out of simple, earthy ingredients. She’d send me out to the garden to pick tomatoes or snap beans, and dinner always felt like a celebration of what we had, right then and there.
One summer afternoon, I was “helping” (read: mostly getting in the way) as she prepped for a big family supper. She had these giant mushrooms from the farmer’s market. I watched, fascinated, as she didn’t just slice them, but gave them the royal treatment—brushing them with herby oil, filling their gills with a cheesy, garlicky miracle mix she whipped up from bits and bobs in her fridge. When they came out of the oven, golden and bubbling, the smell was unreal. That first bite was a revelation: savory, creamy, deeply satisfying. It felt fancy, but it was made with such love and ease. That’s the spirit I try to bring to Food Meld every day. It’s not just about the ingredients in the list; it’s about the joy of creating a little moment of “wow” right in your own kitchen, just like she did.
Gathering Your Flavor Arsenal
Here’s everything you’ll need to create this masterpiece. Don’t stress about exact brands—this is about flavor, not perfection!
- 4 large portobello mushroom caps, stems removed and cleaned – Look for caps that are firm, with smooth, unbroken surfaces. The bigger, the better for stuffing! Pro tip: Use a spoon to gently scrape out the dark gills. It makes more room for filling and prevents excess moisture.
- 2 tbsp olive oil – Our flavor carrier and browning agent. A good extra virgin olive oil adds a fruity note that’s just *chef’s kiss*.
- 3 garlic cloves, minced – The aromatic backbone. Fresh is best here, friends. That jarred stuff just doesn’t have the same punch.
- Salt and pepper, to taste – The dynamic duo. Season every layer—the mushrooms AND the filling—for maximum flavor.
- ½ cup cream cheese, softened – The creamy, tangy base of our filling. Let it sit out for 30 minutes before you start. Trust me, your arm muscles will thank you.
- ¼ cup grated Parmesan cheese – Adds a salty, nutty, umami depth. I use a microplane for super-fine grating that melts seamlessly.
- ¼ cup shredded mozzarella – Our gooey, melty superstar. It creates that irresistible cheese pull we all dream about.
- 2 tbsp chopped fresh parsley (plus extra for garnish) – A pop of fresh, green flavor that cuts through the richness beautifully. In a pinch, 2 tsp of dried parsley works, but fresh is a game-changer.
- Optional: 2 tbsp breadcrumbs or crushed walnuts for topping – A little crunch takes these to the next level! Breadcrumbs give a classic finish, while walnuts add a toasty, earthy crunch that’s just *chef’s mind blown*.
Let’s Build Some Deliciousness: Your Step-by-Step Guide
Ready? Let’s get cooking. This process is as fun as it is easy, and I’ve got some chefy little hacks for you along the way.
- Preheat & Prep: Fire up your oven to 400°F (200°C). This is the perfect roasting temp—hot enough to cook the mushrooms through and get our filling golden, but not so hot it burns the garlic. Line a baking sheet with parchment paper. No scrubbing pans later? Yes, please.
- Mushroom TLC: Place your cleaned portobello caps on the prepared sheet, gill-side up. Drizzle or brush them generously with about 1 tablespoon of the olive oil. Now, take half of your minced garlic and sprinkle it right into those gills. Season well with salt and pepper. This first layer of flavor is crucial—it seasons the mushroom itself from the inside out!
- Create the Magic Filling: In a medium bowl, combine the softened cream cheese, Parmesan, mozzarella, chopped parsley, and the remaining minced garlic. Use a fork or a small spatula to mash and mix it all together until it’s smooth and well-combined. Taste it! This is your moment. Need more pepper? A pinch more salt? Adjust it to *your* palate. That’s what makes it yours.
- The Big Stuff: Divide that gorgeous, garlicky cheese mixture evenly among your four mushroom caps. Don’t be shy—pile it high! Use the back of your spoon to smooth it out into a lovely little dome. If you’re using the breadcrumbs or walnuts, sprinkle them over the top now. They’ll toast up beautifully in the oven.
- Bake to Perfection: Slide that baking sheet into your preheated oven. Bake for 18-20 minutes. You’re looking for the mushrooms to be tender when pierced with a fork (they’ll release their juices) and the filling to be hot, bubbly, and attractively golden on top. If you want extra browning on your topping, you can pop them under the broiler for the last 60-90 seconds—just watch them like a hawk!
- The Grand Finale: Carefully remove the pan from the oven. Let the mushrooms rest for just 2-3 minutes—they’re molten lava hot right out of the oven. Then, transfer them to a serving plate, garnish with that extra fresh parsley for a vibrant finish, and serve immediately. The aroma alone will have people gathering in the kitchen.
How to Serve These Flavor Bombs
Presentation is part of the fun! For a stunning vegetarian main, plate two caps per person on a bed of creamy polenta, garlicky mashed potatoes, or a simple arugula salad with a lemon vinaigrette. The peppery greens with the rich mushrooms? Perfection.
As a hearty side, one cap alongside a grilled steak, a juicy chicken breast, or a piece of pan-seared salmon is absolute heaven. They also make incredible appetizers for a dinner party—slice each baked cap into quarters for easy, elegant finger food. Just be prepared to hand out the recipe!
Make It Your Own: Creative Twists & Swaps
The beauty of this recipe is its flexibility. Here are a few of my favorite ways to mix it up:
- The “Kitchen Sink” Garden Twist: Sauté a handful of fresh spinach or finely chopped kale with the garlic before adding it to the cheese mix. Sun-dried tomatoes or roasted red peppers (chopped) are also incredible additions for a sweet, tangy pop.
- Protein Power-Up: Crumble in some cooked Italian sausage, chopped crispy bacon, or even some shredded rotisserie chicken into the cheese filling for a heartier, non-vegetarian version.
- Go Vegan & Dairy-Free: Super easy! Use a plant-based cream cheese, vegan Parmesan shreds, and vegan mozzarella. The olive oil and garlic base is already plant-powered.
- Gluten-Free & Extra Crunchy: Skip the breadcrumbs and use those crushed walnuts, or try gluten-free panko. You could also sprinkle on some nutritional yeast for an extra cheesy, umami flavor boost.
- Herb Swap: Swap the parsley for fresh thyme, chives, or basil. Each herb will give the dish a completely different personality.
Jackson’s Kitchen Notes
This recipe has been a Food Meld staple since day one, and it’s evolved in my kitchen more times than I can count. I once, in a bleary-eyed morning fog, accidentally used cinnamon instead of paprika for a smoky topping (do not recommend). Lesson learned: label your spices! The biggest game-changer for me was starting to pre-salt the mushroom caps for 10 minutes before oiling. It draws out a bit of moisture, preventing a soggy bottom and concentrating the mushroom flavor. If you have an extra minute, give it a try! Most of all, have fun with it. Cooking is your playground.
Your Questions, Answered
Q: My stuffed mushrooms turned out watery. What happened?
A: Mushrooms hold a lot of water! The key is using high heat (that 400°F is important) and not overcrowding the pan. Also, make sure you scraped out the gills. If you’re still seeing excess liquid in the pan after baking, just tilt the mushroom to drain it off when plating.
Q: Can I make these ahead of time?
A: Absolutely! You can clean the mushrooms and mix the filling up to a day ahead. Keep them separate in the fridge. Assemble and bake just before serving for the best texture.
Q: What can I use instead of cream cheese?
A> Ricotta cheese or goat cheese are fantastic substitutes. Ricotta will be lighter, goat cheese will be tangier. Just make sure whatever you use is at room temperature so it mixes smoothly.
Q: Do I have to remove the black gills?
A> You don’t *have* to, but I highly recommend it. It creates more space for filling, improves the final texture, and prevents the finished dish from looking too dark and muddy.
Nutritional Information (Per Serving – 1 Stuffed Cap)
While we’re all about flavor first, it’s nice to know what’s fueling the fun! Here’s a general breakdown for one generous stuffed portobello cap (calculated without optional breadcrumb topping). Remember, these are estimates, and variations will change the numbers.
- Calories: 220
- Protein: 9g – A great plant-based protein punch from the mushrooms and cheese.
- Carbohydrates: 6g – Mostly from the mushroom itself, making this a lower-carb friendly option.
- Fat: 18g – The good, satisfying fats from olive oil and cheese that carry all our delicious flavors.
- Fiber: 2g – Thanks to our portobello star! Fiber helps keep you full and satisfied.
- Sugar: 2g
- Sodium: 350mg – This will vary based on how you season and the cheeses you use. You have control here!
Let’s Keep the Conversation Going!
And there you have it, friends—your new go-to recipe for when you need a guaranteed hit. These Garlicky Cheesy Stuffed Portobello Caps are proof that unforgettable food doesn’t need a long list of complicated steps. It just needs good ingredients, a bit of love, and the courage to try something new.
I want to see your creations! Did you add a twist? Serve it with something awesome? Tag me on social @FoodMeld with #FoodMeld so I can celebrate your kitchen win. Cooking is about sharing, experimenting, and enjoying every single bite together. Now go forth, stuff some mushrooms, and create your own “you’ve gotta try this!” moment. Until next time, keep melding those flavors!
Jackson


