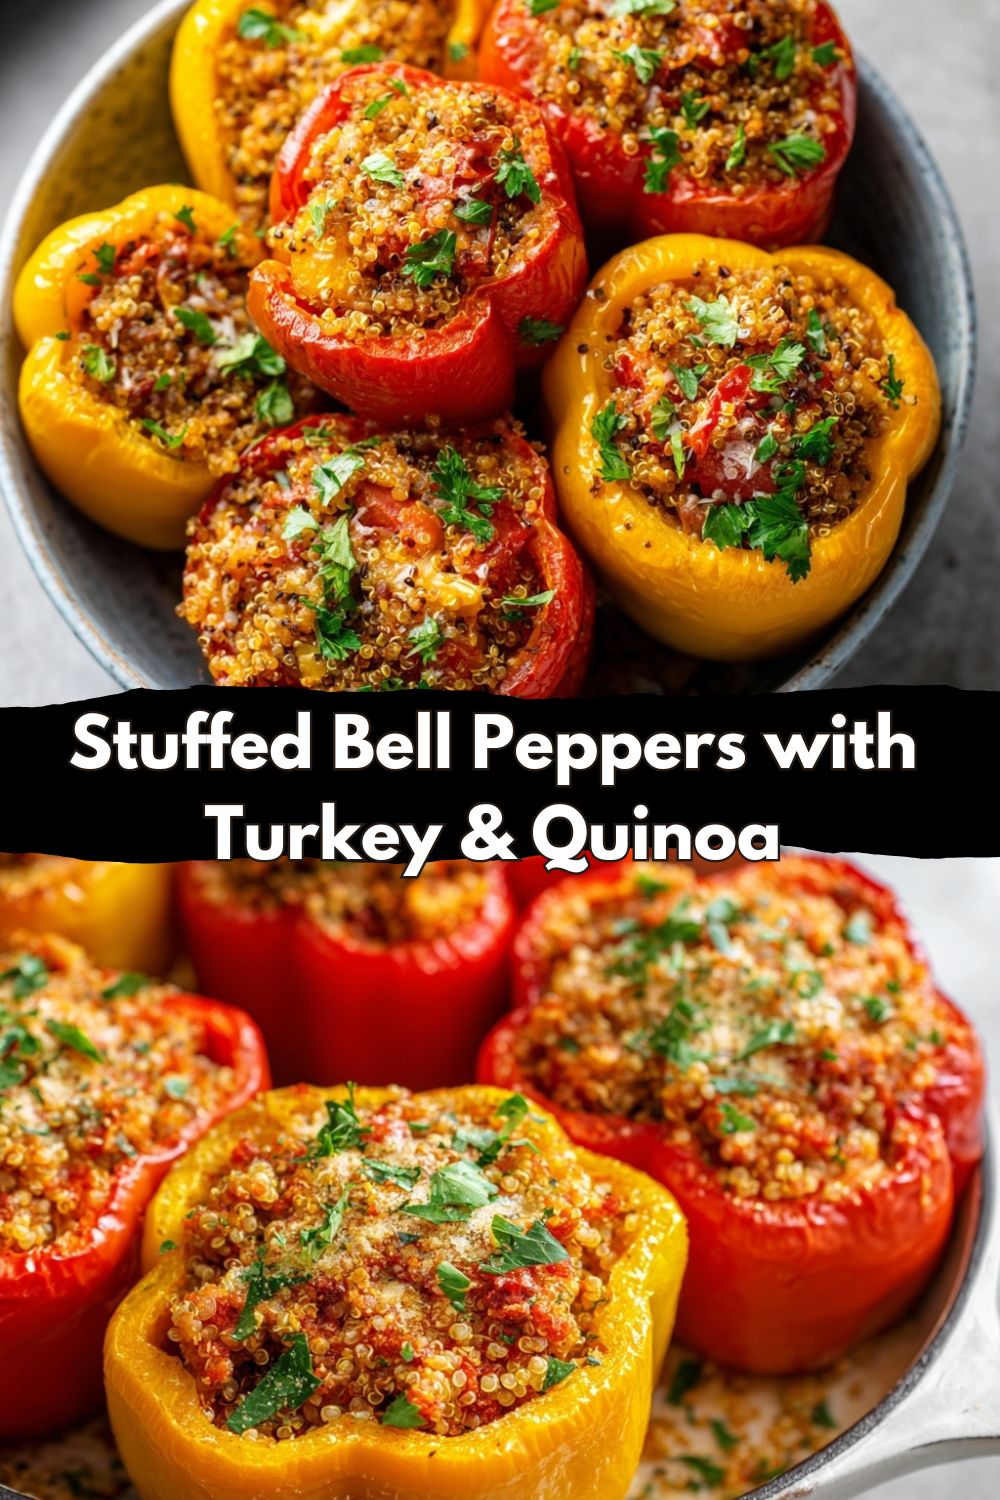
Stuffed Bell Peppers with Turkey & Quinoa: Your New Weeknight Hero
Hey friends, Jackson here from Food Meld. Let me paint you a picture: it’s been one of those days. You’re staring into the fridge, the clock is ticking toward dinnertime, and you’re caught between wanting something actually nourishing and something that just tastes like a big, delicious hug. You’re not in the mood for a sink full of dishes, but a bag of chips for dinner isn’t gonna cut it. Sound familiar? Yeah, I’ve been there more times than I can count.
That’s exactly why I’m so crazy about these Stuffed Bell Peppers. They’re the ultimate kitchen magic trick. You take a handful of simple, good-for-you ingredients, give them a little “what if we tried this?” energy in a skillet, stuff them into a vibrant bell pepper, and let the oven do the rest of the work. What comes out is nothing short of a masterpiece—a complete, balanced meal in its own edible bowl. The pepper gets sweet and tender, the filling is savory and satisfying with lean turkey and fluffy quinoa, and the whole house smells incredible.
This isn’t a fussy, complicated recipe. It’s the kind of cooking I live for at Food Meld: bold, comforting, and totally approachable. Whether you’re a kitchen newbie looking for a confidence-booster or a seasoned pro tired of the same old rotation, this recipe is for you. It’s forgiving, fantastic for leftovers, and packed with the kind of flavor that makes everyone ask, “Okay, what’s your secret?” Spoiler: the secret is just having fun. So, tie on your apron, grab your favorite skillet, and let’s turn a few basic ingredients into something unforgettable.
The Pepper That Started It All: A Tale of Trial and (Mostly) Error
My love affair with stuffed peppers didn’t begin with some flawless family recipe passed down through generations. Oh no. Mine started with a minor kitchen disaster and a serious craving. Back in my early apartment days, I was determined to impress a date with a “gourmet” home-cooked meal. I decided to stuff bell peppers with… well, I’m not entirely sure. It was a haphazard mix of ground beef, rice, and every spice in my cabinet. I didn’t par-cook the peppers, I didn’t season the filling enough, and I definitely didn’t cover them while baking.
The result? The peppers were stubbornly crunchy, the filling was drier than the desert, and my poor date was valiantly chewing with a smile. It was a humbling “you’ve gotta try this?” moment, but for all the wrong reasons! But here’s the thing—that failure stuck with me. I became obsessed with cracking the code. I played with different grains, switched to leaner turkey, learned the power of a good simmer for the filling, and mastered the foil-covered bake for that perfect tender-yet-sturdy pepper. This recipe is the glorious, flavor-packed redemption of that long-ago kitchen flop. It proves that sometimes the best dishes come from a little mess and a lot of heart.
Gathering Your Flavor Crew: Ingredients & Why They Work
Here’s the beautiful part—this is a simple lineup. Each ingredient plays a specific role in building layers of flavor and texture. Let’s break it down.
- 4 large bell peppers (any color): These are our edible vessels! I love using a mix of red, yellow, and orange for a pop of color—they’re slightly sweeter than green. The key is to pick peppers with flat bottoms so they stand up straight in the dish. Chef’s Insight: Don’t throw away the tops! Chop the usable parts and toss them into the filling for zero waste.
- 1 lb lean ground turkey: Our protein powerhouse. It’s lighter than beef but soaks up all the savory flavors beautifully. For a richer taste, use 85/15 blend. Substitution Tip: Ground chicken, lean beef, or even a plant-based crumble work great here.
- 1 cup cooked quinoa: This is our wholesome, fluffy filler. It adds protein, a slight nuttiness, and a perfect texture. Chef’s Insight: Cook your quinoa in low-sodium broth instead of water for an instant flavor upgrade.
- 1 can (14.5 oz) diced tomatoes, drained: They add moisture, a touch of sweetness, and that essential “simmered-in” richness. Substitution Tip: A cup of your favorite chunky salsa can be a fun, zesty swap here.
- 1/2 onion, finely chopped & 2 cloves garlic, minced: The dynamic duo of flavor! Sautéing these first builds the foundation of the entire dish. Chef’s Hack: If you’re in a hurry, a tablespoon of onion powder and a teaspoon of garlic powder can pinch-hit in a jam.
- 1 tablespoon olive oil: For sautéing our aromatics and turkey. Just enough to get things going without making it greasy.
- 1 teaspoon Italian seasoning: My favorite shortcut to a complex, herbaceous flavor profile. It’s like a little flavor fairy dust. Substitution Tip: A mix of dried oregano, basil, and a pinch of thyme works perfectly.
- Salt and pepper to taste: Don’t be shy! Season in layers—a little when sautéing the onions, more when browning the turkey, and a final check before stuffing.
- Optional: Shredded cheese & fresh parsley: The grand finales! A handful of mozzarella, cheddar, or Italian blend gets wonderfully melty. Chopped parsley adds a fresh, bright finish that makes it look (and taste) chef-y.
Let’s Build Some Magic: Step-by-Step Instructions
Alright, team. Let’s get cooking. We’re going to break this into three easy phases: Prep, Cook, and Bake. Put on some tunes, and let’s roll.
Phase 1: Prep Work – Setting the Stage
Step 1: Fire up your oven to 375°F (190°C). This gives it plenty of time to get perfectly hot. Grab a baking dish (an 8×8 or 9×9 works great) and give it a very light coat of oil or a quick spray. This prevents any sticky situations later.
Step 2: Take your bell peppers. Slice the tops off (about ½ inch down) and carefully remove the ribs and seeds. Give them a quick rinse inside and out. Now, here’s a pro-tip for even cooking: If your peppers are very tall and seem like they might tip over, you can slice a very thin piece off the bottom to create a flat base—just be careful not to cut through and create a hole! Set them in your prepared dish.
Phase 2: The Filling – Where Flavor Happens
Step 3: Heat the olive oil in a large skillet over medium heat. Toss in your chopped onion and give it a stir. We’re not looking for color here, just softening. After about 2 minutes, when they start to look translucent, add the minced garlic. Stir for another 30 seconds until it smells incredible. That’s your flavor base singing!
Step 4: Add the ground turkey to the skillet. Use your spoon or a spatula to break it up into small crumbles. Cook until it’s no longer pink, about 5-7 minutes. This is where you add a good pinch of salt and pepper. Little Chef Hack: If there’s a lot of liquid in the pan after the turkey cooks, just drain it off. We want flavorful filling, not watery filling.
Step 5: Time to bring the band together! Stir in the drained diced tomatoes, cooked quinoa, Italian seasoning, and another good pinch of salt and pepper. Reduce the heat to low and let it all simmer together for about 5 minutes. This is the “meld” in Food Meld—letting those flavors get to know each other. Give it a taste! Adjust the seasoning now. Need more herbs? More pepper? This is your moment.
Phase 3: Assembly & Bake – The Grand Finale
Step 6: Using a spoon, generously pack the turkey-quinoa mixture into each bell pepper. Press it down lightly as you go—you want them packed full! Any extra filling can be tucked around the peppers in the dish (bonus bites!).
Step 7: Cover the entire baking dish tightly with aluminum foil. This is the SECRET WEAPON for tender peppers! It traps steam and gently cooks the peppers without drying out the filling. Bake covered for 30 minutes.
Step 8: Carefully remove the dish from the oven (steam is hot!) and take off the foil. The peppers should be starting to soften. If you’re using cheese, now’s the time to sprinkle it over the top. Pop them back in, uncovered, for 5-10 more minutes. You’re waiting for the peppers to be easily pierced with a fork (but not mushy) and the cheese to be beautifully bubbly and golden.
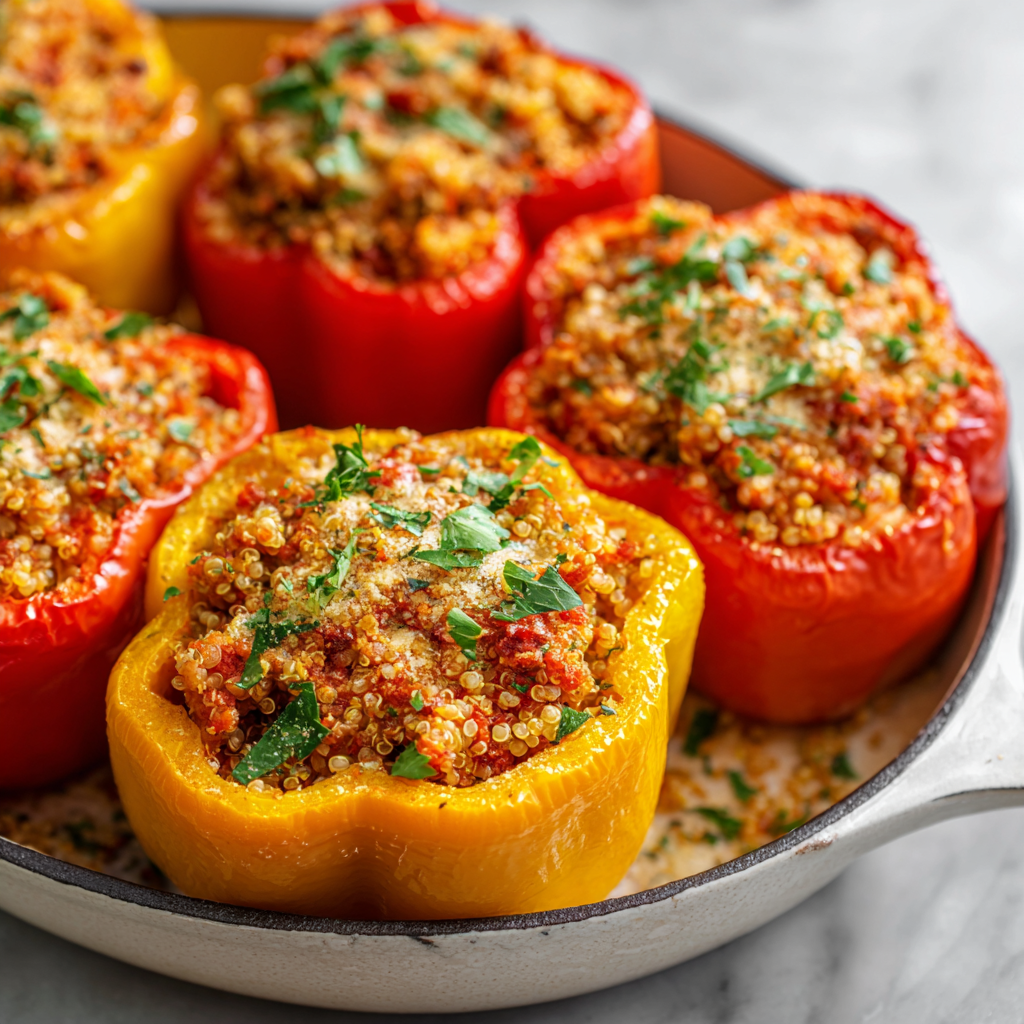
Step 9: Let them cool for just 5 minutes—this helps the filling set. Then, garnish with chopped fresh parsley and serve right from the dish!
Plating Up & Serving with Style
You’ve done the hard work, now let’s make it look as good as it tastes! I love serving these right in the baking dish for a rustic, family-style vibe. Slide the whole dish onto the table and let everyone dig in. If you’re plating individually, use a wide, shallow bowl. Carefully transfer a pepper to the center. Spoon any extra filling from the dish around it, and maybe drizzle a tiny bit of extra virgin olive oil over the top for a glossy finish.
This is a complete meal in one, but if you want to round it out, here are my favorite pairings: A simple crisp green salad with a lemony vinaigrette cuts through the richness perfectly. For a cozy night, a cup of tomato basil soup on the side is a match made in heaven. And don’t forget the bread! A warm, crusty baguette for mopping up any delicious juices is basically mandatory in my kitchen.
Make It Yours: Creative Twists & Swaps
The fun doesn’t stop here. This recipe is a fantastic canvas for your own creativity. Here are a few of my favorite twists:
- Mexican Fiesta: Swap Italian seasoning for taco seasoning. Use black beans instead of half the turkey, and use corn instead of quinoa. Top with pepper jack cheese, fresh cilantro, and a dollop of sour cream or avocado crema.
- Mediterranean Sunshine: Use ground lamb or beef. Add a handful of chopped spinach and crumbled feta cheese to the filling. Swap the diced tomatoes for fire-roasted ones. Garnish with fresh dill and a squeeze of lemon.
- ‘Everything But The Kitchen Sink’ Veggie Load: Sauté diced zucchini, mushrooms, or carrots with the onions. You can even go fully plant-based by using two cups of cooked lentils instead of the turkey.
- Cheeseburger Style: Use lean ground beef and add a tablespoon of ketchup and a teaspoon of yellow mustard to the filling. Top with a mix of cheddar and diced pickles after baking.
- Spicy ‘N Creamy: Stir in a couple of tablespoons of softened cream cheese or a splash of heavy cream into the filling for extra richness. Add a diced jalapeño (seeds removed for less heat) with the onions.
Jackson’s Chef Notes: The Inside Scoop
This recipe has lived on my blog for years, and it’s evolved thanks to all of you! One reader’s brilliant tip was to par-boil the peppers for 3-4 minutes before stuffing if you absolutely despise any crunch. I tried it, and it works like a charm for super-soft peppers. I still prefer the one-pan, no-boil method for simplicity and a bit of texture, but it’s a great hack to have in your back pocket.
Another evolution? The quinoa. I used to use rice, but switching to quinoa made it feel fresher, more nutritious, and it holds up better in the fridge for meal prep. The biggest lesson from that long-ago failed date-night pepper? Season with confidence and cover with foil. Those two steps are non-negotiable for pepper perfection. Now, this dish is my go-to for potlucks and new parents—it travels well, reheats like a dream, and everyone always loves it.
FAQs & Quick Fixes: Your Questions, Answered
Q: My peppers are still really firm after baking. What happened?
A: No worries! This usually means your peppers were extra thick-walled or the oven temp was a touch low. Just cover them back up with foil and bake for another 10-15 minutes, checking every 5. Next time, try the quick par-boil method mentioned in the Chef’s Notes.
Q: Can I make these ahead of time?
A> Absolutely! This is a MEAL PREP DREAM. Assemble the stuffed peppers completely, cover the dish, and refrigerate for up to 24 hours. When you’re ready, just bake as directed, adding maybe 5-10 extra minutes since they’re starting from cold.
Q: The filling is a bit dry. How can I fix it/prevent it?
A> Two things: 1) Make sure you’re using diced tomatoes that are *not* fully drained—leave a little juice for moisture. 2) Don’t over-bake. The covered bake steams the peppers and keeps everything moist, so stick to the timer. If it’s already dry, a spoonful of marinara sauce or a drizzle of broth over the top when serving fixes it right up.
Q: What’s the best way to reheat leftovers?
A> The microwave is fine (covered, 1-2 minutes), but for best results, I reheat them in the oven at 350°F, covered with foil, for about 15-20 minutes. This keeps the texture perfect.
Nutritional Info (Because Knowledge is Power!)
Okay, let’s talk numbers—not because we’re counting, but because it feels good to know what’s fueling you. This info is for one pepper (without optional cheese topping), and remember, it’s an estimate. Using 93% lean turkey and no-added-salt diced tomatoes keeps it lean and clean.
Per Serving (1 pepper): Calories: ~300 | Protein: ~25g | Fat: ~10g | Carbohydrates: ~25g | Fiber: ~5g | Sugar: ~8g


