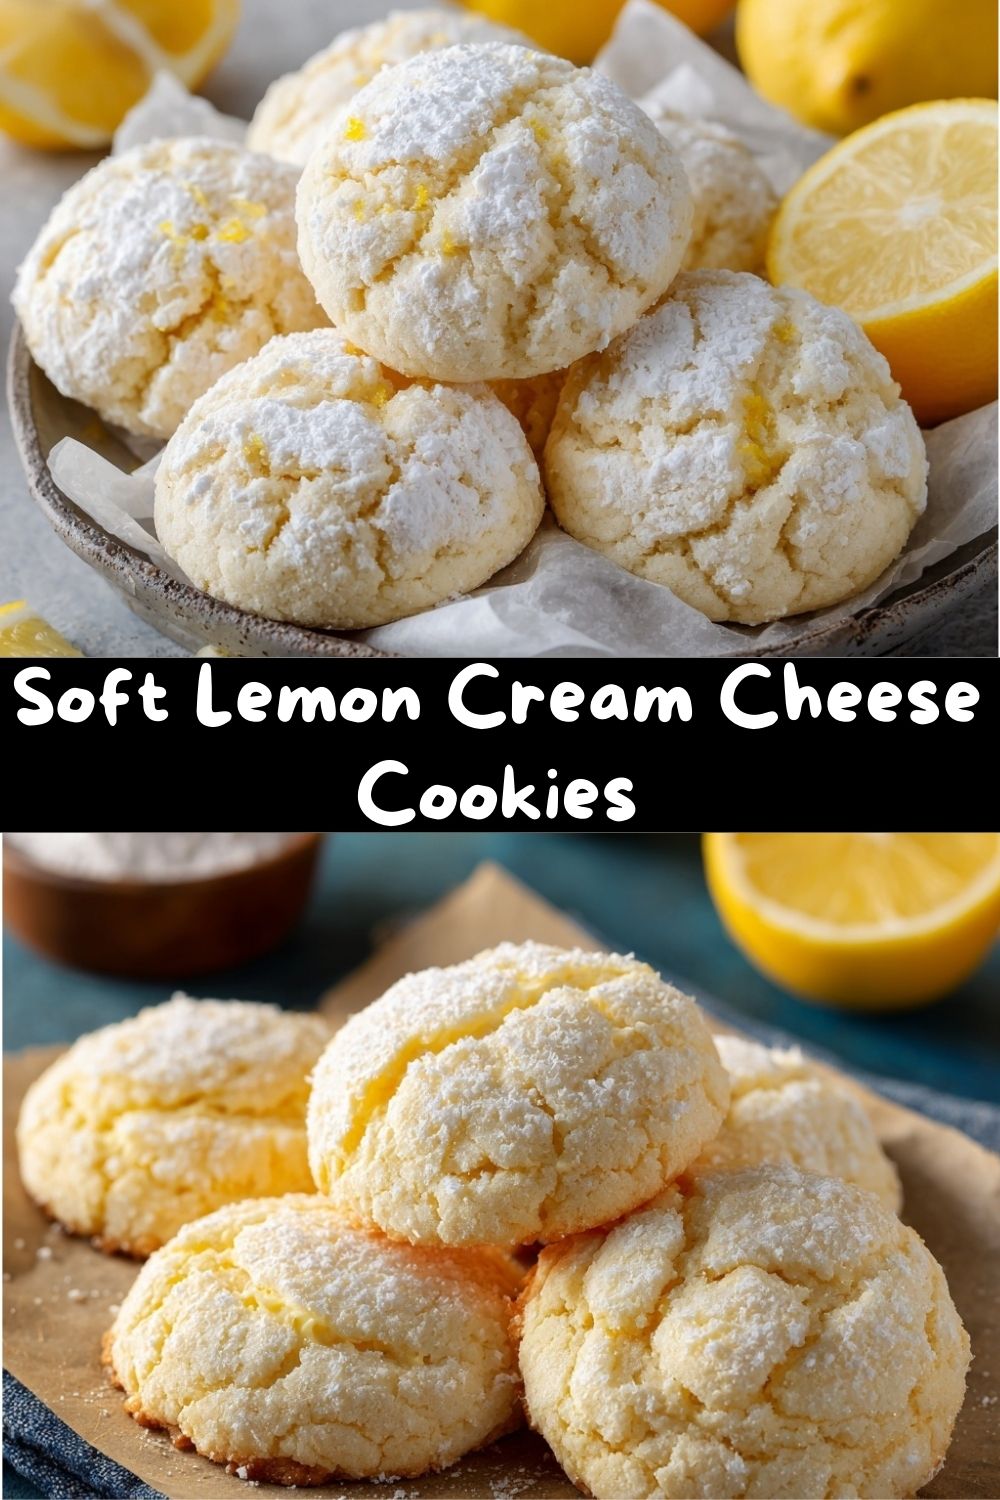
Sunshine in Every Bite: My Soft Lemon Cream Cheese Cookies
Hey friends, Jackson from Food Meld here. Let’s talk about a cookie that doesn’t just sit on a plate—it sings. You know the feeling? You take a bite, and your whole face just… lights up. That’s the magic we’re making today with these Soft Lemon Cream Cheese Cookies.
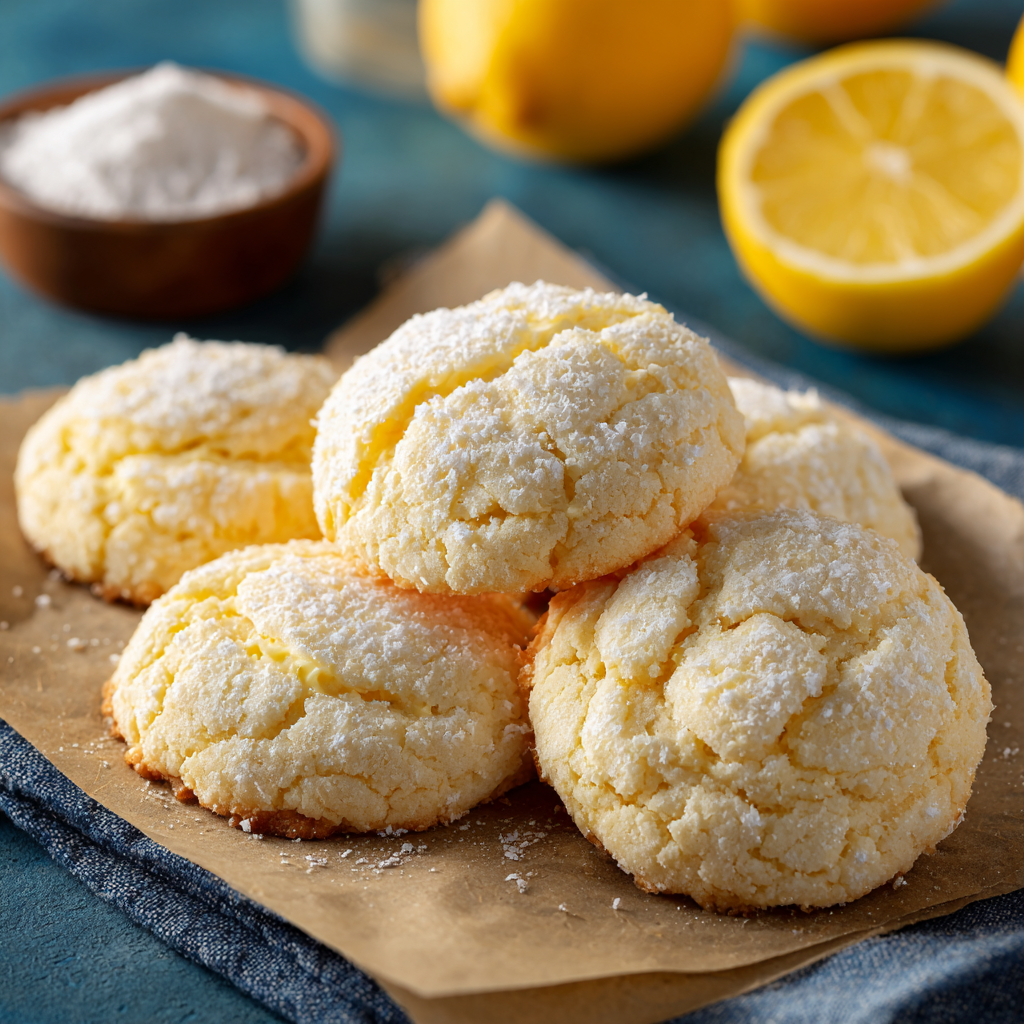
We’re not talking about a shy hint of lemon. Oh no. We’re talking about a full-on, sunny-day, burst-of-citrus flavor that dances with the rich, tangy creaminess of… you guessed it, cream cheese. The result is a cookie that’s impossibly soft, tender enough to melt on your tongue, and has this delightful, cake-like puffiness that feels like a hug from the inside.
I created this recipe for those days when you need a little edible sunshine. Maybe it’s a gray afternoon, maybe you’re prepping for a spring brunch, or maybe you just deserve a treat that’s as fun to make as it is to eat. This is that recipe. It’s beginner-friendly, it uses simple ingredients you probably already have, and it delivers that “wow” factor every single time. I’ve baked these more times than I can count, tweaking and tasting until they were just right. And I promise you, if you follow along with my little kitchen stories and tips, you’re going to end up with a batch of cookies that people will beg you to make again. So, tie on that apron, grab your favorite mixing bowl, and let’s turn your kitchen into the happiest, most lemony-smelling place on the block. Ready? Let’s bake some joy.
The Cookie That Started It All: A Tangy Tale
My love affair with lemon desserts started, ironically, with a pie. My grandma, who was a wizard with a rolling pin, used to make this legendary lemon meringue pie. The filling was so tart and bright it would make your cheeks tingle, and the meringue was a cloud of sweet perfection. As a kid, I’d sit at her kitchen counter, mesmerized, stealing swipes of leftover lemon curd with my finger. That perfect balance of sweet and sharp? It’s pure happiness.
But pie can be… a project. Years later, when I was first finding my feet in the kitchen (and burning my fair share of attempts), I wanted to capture that same sunny, tangy vibe in something simpler, something I could share easily. I started with a basic sugar cookie dough and thought, “What if we add some of that magic?” In went the cream cheese for richness, a generous glug of fresh lemon juice, and a whole lot of zest. The first batch was good. The fifth batch? That was the one. They puffed up like little pillows, had that signature melt-in-your-mouth texture, and carried that same punch of flavor that reminded me of Grandma’s counter. Now, every time I bake them, that zesty smell transports me right back. It’s my way of keeping that sweet, tangy memory alive—and sharing it with you.
Gathering Your Sunshine: The Ingredients (& Why They Matter)
Great cookies start with understanding your players. Here’s what you’ll need and my quick chef insights on each one. Trust me, these little notes make all the difference!
-
- ½ cup (1 stick) unsalted butter, softened: This is our flavor and tenderness foundation. Softened is key here—it should give slightly when you press it, not be melty. I leave mine on the counter for about 45 minutes before I start. Pro tip: If you forget, you can cut it into chunks; it’ll soften faster!
- 4 oz cream cheese, softened: The secret superstar! Full-fat cream cheese gives us that incredible tang and the soft, almost velvety crumb. Make sure it’s at room temperature too, or you’ll end up with lumpy dough. Block-style works better than the tub kind.
- 1 cup granulated sugar: For sweetness and structure. Creaming this with the butter and cream cheese creates tiny air pockets that help our cookies rise.
- 1 large egg: Our binder. It brings everything together and adds moisture. Crack it into a small bowl first to avoid any rogue shells!
- 2 tablespoons fresh lemon juice & 1 tablespoon lemon zest: This is the BRIGHT spot. Please, please use fresh lemons. The bottled stuff just doesn’t have the same vibrant punch. Zest your lemons first (the yellow part only, avoid the bitter white pith), then juice them. You’ll need about 1-2 large lemons for both.
- 1½ teaspoons vanilla extract: The flavor enhancer. It rounds out the citrus and adds a warm, cozy depth. Pure vanilla is always my go-to.
- 2¼ cups all-purpose flour: The backbone. I spoon and level my flour into the measuring cup to avoid packing it down, which can lead to dry cookies.
- ½ teaspoon baking powder & ¼ teaspoon baking soda: Our leavening dream team. The baking powder gives lift, and the baking soda helps with browning and spread. Yes, we need both!
¼ teaspoon salt: The flavor booster. It makes all the other flavors pop and balances the sweetness. Don’t skip it.
- Powdered sugar (optional): For the final snowy, pretty dusting. It adds a lovely visual touch and a whisper of extra sweetness.
Let’s Bake! Your Step-by-Step Guide to Cookie Perfection
Follow these steps, chat with me along the way, and you’ll have perfect cookies. I’m right here in the kitchen with you!
Step 1: Preheat & Prep. Fire up your oven to 350°F (175°C). This gives it time to get perfectly hot and even. Line your baking sheet with parchment paper. This isn’t just for easy cleanup—it prevents the bottoms from browning too fast. A little chef hack: if you don’t have parchment, a light coating of baking spray works, but parchment is king.
Step 2: The Creamy Foundation. In a large bowl, add your softened butter, cream cheese, and granulated sugar. Using a hand mixer or stand mixer fitted with the paddle, beat them together on medium speed for a good 2-3 minutes. We’re not just mixing; we’re creaming. You want it to become noticeably lighter in color, fluffy, and smooth. This incorporates air, which is your ticket to a soft, tender cookie. Scrape down the sides of the bowl once halfway through.
Step 3: Wake Up the Flavor. Beat in the egg, fresh lemon juice, lemon zest, and vanilla extract. Mix on medium until everything is fully combined and the mixture looks creamy and unified. Take a whiff—that amazing lemony aroma is your first reward!
Step 4: The Dry Team Unites. In a separate, medium bowl, whisk together your flour, baking powder, baking soda, and salt. This isn’t just busywork; whisking ensures the leaveners and salt are evenly distributed throughout the flour, so every cookie rises and tastes the same.
Step 5: Bring It All Together. With your mixer on low speed, gradually add the dry ingredients to the wet mixture. I add it in about three additions. Mix just until the flour disappears and a soft, cohesive dough forms. Do not overmix! Overworking the dough develops gluten and can make cookies tough. As soon as you don’t see dry flour, stop the mixer.
Step 6: The Chill Factor. This is the step that feels like a wait but is 100% worth it. Cover the bowl and pop the dough into the fridge for 30 minutes. Chilling firms up the fats, which prevents the cookies from spreading into flat pancakes in the oven. It also gives the flavors time to get to know each other. Use this time to wash up or enjoy a coffee!
Step 7: Scoop & Roll. Once chilled, use a cookie scoop or a tablespoon to portion out dough, about 1½ tablespoons each. Roll them gently between your palms into smooth balls. Place them on your prepared baking sheet, leaving about 2 inches between each cookie—they need room to puff up and spread a little.
Step 8: Bake to Puffy Perfection. Bake for 10-12 minutes. Here’s the visual cue: the edges will be lightly set, and the tops will look puffy and matte, with no browning. They might seem underdone, but that’s the secret to their softness. They firm up as they cool. If you wait for them to turn golden, they’ll be overbaked.
Step 9: The Patient Cool-Down. Let the cookies cool on the baking sheet for 5 full minutes. They’re too delicate to move right away. Then, transfer them gently to a wire rack to cool completely. Once cool, dust generously with powdered sugar if you like that snowy finish. Then, try to eat just one. I dare you.
How to Serve These Lemon Stars
Okay, you’ve got a plate of perfect, sunny cookies. Now, let’s make them shine! Personally, I love them just as they are with a hot cup of black coffee—the bitterness plays so nicely with the sweet-tangy cookie.
For a real showstopper, plate them on a simple white platter or a fun, vintage cake stand. That powdered sugar dusting looks gorgeous against a dark plate, too. If you’re feeling fancy, add a few thin curls of lemon zest or a tiny edible flower on the side for a pop of color.
These are the ultimate sharing cookie. Bring them to a potluck, pack them in a picnic basket, or leave them on the counter for your family to discover. They pair beautifully with afternoon tea, a glass of cold milk, or a scoop of vanilla bean ice cream sandwiched between two cookies for the ultimate lemon-cream dream. However you serve them, get ready for compliments!
Make It Your Own: Fun Flavor Twists!
Love the base recipe? Let’s play with it! Here are a few of my favorite “what if we tried this?” spins.
-
- Lemon Lavender: Add 1 teaspoon of culinary-grade dried lavender buds to the dry ingredients. It adds a beautiful floral note that’s surprisingly elegant with the lemon.
- Blueberry Lemon Thumbprints: Before baking, press your thumb gently into the center of each dough ball to make a well. Fill with a teaspoon of blueberry jam. Bake as directed for a fruity, jammy surprise.
Lemon Ginger Zing: Add 1 tablespoon of finely grated fresh ginger or 1 teaspoon of ground ginger to the wet ingredients. The spicy warmth of ginger and the bright lemon is an unforgettable combo.
- Glaze It Up: Skip the powdered sugar and drizzle with a simple lemon glaze. Whisk together 1 cup powdered sugar with 1½ tablespoons fresh lemon juice and a splash of vanilla until smooth. Drizzle over cooled cookies.
- Gluten-Free Swap: Use a 1:1 gluten-free all-purpose flour blend (like Bob’s Red Mill or King Arthur). The texture might be slightly more delicate, but they’ll still be delicious.
Jackson’s Chef Notes & Kitchen Stories
This recipe has been my faithful companion for years, and it’s evolved in my kitchen. The first time I made them, I was so eager I skipped the chill time. The result? Delicious, but flat, buttery puddles. Lesson learned! The chill is non-negotiable for that perfect puffy shape.
I also learned that the quality of your lemons makes a world of difference. Find the heaviest, brightest-skinned lemons you can—they’re the juiciest. And when life gives you leftover lemon halves after zesting and juicing, don’t toss them! Toss them in the disposal to freshen it up, or simmer them in a pot of water on the stove for a natural, amazing kitchen scent. Waste not, want not, right? Happy baking, friends.
FAQs: Your Questions, Answered
Q: My cookies spread too much and got flat. What happened?
A: The usual suspects are butter/cream cheese that was too warm or melted, or skipping/shortening the chill time. Make sure your ingredients are just softened, not greasy, and always chill the dough for at least 30 minutes. Also, double-check your oven temperature with a thermometer—an oven that runs cool can cause spreading.
Q: Can I make the dough ahead of time?
A: Absolutely! You can cover the dough tightly and refrigerate it for up to 2 days. Let it sit at room temp for 10-15 minutes before scooping if it’s very firm. You can also freeze scooped dough balls on a tray, then transfer to a bag. Bake from frozen, adding 1-2 minutes to the bake time.
Q: My cookies aren’t lemony enough! How can I boost the flavor?
A: I feel you! Lemon flavor can vary. Next time, add an extra tablespoon of zest. You can also add ¼ teaspoon of lemon extract (in addition to the vanilla) to the wet ingredients for a more concentrated punch. Always use fresh juice—it’s a game-changer.
Q: Can I use bottled lemon juice?
A> You *can*, but I really don’t recommend it for this recipe. Fresh lemon juice has a bright, vibrant acidity. Bottled juice often has a flat, sometimes metallic taste that just won’t give you that “sunshine in a bite” effect we’re going for.
Nutritional Info (Because We’re Curious!)
Here’s a general breakdown per cookie (based on a yield of 24, without optional powdered sugar). Remember, I’m a chef, not a nutritionist, but this gives you a good idea!
- Calories: 140
- Total Fat: 6g
- Saturated Fat: 3.5g
- Cholesterol: 20mg
- Sodium: 80mg
- Carbohydrates: 20g
- Sugars: 10g
- Protein: 2g
Prep Time: 15 min | Chill Time: 30 min | Bake Time: 10-12 min | Total Time: ~1 hour
Final Thoughts from My Kitchen to Yours
And there you have it, friends—my Soft Lemon Cream Cheese Cookies in all their bright, fluffy, sunshine-filled glory. These cookies are proof that sometimes the simplest ingredients, treated with a little care and a lot of love, can create something truly special. They’re cheerful without being flashy, comforting without being heavy, and just tangy enough to keep you reaching for another.
I love how these cookies fit into just about any moment. They’re elegant enough for a spring brunch, cozy enough for a quiet afternoon at home, and friendly enough to bring to a potluck where you want to share something that feels homemade in the best way. Every time I bake them, that lemony aroma fills the kitchen and instantly lifts my mood—and honestly, that alone makes them worth it.
If you give these a try, I’d love to hear how they turn out. Did you glaze them? Add blueberries? Go classic with powdered sugar? However you make them, I hope they bring a little brightness to your day and a lot of smiles to the people you share them with.
Until next time, keep baking with curiosity, cooking with heart, and always save room for cookies. 🍋🍪


