Let’s Bake Some Joy: The Ultimate Oatmeal Raisin Cookie
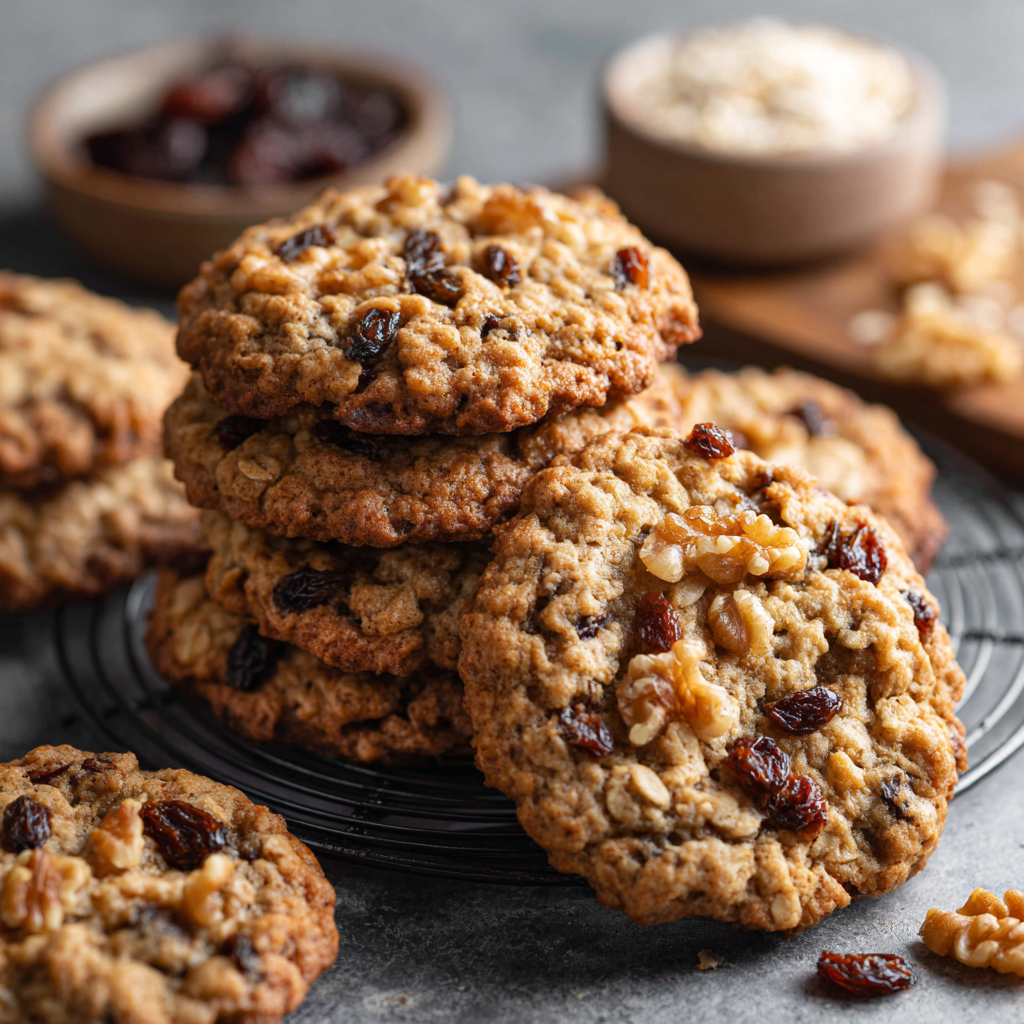
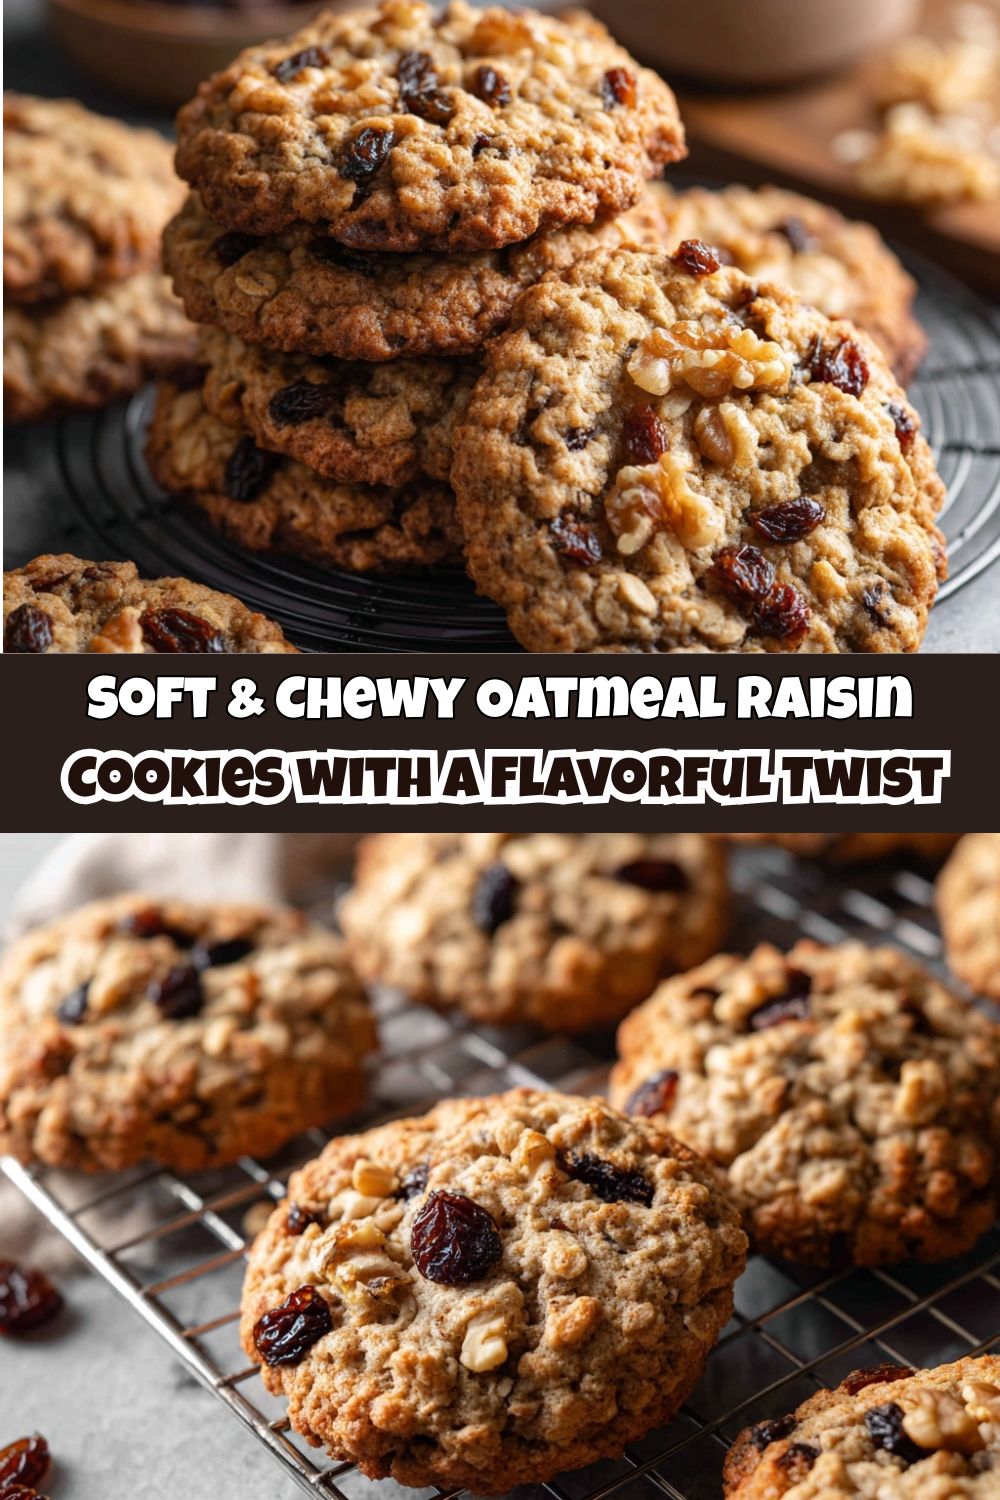
Hey friends, Jackson from Food Meld here! Let’s talk about one of life’s simple, soul-warming pleasures: a perfect oatmeal raisin cookie. I’m not talking about the dry, sad ones that get left in the cookie tin. I’m talking about a bakery-style masterpiece—crisp and golden around the edges, soft and chewy in the center, and packed with so much flavor that you’ll be hiding the batch from your family.
This recipe is my love letter to an old-fashioned classic. We’re keeping that comforting, heart-of-grandma’s-kitchen vibe but giving it a few of my signature “what if we tried this?” upgrades. A kiss of maple syrup for a deeper, richer sweetness, a bright spark of orange zest to make the cinnamon sing, and the optional (but highly recommended) crunch of toasted walnuts. This is the kind of cookie that turns a regular Tuesday into a small celebration.
I promise you, this isn’t a fussy, complicated recipe. It’s built for real life, for a bit of kitchen mess, and for that unbeatable feeling of pulling a tray of perfectly golden cookies out of your own oven. So, tie on your apron, preheat that oven, and let’s cook something awesome together. You’re about to make your new favorite cookie.
A Cookie That Tastes Like Home
Every time I smell cinnamon and toasting oats, I’m instantly ten years old again, sitting on a stool in my grandma’s kitchen in Georgia. Her house always had this magical, warm-baked scent, and her oatmeal cookies were legendary. She’d let me be the official “raisin adder,” which I took very seriously, and she always, always let me sneak a spoonful of the raw dough. (A chef’s secret indulgence, shhh.)
But my favorite memory is how she’d test for doneness. She never used a timer. She’d just peer through the oven window, wait for that perfect moment when the edges were just set and the centers were still puffed up and soft, and declare, “They’re ready for a hug.” She’d take them out and give the baking sheet a firm tap on the countertop, causing the cookies to deflate slightly into that ideal chewy texture. That “pan tap” is a move I still use today, and it’s the little hack that guarantees that perfect, soft-centered cookie. This recipe is her legacy, with just a few of my own flavorful twists mixed in.
Gathering Your Flavor Arsenal
Here’s everything you’ll need to create this cookie magic. I’ve included some of my favorite insights and swaps so you can make this recipe your own.
- 1½ cups butter, softened – This is the foundation of flavor and that dreamy, soft texture. “Softened” means it should give easily when you press it, but not be melted or greasy. Pro tip: if you’re in a hurry, cut it into tablespoons and let it sit for 15 minutes.
- 1 cup granulated sugar + 2 cups brown sugar – The dynamic duo! White sugar helps them spread and crisp up, while brown sugar brings that iconic molasses-y moisture and chew. Using both is non-negotiable for the perfect texture.
- 4 large eggs – They bind everything together and add richness. Make sure they’re at room temperature to cream beautifully with the butter and sugar.
- 2 tsp pure vanilla extract + 1 tbsp maple syrup – Vanilla is a given, but the maple syrup is our first flavor twist! It adds a warm, complex sweetness that pairs incredibly well with the oats and cinnamon.
- 4 cups all-purpose flour – The structure-builder. We’ll fluff it up in the bowl before measuring for accuracy.
- 2 tsp baking soda + 1 tsp salt – Baking soda gives them a great rise, and salt is the secret weapon that makes all the other flavors pop. Don’t you dare skip it!
- 1 tsp cinnamon + 1 tsp orange zest – Cinnamon is the cozy, familiar hug. The orange zest? That’s the “meld” magic. It brightens the entire cookie and cuts through the sweetness in the most delightful way.
- 6 cups old-fashioned rolled oats – The star of the show! Old-fashioned give you that wonderful chewy, hearty texture. Don’t use quick oats—they’ll make the cookies mushy.
- 3 cups raisins – For that classic, juicy burst in every bite. See the variations below for some fun swaps!
- 1 cup chopped walnuts (optional) – I love the textural contrast and toasty flavor. If you’re not a nut person, just leave ’em out!
Let’s Make Some Cookie Magic: Step-by-Step
Okay, team. Let’s do this. It’s a simple process, but a few key steps make all the difference between a good cookie and a great one.
- Preheat and Prep. Get that oven roaring to a nice 350°F (175°C). Line your baking sheets with parchment paper. This isn’t just for easy cleanup; it prevents the bottoms from over-browning. Chef’s Hack: If you don’t have parchment, you can use a silicone baking mat or even just give the pan a very light greasing.
- The Creaming Method is Key. In a large bowl, cream together the softened butter, granulated sugar, and brown sugar. Use an electric mixer (or some serious elbow grease) and beat it for a good 2-3 minutes until it’s light, pale, and fluffy. This step incorporates air, which is what gives our cookies a lovely lift. Don’t rush this!
- Combine the Wet Team. Beat in the eggs, one at a time, letting each one fully incorporate before adding the next. This prevents the batter from breaking. Then, mix in the vanilla and that glorious maple syrup. Your kitchen should already be smelling incredible.
- Whisk the Dry Crew. In a separate bowl, whisk together the flour, baking soda, salt, cinnamon, and orange zest. Whisking is important here—it ensures the leavening and salt are evenly distributed so every cookie bakes up perfectly.
- Bring It All Together. Gradually add the dry ingredients to the wet mixture, mixing on low speed just until the flour disappears. Now, switch to a sturdy spatula or wooden spoon and stir in the oats, raisins, and walnuts. The dough will be thick and hearty—that’s exactly what we want! Chef’s Note: If the dough feels too stiff, you can use your hands to mix in the last of the oats. Get in there and feel the texture!
- Scoop and Space. Drop the dough by rounded tablespoons onto your prepared baking sheets, leaving about 2 inches between them. These cookies need room to spread and breathe. For a super pro look, you can gently roll the scoops into rough balls.
- Bake to Perfection. Bake for 10-12 minutes. You’re looking for golden edges and centers that are just barely set and still look a little soft. They might even seem slightly underdone, but trust me, they are perfect. This is the secret to a soft, chewy center. Grandma’s Hack: Right when they come out, lift the pan a few inches and gently drop it onto the stovetop. This “pan tap” makes them deflate slightly and creates that perfect chewy texture.
- The Cool Down. Let the cookies cool on the hot baking sheet for 5 minutes. This allows them to set up enough to move without falling apart. Then, transfer them to a wire rack to cool completely. The hardest part? Resisting the urge to eat them all while they’re still warm.
How to Serve These Beauties
Okay, you’ve survived the wait. Now, how do you enjoy the fruits of your labor? Let me count the ways.
The absolute, number-one, cannot-be-beat way to eat one of these cookies is still slightly warm from the oven, maybe even with a little melted butter on top if you’re feeling decadent. The chocolate chips (if you went that route, you rebel) will be gloriously gooey.
For the full experience, place a couple on a small plate and serve them alongside a tall, ice-cold glass of milk. I’m a whole milk guy for dunking—it’s rich enough to stand up to the cookie. Or, take it to the next level with a hot cup of coffee. Dunking one of these spicy, chewy cookies into a dark roast is a little slice of heaven.
These also make a phenomenal gift! Let them cool completely, then stack them in a cellophane bag tied with a ribbon, or layer them in a tin between sheets of parchment. A homemade gift like this says “I care about you” more than anything store-bought ever could.
Mix It Up! Your Cookie, Your Rules
This recipe is a fantastic canvas for your own creativity. Here are a few of my favorite twists to get you started:
- Chocolate Chip Oatmeal Cookies: Swap the raisins for 2 cups of semi-sweet chocolate chips. It’s a classic for a reason. Sometimes I do half raisins, half chocolate for the best of both worlds.
- Cranberry Orange Delight: Replace the raisins with dried cranberries and bump the orange zest up to 1 ½ teaspoons. This combo is bright, tart, and perfect for the holidays.
- Coconut Lover’s Dream: Stir in 1 cup of shredded coconut along with the oats. It adds a wonderful tropical chewiness that’s just divine.
- Spiced Apple Twist: Fold in 1 cup of finely chopped, peeled apple (like Granny Smith) and add ½ teaspoon of nutmeg to the dry ingredients. It’s like apple pie in cookie form.
- Gluten-Free & Vegan Friendly: Use a 1:1 gluten-free flour blend and certified GF oats. For vegan, use plant-based butter, flax eggs (1 tbsp ground flax + 3 tbsp water per egg), and ensure your sugar is vegan.
Jackson’s Kitchen Confidential
This recipe has been a living, evolving thing in my kitchen for years. The orange zest was a happy accident one day when I was zesting an orange for a cocktail and some fell into the mixing bowl. The result was so good it instantly became a staple.
A funny story: I once, in a pre-coffee haze, accidentally used baking powder instead of baking soda. The cookies spread into one giant, thin, cake-like cookie sheet. It was a disaster… but you know what? We broke it into pieces, called it “Oatmeal Raisin Brittle,” and ate it over ice cream. There are no real mistakes in the kitchen, just unplanned recipe variations!
One last pro-tip: The dough freezes beautifully. Scoop it into balls, freeze them on a sheet pan, then toss them into a freezer bag. You can bake frozen cookie dough balls anytime a craving strikes—just add 1-2 minutes to the baking time.
FAQs & Cookie Rescue
Q: My cookies came out flat. What happened?
A: The usual suspects are over-softened or melted butter, or your baking soda might be old. Make sure your butter is just soft to the touch, not greasy, and check the expiration date on your leavening agents. Chilling the dough for 30 minutes before baking can also help prevent overspreading.
Q: Can I make the dough ahead of time?
A: Absolutely! I do this all the time. Cover the bowl and refrigerate it for up to 48 hours. The flavor actually deepens as it rests. Just let it sit at room temp for 15-20 minutes before scooping if it’s too firm.
Q: My cookies are too cakey. How do I get them chewier?
A: Cakey cookies can happen if you over-measured the flour. The best way to measure flour is to fluff it with a spoon, spoon it into your measuring cup, and level it off with a knife. Also, make sure you’re not over-mixing once the flour is added.
Q: The raisins are dry/hard. Any tips?
A: Great question! For super plump, juicy raisins, you can plump them up before adding. Just soak them in hot water (or even better, hot tea or orange juice!) for 10 minutes, then drain and pat them dry before mixing in.
Nutritional Info (The Fun Part)
Okay, let’s talk real quick about what’s in these delicious bites. Remember, this is a treat, and it’s all about balance! (Note: These are approximate values and can vary based on specific ingredients and serving size.)
Per Cookie (approximate):
Calories: 180 | Protein: 2g | Fat: 8g | Carbs: 26g | Fiber: 2g
These cookies pack a decent fiber punch thanks to the heart-healthy oats and raisins, which is a nice bonus. The fats come primarily from the butter and walnuts, providing energy and helping you feel satisfied. They’re a wholesome-ish indulgence that’s far better than anything you’d grab from a vending machine. So, enjoy one (or two!) with a clear conscience.
Your New Go-To Cookie Recipe
And there you have it! Your journey to oatmeal raisin cookie nirvana is complete. This recipe is built for comfort, for sharing, and for those moments when you just need a little homemade happiness.
I hope this becomes a staple in your kitchen, just like it is in mine. Don’t be afraid to play with it, make it your own, and create some new kitchen stories. That’s what Food Meld is all about.
If you make them, I’d love to see your creations! Tag me on social @FoodMeld and use the hashtag #FoodMeld so I can cheer you on. Now go forth, bake with confidence, and enjoy every single, unforgettable bite. Talk soon!
– Jackson


