Forget Takeout: Your Hibachi Adventure Starts Now!
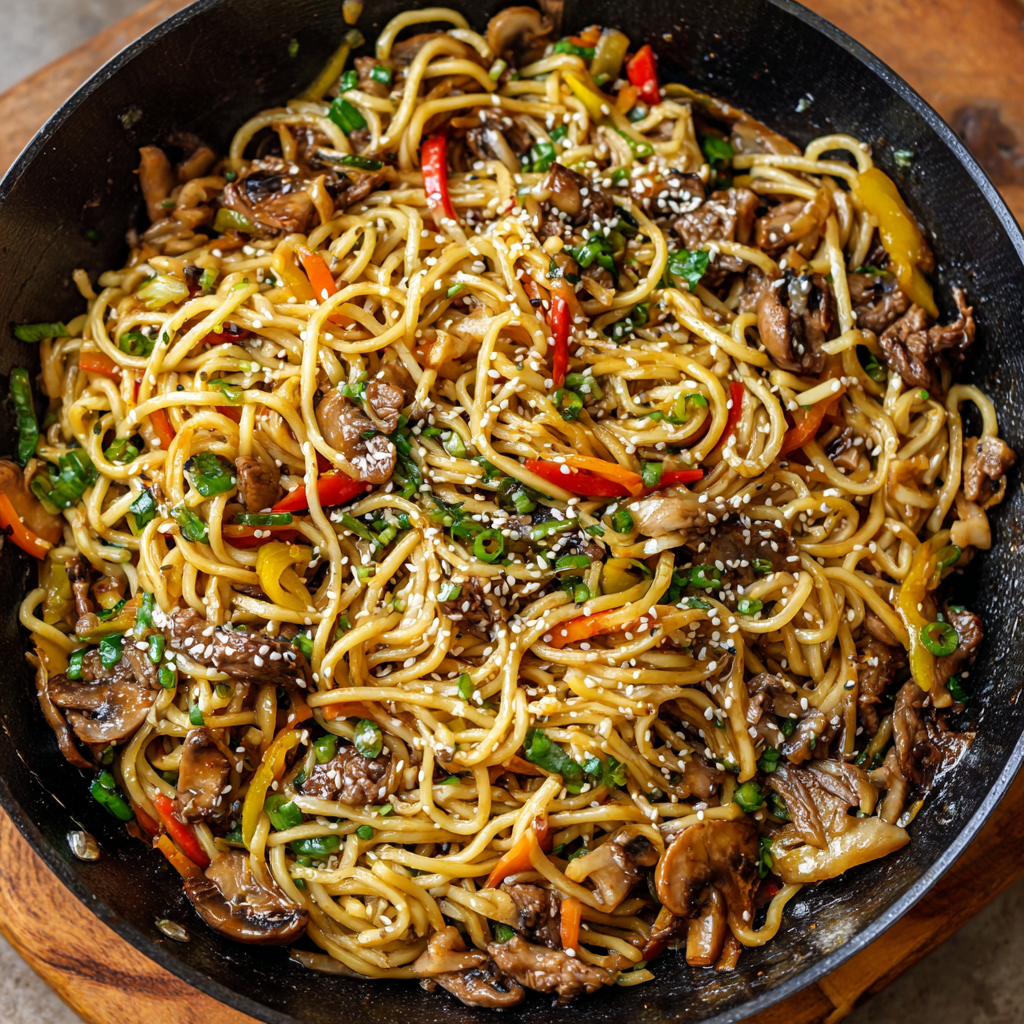
Hey there, Food Meld family! Jackson here. Let me paint a picture for you: the sizzle of a hot grill, the incredible aroma of garlic and soy sauce dancing in the air, a chef flipping shrimp tails into their hat with a mischievous grin, and a towering pile of those irresistible, buttery, savory-sweet hibachi noodles landing right on your plate. It’s a full-on experience, right? It’s dinner and a show.
But let’s be real. We can’t all jet off to our favorite Japanese steakhouse every time that craving hits. Sometimes, a Tuesday night just feels like a Tuesday night, and you need a hero to swoop in and save dinner from the mundane. Well, consider this recipe your cape.
I’m about to show you how to whip up a massive platter of Savory Hibachi Noodles that are so good, they’ll make you forget all about reservations. The best part? We’re doing it in 25 minutes flat, with ingredients you probably already have in your pantry. This isn’t about complicated techniques or hard-to-find ingredients; it’s about unlocking that “wow” factor on a regular weeknight. We’re bringing the show to your kitchen, and you’re the star chef. So, grab your favorite skillet, and let’s turn up the heat and create some magic together!

The Night I Realized Magic Was Just Butter and Soy Sauce
This recipe takes me right back to my college days. My buddy Mark and I were broke, but we’d save up our loose change for months to celebrate the end of finals at this legendary local hibachi spot. We’d sit at that giant grill, stomachs growling, watching the chef perform what seemed like culinary wizardry. When that mountain of noodles finally hit our plates, we’d practically inhale it. It was the ultimate comfort food.
One night, driving home in a blissful food coma, we had a revelation: “We have to figure out how to make those noodles.” The next day, our kitchen looked like a flavor lab experiment gone wrong. Bottles of soy sauce, different sugars, and about five sticks of butter later… we finally nailed it. That first successful bite, right out of our own dingy college skillet, tasted like victory. It was the moment I truly understood that the most “magical” restaurant flavors are often just a few simple, good ingredients, combined with a little bit of courage. This recipe is that victory, perfected over the years and now passed on to you.
Gathering Your Flavor Power-Ups
This is where the fun begins! Here’s your shopping list for flavor town. Don’t stress if you need to make a swap—I’ve got your back with some easy alternatives.
- 1 lb. Linguine or Noodles of Choice: I love linguine because its flat surface grabs onto the sauce beautifully. But this is a no-judgment zone! Spaghetti, fettuccine, or even udon noodles work fantastically. The key is to cook them al dente—they’ll finish cooking in the sauce and won’t get mushy.
- 3 Tablespoons Butter: This is the soul of the dish, giving it that rich, creamy, and unmistakably “hibachi” flavor. For a deeper note, try using half butter and half avocado or vegetable oil.
- 1 Tablespoon Garlic, Minced: Fresh is best here, friends! That punchy, aromatic fragrance is non-negotiable. In a pinch, ¾ teaspoon of garlic powder will do, but fresh really makes it sing.
- 3 Tablespoons Sugar: This is our secret weapon for that signature sweet-savory glaze. It caramelizes with the soy sauce to create something incredible. For a healthier twist, you can use coconut sugar or even a splash of maple syrup.
- 4 Tablespoons Soy Sauce: The backbone of our savory flavor. If you’re gluten-free, tamari or coconut aminos are perfect 1:1 substitutes. Low-sodium soy sauce works great, too, if you’re watching your salt intake.
- 1 Tablespoon Teriyaki Sauce: This little addition adds a layer of complexity and a touch of sweetness that pushes the flavor over the top. If you don’t have any, just add an extra teaspoon of soy sauce and an extra half teaspoon of sugar.
- Salt and Pepper to Taste: Season as you go! I always add a crack of black pepper with the garlic—it wakes up the flavors.
- 1 Tablespoon Sesame Oil: Do NOT cook with this! We drizzle it in at the very end. Toasting the sesame seeds unlocks a nutty, profound flavor that is the finishing touch. This is my chef’s kiss in a bottle.
- 1 Tablespoon Sesame Seeds: A sprinkle for garnish adds a lovely little crunch and visual pop. Toast them in a dry pan for a minute until golden for an even bigger flavor boost!
Let’s Cook! Your Step-by-Step Flavor Journey
Alright, team, fire up the stove! This is where we turn simple ingredients into a masterpiece. Read through these steps once before you start—it’s like having a game plan for the big match.
- Noodle Prep is Key: First things first, get a large pot of well-salted water boiling and cook your noodles according to the package directions, but aim for al dente (that means they should still have a slight bite to them). Once cooked, drain them, but do NOT rinse them! That starchy coating helps the sauce cling to every strand. A little chef hack? Toss the drained noodles with a tiny bit of oil to prevent sticking while you prepare the sauce.
- Butter & Garlic Foundation: Place your largest skillet or wok over medium-high heat. Add the butter and let it melt and get a little foamy. Now, toss in your minced garlic (and that crack of black pepper I mentioned!). We’re not looking to brown the garlic, just wake it up. Sauté for about 60 seconds until your kitchen smells like heaven. You’ll know it’s ready.
- The Big Toss: Carefully add your cooked and drained noodles to the skillet. Using a pair of tongs is your best friend here—toss and stir to coat every single noodle in that glorious, garlicky butter. Get in there and make sure everyone in the pool is having a good time.
- Create the Glaze: This is the magic moment! Sprinkle the sugar evenly over the noodles, then pour in the soy sauce and teriyaki sauce. Now, toss, toss, TOSS! Keep everything moving for a couple of minutes. You’ll see the sauce start to bubble, thicken, and turn into a beautiful, glossy glaze that coats the noodles perfectly. This is the transformation!
- Season and Taste: Now, do a taste test. This is the most important step! Does it need a pinch of salt? A bit more pepper? Adjust to your liking. Remember, you’re the chef of your kitchen.
- The Finishing Touch: Remove the skillet from the heat. Now, drizzle that precious sesame oil over everything. Giving it one final, vigorous toss to distribute that incredible nutty aroma throughout the entire dish.
- Plate and Garnish: Pile those gorgeous, glistening noodles high onto a platter or into bowls. Give them a generous sprinkle of sesame seeds for that final bit of texture and flair. And just like that, you’ve done it!
How to Serve Your Hibachi Masterpiece
Presentation is part of the fun! You’ve just made something incredible—let’s show it off. I love serving this family-style, right in the middle of the table. Pile the noodles high on a big platter, letting them cascade down. That glossy sheen and sprinkle of sesame seeds will have everyone reaching for their forks.
Of course, these noodles are a star all on their own for a quick lunch or a lazy dinner. But if you want to go full hibachi-house at home, pair them with some simple grilled chicken skewers, seared shrimp, or pan-fried steak bites. A side of my Easy Crispy Roasted Broccoli or a quick cucumber salad with rice vinegar is the perfect fresh counterpoint to the rich, savory noodles. Don’t forget the extra soy sauce and a dollop of yum yum sauce on the side for dipping!
Mix It Up! Creative Twists on the Classic
Once you’ve mastered the base recipe, the playground is open! Here are a few of my favorite ways to mix it up and make it yours.
- The Veggie Lover’s Load-Up: Add a colorful stir-fry of vegetables directly after sautéing the garlic. Thinly sliced onions, matchstick carrots, zucchini, and mushrooms are all fantastic. Sauté them until tender-crisp before adding the noodles.
- Spicy Garlic Yum Yum: Kick up the heat! Add 1-2 teaspoons of Sriracha or a sprinkle of red pepper flakes to the sauce mixture. A little minced ginger with the garlic takes it to another level.
- Protein Power Bowl: Turn this side into a main event. Stir in 2 cups of shredded rotisserie chicken, thinly sliced steak, or a bunch of peeled shrimp right after you’ve made the glaze. Let it heat through before the sesame oil step.
- The Ginger-Zest Boost: Add 1 teaspoon of freshly grated ginger along with the garlic. Right at the end, finish with a squeeze of fresh lime juice and some chopped green onions for a bright, zingy finish.
- Gluten-Free & Vegan Delight: It’s easily adaptable! Use your favorite gluten-free pasta, swap the butter for vegan butter or coconut oil, and use tamari instead of soy sauce. It’s just as delicious!
Jackson’s Kitchen Notes & Stories
This recipe has been with me for years, and it’s evolved in the best ways. I once made a triple batch for a last-minute potluck and transported it in a, get this, clean flower pot liner because it was the only thing big enough! It was the talk of the party, and nobody knew their noodles came from a “planter.”
The biggest lesson I’ve learned? Don’t be afraid of the sugar. It’s not meant to make the noodles sweet; it’s there to caramelize and create that deep, complex, umami-rich glaze that defines the dish. Trust the process! This is a recipe that encourages playing, so make it once as written, then go wild and add your own signature spin.
Your Questions, Answered!
I’ve gotten a lot of questions about this recipe over the years. Here are the answers to the most common ones to ensure your success!
Q: My noodles turned out a bit sticky/clumpy. What happened?
A: This usually means the skillet wasn’t hot enough when you added the sauce, or there wasn’t enough fat. Make sure your pan is on a solid medium-high heat so the sauce sizzles and reduces immediately. If it seems dry, don’t hesitate to add another tablespoon of butter when you’re tossing everything together. Also, ensure you didn’t rinse the noodles—that starch is your friend!
Q: Can I make this ahead of time?
A: You can! It’s best fresh, but it reheats surprisingly well. Store it in an airtight container in the fridge for up to 3 days. Reheat it in a skillet over medium heat with a tiny splash of water or broth to loosen the sauce. The microwave works too, but the skillet will help restore that perfect texture.
Q: Is there a low-carb alternative to pasta?
A> Absolutely! Spiralized zucchini or yellow squash (zoodles) are a great option. The key is to salt them and let them drain in a colander for 20 minutes to remove excess water, then pat them dry. Sauté them quickly in the butter/garlic mixture just until tender, then proceed with the sauce. You won’t need to cook them for long! Shirataki noodles are another excellent low-carb choice.
Q: My sauce didn’t get very “glazy.” How can I fix that?
A: No worries! This often means there was too much residual water on the noodles. Next time, make sure your noodles are very well-drained. If it’s happening in the moment, just let the noodles cook in the sauce for another minute or two over the heat, tossing constantly, until the liquid reduces and coats the noodles beautifully.
Let’s Talk Nutrition (The Real Talk)
I’m all about balance. This is a comforting, carb-forward dish that’s perfect for when you need a big, satisfying flavor hit. It’s not a “diet” food, and I’d never pretend it is! But it’s made with real, simple ingredients you can feel good about.
A standard serving provides a good amount of energy (carbs) from the pasta, and the fat from the butter and oil helps carry the flavors and keep you full. To make it a more balanced meal, I always recommend loading it up with lean protein and veggies (see the variations above!). Think of this as an incredible base—a canvas for you to add color, protein, and whatever makes your body and taste buds happy.
You Did It! Now, Go Forth and Cook
And there you have it! You’ve just unlocked the secret to ridiculously good, restaurant-quality hibachi noodles right in your own kitchen. No fancy equipment, no years of training—just a handful of simple ingredients and the courage to try something new.
I hope this recipe becomes a trusted friend in your weekly rotation, a lifesaver on busy nights, and a reminder that incredible food doesn’t have to be complicated. It should be fun, a little messy, and always, always packed with flavor.
I’d love to hear how it turned out for you! Did you add extra garlic? Throw in some shrimp? Tag me on social @FoodMeld and show me your creations. Let’s keep the conversation going. Until next time, keep cooking, keep experimenting, and most importantly, enjoy every single bite.
Your friend in the kitchen,
Jackson


