Salted Peanut Cookies: Your New Favorite Sweet & Salty Crunch
Hey friends, Jackson here from Food Meld. Let’s talk about one of life’s greatest simple pleasures: a truly incredible cookie. I’m not talking about a dainty, perfectly-iced little thing. I’m talking about a cookie with some personality. A cookie that’s got a little crunch, a little chew, a little chocolatey river running through it, and that magical, can’t-put-your-finger-on-it quality that makes you go back for just one more… and then maybe another.
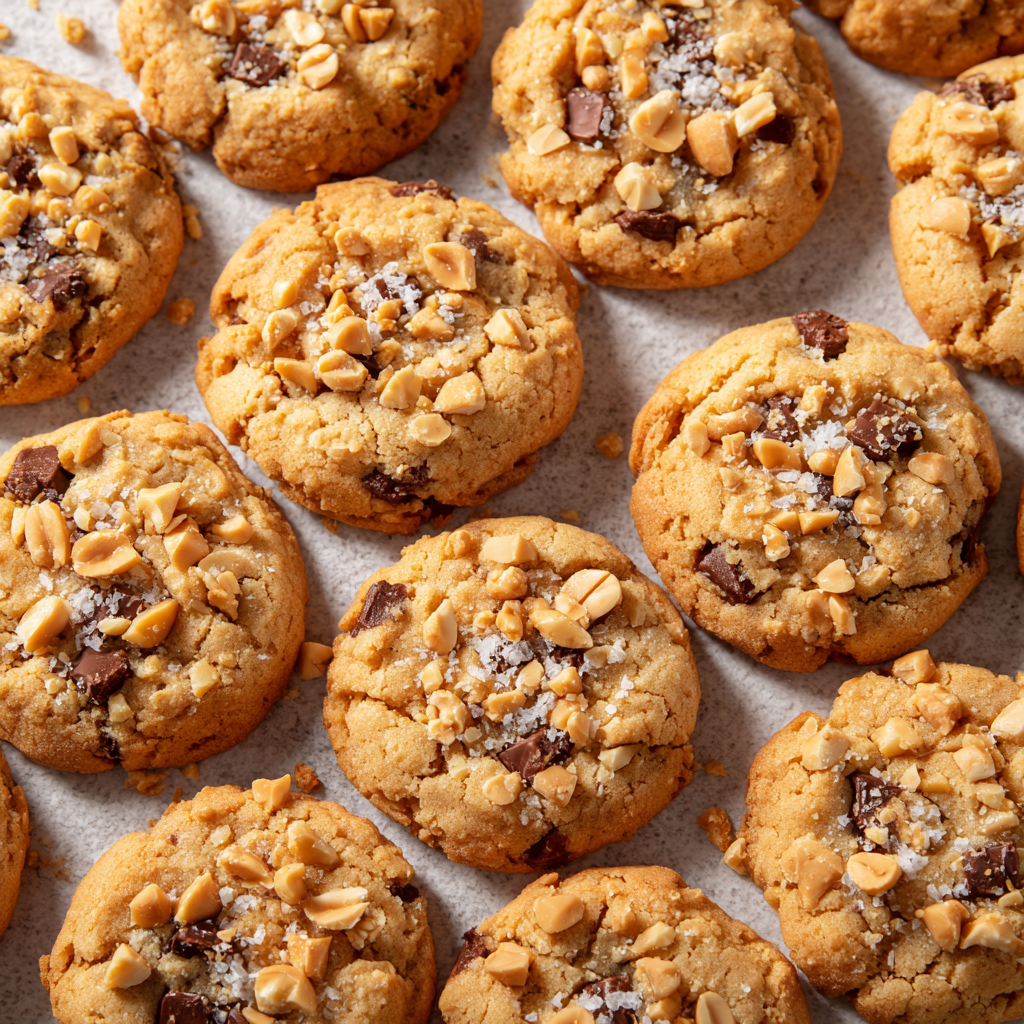
That, my friends, is the power of the Salted Peanut Cookie. This isn’t just another peanut butter cookie. Oh no. We’re using actual salted peanuts right in the dough, alongside pools of melted semisweet chocolate. The result? A cookie that’s a full-on flavor party in your mouth. You get the crispy, buttery edges, the tender center, the satisfying crunch of peanuts, and that perfect hit of sweet-and-salty in every single bite.
I see you there, maybe a little intimidated by baking from scratch. Trust me, I get it. But this recipe? This is your new best friend. It’s straightforward, uses simple ingredients, and is practically foolproof. We’re going to mix, drop, and bake our way to cookie heaven. So, tie on that apron, clear some counter space, and let’s make a batch of cookies that’ll have everyone in your house asking, “What’s that amazing smell?” Let’s cook something awesome together.

The Cookie Jar of My Childhood
This recipe takes me straight back to my grandma’s kitchen in Georgia. Her cookie jar was never one of those fancy, for-show pieces. It was a beat-up old ceramic pig with a chipped ear, and it was always, always full. But my favorite was when she’d make what she called her “Knock-Your-Socks-Off Peanut Cookies.”
The whole house would smell like toasted nuts and brown sugar. My brother and I would hover around the kitchen table, waiting for that first tray to come out of the oven, the chocolate chips still glistening and gooey. She’d always let us “test” one while it was still dangerously warm, and we’d burn our tongues every single time, but it was absolutely worth it. That combination of the salty, crunchy peanut and the sweet chocolate felt so rebellious and fun. It was more than a cookie; it was a little moment of joy. This is my version of her legendary recipe, tweaked just a bit over the years, but still holding onto all that nostalgic, “knock-your-socks-off” magic.
Gathering Your A-Team: The Ingredients
Simple ingredients, big flavor. That’s the Food Meld motto. Here’s everything you’ll need to make about 10 dozen of these glorious cookies. (Don’t worry, they freeze beautifully! Or, you know, you could just have a lot of happy friends.)
- 1½ cups Shortening: This is our secret weapon for an extra-crispy edge and a tender, cakey center. Butter can make cookies spread more and become flatter, but shortening gives us that perfect puff and crunch. If you’re a butter purist, you can swap it 1:1, but I highly recommend trying it with shortening first for that classic texture.
- 1 cup Granulated Sugar & 1 cup Packed Brown Sugar: The dynamic duo! White sugar gives us that lovely crispness, while the brown sugar (make sure you pack it tight!) brings that deep, molasses-y moisture and chew. Together, they create the perfect cookie foundation.
- 3 Eggs: Our binding agents, bringing everything together and adding richness. Pro tip: use room-temperature eggs if you can remember to take them out ahead of time—they incorporate into the dough much more smoothly.
- 1 tsp Vanilla Extract: The flavor enhancer. It might seem small, but a good quality vanilla adds a warm, aromatic depth that makes the chocolate and peanuts sing.
- 3¾ cups All-Purpose Flour: The backbone of our cookie. I like to fluff my flour up in the container before scooping and leveling it off with a knife. This prevents you from accidentally using too much and ending up with dry cookies.
- 2 tsp Baking Soda & 1 tsp Salt: Don’t forget the salt! It’s crucial for balancing all that sweetness. The baking soda is our leavening agent, giving the cookies their perfect lift and spread.
- 1½ cups Salted Peanuts & 1½ cups Semisweet Chocolate Chips: The stars of the show! Using salted peanuts is non-negotiable for that sweet-and-salty vibe. For the chocolate, I love semisweet for its balanced flavor, but feel free to use milk chocolate if you have a serious sweet tooth, or dark chocolate for a more grown-up, intense bite.
Let’s Get Baking: The Step-by-Step Magic
Ready to see some magic happen? Follow these steps, and you’ll be a cookie hero in no time. I’ve sprinkled in my favorite chef hacks to make sure you get perfect results every single time.
- Preheat your oven to 350°F (175°C). This is step one for a reason! You want your oven fully heated and ready to go so your cookies bake evenly from the second they hit the rack. While it’s heating, grease your baking sheets or line them with parchment paper. (My personal hack: parchment paper. It makes cleanup a dream and prevents any sticking.)
- In a large bowl, cream together the shortening, granulated sugar, and brown sugar. Now, “creaming” sounds fancy, but it just means beating them together until the mixture is light, pale, and fluffy. This is where you build the cookie’s texture. I use a hand mixer for about 2-3 minutes on medium speed. You’ll actually see it change color and get airy! This step is key for that perfect tender crumb.
- Add the eggs one at a time, beating well after each addition. Then, stir in the vanilla. Adding the eggs one by one allows them to fully emulsify into the fat and sugar, creating a smooth, cohesive dough. Scrape down the sides of the bowl with a spatula to make sure everything is getting mixed in evenly.
- In a separate bowl, whisk together the flour, baking soda, and salt. Why whisk? It evenly distributes the baking soda and salt throughout the flour, so you don’t get a bitter bite of baking soda in one cookie and none in another. It’s a tiny step that makes a big difference.
- Gradually blend the dry ingredients into the creamed mixture. I usually add the flour mixture in about three parts, mixing on low speed until just combined. Don’t overmix here! Once you no longer see streaks of flour, stop. Overmixing develops the gluten in the flour and can lead to tough cookies.
- Stir in the salted peanuts and semisweet chocolate chips. This is the fun part! Switch to a sturdy spatula or wooden spoon and fold in those glorious peanuts and chocolate chips. Make sure they’re evenly distributed so every cookie gets its fair share of goodies.
- Drop the dough by rounded tablespoonfuls onto your prepared baking sheets, spacing them about 2 inches apart. I use a small cookie scoop for this—it keeps the size uniform so they all bake at the same rate. That 2-inch space is important; these guys need room to spread and puff up!
- Bake for 10–12 minutes, or until the edges are lightly golden brown. The centers might still look a little soft and underdone, but that’s perfect! They will continue to cook on the hot baking sheet as they cool, giving you a crispy edge and a soft, chewy center. This is the secret to bakery-style cookies at home.
- Let the cookies cool on the baking sheet for 5 minutes before transferring them to a wire rack to cool completely. I know it’s tempting to eat them right away (and you totally should have one warm!), but this resting time on the pan lets them set up so they don’t fall apart when you move them.
How to Serve These Cookie Superstars
Okay, you’ve baked the perfect batch. Now, how do you serve them? Let’s get creative!
The classic way is, of course, piled high on a plate with a tall glass of ice-cold milk. It’s a timeless combo for a reason. But let’s kick it up a notch. For a next-level dessert, crumble a warm cookie or two over a scoop of high-quality vanilla bean ice cream. The contrast of hot and cold, crunchy and creamy, is absolutely mind-blowing.
Hosting a party? Stack them on a cute cake stand for a casual, help-yourself vibe. They’re also the perfect cookie to pack in a lunchbox (a little surprise to make anyone’s day) or to bring to a potluck—they travel like a dream and are always the first to disappear. Honestly, the best way to serve them is with a big smile, straight from your kitchen to the people you love.
Make It Yours: Fun Recipe Twists
Once you’ve mastered the classic, it’s time to play! Here are a few of my favorite ways to mix things up.
- Peanut Butter Cup Explosion: Swap out the chocolate chips and peanuts for 2 cups of chopped peanut butter cups. You get that same peanut-chocolate magic but with a gooey, melty center.
- The “Everything” Cookie: Feeling adventurous? Reduce the peanuts to 1 cup and add ½ cup of rolled oats and ½ cup of sweetened shredded coconut. You get more texture and a fantastic, almost tropical twist.
- Dark Chocolate & Sea Salt: For a more sophisticated cookie, use dark chocolate chunks instead of semisweet chips. Right when the cookies come out of the oven, give them a very light sprinkle of flaky sea salt. It amplifies the salty-sweet thing to the max.
- Gluten-Free Goodness: No problem! Simply replace the all-purpose flour with a 1:1 gluten-free baking blend. I’ve had great results with this swap, and the cookies turn out just as deliciously crunchy and tender.
Jackson’s Chef’s Notes & Kitchen Stories
This recipe has been a work in progress for years. My grandma’s original actually used butter and no chocolate chips—can you imagine? I added the chocolate early on after a “what if we tried this?” moment that, frankly, was a total game-changer. The first time I made them for a big family reunion, my uncle ate four in a row and then tried to sneak the whole plate into his car “for the road.” I consider that the highest form of praise.
One thing I’ve learned: the dough is surprisingly forgiving. If you’re in a rush, you can absolutely bake them right away. But if you have the time, chilling the dough for 30-60 minutes will give you a slightly thicker, chewier cookie. It’s a tiny step with a big payoff. Most of all, have fun with it. Baking is supposed to be a joy, not a stress.
Your Questions, Answered!
Got a baking question? I’ve probably heard it. Here are the answers to the most common ones.
Q: My cookies spread too much and got really flat. What happened?
A: This is usually one of two things! First, your baking soda might be old. It loses its potency over time. Second, your dough might have been too warm. If your kitchen is hot or you used melted butter instead of shortening, the fat spreads before the cookie has time to set. Try popping the dough in the fridge for a bit before baking.
Q: Can I freeze the cookie dough?
A: Absolutely! This is one of my favorite meal prep tricks. Scoop the dough into balls, place them on a baking sheet, and freeze until solid. Then, toss the frozen dough balls into a zip-top bag. You can bake them straight from frozen—just add 1-2 minutes to the baking time. Fresh, warm cookies on demand!
Q: My cookies are too cakey. How do I get them chewier?
A: A cakey texture often comes from too much flour. Next time, try fluffing your flour and then spooning it gently into your measuring cup before leveling it off. Don’t scoop the cup directly into the flour bag, as it packs it down. Using an extra ¼ cup of brown sugar can also promote chewiness.
Nutritional Info (For Your Inner Foodie)
Hey, we’re all about balance here at Food Meld. While these cookies are a treat, it’s always good to know what you’re enjoying. This is a general breakdown per cookie (and with a yield of about 10 dozen, they’re perfectly portioned for a little indulgence).
- Calories: ~120
- Fat: 6g
- Carbohydrates: 15g
- Sugar: 9g
- Protein: 2g
- Fiber: <1g
- Sodium: ~90mg
Remember, these are estimates and can vary based on the specific brands of ingredients you use. My philosophy? Enjoy a couple of cookies mindfully, savor every bite, and don’t sweat the small stuff. Life’s too short not to have a great cookie now and then.
Final Thoughts: Let’s Keep the Conversation Going!
And there you have it! My all-time favorite Salted Peanut Cookie recipe. It’s a cookie that’s seen me through childhood summers, late-night study sessions, and countless happy gatherings around my own kitchen table. I hope it brings just as much joy and flavor to your home.
The best part about a recipe like this is that it becomes yours. You tweak it, you add your own twists, and you share it with the people you care about. That’s what Food Meld is all about.
I’d love to hear how your cookies turn out! Did you add a twist? Did your family go crazy for them? Tag me on social @FoodMeld or drop a comment below and tell me all about your baking adventure. Until next time, happy baking, friends!
— Jackson


