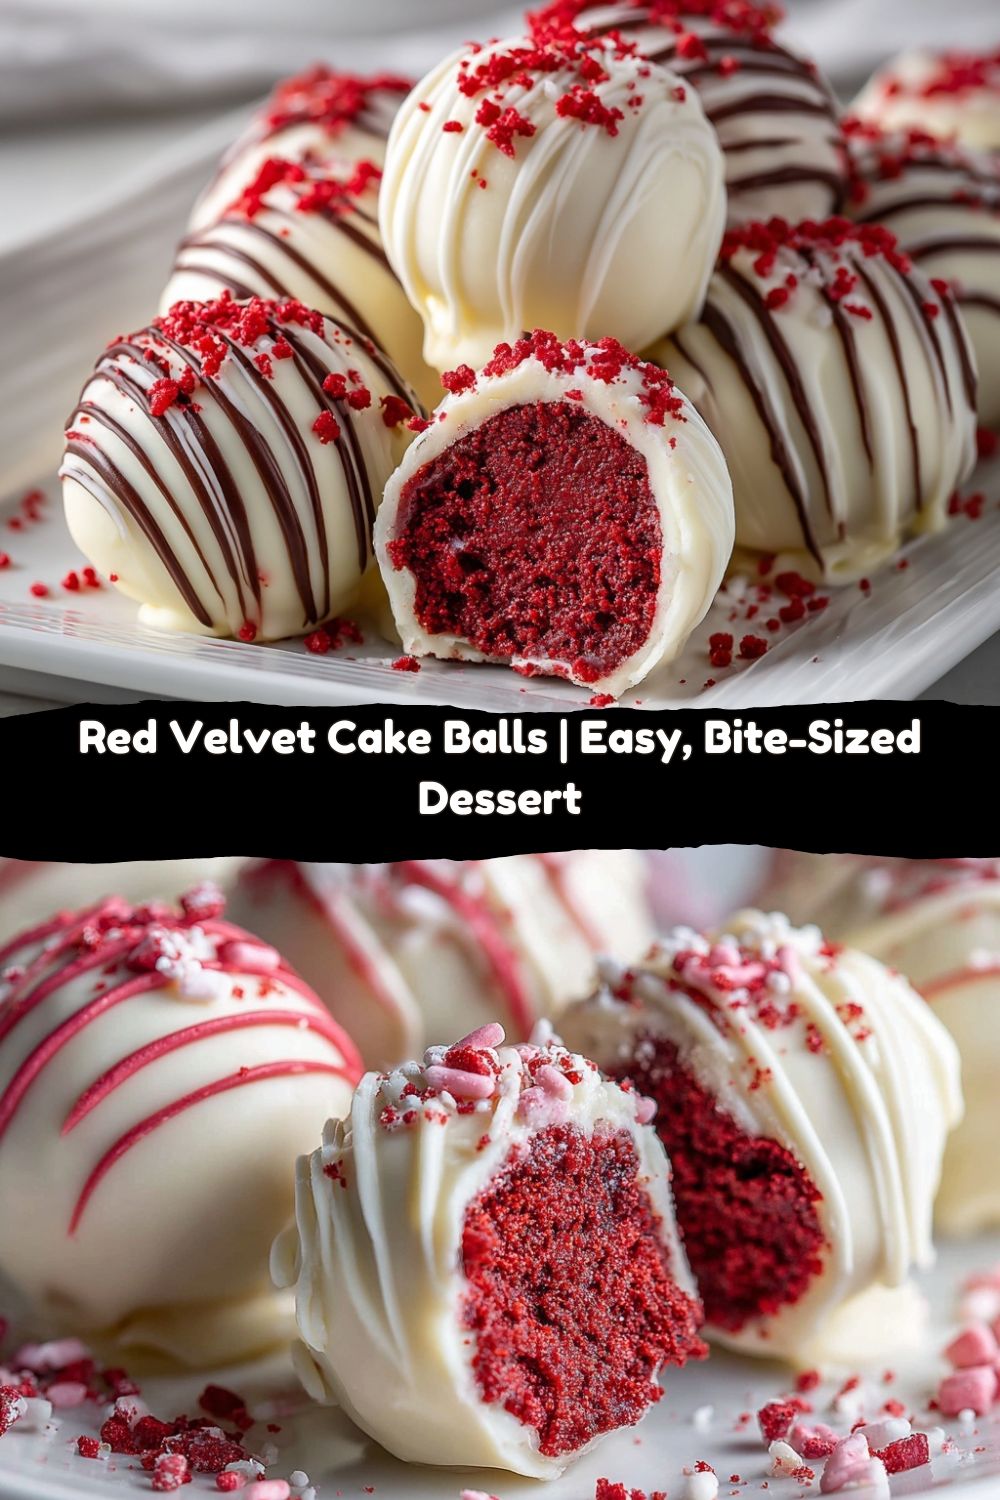
Red Velvet Cake Balls: Your New Favorite Bite-Sized Celebration
Hey friends, Jackson from Food Meld here! Let’s talk about a little magic trick you can pull off right in your own kitchen. You know that feeling when you take a bite of the most perfect, moist, decadent slice of red velvet cake? The kind that’s so good it makes you close your eyes for a second? Now, imagine capturing all of that incredible flavor—the rich cocoa, the subtle tang, the velvety crumb—and rolling it up into a single, irresistible, bite-sized pop of joy.
That, my friends, is the power of the Red Velvet Cake Ball.
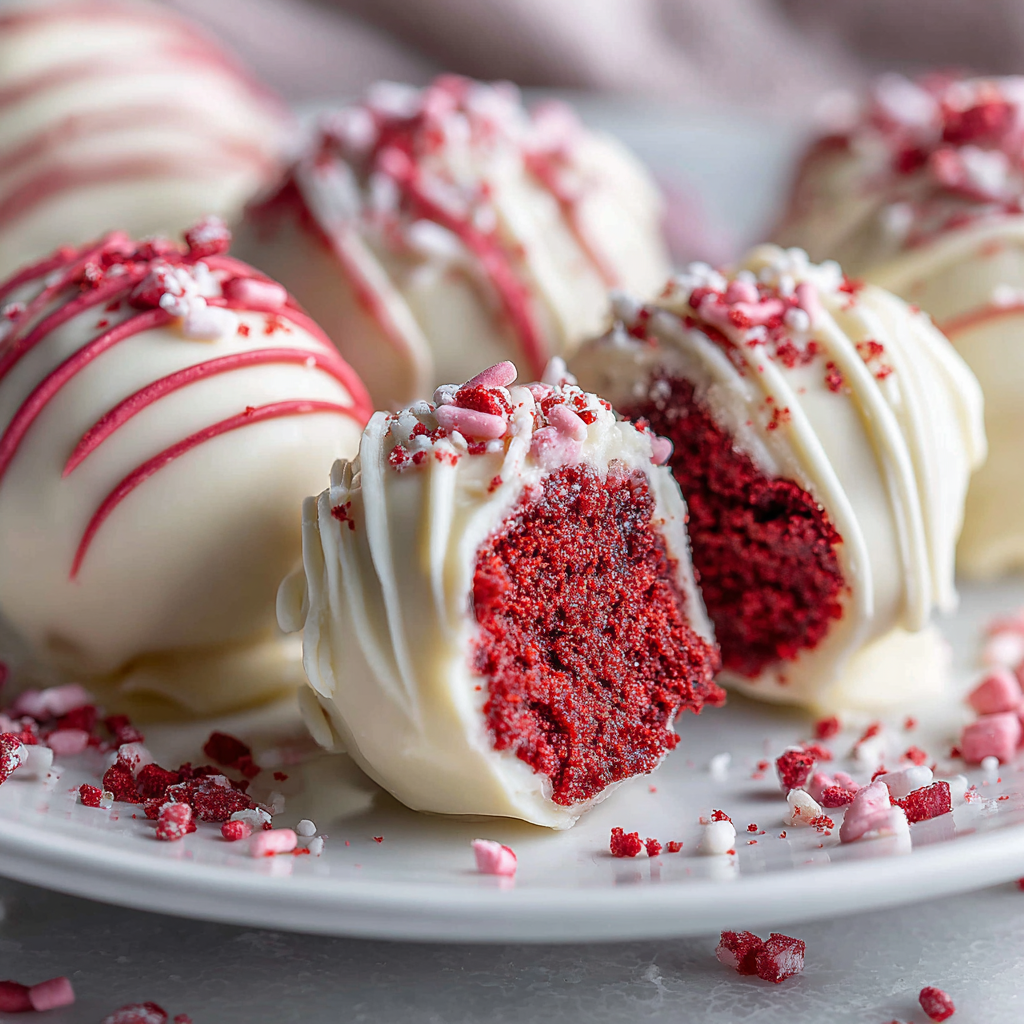
We’re taking everything we adore about a classic red velvet cake, blending it with luscious, tangy cream cheese, and then giving it a smooth, crisp coat of white chocolate. The result is a treat that’s somehow both elegantly fancy and wildly fun. They’re perfect for parties, sure, but they’re also just as perfect for a Tuesday night when you deserve a little something special. The best part? They’re seriously easy to make. We’re talking minimal fuss, maximum flavor, and a whole lot of those “you’ve gotta try this!” moments I live for. So, grab a bowl, and let’s turn that classic cake into a handheld celebration.
A Happy Accident and a Batch of Sweet Memories
I have to confess, my first encounter with a cake ball wasn’t some grand, planned recipe test. It was a classic “kitchen rescue” mission. Picture this: I was about sixteen, attempting my first-ever layered red velvet cake from scratch for my mom’s birthday. I was so proud of those two tall, vibrant red layers… until I tried to flip one out of the pan. You can probably guess what happened next. A beautiful cake, now in several large, sad-looking pieces on the counter.
My heart sank for a second, but my grandma, who was visiting, just chuckled and said, “Honey, the best desserts are often the ones you have to fix.” She had me crumble the entire cake into a big bowl, mix in some leftover cream cheese frosting we had in the fridge, and roll the whole sticky, delicious mess into little truffles. We didn’t even have chocolate to dip them in—we just rolled them in cocoa powder. They were a little messy, a little rustic, but oh my goodness, they were a hit. Everyone at the party raved about them, and my “failure” turned into a family legend. It taught me a lesson I carry with me in the kitchen every single day: some of the best creations come from a little improvisation and a whole lot of heart.
Gathering Your Flavor Arsenal
One of the things I love most about this recipe is its beautiful simplicity. You only need a handful of key players to create something truly spectacular. Here’s the lineup:
- 1 baked red velvet cake (9×13”, cooled completely) – You can absolutely use your favorite homemade recipe here (I’ve got a killer one on the blog!), but for speed and ease, a box mix works wonderfully. Chef’s Insight: The cake needs to be completely cool. A warm cake will turn into a gummy paste when you mix in the cream cheese.
- 6 oz cream cheese, softened – This is our binding agent and the source of that iconic tangy flavor. Substitution Tip: For a slightly lighter flavor, you can use mascarpone cheese. For a dairy-free version, a high-quality vegan cream cheese works surprisingly well!
- 12 oz white chocolate chips or melting wafers – This is for our beautiful, crisp shell. Chef’s Hack: I highly recommend using “candy melting wafers” if you can find them. They’re specifically designed for coating and set up much smoother and firmer than regular chocolate chips, which often need added oil to thin them out.
- Optional: Red or pink sprinkles & a drizzle of dark chocolate – This is where you get to have fun and make them your own! Sprinkles add a festive crunch, and a little dark chocolate drizzle gives a gorgeous visual contrast and a hint of bitter sweetness that plays so well with the white chocolate.
Let’s Get Rolling: Your Step-by-Step Guide to Cake Ball Bliss
Alright, team, this is where the fun begins. Put on some music, clear a little counter space, and let’s create some magic. Follow these steps, and you’ll be a cake ball pro in no time.
- Crumble It Up! Take your completely cooled cake and crumble it into a large mixing bowl. You want the crumbs to be nice and fine, with no large chunks. My favorite method? I just use my clean hands—it’s therapeutic! But you can also use a food processor for a super-fine, even crumb. Little Chef Hack: If your cake has a slightly darker, crustier top from baking, you can gently rub the two halves of the cake together to help the crust blend in with the softer interior crumbs.
- The Creamy Bind. Add your softened cream cheese to the bowl of cake crumbs. Now, get in there with a sturdy spoon or, again, those clean hands, and mix until it’s fully combined. You’re looking for a consistency that’s like a soft, moist cookie dough. It should hold together when you pinch it. Pro Tip: Don’t over-mix! Once it’s combined, stop. Over-mixing can make the cake balls a bit tough.
- Roll, Roll, Roll Your Balls. Using a small cookie scoop or a tablespoon, portion out the mixture. Then, roll each portion between your palms to form a smooth, 1-inch ball. Place each one on a baking sheet lined with parchment paper. Little Chef Hack: If the mixture is sticking to your hands, lightly dampen them with a bit of water. This creates a non-stick barrier and makes rolling a breeze!
- The All-Important Chill Session. Pop the entire baking sheet into the refrigerator for at least 30 minutes, or into the freezer for 15. This step is non-negotiable! Chilling firms up the cake balls, which makes them much, much easier to dip and prevents them from falling apart in the warm chocolate.
- Melt That Chocolate. While the balls are chilling, place your white chocolate or melting wafers in a microwave-safe bowl. Melt in 30-second intervals on medium power, stirring thoroughly after each interval, until it’s completely smooth. Pro Tip: Be patient! Don’t blast it on high heat. Slow and steady prevents the chocolate from seizing up and becoming a grainy mess.
- The Dip & Tap. Now for the main event! Remove a few cake balls from the fridge at a time. Drop one ball into the melted chocolate. Use a fork to gently roll it around until it’s fully coated. Then, lift it out with the fork, and gently tap the fork on the side of the bowl to let the excess chocolate drip off. This is the secret to a thin, professional-looking shell.
- Decorate & Set. Carefully slide the coated cake ball off the fork and back onto the parchment-lined tray. Immediately, while the chocolate is still wet, add your sprinkles or a little drizzle of melted dark chocolate. Repeat with the remaining balls. Let them set at room temperature until the shell is firm, or pop them back in the fridge to speed things up.
Sharing the Sweetness: How to Serve Your Masterpieces
You’ve created something amazing, so let’s show it off! Presentation is half the fun. For a casual get-together, I love piling them high on a rustic wooden board or in a big, colorful ceramic bowl. Let people just grab and go!
If you’re feeling a bit fancier, you can place each cake ball in a small, colorful paper candy cup. It makes them look like they came from a fancy chocolatier and keeps them from sticking together. They also make incredible edible gifts. Tuck a dozen into a cute gift box or a clear cellophane bag tied with a ribbon. I promise you, it’s a gift people will remember.
And what to serve with them? A cold glass of milk is a classic for a reason. For the adults, a cup of strong black coffee or a glass of bubbly Prosecco makes for a stunning pairing. The bitterness of the coffee and the bubbles from the Prosecco cut through the sweetness of the cake ball perfectly.
Mix It Up! Creative Twists on the Classic
Once you’ve mastered the basic recipe, the world is your oyster! Don’t be afraid to play around and make this recipe your own. Here are a few of my favorite twists:
- Chocolate Lover’s Dream: Swap the white chocolate coating for dark or semi-sweet chocolate. The deeper chocolate flavor is incredible with the red velvet.
- Cookie Dough Vibe: Add a handful of mini chocolate chips to the cake and cream cheese mixture before rolling. It gives a fun, chunky texture and an extra hit of chocolate.
- “Naked” Cake Balls: Skip the chocolate coating altogether! Instead, roll the finished balls in a light dusting of powdered sugar or unsweetened cocoa powder for an elegant, less-sweet finish.
- Peppermint Patty: Add ¼ teaspoon of peppermint extract to the cake mixture and use dark chocolate for the coating. Perfect for the holidays!
- Gluten-Free & Vegan Friendly: Use a gluten-free cake mix and a vegan cream cheese substitute. For the coating, make sure to use dairy-free white chocolate.
Jackson’s Kitchen Notes: A Few Parting Thoughts
Over the years, this recipe has become a staple in my kitchen, and it’s evolved in so many fun ways. I once made a massive batch for a friend’s wedding, dipping them in gold-dusted white chocolate—they were a huge hit! The beauty of this recipe is its flexibility. Don’t stress if your first few cake balls aren’t perfectly round or if the chocolate coating has a little swirl from the fork. That’s part of their handmade charm! It shows they were made with love. The most important ingredient is always the fun you have while making them. So, put on your favorite apron, don’t be afraid of a little mess, and enjoy the process.
FAQs & Quick Fixes: Your Cake Ball Questions, Answered!
Q: My cake ball mixture is too wet and sticky. What did I do wrong?
A: This usually happens if the cake was still even slightly warm when you mixed it, or if your cake was just extra moist to begin with. No worries! Just add a tablespoon or two of plain breadcrumbs or crushed graham cracker crumbs to the mixture until it reaches a rollable consistency.
Q: Why is my melted chocolate so thick and clumpy?
A: Ah, you’ve encountered “seized” chocolate! This happens when a tiny bit of moisture gets into the melting chocolate. To fix it, try stirring in a teaspoon of vegetable shortening or coconut oil. The added fat can often bring it back to a smooth, dippable state.
Q: Can I make these ahead of time?
A: Absolutely! They are fantastic for making ahead. Once set, store them in a single layer in an airtight container in the fridge for up to a week, or in the freezer for up to 3 months. Just let them come to room temperature for about 15 minutes before serving for the best texture and flavor.
Q: My cake balls are cracking after I dip them. Help!
A> Cracking is almost always a temperature issue. If the chilled cake balls are too cold and the melted chocolate is too hot, the sudden temperature change causes the shell to crack. Make sure your chocolate isn’t piping hot, and let your cake balls sit out at room temperature for 5-10 minutes before dipping if they’ve been in the freezer.
Let’s Talk Ingredients & Nutrition
I’m all about enjoying life and the food that makes it great, and that includes treats like these! I believe in being transparent about what we’re eating. These cake balls are a decadent, celebratory dessert. Each one is a little bundle of joy, but they are rich, so one or two is usually plenty to satisfy that sweet tooth.
Here’s a general breakdown per cake ball (assuming a yield of 24, using a standard box mix and ingredients):
- Calories: ~160
- Fat: ~9g
- Sugar: ~14g
This recipe is naturally vegetarian-friendly. As I mentioned in the variations, with a few simple swaps (gluten-free cake mix, vegan cream cheese, and dairy-free chocolate), you can easily adapt it to be gluten-free and vegan as well. The goal here is to create a treat that everyone can enjoy!
Your New Go-To Party Trick
And there you have it! You’re now fully equipped to whip up a batch of these unforgettable Red Velvet Cake Balls. They’re more than just a dessert; they’re a conversation starter, a gift from the heart, and a testament to the fact that the most delicious things in life don’t have to be complicated.
I hope you have as much fun making them as I do. I want to see your creations! Tag me on social @FoodMeld with your photos—nothing makes me happier than seeing your kitchen wins.
Now go on, melt that chocolate, get a little messy, and cook something awesome. Until next time, friends!
– Jackson


