
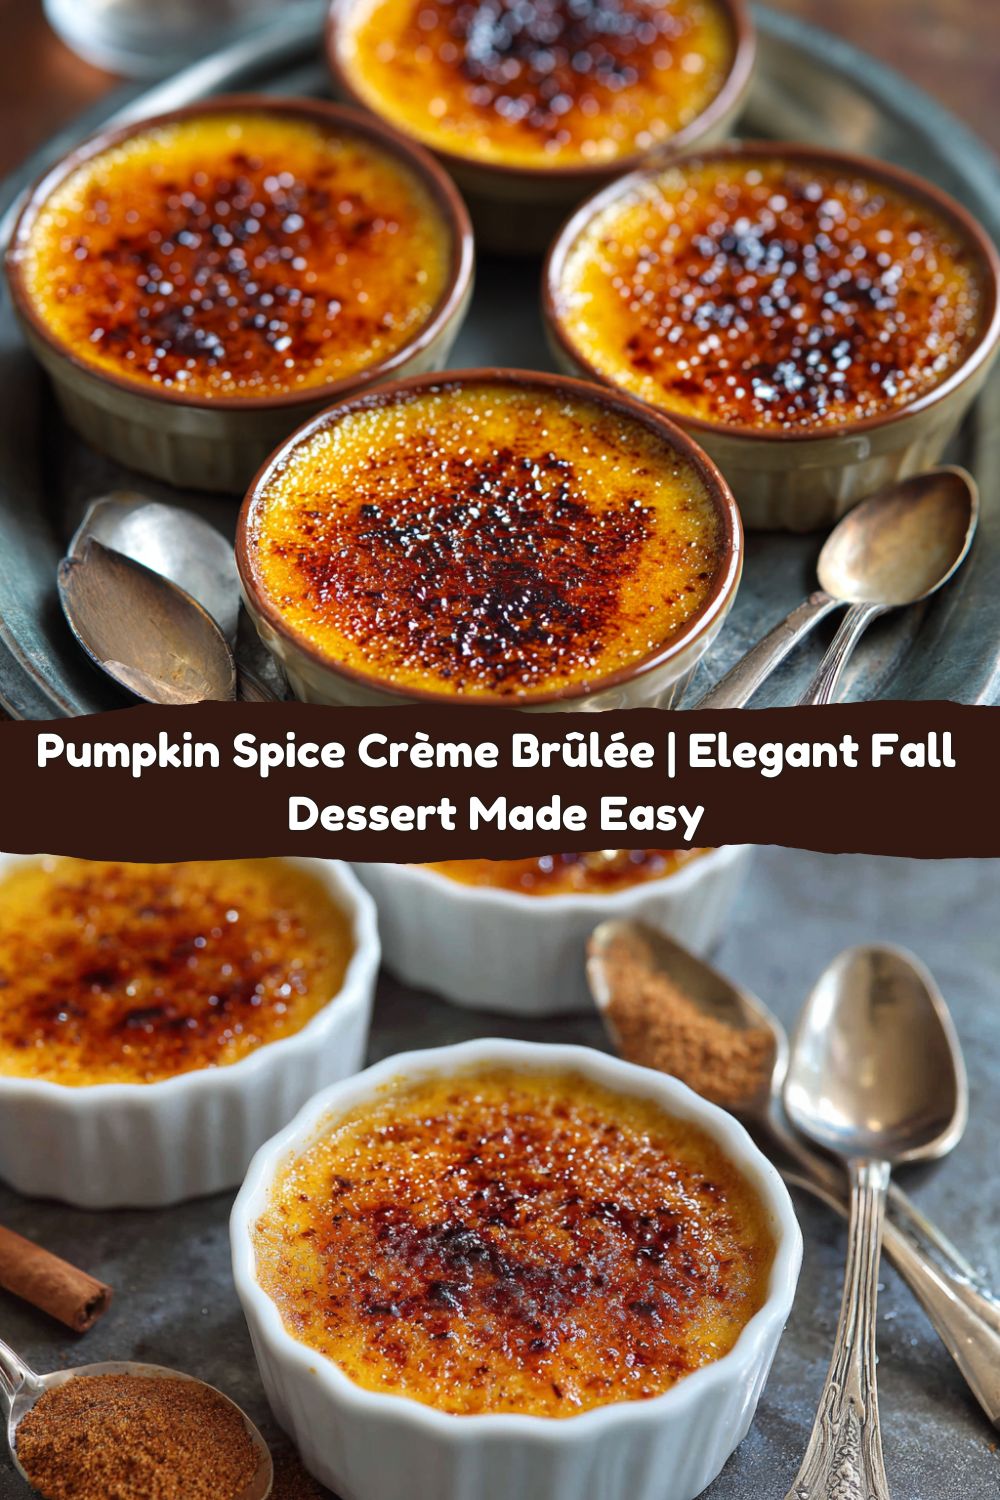
Pumpkin Spice Crème Brûlée: Your New Favorite Fall Dessert
Hey friends, Jackson here from Food Meld. Let’s talk about that moment. You know the one. You’re at a fancy restaurant, the main course plates are cleared away, and the server brings over the dessert menu. Your eyes scan past the chocolate cake, glide over the cheesecake, and then—bam—they land on it. Crème Brûlée. You order it, partly because it feels classy, but mostly because you’re secretly there for the grand finale: that satisfying crack of the sugar crust. It’s a tiny moment of culinary theater that never gets old.
But what if I told you that you don’t need a white-tablecloth restaurant or a pastry degree to create that magic? What if you could make a version that’s not only impossibly elegant but also tastes like the very essence of fall? Enter my Pumpkin Spice Crème Brûlée. This isn’t just a dessert; it’s a creamy, spiced, silky-smooth custard experience hiding under a layer of caramelized sugar that shatters with the tap of a spoon. It’s the perfect marriage of a French classic and the cozy, comforting flavors we all crave this time of year.
I see you—maybe you’re a little intimidated. Custards can seem fussy. But trust me, this is one of those “looks fancy but is secretly simple” recipes I live for. We’re going to walk through this together, step-by-step. No fancy jargon, just real talk and my best kitchen hacks. So, grab your ramekins and that can of pumpkin purée hiding in your pantry. Let’s melt some flavors together and create a dessert that’ll have everyone at your table asking for the recipe.
A Thanksgiving Tradition (That Almost Wasn’t)
This recipe actually has its roots in a near-disaster. A few years back, I was tasked with bringing dessert to my family’s Thanksgiving. The plan was a classic pumpkin pie—my grandma’s recipe, no less. I was feeling confident, maybe a little too confident. I got chatting with my uncle, lost track of time, and… well, let’s just say I learned the hard way that pie crusts are not forgiving of an extra 20 minutes in the oven.
I was staring at a sadly scorched crust with a perfect filling, panicking. I had about four hours before we had to leave. Scrambling, I remembered the basics of custard. I whipped up a quick version of this pumpkin brûlée, praying it would set in time. I remember my heart pounding as I pulled the tray out of the oven. They were jiggly but set! After a frantic ice bath to chill them, I torched the tops right there on my mom’s countertop.
The result? That first crack of the spoon was met with “oohs” and “aahs.” My cousin looked at me and said, “You made this? This is way better than pie.” A culinary faceplant turned into a total victory. Now, it’s not Thanksgiving in our house without them. It’s a good reminder that sometimes the best recipes are born from a happy little kitchen accident and a whole lot of “what if we tried this?” energy.
Gathering Your Flavor Arsenal
This is where the magic starts. Simple, high-quality ingredients are key here. Let’s break them down. (Makes 6 perfectly portioned desserts)
- 2 cups heavy cream: This is the base of our luxurious custard. Its high fat content is what gives crème brûlée that signature rich, velvety mouthfeel. For a slightly lighter version, you can substitute 1 cup of heavy cream with 1 cup of half-and-half, but I highly recommend going full-fat for the real deal experience.
- 5 large egg yolks: Our natural thickeners! The yolks provide the structure and that beautiful yellow color. Pro tip: save the whites for a healthy omelet the next morning or some incredible meringues!
- ½ cup granulated sugar: We’re using this in the custard itself to sweeten it perfectly. You’ll also need extra coarse sugar for the top—its larger crystals caramelize better and create that iconic, glass-like crust.
- ½ cup pumpkin purée: Not pumpkin pie filling! Make sure you’re grabbing the plain, unsweetened stuff. This is our star flavor and it gives the custard its gorgeous autumnal hue and earthy sweetness.
- 1 tsp pumpkin pie spice: The warm hug of fall in a jar. This blend usually contains cinnamon, ginger, nutmeg, and allspice. If you don’t have any pre-mixed, don’t sweat it—I’ve got a hack for you in the Chef’s Notes.
- ½ tsp cinnamon: A little extra cinnamon never hurt anybody. It amplifies the warmth and makes the spice profile pop.
- 1 tsp vanilla extract: The flavor enhancer. Vanilla works in the background to round out all the other flavors and add a layer of comforting sweetness. Use the good stuff if you have it!
- Pinch of salt: This is non-negotiable! Salt is the ultimate flavor booster. It cuts through the sweetness and makes every other ingredient taste more like itself.
Let’s Build Some Creamy, Dreamy Custard
Okay, team. Time to get our hands dirty (figuratively, we’re keeping things clean here). Follow these steps, and you’ll be a custard pro in no time.
- Preheat & Prep: Fire up your oven to 325°F (160°C). This is a low and slow bake, which is crucial for a smooth, not curdled, custard. Place your 6 ramekins into a deep baking dish—a 9×13” cake pan works perfectly. This is our setup for the water bath, which we’ll get to.
- Warm the Cream: Pour the heavy cream into a medium saucepan. Heat it over medium heat until it’s just beginning to steam and you see tiny bubbles forming around the edges. Do not let it boil. We’re just waking it up. The second it starts to steam, pull it off the heat. This step helps infuse the flavors and makes for a smoother final product.
- Whisk the Good Stuff: In a separate, medium-sized bowl, combine the egg yolks and that ½ cup of granulated sugar. Whisk them together until they’re just combined and pale yellow—you’re not trying to make them fluffy, just unified. Then, whisk in the pumpkin purée, pumpkin pie spice, cinnamon, vanilla extract, and that all-important pinch of salt. Get it all nice and smooth.
- The Tempering Tango: This is the step that makes everyone nervous, but you’ve got this. We need to slowly introduce the hot cream to the egg mixture without scrambling the eggs. Here’s my foolproof method: grab a ladle. Slowly drizzle a small ladleful of the warm cream into the pumpkin-egg mixture while whisking constantly. Once that’s incorporated, add another ladleful, still whisking. Now, you can slowly pour the rest of the warm cream into the bowl while continuing to whisk. You’ve just tempered like a pro!
- Strain for Smoothness: This is my #1 chef hack for the silkiest custard imaginable. Place a fine-mesh sieve over a large measuring cup or a bowl with a spout. Pour the entire custard mixture through the sieve. This will catch any little bits of cooked egg or pumpkin that didn’t get fully incorporated, guaranteeing a texture as smooth as satin.
- Into the Bath: Carefully divide the strained custard evenly among your 6 ramekins. Now, bring your baking dish with the ramekins over to the oven. Pull the oven rack out slightly. Using a kettle or a heatproof measuring cup, pour hot water into the baking dish until it comes about halfway up the sides of the ramekins. This water bath is non-negotiable! It creates a gentle, steamy environment for the custards to bake evenly without curdling.
- Bake to Perfection: Gently slide the rack back into the oven and bake for 35-40 minutes. The custards are done when the edges are set but the centers still have a slight, confident jiggle—like Jell-O, not like waves. If they look completely solid, they’re overdone.
- The Chill Factor: Carefully remove the baking dish from the oven. Let the ramekins cool in the water bath for about 15-20 minutes before taking them out. This prevents a temperature shock. Then, remove them from the water, dry the bottoms, and let them cool to room temperature on a wire rack. Once cool, cover them with plastic wrap and refrigerate for at least 4 hours, but preferably overnight. This chilling time is magic—it allows the flavors to fully meld and the texture to become perfectly firm.
- The Grand Finale – The Crack! When you’re ready to serve, take the custards out of the fridge. Blot the tops gently with a paper towel to remove any condensation. Sprinkle a thin, even layer of coarse sugar over each one. Now, fire up your kitchen torch! Hold the flame a few inches away and move it in slow, circular motions until the sugar melts, bubbles, and turns a deep, golden amber. No torch? See the FAQ for a broiler method! Let them sit for a minute or two to let the sugar harden into that perfect, glassy shell.
How to Serve This Stunner
Presentation is part of the fun! You’ve worked hard, so let’s show it off.
I love serving these right in the ramekins they were baked in. Place each one on a small dessert plate or even a rustic wooden board to contrast the elegance. That moment you present them, they should still be cool from the fridge, but the sugar top should be slightly warm from the torch—a fantastic sensory contrast.
While this dessert is a superstar all on its own, a little garnish never hurts. A tiny dollop of freshly whipped cream on the side, a single delicate mint leaf, or even a few candied pecans for a little crunch all work beautifully. The key is to keep it simple and let the custard be the star.
This is the ultimate make-ahead dessert for entertaining. You can have these completely done and chilling in your fridge up to two days before your dinner party. Then, all you have to do right before serving is caramelize the tops. That’s it! You get to be the cool, calm, collected host who just whipped up a restaurant-quality dessert with a flick of the wrist.
Make It Your Own: Creative Twists
Once you’ve mastered the base recipe, the world is your oyster (or, well, your pumpkin). Here are a few of my favorite ways to mix it up:
- Bourbon-Spiked: For a grown-up twist, add 1-2 tablespoons of good-quality bourbon to the custard along with the vanilla. It adds a wonderful depth and warmth that pairs incredibly with the pumpkin.
- Ginger Snap Crust: Want a textural element? Before pouring in the custard, press a tablespoon of crushed ginger snap cookies into the bottom of each ramekin. It creates a delicious crust that plays so well with the spices.
- Dairy-Free Delight: You can absolutely make this vegan! Swap the heavy cream for full-fat canned coconut milk and use a high-quality vegan sugar. For the egg yolks, I’ve had success using a cornstarch slurry (1 tbsp cornstarch mixed with 2 tbsp water per egg yolk), though the texture will be a tad less rich.
- Maple Sweetness: Replace half of the granulated sugar in the custard with pure maple syrup. It adds a beautiful, nuanced sweetness that feels so right for fall.
- Extra Coffee Kick: Infuse the cream with a tablespoon of instant espresso powder or very finely ground coffee when you heat it. Strain it out when you pour the cream through the sieve. The coffee flavor is subtle but amazing with the pumpkin.
Jackson’s Chef Notes & Kitchen Stories
This recipe has evolved in my kitchen over the years. The first time I made it, I was so scared of curdling the eggs that I barely heated the cream. The custard took forever to set! Now I know that getting the cream properly hot (but not boiling) is key to a smooth texture and timely bake.
No pumpkin pie spice? No problem! Make your own blend with 1 ½ tsp cinnamon, ½ tsp ginger, ¼ tsp nutmeg, and ¼ tsp allspice or cloves. Use that for the total amount needed.
And a funny story: I once tried to caramelize the sugar topping with a heat gun I use for DIY projects. It… kind of worked? But it also smelled vaguely of burning plastic. Stick with a kitchen torch, folks. They’re cheap, fun, and much safer for your dessert!
Your Questions, Answered
Q: I don’t have a kitchen torch. How can I caramelize the sugar?
A: You can use your oven’s broiler! Place the sugared custards on a baking sheet and position them about 3-4 inches from the broiler element. Turn the broiler on high and watch them like a hawk! It only takes 1-3 minutes, and they can go from golden to burnt in seconds. Rotate the pan for even browning.
Q: My custard is watery/ didn’t set properly. What happened?
A: This usually means it needed more time in the oven. Remember, we’re going for a jiggle, not a wave. If it’s still very sloshy after 40 minutes, give it another 5-10 minutes. Also, ensure your water bath is hot when it goes in the oven, as this helps the custard cook evenly. If it’s still runny after chilling, it’s likely underbaked.
Q: Why did my custard get bubbly or curdled?
A: This is typically caused by too high heat. Either the cream was too hot when tempered with the eggs, or the oven temperature was too high, causing the water bath to simmer rather than gently steam. Low and slow is the name of the game!
Q: Can I make one large crème brûlée instead of individuals?
A: Absolutely! Use a shallow, oven-safe baking dish (like a 9-inch pie plate or a ceramic baker). The baking time will be longer, likely 50-60 minutes. Still use a water bath and check for that set-around-the-edges, jiggly-center doneness.
Pumpkin Spice Crème Brûlée (Elegant Fall Dessert)
- Total Time: ~5 hrs
- Yield: 6 1x
Description
This fall twist on the classic French dessert brings rich pumpkin, warm spices, and silky custard together under a caramelized sugar crust. It’s simple, impressive, and made for cozy nights or holiday entertaining.
Ingredients
2 cups heavy cream
5 large egg yolks
½ cup granulated sugar (plus more for topping)
½ cup pumpkin purée
1 tsp pumpkin pie spice
½ tsp cinnamon
1 tsp vanilla extract
Pinch of salt
Instructions
Preheat oven to 325°F (160°C). Place 6 ramekins in a deep baking dish.
In a saucepan, heat cream until just steaming—not boiling.
In a bowl, whisk egg yolks, sugar, pumpkin, spices, vanilla, and salt until smooth.
Slowly whisk warm cream into pumpkin mixture. Strain through a fine mesh sieve for extra smoothness.
Divide mixture into ramekins. Fill baking dish with hot water halfway up the sides.
Bake 35–40 minutes until centers are just set. Cool to room temp, then chill at least 4 hours.
Before serving, sprinkle each custard with sugar. Torch or broil until caramelized and crisp.
- Prep Time: 15 minutes
- Chill Time: 4 hrs
- Cook Time: 40 minutes
Nutrition
- Calories: 300 / Serving
- Sugar: 18g / Serving
- Sodium: 35mg / Serving
- Fat: 25g / Serving
- Saturated Fat: 15g / Serving
- Carbohydrates: 20g / Serving
- Protein: 4g / Serving
- Cholesterol: 215mg / Serving
Nutritional Information (Per Serving)
Alright, let’s keep it real. This is a decadent dessert, and it’s meant to be enjoyed as such! Here’s a rough breakdown for one serving (based on the specific ingredients listed). Remember, this is an estimate and can vary based on the exact brands you use.
Calories: ~300 kcal
Fat: 25g
Saturated Fat: 15g
Carbohydrates: 20g
Sugar: 18g
Protein: 4g
Cholesterol: 215mg
Sodium: 35mg
Final Thoughts: Crack Into Fall Magic
There you have it, friends—my Pumpkin Spice Crème Brûlée, a dessert that proves elegance doesn’t have to be complicated. It’s everything we love about fall—pumpkin, cinnamon, warmth, and comfort—tucked into a silky-smooth custard with that iconic sugar crust we all can’t resist. This recipe takes the intimidation factor out of crème brûlée and replaces it with a little kitchen theater you can pull off right at home.
For me, it’s more than just a dessert—it’s a reminder that happy accidents (like my scorched pie crust) often lead to brand-new traditions. Every time I hear that first spoon crack at the table, I know I’ve created a moment that will be remembered long after the plates are cleared.
So, whether you’re serving it at a Thanksgiving feast, a holiday dinner party, or just treating yourself on a quiet autumn night, I hope this brûlée brings the same joy to your table as it does to mine. Don’t be afraid to torch with confidence, experiment with twists, and most of all—share it with people who make you smile.
Until next time, keep cooking boldly, keep cracking that sugar crust, and keep melting flavors together. 🍂✨
— Jackson


