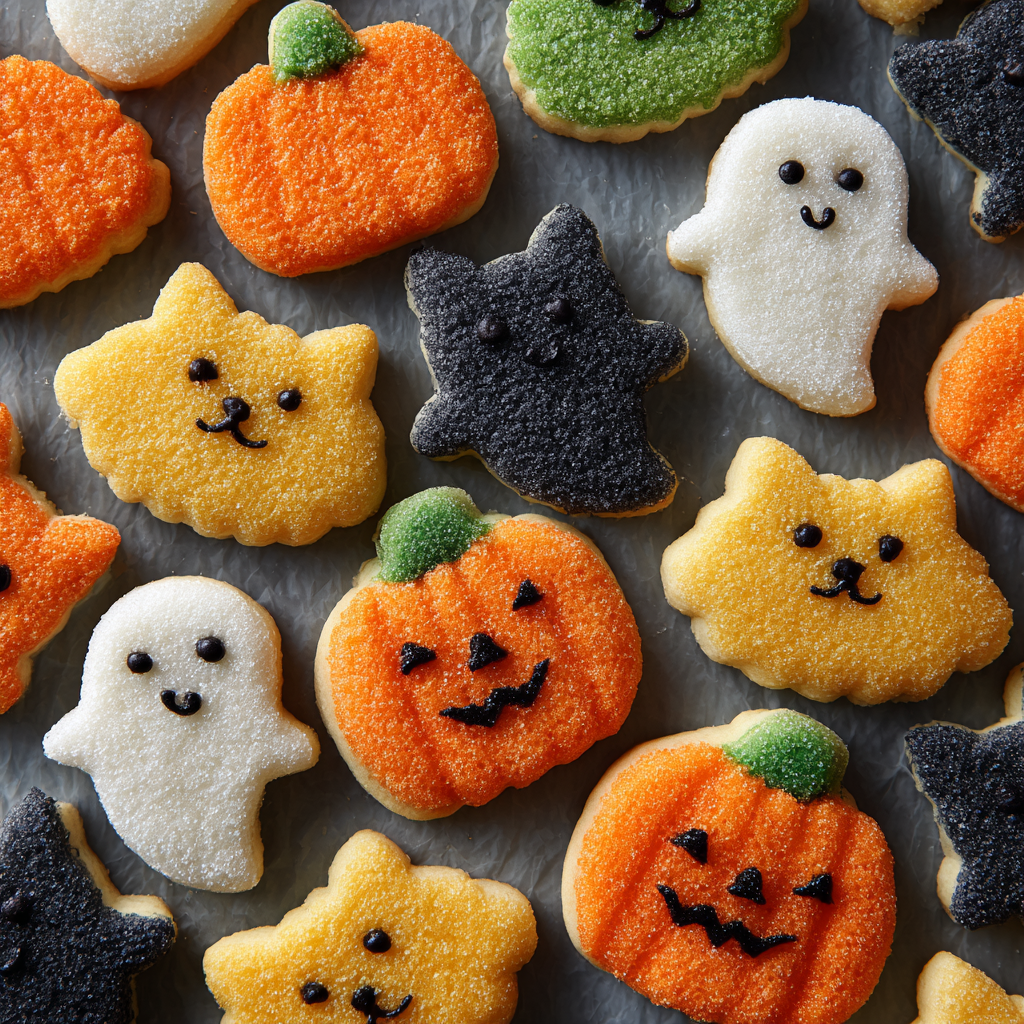
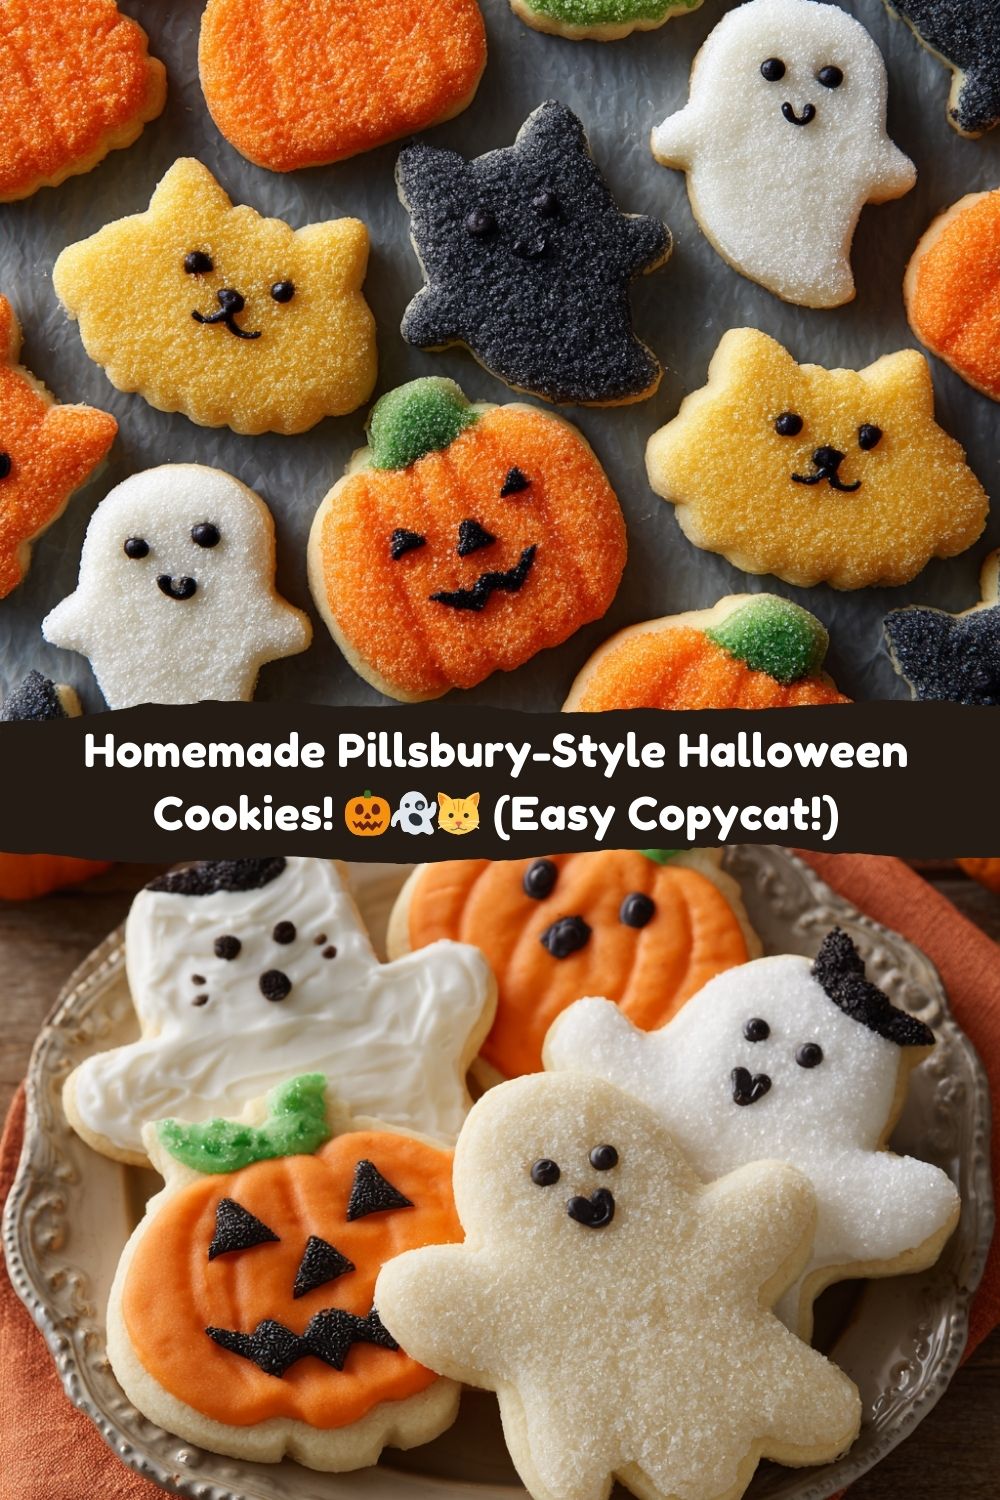
Spooky & Simple: Homemade Halloween Shape Cookies (Pillsbury-Style!) 🎃👻🐱
Hey friends, Jackson from Food Meld here! You know what screams “Halloween” almost as loud as my nephew spotting a full-size candy bar? That iconic tube of Pillsbury Halloween cookies chilling in the fridge aisle – those grinning pumpkins, friendly ghosts, and the mysteriously vanished spooky black cats! 🐱 But what if I told you we could create that same nostalgic, soft-bite magic right in your kitchen? No artificial preservatives, no waiting for dough to chill, and WAY more fun? Yep, we’re making homemade Pillsbury-style Halloween Shape Cookies today! These slice-and-bake wonders capture all the festive joy and soft texture you love, but with your own creative flair. Think vibrant orange pumpkins, cute little ghosts, and bringing back that long-lost spooky cat shape (seriously, why did they disappear?!). Perfect for parties, lunchboxes, or just a fun kitchen adventure with the kids. Let’s ditch the tube and create some edible spooky art that’ll have everyone asking, “Did you *really* make these?!” Grab your cookie cutters – it’s time to meld some flavor and fun! 👻
My Ghostly Kitchen Mishap (And Why I Love These Cookies!)
Halloween cookies and I go way back. Picture 8-year-old Jackson, buzzing on candy corn, determined to bake ghost cookies *all by myself* for my class party. I grabbed my mom’s tube of Pillsbury ghosts… only to whack it WAY too hard on the counter edge. *POOF!* Dough exploded everywhere – the ceiling fan, my hair, the cat (who was decidedly *not* a spooky shape). Mom found me covered in sticky dough bits, looking more like a flour ghost than a kid. We salvaged what we could, laughing hysterically while shaping lopsided ghosts. The cookies were a hit, obviously – kids don’t care about aesthetics when sugar’s involved! That messy chaos sparked my love for simple, joyful baking. These homemade versions? They capture that same pure fun without the pressurized tube risk! It’s about the laughter, the slightly imperfect shapes, and the shared “oohs” when they come out of the oven. That’s the real magic – edible memories. Now, let’s make some *controlled* spooky fun!
Your Spooky Cookie Toolkit (Simple & Swap-Friendly!)
Gather your cauldron… I mean, mixing bowls! Here’s what you’ll need for about 40 delightfully spooky cookies:
- 1 cup (226g) unsalted butter, softened – The KEY to that melt-in-your-mouth texture! Pro Tip: Soften it on the counter for 1-2 hours. If you poke it, your finger should leave a clear dent. No microwave shortcuts here – melted butter changes the game!
- ¾ cup (150g) granulated sugar – Sweetness and helps the cookies spread just right.
- ¼ cup (30g) powdered sugar – The SECRET for that signature soft, tender bite! It adds a delicate crumb.
- 1 large egg – Binds everything together and adds richness.
- 1 ½ tsp vanilla extract – Pure vanilla is best for that warm background note. Fun Twist: Try almond extract for ghosts – tastes like spooky marzipan!
- 2 ¼ cups (280g) all-purpose flour – The foundation. Spoon & level it into your measuring cup, don’t scoop!
- ½ tsp baking powder – Gives a tiny lift, keeping them soft, not cakey.
- ¼ tsp salt – Balances the sweetness. Crucial!
- Food coloring: Orange, Black, White/Gel (Gel preferred!) – Gel food coloring is the MVP! It gives vibrant color without thinning the dough. Liquid can make it sticky. Chef Hack: For deep black, use a specialty black gel or mix cocoa powder into the dough first, THEN add black gel.
- Halloween cookie cutters: Pumpkin, Ghost, Cat – The spookier, the better! Can’t find a cat? A bat or witch hat works!
- Optional: Mini chocolate chips or candy eyes for decorating – Because googly-eyed ghosts are hilarious!
Let’s Bake Some Spooky Friends! (Step-by-Step)
Ready for the fun part? Let’s roll (literally!):
- Preheat & Prep: Crank that oven to 350°F (175°C)! Line your baking sheets with parchment paper. Trust me, this prevents sticking AND makes cleanup a ghostly breeze. Chef Hack: Got multiple sheets? Prep them all now!
- Creamy Dreamy Base: In a large bowl, beat the softened butter, granulated sugar, and powdered sugar together with an electric mixer on medium-high. Beat for 2-3 minutes until it’s super light, fluffy, and almost white. This incorporates air – essential for texture! Pro Tip: Scrape the bowl sides halfway through!
- Egg-cellent Addition: Crack in the egg and add the vanilla. Mix on medium until just fully combined – about 30 seconds. Don’t overmix here!
- Dry Team Unite: In a separate bowl, whisk together the flour, baking powder, and salt. Gradually add this to the butter mixture, mixing on LOW speed just until the dough comes together and no dry flour remains. Watch Closely: Overmixing = tough cookies! It should look cohesive but maybe a little crumbly – that’s okay!
- Color Chaos! Divide the dough into portions: one for pumpkins (orange!), one for cats (black!), and leave one plain for ghosts. Chef Hack: Wear gloves unless you want festive hands! Start with a small amount of gel color and knead it in. Add more drop by drop until you get monster-worthy vibrancy. Black takes patience – keep kneading!
- Rollin’ & Chillin’: Place one dough portion between two sheets of parchment paper. Roll it out evenly to about ¼-inch thick. Pro Tip: Rolling pins with thickness guides are lifesavers! Remove the top parchment. Cut out shapes close together. Re-roll scraps until done. Repeat with other colors. Place cut shapes on parchment-lined sheets. Pop the sheets in the fridge for 10 minutes. Why? This prevents spreading, keeping your pumpkins plump and cats crisp!
- Bake to Spooky Perfection: Bake for 8-10 minutes. DO NOT OVERBAKE! They should look set around the edges but still *very* pale in the center – they’ll firm up as they cool. Chef Insight: Black cookies are trickier – watch closely after 8 mins! They’re done when the edges feel slightly firm.
- Cool & Create: Let cookies cool on the baking sheet for 5 minutes (they’re fragile when hot!). Then, transfer them gently to a wire rack to cool completely. Once cool, get decorating! Press mini chocolate chips into ghosts for eyes, add candy eyes to cats, or pipe on faces with icing. Go wild!
Show Off Your Spooky Squad!
Presentation is part of the fun! Pile them high on a rustic wooden board for a haunted harvest vibe. Layer different shapes on a cake stand draped with black cheesecloth for instant drama. For parties, place individual cookies in mini cupcake liners – easy grabbing! The real magic? Watching faces light up when you reveal them. Pair with a big glass of cold milk or a mug of hot apple cider. Spooky has never tasted so good!
Mix Up Your Monster Mash!
Don’t stop at the classics! Try these fun twists:
- Flavor Fusion: Add 1 tsp pumpkin spice to the orange dough! Or ¼ cup cocoa powder to the black dough for chocolate-cat cookies.
- Gluten-Friendly Ghouls: Swap the AP flour 1:1 with a good gluten-free blend (like King Arthur Measure for Measure).
- Spooky Sprinkle Sensation: After cutting shapes, gently press the edges into orange, black, or purple sprinkles before baking.
- Boo-tiful Icing: Skip the chips/eyes and drizzle cooled cookies with simple white icing (powdered sugar + milk) or pipe on silly/scary faces.
- Vampire Bites: Use a small round cutter after baking to punch a “bite” out of ghost cookies! Fill the hole with red jam.
Jackson’s Spooky Cookie Chronicles
This recipe is a labor of spooky love! It took a few test batches (my neighbors became unwilling taste-testers!) to nail that perfect soft-but-not-cakey Pillsbury texture. The powdered sugar trick was the game-changer! The biggest laugh? My first black dough attempt looked like a sad gray blob – hence the cocoa powder hack. And those elusive cats? I hunted thrift stores for vintage cutters! One year, my niece insisted we make “zombie” pumpkins by adding green food coloring streaks – they were hideously awesome. The beauty is in the imperfection. So what if your ghost has a wonky eye? Own it! That’s homemade charm. These cookies evolve every Halloween in my kitchen – what twist will YOU add?
Spooky Cookie SOS: Your Questions Answered!
Let’s tackle those cookie conundrums:
- Q: My dough is too sticky after coloring! Help!
A: Gel coloring shouldn’t add much liquid, but humidity happens! Pop the sticky dough in the fridge for 15 minutes. When rolling, use plenty of flour on your parchment/rolling pin. If it’s *really* bad, knead in a tiny bit more flour (1 tsp at a time). - Q: Why did my cookies spread into spooky blobs instead of holding their shape?
A: Two likely culprits: 1) Butter was too warm/melted. Ensure it’s softened but cool. 2) Skipped the 10-minute fridge chill before baking! That step is crucial for shape retention. Also, double-check your baking powder isn’t expired. - Q: Can I make the dough ahead of time?
A: Absolutely! Wrap the uncolored dough tightly in plastic wrap and refrigerate for up to 3 days, or freeze for 1 month. Thaw overnight in the fridge before coloring, rolling, and cutting. You can also freeze the cut-out shapes on the baking sheet, then transfer to a freezer bag. Bake straight from frozen, adding 1-2 minutes to the bake time. - Q: My black cookies taste bitter! What went wrong?
A: Some black gel colors can have a slight bitter edge. Counteract it by adding ¼ tsp of vanilla or almond extract directly to the black dough portion when mixing. The cocoa powder hack also helps mask any bitterness!
Spooky Stats (Approximate per cookie)
Calories: 120 | Fat: 6g | Carbs: 15g | Protein: 1g | Sugar: 7g
(Remember, these are estimates. Your decorations add a bit more!)

Pillsbury-Style Halloween Shape Cookies
- Total Time: 30 minutes
- Yield: 40 Cookies 1x
Description
Inspired by Pillsbury’s nostalgic pre-cut Halloween cookies—pumpkin, ghost, and the long-lost spooky cat—this homemade version captures that same soft texture and festive fun, with your own custom twist. No preservatives, no chill time, just slice, bake, and get spooky!
Ingredients
1 cup (226g) unsalted butter, softened
¾ cup (150g) granulated sugar
¼ cup (30g) powdered sugar
1 large egg
1 ½ tsp vanilla extract
2 ¼ cups (280g) all-purpose flour
½ tsp baking powder
¼ tsp salt
Food coloring: orange, black, and green (gel preferred)
Halloween cookie cutters: pumpkin, ghost, cat
Optional: mini chocolate chips or candy eyes for decorating
Instructions
Preheat oven to 350°F (175°C). Line baking sheets with parchment.
In a large bowl, cream butter, granulated sugar, and powdered sugar until fluffy.
Mix in egg and vanilla until smooth.
In another bowl, whisk flour, baking powder, and salt. Gradually add to the butter mixture until dough forms.
Divide dough into 2 or 3 portions. Tint with food coloring (orange for pumpkins, black for cats, white/plain for ghosts).
Roll each portion between parchment paper to ¼-inch thick.
Use cookie cutters to cut shapes, re-rolling scraps as needed.
Transfer to baking sheet and chill for 10 minutes to hold shape (optional, but helps).
Bake for 8–10 minutes until just set. Do not overbake.
Let cool and decorate with mini chips or candy eyes if desired.
- Prep Time: 20 minutes
- Cook Time: 10 minutes
Nutrition
- Calories: 120 / Cookie
- Sugar: 7g / Cookie
- Fat: 6g/ Cookie
- Carbohydrates: 15g / Cookie
- Protein: 1g / Cookie
🎃 Final Thoughts: Nostalgia Meets Homemade Magic
These Homemade Pillsbury-Style Halloween Cookies are more than just a sweet treat — they’re a trip down memory lane. From the buttery-soft texture to those playful pumpkin, ghost, and spooky cat designs, they capture the spirit of Halloween in every bite. The best part? You don’t need to rely on store-bought dough to bring that nostalgic joy back to your kitchen.
Whether you’re baking with your kids, surprising your party guests, or just sneaking a warm cookie with a glass of milk after dark, these cookies guarantee smiles all around. So roll, slice, and bake your way into spooky season — because nothing says Halloween magic like a plate of fresh-from-the-oven cookies glowing with color and charm.
Happy baking,
– Jackson @ Food Meld


