Your New Holiday Secret Weapon: The Perfect Spritz Cookie
Hey friends, Jackson from Food Meld here! Is there anything that screams “holiday season” quite like a beautifully packed cookie tray? You’ve got your chocolate chip contenders, your gingerbread houses, maybe a few sugar cookies fighting for space. But right there in the center, the undisputed star of the show, is that one classic cookie: the spritz. You know the one. It’s buttery, it’s tender, it melts in your mouth, and it comes in all those adorable, festive shapes. For years, I thought these cookies were some kind of kitchen magic reserved for grandmas and professional pastry chefs. I’d look at those intricate designs and think, “Nope, that’s way beyond my paygrade.”
Well, I’m here to tell you that the secret is out, and it’s so much easier than it looks. These perfect holiday spritz cookies are my absolute go-to for bringing massive cheer with minimal stress. This isn’t just a recipe; it’s your ticket to becoming a cookie-tray hero. We’re making a double batch because, trust me, they disappear faster than you can say “ho ho ho.” We’re using a little trick with both butter and margarine to nail that old-school, tender-yet-crisp texture that makes these cookies legendary. And the best part? We’re going all-in on the fun with colors and decorations. So, grab your cookie press, put on your favorite holiday playlist, and let’s cook something awesome together. Welcome to your new favorite holiday tradition.

The Christmas I Almost Glued the Tree Together
My love affair with spritz cookies started, like all good things, at my grandma’s house. Every December, her kitchen would transform into a North Pole workshop. The air was thick with the smell of melted butter and vanilla, and every flat surface was covered in cooling cookies. My job, as her eager (if slightly messy) sous-chef, was to operate the cookie press. I’d load that cannon-like device with soft, pale dough, position it on the cool baking sheet, and press the trigger with all the dramatic flair a seven-year-old could muster. Out would pop a perfect little tree, a delicate wreath, or a stubborn reindeer that sometimes needed a little… persuasion.
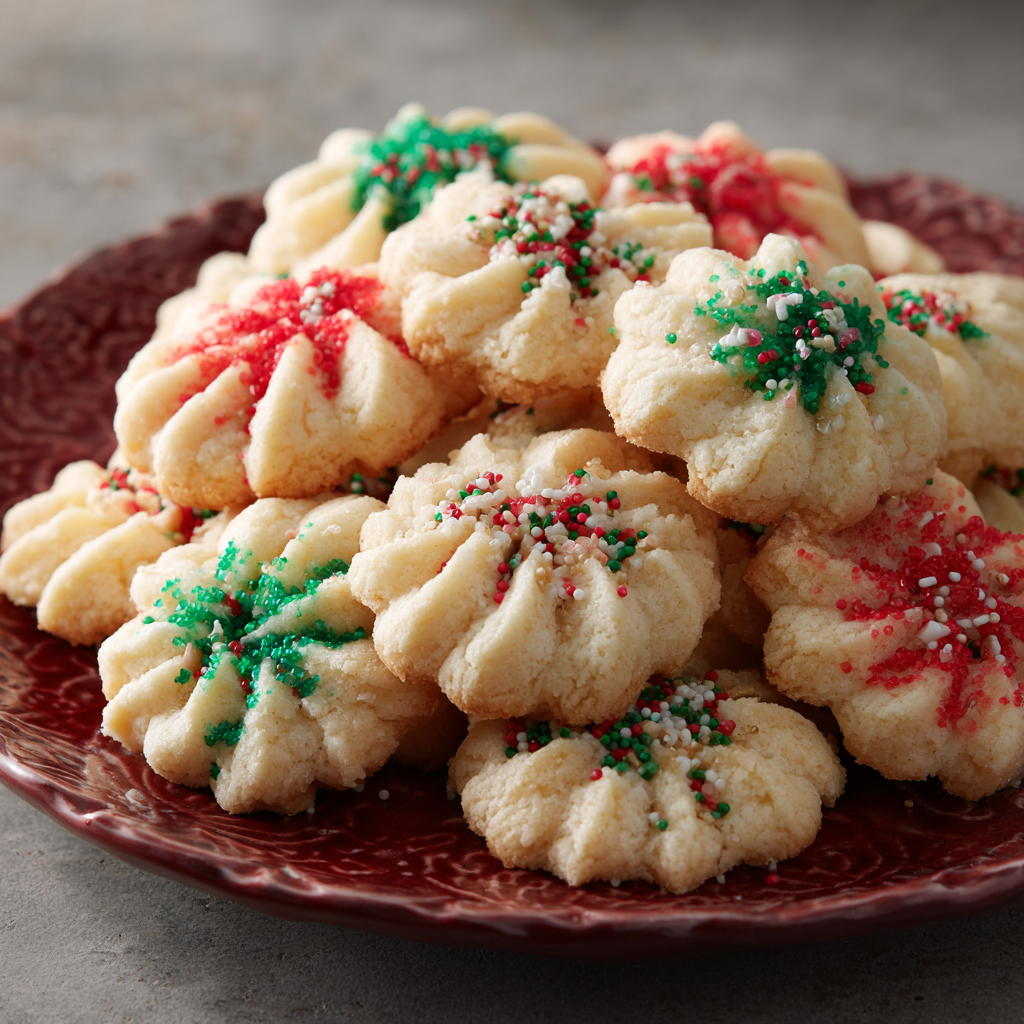
One year, I got a little too enthusiastic with the green food coloring. We’re talking Shrek-level green. I was so proud of my vibrant forest of Christmas trees. Grandma just smiled, handed me a bowl of red dough, and said, “Now let’s make some poinsettias to go with them, sugar.” We decorated them with red sugar crystals and, in a moment of pure genius (or madness), we used a tiny dab of icing to “glue” a nonpareil in the center of each flower. I remember so clearly looking at that tray of green trees and red flowers, my fingers stained with color, and feeling like we’d created actual magic. That’s the spirit I want to bring to your kitchen. It’s not about perfection; it’s about the fun, the mess, and the unforgettable memories you create one cookie at a time.
Gathering Your Cookie Crew: The Ingredients
This recipe is a double batch for a reason—it’s party time! Here’s everything you’ll need to make about 6-7 dozen little bites of joy. Don’t be intimidated by the quantity; the process is a breeze.
- 1 cup unsalted butter, softened: This is our flavor MVP. Unsalted lets us control the salt level. Chef’s Insight: “Softened” is key! Leave it on the counter for an hour. It should yield gently to a finger press. Too cold and it won’t cream; too warm and your cookies will spread.
- 1 cup margarine, softened: Wait, margarine? Trust me on this. Using half margarine is an old baker’s trick. It has a higher water content and different fat structure than all-butter, which gives the cookies a lighter, crispier texture that holds those intricate press shapes beautifully. Sub Tip: You can use all butter, but your cookies might be a tad richer and spread a bit more.
- 1½ cups granulated sugar: Sweetens the deal and helps create that light, fluffy texture when creamed with the fats.
- 4 large eggs: The glue that holds our cookie universe together. They provide structure and richness. Make sure they’re at room temperature to blend smoothly into the creamed butter.
- 2 teaspoons vanilla extract: The classic flavor workhorse. Use the good stuff—pure vanilla extract makes a difference.
- ½ teaspoon almond extract (optional but highly recommended): This is my secret weapon. It adds a warm, bakery-style depth of flavor that makes people go, “Wow, what is that?” It’s unforgettable. Sub Tip: If you’re not an almond fan, try an equal amount of lemon or orange extract for a citrusy twist.
- 1 pinch salt: Balances the sweetness and makes all the other flavors pop. Don’t skip it!
- 7 cups all-purpose flour: The foundation of our cookie. It gives the dough the necessary structure to be pressed and hold its shape.
- 2 heaping teaspoons baking powder: Our leavening agent. This gives the cookies a tiny bit of lift and that perfect tender bite.
- Gel food coloring: Gel is better than liquid because it provides vibrant color without altering the dough’s consistency. Go for red, green, gold—get festive!
- Festive sprinkles, sanding sugar, or melted chocolate for decorating: This is where your personality shines. Sanding sugar bakes right on, sprinkles add fun, and a chocolate drizzle at the end is pure elegance.
Let’s Press On: Making the Magic Happen
Ready to roll? Let’s do this. Follow these steps, and you’ll be a spritz pro in no time. I’ve packed this section with all my best tips and hacks to guarantee your success.
Step 1: Preheat and Prepare. Get that oven heating to 375°F (190°C). Here’s a non-negotiable tip: DO NOT grease or line your baking sheets. I know it’s counterintuitive! But the cookie press needs a bare, ungreased surface for the dough to grip onto so it can release cleanly. If the sheet is greased, you’ll get a sad, blobby mess. If you’re worried about sticking, use an un-greased, light-colored aluminum sheet—they work best.
Step 2: Cream the Good Stuff. In a large bowl, beat the softened butter, margarine, and sugar together on medium-high speed. We’re not just mixing; we’re “creaming.” This means beating until the mixture becomes noticeably paler in color, fluffy, and smooth. This step incorporates air, which is crucial for the texture. This should take a good 3-4 minutes. Don’t rush it!
Step 3: Incorporate the Wet Team. Beat in the eggs, one at a time, making sure each is fully incorporated before adding the next. This prevents the mixture from breaking. Then, add the vanilla, almond extract (if using), and that all-important pinch of salt. Mix until it’s all one happy, smooth, fragrant family.
Step 4: Bring in the Dry Crew. In a separate bowl, whisk together the flour and baking powder. This ensures the baking powder is evenly distributed. Now, with your mixer on low speed, gradually add the flour mixture to the wet ingredients. Mix just until the flour disappears. Overmixing at this stage can make the cookies tough. The dough will be thick and may even seem a little dry—that’s perfect! It needs to be firm to hold its shape.
Step 5: Color Your World. Divide the dough into portions for coloring. Gel food coloring is powerful, so start with a toothpick dab and knead it in with your hands (wear gloves if you don’t want rainbow fingers!). Add more until you reach your desired holiday hue.
Step 6: Press It, Girl! (Or Guy!). Load a portion of dough into your cookie press. Follow your press’s instructions, but the general rule is to fit the plate with your desired shape, fill the chamber, and screw it shut. Press the dough directly onto your un-greased, cold baking sheet. If your sheets are even slightly warm, the dough will start to soften and won’t release well. Have multiple sheets or cool them down between batches. Press, hold for a second, and lift straight up. If the dough sticks, your dough might be too warm or your sheet might be greased. Pop the dough in the fridge for 15 minutes to firm up.
Step 7: Decorate & Bake. Before baking, add your sprinkles or sanding sugar. Now, bake for 6-8 minutes. Watch them like a hawk! We’re looking for the edges to be just barely starting to turn golden. The tops should still look pale. They continue to cook on the hot sheet out of the oven, so this prevents over-baking. Over-baked spritz cookies lose their tender magic.
Step 8: Cool and Drizzle. Let the cookies cool on the baking sheet for 2-3 minutes to set, then carefully transfer them to a wire rack to cool completely. If you’re going for a chocolate drizzle, wait until they are fully cooled. Melt some chocolate chips with a tiny bit of coconut oil, put it in a zip-top bag, snip off a corner, and go to town!
Sharing the Joy: How to Serve These Beauties
Okay, you’ve created a masterpiece (or six dozen of them). Now, how do you show them off? This is the best part.
The classic move is, of course, The Cookie Tray. Arrange them on a beautiful platter or a rustic wooden board. Mix and match the colors and shapes. Group all the trees together, make a wreath out of the wreath cookies, let your inner artist shine. They are the star that makes every other cookie on the tray look better.
But let’s think bigger. These cookies make incredible edible gifts. Stack them in a clear cellophane bag tied with a pretty ribbon, or layer them carefully in a festive tin. A homemade gift of cookies says “I care about you” more than any store-bought item ever could.
My personal favorite? Cookie and Coffee Hour. Pile a few on a small plate next to a steaming mug of coffee or hot chocolate. The simple, buttery flavor of the spritz cookie is the perfect companion to a rich, dark brew. It’s a moment of pure, quiet holiday bliss. However you serve them, do it with pride. You made these!
Mix It Up: Creative Spritz Twists
Once you’ve mastered the classic, it’s time to play. Here are a few of my favorite ways to mix up the flavor profile.
1. Citrus Sunshine: Omit the almond extract. Instead, add the zest of one lemon and one orange, plus a teaspoon of lemon extract. Color the dough a cheerful yellow or leave it natural. It’s bright, refreshing, and perfect for cutting through the richness of the holidays.
2. Chocolate Swirl: Divide the finished dough in half. To one half, knead in ¼ cup of sifted cocoa powder. You can press these separately for classic chocolate spritz, or you can marble them! Take a small piece of each dough, twist them together, and load them into the press for a beautiful swirled effect.
3. Gingerbread Spritz: Add 2 teaspoons of ground ginger, 1 teaspoon of cinnamon, and ½ teaspoon of ground cloves to the flour mixture. Use molasses instead of one of the eggs to get that classic gingerbread flavor and color. Press into tree shapes and decorate with white icing.
4. Nutty Professor: Replace the almond extract with ½ teaspoon of maple extract. After pressing the cookies, gently press a single pecan half or a few sliced almonds onto the top before baking.
5. Gluten-Free Friendly: You can try a 1:1 gluten-free all-purpose flour blend. The texture might be slightly more delicate, but it works! Just ensure your baking powder is gluten-free.
Jackson’s Kitchen Notes
This recipe has evolved in my kitchen over the years. The margarine trick was a total game-changer I learned from a fellow baker at a holiday market. My first batch without it spread into weird, butter puddles—tasty, but not exactly blog-worthy! The almond extract was my own addition, inspired by my love for Italian amaretti cookies. I wanted that same warm, cozy feeling.
A funny story: I once was filming a reel for these cookies and was so focused on talking to the camera that I completely over-filled the cookie press. I pressed the trigger and dough exploded out of the back of the tube, all over my apron and the floor. My dog, Duke, thought it was the best day of his life. The moral of the story? Cooking is messy. Baking is messy. Life is messy. Embrace it, laugh about it, and keep pressing on (pun totally intended).
Spritz Cookie 911: FAQs & Fixes
Q: My dough won’t release from the press! What am I doing wrong?
A: This is the #1 question! Usually, it’s one of three things: 1) Your dough is too warm. Pop it in the fridge for 15 minutes. 2) Your baking sheet is too warm. Use a cool, room-temperature sheet. 3) You greased the sheet. Remember, no grease! The dough needs to grip the metal.
Q: Can I make the dough ahead of time?
A: Absolutely! This dough is great for make-ahead. Wrap it tightly in plastic wrap and store it in the fridge for up to 3 days. Let it sit on the counter for 15-20 minutes to soften slightly before trying to press it. You can also freeze the dough log for up to 3 months. Thaw in the fridge overnight before using.
Q: My cookies are spreading and losing their shape.
A: This is usually a temperature issue. Your butter might have been too soft, or your baking sheet was warm when you started. Always use cool, un-greased sheets. Also, ensure your oven is fully preheated. A hot oven sets the shape quickly.
Q: Why are my cookies tough?
A: You likely overmixed the dough after adding the flour. Mix just until the flour disappears. Also, be careful not to over-bake them. They should not be brown on top.
Nutritional Information*
*Please note: This is an estimated nutritional breakdown based on the ingredients used. Your specific values may vary depending on brands and actual portion size.
Yield: About 84 cookies (7 dozen)
Serving Size: 1 cookie
Yield: ~84 cookies (7 dozen)
Serving Size: 1 cookie
-
Calories: 70
-
Fat: 3.5g
-
Saturated Fat: 2g
-
Carbohydrates: 8g
-
Sugar: 4g
-
Protein: 1g
-
Sodium: 25mg
These are light little bites, which makes it dangerously easy to reach for “just one more.” Pair them with coffee or cocoa, and they hit that perfect sweet note without being overwhelming.
Final Thoughts: Pressed, Baked, and Loved
Spritz cookies might look intricate, but they’re all about joy, simplicity, and tradition. Whether you’re rolling out trays for a family cookie swap, packing them into tins as edible gifts, or sneaking a few for yourself with a hot cup of coffee, these cookies carry the magic of the season in every buttery bite.
Remember, holiday baking doesn’t have to be perfect—it just has to be shared. A splash of food coloring here, a sprinkle of sugar there, a dog stealing a runaway cookie dough blob off the floor… that’s the stuff memories are made of.
So dust off that cookie press, put on the carols, and fill your kitchen with the scent of butter and vanilla. These spritz cookies aren’t just treats—they’re tradition, creativity, and pure holiday happiness.
From my kitchen to yours—happy pressing, happy baking, and happiest holidays!


