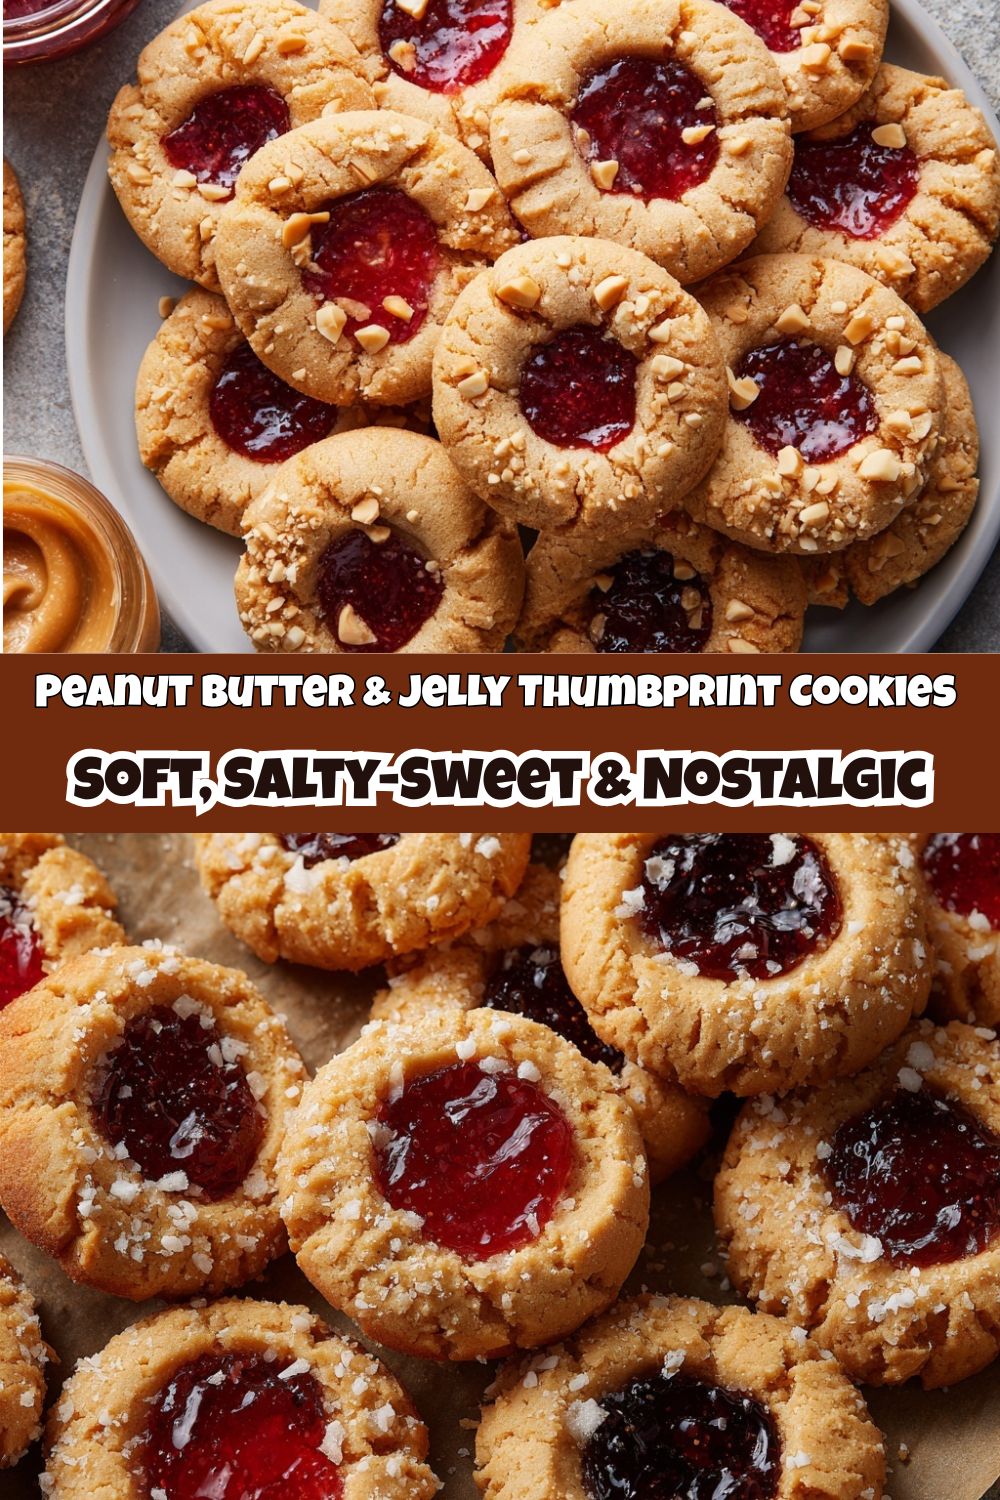
Peanut Butter & Jelly Thumbprint Cookies: Your New Favorite Comfort Food
Hey friends, Jackson from Food Meld here! Let’s get real for a second. Is there any flavor combo in the world more iconic, more straight-up comforting, than peanut butter and jelly? It’s the taste of childhood lunchboxes, of after-school snacks, of simple, no-fuss goodness. But what if we could take that classic duo and level it up? Transform it from a sandwich squished in a bag into a warm, chewy, melt-in-your-mouth cookie that’s somehow both nostalgic and totally new?
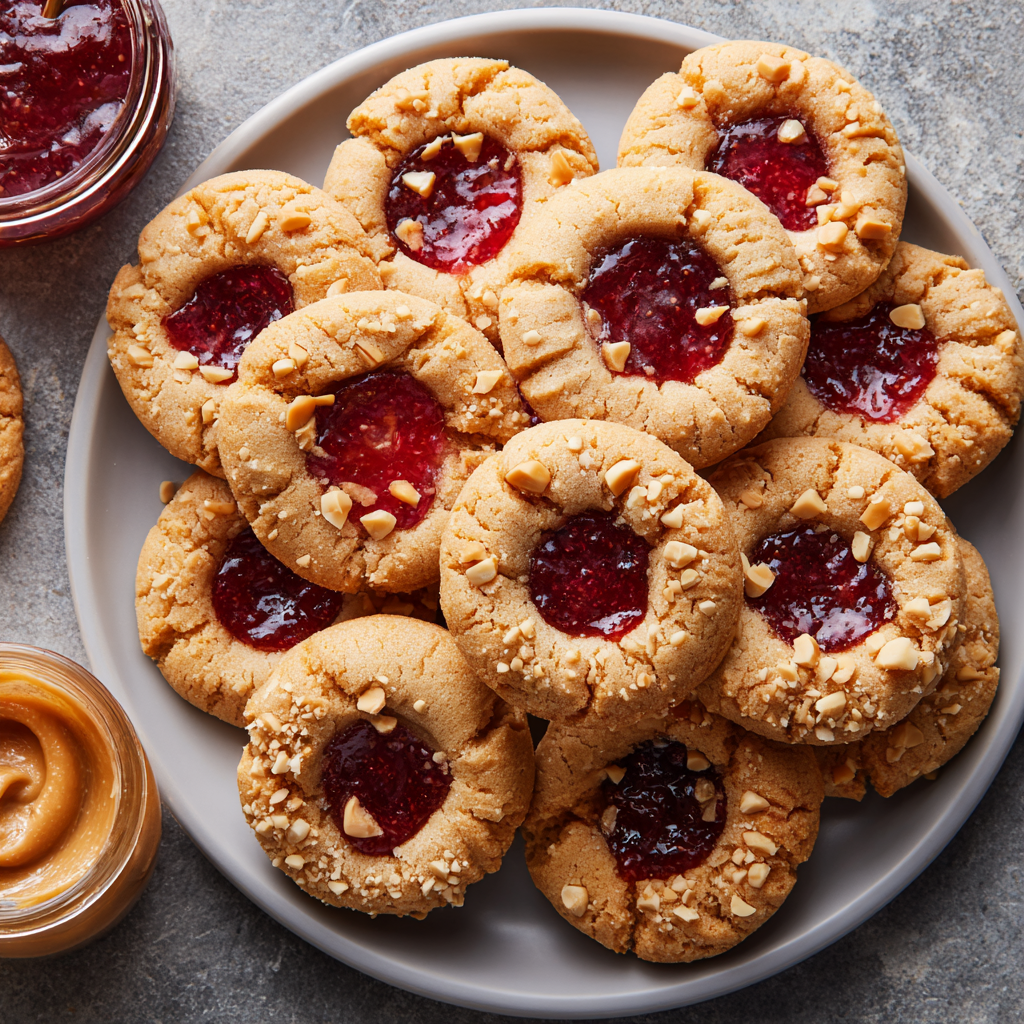
That’s exactly what we’re doing today with these Peanut Butter & Jelly Thumbprint Cookies. We’re talking a super soft, peanut buttery dough that’s just begging for a sweet, fruity jewel of jam right in the center. And because we’re all about that “what if we tried this?” energy here at Food Meld, we’re not stopping there. We’re adding a sprinkle of flaky sea salt for that perfect sweet-and-salty kick, a hint of honey for a floral shine, and a crunchy peanut or pretzel topping because, well, why not? It’s all about creating those “you’ve gotta try this” moments, right in your own kitchen.
This recipe is a total crowd-pleaser, perfect for bake sales, potlucks, or just a Tuesday night when you need a little edible hug. I’ve doubled the batch because trust me, you’ll want a big stack of these. They’re fun to make, even more fun to eat, and they’ll make your whole house smell incredible. So, grab your favorite jar of jelly, and let’s turn that classic flavor into something unforgettable.
A Lunchbox Memory Turned Cookie Dream
This recipe takes me right back to my grandma’s kitchen table. I spent a lot of afternoons there, and without fail, she’d have a PB&J sandwich waiting for me. But it was never just any sandwich. It was always on toasted wheat bread, with extra-crunchy peanut butter and her homemade strawberry-rhubarb jam. She’d cut it into four perfect little triangles, and we’d sit and talk about my day. It was our thing.
One day, I was “helping” her bake her famous thumbprint cookies, the ones she usually filled with apricot jam. I looked at the little thumb indents in the dough and then at my half-eaten sandwich, and my six-year-old brain had what felt like a revolutionary idea. “Grandma,” I said, with all the seriousness I could muster, “what if we put peanut butter IN the cookie, and then used your jelly in the middle?” She laughed that big, warm laugh of hers and said, “Jackson Walker, you might be on to something.” We experimented right then and there, and while that first batch was a little… rustic… the magic was there. This recipe is my grown-up, polished, and Food Meld-approved version of that messy, beautiful kitchen moment. It’s a taste of my Southern roots, a nod to classic comfort, and a whole lot of fun.
Gathering Your Flavor Arsenal
Here’s everything you’ll need to create these little pockets of joy. I’ve included some of my favorite chef insights and swaps so you can make this recipe your own.
- 1 cup (2 sticks) unsalted butter, softened – This is the base of our rich, tender dough. Using unsalted lets you control the salt level. Chef’s Tip: “Softened” means cool to the touch but your thumb can make a gentle indent. Don’t melt it! If you’re in a hurry, cut the sticks into tablespoons and let them sit for 15-20 minutes.
- 1 cup creamy peanut butter – I prefer creamy for a smooth dough, but crunchy works great if you want extra texture throughout. For a next-level flavor, try using a natural, no-stir peanut butter.
- 1 cup granulated sugar + 1 cup packed brown sugar – The white sugar gives structure and crispness, while the brown sugar brings moisture, chew, and that deep molasses flavor. Really pack it into your measuring cup!
- 2 large eggs – Our binding agent. Make sure they’re at room temperature to blend seamlessly into the creamed butter and sugar.
- 2 tsp vanilla extract – The warm, aromatic backbone that makes everything taste more… well, everything. Don’t skip it!
- 2 1/2 cups all-purpose flour – The structure of our cookie. For a slightly more tender cookie, you can swap 1/2 cup with whole wheat pastry flour.
- 1 tsp baking soda + 1/2 tsp baking powder – Our leavening dream team. The baking soda helps with spread and browning, while the baking powder gives a little lift. Check the dates on your containers—old leaveners are a cookie’s worst enemy!
- 1/2 tsp salt – Crucial for balancing all the sweetness and making the peanut butter flavor pop.
- 1 cup jelly or jam (strawberry, raspberry, or grape) – The star of the show! I love a seedless raspberry for its tartness, but use your favorite. Pro Tip: Gently warm the jam for 10 seconds in the microwave to make it easier to spoon.
- 1 tbsp honey (optional) – A little swirl mixed into the jam adds a beautiful shine and a subtle floral note that pairs amazingly with peanut butter.
- Chopped roasted peanuts or crushed pretzels (for garnish) – This is our “creative twist.” Peanuts double down on the flavor, while pretzels add a fantastic salty crunch.
- Flaky sea salt (optional, for topping) – This is my secret weapon. A tiny sprinkle on the warm cookies right when they come out of the oven creates a perfect sweet-and-salty bite.
Let’s Build Some Cookie Magic: Step-by-Step
Ready to get your hands a little messy? This is the fun part. Follow these steps, and you’ll be a thumbprint cookie pro in no time.
- Preheat and Prep. Fire up your oven to 350°F (175°C). Line your baking sheets with parchment paper. This isn’t just for easy cleanup; it prevents the bottoms from over-browning and makes your life so much easier. Chef’s Hack: If you don’t have parchment, a light coating of baking spray works too.
- Cream the Good Stuff. In a large bowl, beat together the softened butter, peanut butter, granulated sugar, and brown sugar. We’re not just mixing here; we’re “creaming.” Beat it on medium-high speed for a good 2-3 minutes until it’s light, fluffy, and pale in color. This step incorporates air, which is key for a perfect cookie texture.
- Incorporate the Wet Team. Beat in the eggs, one at a time, letting each one fully blend in before adding the next. Then, pour in that glorious vanilla extract. Scrape down the sides of the bowl to make sure everything is homogenous.
- Whisk the Dry Ingredients. In a separate bowl, whisk together the flour, baking soda, baking powder, and salt. Why whisk? It evenly distributes the leaveners so you don’t get a bitter bite of baking soda in one cookie and a flat cookie next to it. Gradual is the name of the game here. Add the dry ingredients to the wet in two or three additions, mixing on low speed until just combined. Overmixing is the enemy of a tender cookie!
- Scoop and Roll. This is where the cookie shape comes to life! I use a 2-tablespoon cookie scoop for perfect uniformity, but a spoon works just fine. Roll the dough into smooth, tight balls. This helps them keep their shape in the oven.
- Make Your Mark. Place the dough balls a couple of inches apart on your prepared baking sheets. Now, press a deep, confident well into the center of each ball. I use the handle of a wooden spoon—it’s the perfect size! Don’t be shy; you want a good crater to hold all that jammy goodness. If the dough cracks a little, just smooth it with your fingers.
- First Bake. Pop those trays into your preheated oven and bake for 10-12 minutes. You’re looking for puffed tops and set edges. They might still look a little soft in the middle—that’s perfect! They’ll firm up as they cool.
- The Jam Jam. As soon as the cookies come out of the oven, the wells will have puffed up a bit. Take the back of that same wooden spoon (or your thumb) and gently re-press the indentations. Now, spoon about a teaspoon of your jam (mixed with that optional honey) into each well. The residual heat will make the jam all glossy and inviting.
- Garnish and Glam. While the cookies are still warm and the jam is tacky, sprinkle on your chopped peanuts or crushed pretzels. This is also the time for that magical flaky sea salt. It sticks perfectly now and makes all the difference.
- The Hardest Part: Wait. Let the cookies cool on the baking sheet for at least 10 minutes before transferring them to a wire rack. I know, it’s torture. But this allows them to set up so you don’t have a jammy disaster. They are absolutely divine slightly warm, but just as amazing at room temp.
How to Serve These Beauties
Okay, you’ve baked a masterpiece. How do you show it off? These cookies are stars on their own, but a little presentation goes a long way.
For a simple, homey vibe, pile them high on a rustic wooden board or a vintage plate. That jam center just pops against a dark background. If you’re serving them for dessert, take it up a notch. Place a warm cookie on a small plate next to a scoop of really good vanilla bean ice cream. The contrast of warm cookie and cold ice cream is a religious experience. For a fun brunch or coffee break, serve them on a tiered stand with other pastries.
My favorite way? With a tall, ice-cold glass of milk, obviously. But for the adults, a cup of strong black coffee or even a glass of dessert wine like a Moscato d’Asti pairs incredibly well. The wine’s slight fizz and peach notes cut through the richness of the peanut butter beautifully. However you serve them, get ready for recipe requests!
Mix It Up! Creative Twists on the Classic
Feeling adventurous? This recipe is a fantastic canvas for your own flavor experiments. Here are a few of my favorite ways to mix it up:
- Chocolate Drizzle Dream: After the cookies have cooled, melt some chocolate chips with a teaspoon of coconut oil and drizzle it extravagantly over the top. It’s like a PB&J got fancy.
- Spicy & Smoky Upgrade: Add 1/2 teaspoon of cinnamon and a tiny pinch of cayenne pepper to the dry ingredients. The warm spice with the sweet jam and salty peanut butter is a next-level flavor bomb.
- SunButter & Apple Swirl (Allergy-Friendly): Swap the peanut butter for sunflower seed butter and fill the thumbprints with a thick apple butter. Garnish with sunflower seeds. It’s a safe and utterly delicious alternative for school functions.
- Granola Crunch: Instead of peanuts or pretzels, use your favorite granola clusters for the garnish. It adds a wonderful texture and a honey-oat flavor that’s just so good.
- Gourmet Jam Bar: Make a few small batches! Do a third with raspberry jam, a third with orange marmalade, and a third with a spicy pepper jelly. It’s a beautiful and impressive platter that lets everyone find their favorite.
Jackson’s Kitchen Notes & Stories
This recipe has seen a lot of iterations in my kitchen. The first time I made them for the blog, I got a little overzealous with the thumbprint and pressed straight through to the pan. Let’s just say I had a batch of PB&J lace cookies with a jam-filled crater in the center. They were still delicious, but not exactly blog-worthy! The key is a firm, deep press, but not a puncture.
I’ve also learned that the type of peanut butter matters. The natural, oily kind can sometimes make the cookies spread more. If that’s all you have, no worries! Just give it a good stir and maybe add an extra tablespoon or two of flour to the dough until it feels scoopable, not greasy. This recipe is forgiving, I promise. It’s all about having fun and enjoying the process, even the messy parts.
FAQs & Quick Fixes for Cookie Calamities
I’ve gotten a lot of questions about this recipe over the years. Here are the answers to the most common ones!
Q: My thumbprint wells puffed up completely during baking! What did I do wrong?
A: This happens to the best of us! It usually means the wells weren’t quite deep enough. Next time, press a little deeper and wider. The good news is, it’s an easy fix. As soon as the cookies come out of the oven, take the back of a teaspoon or a small, round measuring spoon and firmly but gently re-indent the wells. Then, quickly add your jam.
Q: Can I make the dough ahead of time?
A: Absolutely! You can scoop the dough balls, place them on a baking sheet, and freeze them solid. Then, transfer them to a freezer bag. When you’re ready to bake, just arrange the frozen dough balls on your pan, let them sit for 5-10 minutes to warm up slightly so you can make the thumbprint, and then bake. You might need to add 1-2 minutes to the baking time.
Q: My jam slid right off the warm cookie. Help!
A> This usually means the jam was too runny. The fix is simple: next time, use a thicker jam or preserves. If you only have jelly, you can cook it down in a small saucepan for a few minutes to thicken it, then let it cool slightly before using. Also, make sure you’re adding the jam after the cookies come out of the oven and you’ve re-pressed the wells.
Q: Can I use natural peanut butter?
A> You can, but be prepared for a slightly different texture. Natural peanut butters (the kind that separate) have more oil and can make the cookies spread more and be a bit more crumbly. If you use it, make sure you stir it incredibly well so the oil is fully incorporated, and consider chilling the dough for 30 minutes before scooping and baking.
Nutritional Info (Because We’re All Curious!)
Okay, let’s be clear: this is a treat, and a darn good one. But I know many of you like to keep track, so here’s a rough breakdown per cookie (assuming you get 32 cookies from the batch). Remember, these are estimates and can vary based on the specific brands of ingredients you use.
Calories: ~180 | Fat: 10g | Carbs: 20g | Sugar: 11g | Protein 4g Fiber: 1g Sodium: 85mg
Final Thoughts: A Cookie That Feels Like Home
And there it is — the humble peanut butter and jelly, all grown up but still carrying that same heartwarming nostalgia in every bite. These Peanut Butter & Jelly Thumbprint Cookies are the kind of treat that remind you why you fell in love with baking in the first place. They’re simple, cozy, and packed with that “made with love” energy we all crave.
I love how these cookies manage to walk that perfect line between comfort and creativity. They’re familiar enough to make everyone smile, but just different enough to make them memorable. Whether you’re baking them for a bake sale, a family get-together, or just because the afternoon feels like it could use a little sweetness, they always deliver.
As the smell of peanut butter fills the kitchen and that glossy jam catches the light, you’ll know you’ve created something special — something that connects the past to the present, one cookie at a time. So go ahead, grab a few warm from the tray, pour a glass of milk (or coffee, if you’re me), and take a moment to savor that first bite.
Because sometimes, the best recipes are the ones that take us right back home. 💛


