
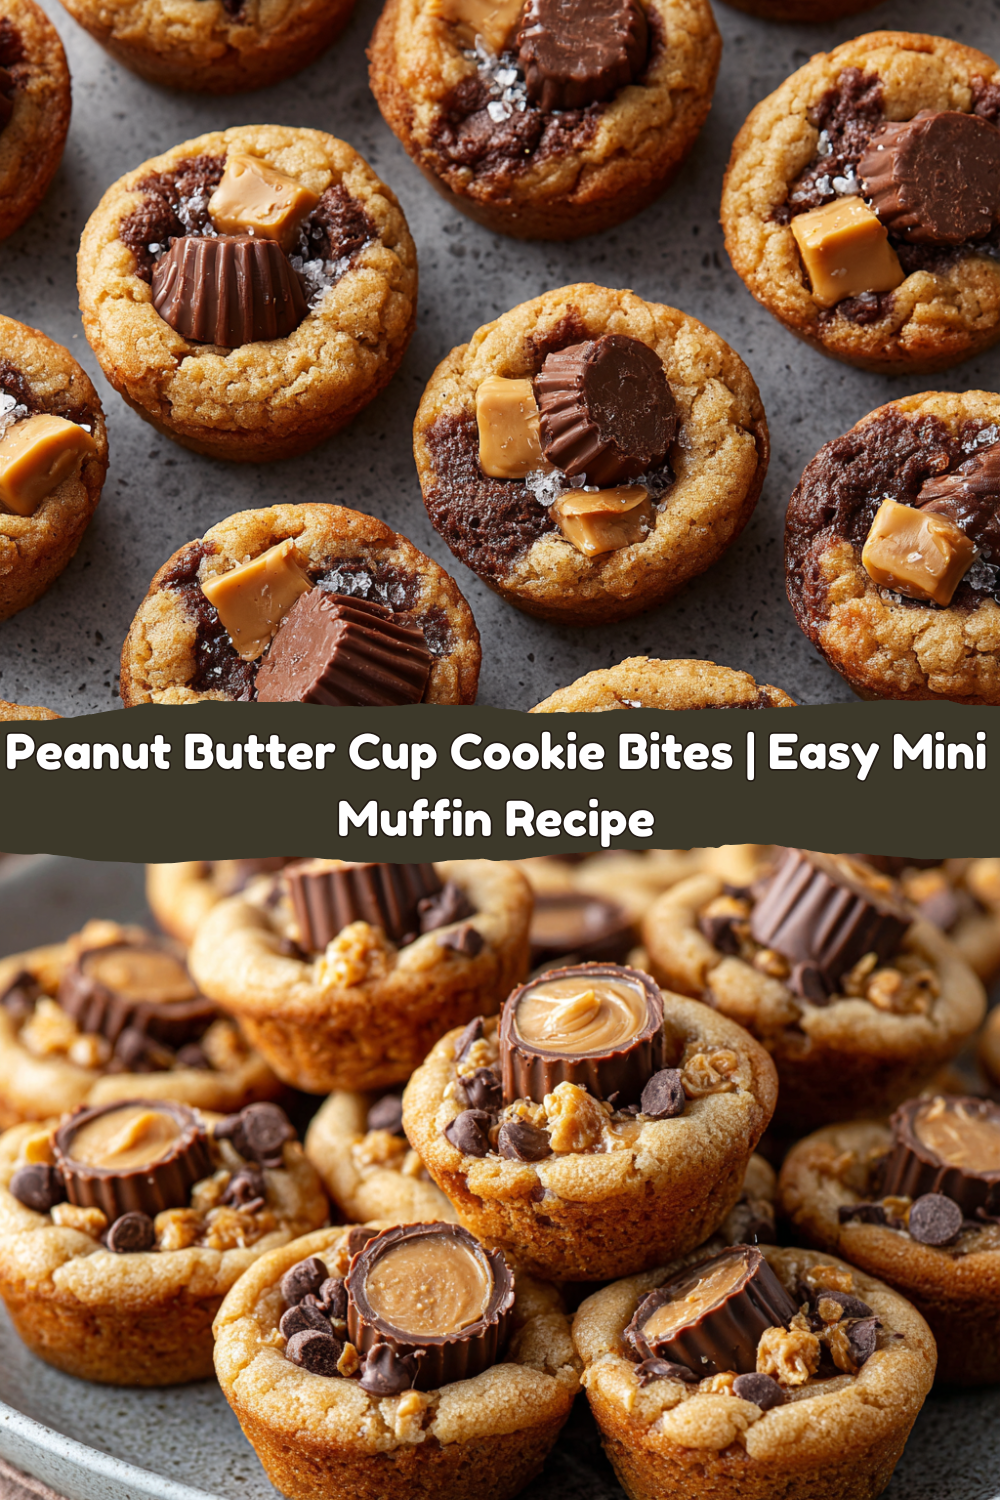
Your New Favorite Bite-Sized Obsession: Peanut Butter Cup Cookie Bites
Hey friends, Jackson from Food Meld here. Let’s get real for a second. Is there any duo in the history of, well, everything, that’s more perfect than peanut butter and chocolate? It’s the ultimate comfort food pair, the king of candy aisles, and the flavor combo that turns a regular Tuesday into a mini celebration. I’m talking about that rich, salty-sweet peanut butter goodness melting into deep, luxurious chocolate. It’s a match made in flavor heaven, and today, we’re baking it into the most irresistible, crowd-pleasing, “I-need-another-one-immediately” cookie bite you’ve ever sunk your teeth into.
These aren’t just any cookies. We’re taking a soft, chewy, peanut butter cookie base, baking it into perfect little cups in a mini muffin pan, and then, while they’re still warm and dreamy from the oven, we’re pressing a miniature peanut butter cup right into the center. The result? A cookie-cup hybrid that’s part cookie, part candy, and 100% pure magic. The edges are slightly crisp, the center is impossibly soft, and that melty peanut butter cup crown? Forget about it. It’s the stuff of legends. I’ve doubled this batch to make a whopping 80 because, trust me, you’ll want to share these (or maybe not, no judgment here). So, preheat that oven, grab your favorite mixing bowl, and let’s cook something awesome together.
The Day My Grandma’s Cookie Jar Got an Upgrade
This recipe takes me right back to my grandma’s kitchen in Georgia. She had this giant ceramic cookie jar shaped like a rooster that was always full. Her classic peanut butter cookies, with those iconic criss-cross fork marks, were my kryptonite. I’d sneak in after school, grab a few still-slightly-warm from her afternoon bake, and dunk them in a glass of cold milk. It was my perfect after-school ritual.
But then, one Halloween, I had a brainwave. I’d just come back from trick-or-treating with a pillowcase full of loot, and a bunch of those miniature peanut butter cups were staring me down. I looked at Grandma’s cookies. I looked at the candy. And a lightbulb went off. I carefully unwrapped a few and pressed them into the center of a fresh batch of warm cookies. The peanut butter cup softened instantly, becoming this gooey, glorious topping. I handed one to my grandma. She took a bite, her eyes got wide, and she just said, “Well, I’ll be. Jackson Walker, you’re a genius.” That was the moment I learned that the best recipes often start with a simple, fun, “what if we tried this?” moment. This recipe is that moment, perfected.
Gathering Your Flavor Arsenal
Here’s everything you’ll need to create these little bites of joy. I’ve included some of my favorite insights and swaps to make this recipe truly yours.
- 3 ½ cups all-purpose flour: The foundation of our cookie. It gives structure so our bites hold their cup shape. For a slightly more tender bite, you can swap one cup with cake flour.
- 1 tsp salt: Crucial. It balances the sweetness and makes the chocolate and peanut butter flavors pop. I always use fine sea salt in the dough.
- 2 tsp baking soda: Our leavening agent. It gives the cookies that perfect puff and lift. Make sure it’s fresh for the best results!
- 1 cup unsalted butter, softened: The key to richness and that dreamy, soft texture. “Softened” means it should give slightly when you press it, but not be oily or melted. This is non-negotiable for creaming properly!
- 1 cup white sugar + 1 cup packed brown sugar: The dynamic duo of sweetness. White sugar helps them spread and crisp up a bit, while brown sugar (pack it tight into your measuring cup!) adds moisture, chew, and that classic molasses warmth.
- 1 cup creamy peanut butter: The star of the show! Use a standard commercial brand like Jif or Skippy for the best texture and consistency. Natural peanut butter (the kind that separates) can make the dough too oily.
- 2 large eggs, beaten: Our binder. They bring everything together and add richness. Let them come to room temperature for a smoother, more emulsified dough.
- 2 tsp vanilla extract: The flavor enhancer. It adds a beautiful depth that makes the cookies taste more complex. Don’t skip it!
- 4 tbsp milk: A little extra liquid to make the dough perfectly pliable and soft.
- 80 miniature chocolate-covered peanut butter cups, unwrapped: The grand finale! Unwrapping them is a great job for helpers in the kitchen. Pro tip: get this done before you start baking so you’re ready to go when the cookies come out of the oven.
- Optional twist: ½ tsp cinnamon: My little secret. It adds a whisper of warmth in the background that makes the peanut butter taste even more incredible. You won’t pinpoint the cinnamon, you’ll just think, “Wow, what is that amazing flavor?”
- Optional twist: ½ cup mini chocolate chips: Fold these in for double the chocolatey goodness. Because more chocolate is always the answer.
- Optional garnish: Sea salt flakes or crushed peanuts: A light sprinkle on top right after pressing in the peanut butter cup takes these from a 10 to an 11. The salty crunch is everything.
Let’s Build Some Magic: Step-by-Step
Okay, team, let’s do this. It’s simple, I promise. Just follow these steps and you’ll be a cookie-bite hero in no time.
Step 1: Fire up your oven to 375°F (190°C). This is our sweet spot—hot enough to get a nice puff and set the edges, but not so hot that the bottoms burn before the centers are cooked. While it’s heating, get your mini muffin pans ready. I like to give them a very light coating of non-stick spray, even if I’m using paper liners. It just guarantees a clean release. If you’re using liners, go for it! They make cleanup a breeze and look cute for parties.
Step 2: In a medium bowl, let’s whisk together our dry team: the flour, salt, baking soda, and if you’re being fancy, that ½ tsp of cinnamon. Whisking is better than sifting here—it aerates the flour and makes sure everything is evenly distributed. No one wants a pocket of baking soda in their cookie! Set this bowl aside.
Step 3: In a large mixing bowl, it’s time for the main event: creaming. Using a hand mixer or a stand mixer with the paddle attachment, beat the softened butter, white sugar, brown sugar, and peanut butter together. Now, don’t rush this! Beat it on medium-high speed for a good 2-3 minutes, until it’s pale, fluffy, and beautifully smooth. This step incorporates air into the dough, which is key for texture. You’ll actually hear the sound change when it’s ready—it gets quieter.
Step 4: Scrape down the sides of the bowl with a spatula. Now, beat in the beaten eggs, vanilla extract, and milk until everything is fully combined. It might look a little curdled at first, but just keep mixing and it will come together into a gorgeous, smooth mixture.
Step 5: Now, with your mixer on low speed, gradually add the dry ingredients to the wet ingredients. Mix just until the flour disappears. Do not overmix! Overworking the dough after the flour is added is the number one way to end up with tough cookies. As soon as you don’t see any more dry flour, stop! If you’re adding the ½ cup of mini chocolate chips</strong, now’s the time to fold them in gently with a spatula.
Step 6: Time to get your hands dirty! Roll the dough into small, 1-inch balls. I use a small cookie scoop for this to keep them all uniform, which means they’ll bake evenly. Place each ball into a cup of your prepared mini muffin pan. You don’t need to press them down; they’ll spread as they bake.
Step 7: Bake for 8-10 minutes. They’re done when the edges are lightly golden and the tops are puffed and set. They might look a tiny bit underdone in the center—that’s perfect! They will continue to cook from the residual heat in the pan. This is the secret to a soft, chewy center.
Step 8: HERE IS THE MOST IMPORTANT STEP. The second the pans come out of the oven, take an unwrapped peanut butter cup and firmly press it right into the center of each hot cookie. You’ll see it start to get all shiny and melty immediately. This is what you want! Let the cookies cool in the pan for a full 10 minutes. This allows them to set and firm up enough to handle. If you try to take them out too early, they might break.
Step 9: After 10 minutes, carefully transfer the cookie bites to a wire rack to cool completely. If you’re using the sea salt flakes or crushed peanuts, sprinkle a tiny bit on top of each melty peanut butter cup now. Let them cool completely if you can resist—the peanut butter cup will set into a fudgy, perfect topping.
How to Serve These Showstoppers
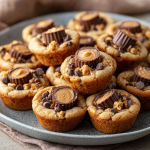
These cookie bites are stars all on their own, but a little presentation goes a long way! For a casual family treat, just pile them high on a rustic wooden board or in that trusty old cookie jar. The sight of them is enough to make anyone smile.
If you’re bringing them to a party or potluck, I love placing them in mini paper liners (if you didn’t bake them in liners) and arranging them on a festive platter. They’re the perfect finger-food size, so no plates or forks needed! For the ultimate experience, serve them slightly warm. Pop them in the microwave for about 5-8 seconds to get that peanut butter cup melty again. And please, for the love of all that is good, serve them with a tall, ice-cold glass of milk. It’s a mandatory part of the experience. A scoop of vanilla bean ice cream on the side turns them into a next-level dessert.
Mix It Up: Fun Flavor Twists
Once you’ve mastered the classic, it’s time to play! Here are a few of my favorite ways to mix it up:
- The Nutty Professor: Swap the creamy peanut butter for crunchy peanut butter and fold in ½ cup of chopped, toasted peanuts for an incredible texture throughout.
- Dark Chocolate Dream: Not a milk chocolate fan? Use miniature dark chocolate peanut butter cups instead for a richer, less sweet bite. You could even press a square of dark chocolate into the center instead!
- PB&J Surprise: Before baking, use your thumb or the back of a ¼ tsp measuring spoon to make a small indentation in the center of each dough ball. Fill it with a tiny dollop (about ¼ tsp) of your favorite jam or raspberry preserves. Bake as directed. The jam bakes into the cookie for a delicious surprise.
- The “Elvis”: channel the King himself! Add ½ cup of chopped, cooked bacon (make it crispy!) to the dough. The salty, smoky bacon with the sweet peanut butter and chocolate is mind-blowing.
- Gluten-Free Friendly: You can easily make these gluten-free by using a 1:1 gluten-free all-purpose flour blend. I’ve had great success with Bob’s Red Mill and Cup4Cup brands.
Jackson’s Chef Notes & Kitchen Stories
This recipe has evolved from that first childhood experiment in my grandma’s kitchen. The biggest lesson I’ve learned? The unwrapping. The first time I made a triple batch for a friend’s wedding, I seriously underestimated the time it would take to unwrap 240 miniature peanut butter cups. My wife and I sat on the kitchen floor, surrounded by piles of foil wrappers, feeling like we’d undertaken a monumental task. Now, I either enlist a team of helpers (kids are weirdly efficient at this) or I buy the bags of unwrapped mini PB cups you can sometimes find at bulk stores or online. A total game-changer.
Also, don’t be afraid if your dough seems a little thick—it’s meant to be! It should be rollable and not overly sticky. If it is sticking to your hands, pop it in the fridge for 15-20 minutes to firm up. And finally, always, always press the peanut butter cup in while the cookies are blazing hot. That’s what creates the unbreakable bond between cookie and candy.
FAQs: Your Questions, Answered
Q: My cookie bites stuck to the pan! How do I prevent this?
A: Greasing the pan well is key, even if you use liners. If you’re not using liners, let them cool for the full 10 minutes. If they still seem stuck, carefully run a small offset spatula or a butter knife around the edges to loosen them. They will firm up as they cool.
Q: Can I make the dough ahead of time?
A: Absolutely! You can cover the dough bowl and refrigerate it for up to 2 days. Let it sit at room temperature for about 20-30 minutes before rolling into balls so it’s easier to work with. You can also freeze the rolled, unbaked dough balls on a baking sheet, then transfer them to a freezer bag. Bake straight from frozen, adding 1-2 minutes to the baking time.
Q: Why are my cookies dry or cakey?
A: This usually means the dough was overmixed after the flour was added, or they were baked a minute or two too long. Remember, mix until *just* combined and take them out when the edges are golden but the centers still look soft.
Q: Can I use a standard muffin pan instead?
A: You can, but you’ll get fewer, much larger cookies. I’d recommend dividing the dough into larger balls (maybe 1.5 inches) and adjusting the bake time to 12-15 minutes. You’ll also need full-size peanut butter cups for the topping!
Peanut Butter Cup Cookie Bites
- Total Time: 35 minutes
- Yield: 80 Cookies 1x
Description
These irresistible peanut butter cookie bites are soft, chewy, and loaded with rich, chocolatey goodness—baked to perfection in mini muffin pans and crowned with a melty peanut butter cup. We’ve doubled the batch to make 80 cookies (because one is never enough) and added a few fun twists to elevate every bite.
Ingredients
3 ½ cups all-purpose flour
1 tsp salt
2 tsp baking soda
1 cup unsalted butter, softened
1 cup white sugar
1 cup creamy peanut butter
1 cup packed brown sugar
2 large eggs, beaten
2 tsp vanilla extract
4 tbsp milk
80 miniature chocolate-covered peanut butter cups, unwrapped
Optional twist: ½ tsp cinnamon for warmth
Optional twist: ½ cup mini chocolate chips folded into the dough
Optional garnish: Sea salt flakes or crushed peanuts for topping
Instructions
Preheat oven to 375°F (190°C). Lightly grease mini muffin pans or line with paper mini cups.
In a bowl, whisk flour, salt, baking soda, and cinnamon (if using).
In a large mixing bowl, cream butter, white sugar, brown sugar, and peanut butter until smooth and fluffy.
Beat in eggs, vanilla, and milk until fully combined.
Gradually mix in the dry ingredients. If using, fold in mini chocolate chips.
Roll dough into 1-inch balls and place each into a mini muffin cup.
Bake for 8–10 minutes, or until lightly golden and puffed.
Immediately press an unwrapped peanut butter cup into the center of each cookie. Let cool in the pan for 10 minutes before transferring to a wire rack.
Sprinkle tops with sea salt or crushed peanuts if desired.
- Prep Time: 25 minutes
- Cook Time: 10 minutes
Nutrition
- Calories: 130 / Cookie
- Sugar: 9g / Cookie
- Fat: 7g / Cookie
- Saturated Fat: 3g / Cookie
- Carbohydrates: 14g / Cookie
- Protein: 2g / Cookie
Nutritional Info (Approximate, Per Cookie)
Alright, let’s keep it real. These are a treat, and treats are meant to be enjoyed! But here’s a rough breakdown so you can indulge mindfully. Remember, these values can vary based on specific brands and ingredients used.
- Calories: 130
- Total Fat: 7g
- Saturated Fat: 3g
- Carbohydrates: 14g
- Sugar: 9g
- Protein: 2g
These are rich and satisfying, so one or two is often enough to curb that sweet tooth. But hey, I won’t tell if you have three.
Final Thoughts
And that’s it, folks! You’re now armed with the recipe for what might just become your most-requested treat: Peanut Butter Cup Cookie Bites. These little gems strike the perfect balance between chewy cookie and melty candy, with a nostalgia factor that’s off the charts. Whether you’re piling them into Grandma’s cookie jar, bringing them to a party, or sneaking one straight off the cooling rack, they’re guaranteed to disappear fast.
My best advice? Always double the batch. One for sharing, one for keeping hidden in your freezer stash (no judgment). Enjoy every bite of that chocolate–peanut butter magic, and tag me @FoodMeld when you make them—I can’t wait to see your spin!


