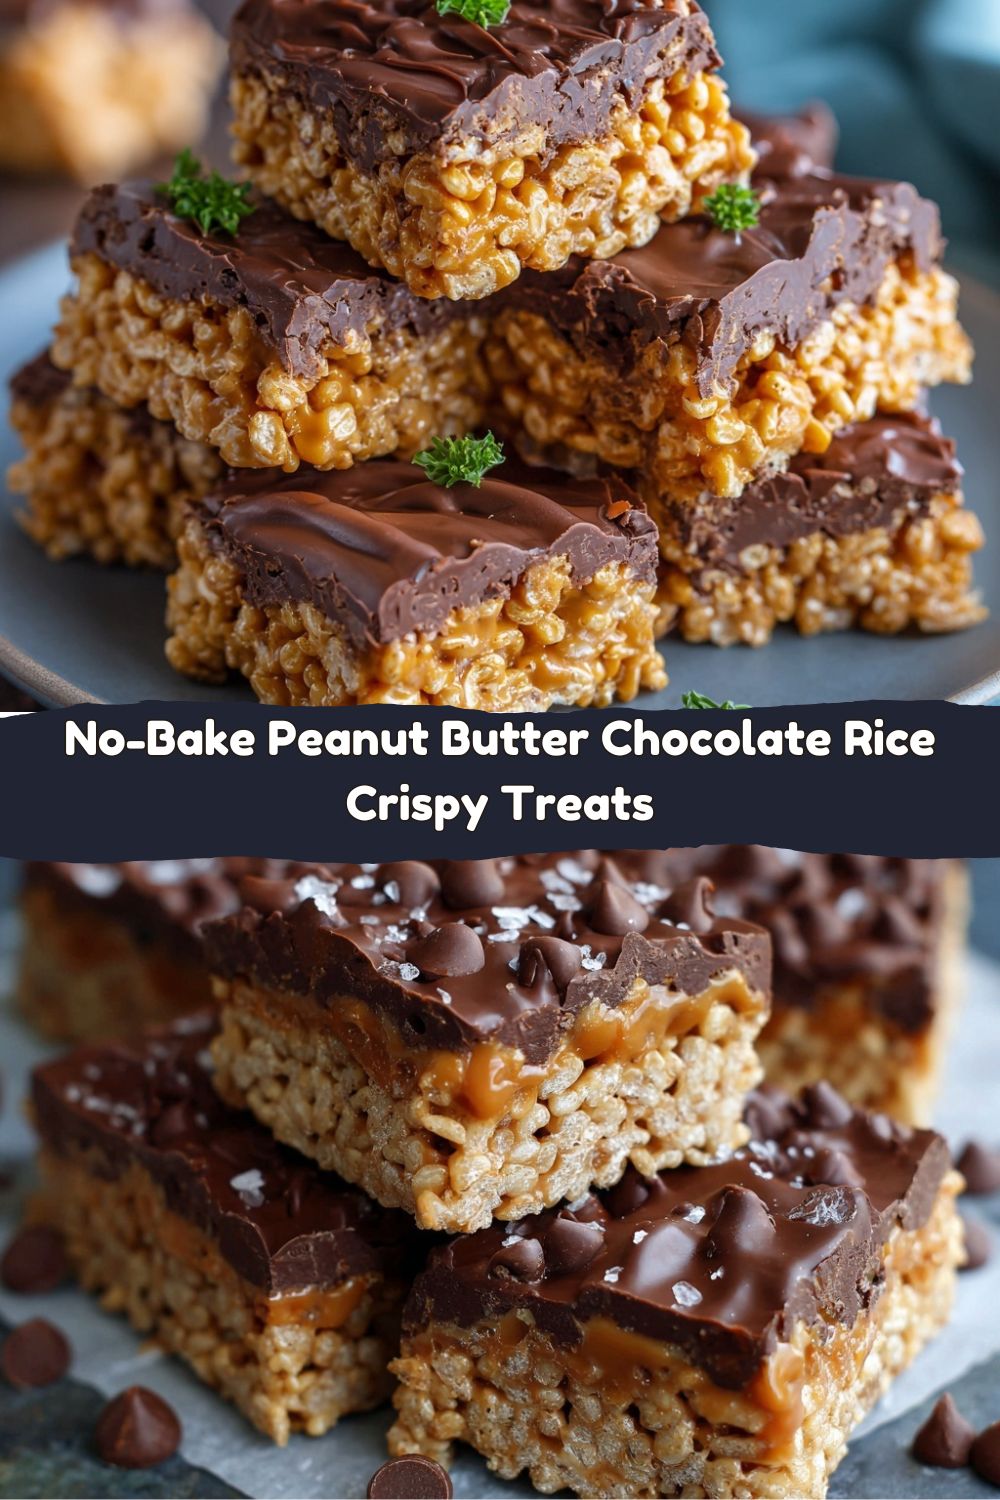
Peanut Butter Chocolate Rice Crispy Treats: The No-Bake Legend
Hey friends, Jackson from Food Meld here. Let’s get one thing straight right out of the gate: I love a complex, slow-simmered sauce or a perfectly seared steak as much as the next guy. But sometimes? Sometimes, the food that really wins your heart isn’t the fancy one. It’s the one that comes together in a single pot, with zero oven time, and delivers a level of pure, unadulterated joy that’s just… unbeatable.
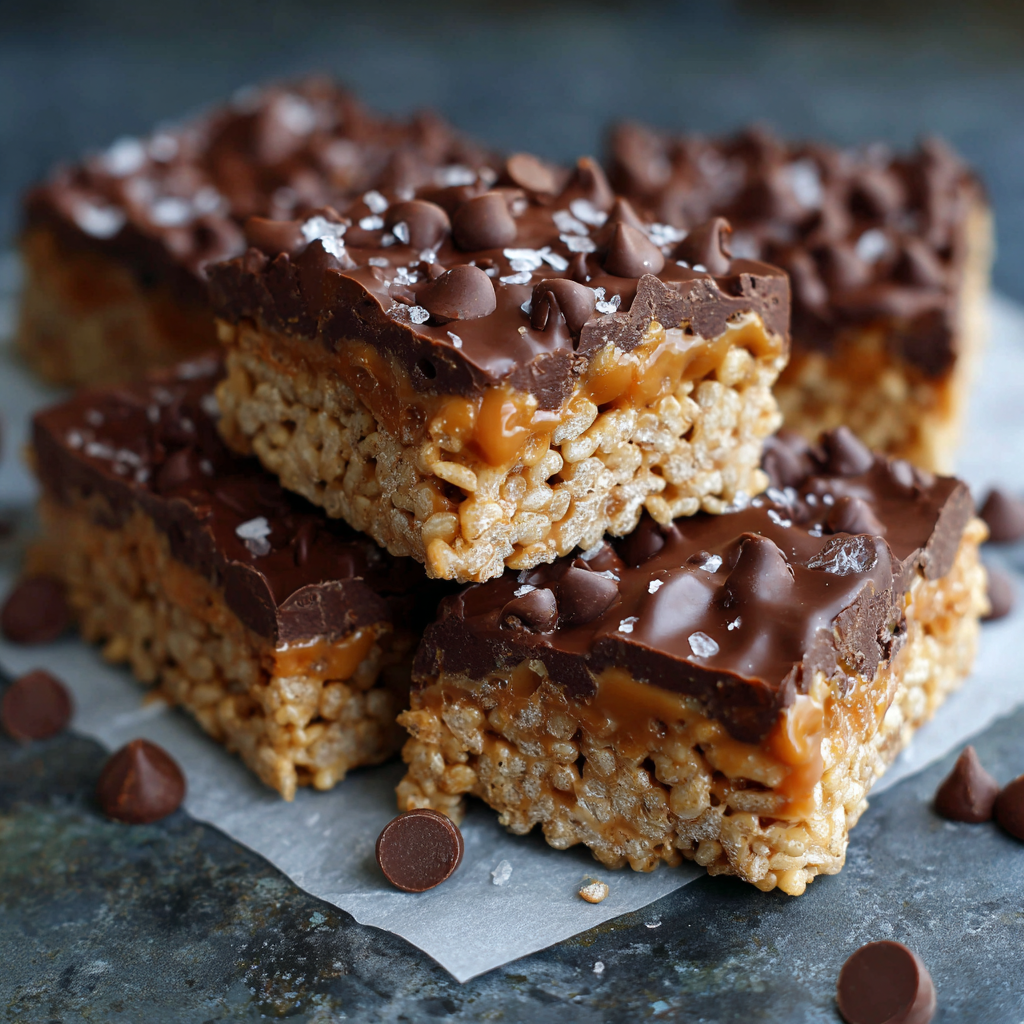
That’s exactly where these Peanut Butter Chocolate Rice Crispy Treats come in. We’re taking a classic and turning it into a superstar. Imagine this: a base that’s buttery, chewy, and packed with that sweet-and-salty peanut butter punch. Then, we crown it with a slick, rich layer of chocolate and butterscotch that hardens into this perfect, glossy shell. The texture is everything—a satisfying crunch gives way to a gooey, melt-in-your-mouth center.
The best part? You don’t need to be a pastry chef. You don’t even need to preheat an oven. This is a 15-minute, one-pan (okay, one saucepan and one baking sheet) miracle. It’s the kind of recipe you whip up when a sugar craving hits, when friends pop over unexpectedly, or when you just need a guaranteed win. It’s fun, it’s a little messy, and it’s absolutely packed with those “you’ve gotta try this” flavors I’m always chasing. So, grab your biggest saucepan and let’s make some magic happen.
The Bake Sale That Started It All
This recipe takes me right back to my grandma’s kitchen, with its yellow Formica counters and the constant, comforting smell of something sweet. She was the queen of “doctored-up” classics. One year, for our school bake sale, she decided our standard rice crispy squares needed a little more “oomph.” With a mischievous grin, she pulled out her jar of chunky peanut butter and a bag of chocolate chips.
What happened next felt like alchemy. She melted, she stirred, she pressed that sticky cereal mixture into her trusty old pan with the heel of her hand. Then came the glorious chocolate layer. The result was pure bedlam at the bake sale table. Our treats sold out in minutes, and I remember beaming with pride, my chin still smudged with chocolate from our “quality control” test. That day, she taught me a core Food Meld philosophy: never be afraid to play with your food and make it your own. This recipe is a direct descendant of that afternoon—a little Southern ingenuity, a whole lot of love, and a very happy ending.
Gathering Your Gooey Arsenal
Here’s the beautiful, simple lineup you’ll need. I’ve added a few of my chef-y insights and swap ideas to make this recipe truly yours.
- ½ cup (1 stick) Unsalted Butter: This is the flavor foundation. I use unsalted so I can control the salt level, but salted works too—it just enhances that sweet-salty vibe! Chef’s Tip: For a deeper, nuttier flavor, you can brown your butter first. Just melt it in the saucepan until it foams and little brown specks appear, then proceed. It’s a next-level move!
- 1 cup Light Corn Syrup: This is our key to a chewy, soft treat that doesn’t get rock-hard. It provides that perfect, pliable texture.
- 1 cup Granulated Sugar: It sweetens the deal and works with the corn syrup to create that iconic crispy treat structure.
- 1 cup Creamy Peanut Butter: The star of the show! I like creamy for a smooth texture, but if you’re a texture person, chunky peanut butter adds a fantastic nutty crunch. Natural peanut butter can sometimes separate, so for guaranteed gooeyness, a standard brand like Jif or Skippy works best here.
- 8 cups Crispy Rice Cereal: The crunch! Any brand will do, but make sure your cereal is fresh for the best snap.
- 6 oz Semi-Sweet Chocolate Chips: I love the balance semi-sweet brings against the sweetness of the base. It keeps things from being too cloying.
- 6 oz Butterscotch Chips: This is the secret weapon! Butterscotch and peanut butter are a match made in heaven. It creates a uniquely rich, caramel-like topping that’s way more interesting than plain chocolate.
Let’s Build These Beauties: Your Foolproof Roadmap
Follow these steps, and you really can’t go wrong. I’m talking you through it like you’re right here in the kitchen with me.
- Prep Your Pan: First things first, grab that 11×17 inch baking sheet (a standard jelly roll pan). Grease it lightly with butter or, my personal favorite, line it with parchment paper. The parchment paper is a game-changer—it gives you a “sling” to lift the whole block out later for super clean cuts. No sticking, no fuss.
- Melt the Foundation: In a large saucepan (I mean it, go big—you’ll thank me later), melt your stick of butter over medium heat. Once it’s liquified, stir in the corn syrup and granulated sugar. Now, here’s a key tip: heat this gently until the mixture is just starting to bubble around the edges. Do not let it come to a rolling boil. We’re just dissolving the sugar, not making candy. This should only take 2-3 minutes.
- Create the Goo: Take the pan off the heat! This is important. Immediately dump in that whole cup of peanut butter. Stir, stir, stir until it’s completely melted and you have a smooth, gloriously shiny and fragrant peanut butter sauce. Take a moment to appreciate this. It’s a beautiful thing.
- Bring in the Crunch: Now, pour all 8 cups of crispy rice cereal into the saucepan. Using a sturdy spatula or a wooden spoon, gently fold the cereal into the peanut butter goo. Be patient and thorough—you want every single piece of cereal to get coated in that deliciousness. No naked cereal allowed!
- The Great Press-Down: Quickly transfer the mixture to your prepared pan. Now, for a perfectly even, compact treat, here’s my hack: take another piece of parchment paper and place it on top of the cereal mixture. Then, use the bottom of a flat measuring cup or a glass to press down firmly and evenly across the entire surface. This prevents the treats from being crumbly and gives you that perfect, dense chew.
- Whip Up the Magic Shell: In a microwave-safe bowl, combine the chocolate chips and butterscotch chips. Microwave on high for 2 minutes. Take it out (bowl might be hot, be careful!), and stir. It might not look melted yet, but keep stirring. The residual heat will melt the rest. If needed, pop it back in for 20-30 second bursts, stirring in between, until it’s completely smooth. Chef’s Note: You can also do this in a double boiler on the stovetop if you’re wary of the microwave!
- The Grand Finale & The Wait: Pour the melted chocolate-butterscotch goodness over the pressed cereal base. Use an offset spatula or the back of a spoon to spread it into a beautiful, even layer. Now, the hardest part: the waiting. Let the pan sit at room temperature until the topping is firm and set. This usually takes an hour or two. If you’re impatient (like me), you can speed this up by popping the whole pan into the fridge for about 30 minutes.
- Slice and Conquer: Once set, use a sharp knife to slice them into squares. For super clean cuts, you can run the knife under hot water and wipe it dry between slices. Then, try not to eat the whole pan in one sitting. You’ve been warned.
How to Serve These Show-Stoppers
Honestly, these treats are perfect just handed directly to a hungry human over the kitchen counter. But if you want to dress them up a little, I’ve got you covered.
For a party platter, stack them up on a cool cake stand or a rustic wooden board. You can even sprinkle a tiny bit of flaky sea salt over the chocolate topping right after you spread it for a gourmet touch and an extra flavor pop.
They’re the ultimate potluck hero—easy to transport and universally loved. And let’s talk about a la mode. Yes, you heard me. Gently warm a square for 10-15 seconds in the microwave and serve it with a scoop of vanilla bean ice cream. It’s a next-level dessert that’ll have everyone thinking you slaved away for hours.
Mix It Up! Creative Twists on the Classic
This recipe is a fantastic canvas for your own creativity. Here are a few of my favorite ways to mix it up:
- The Nutty Professor: Swap the creamy peanut butter for almond butter or cashew butter. Use all chocolate chips (no butterscotch) and sprinkle the top with chopped, toasted almonds for an elegant twist.
- Pretzel Power: For an insane sweet-and-salty crunch, replace 2 cups of the rice cereal with 2 cups of mini pretzel twists. The combination of the crispy cereal and the chewy pretzel is a texture dream.
- Rocky Road Rendezvous: After mixing the cereal, fold in 1 cup of mini marshmallows. Let them just barely start to melt into the mixture. Then, for the topping, use all chocolate chips and sprinkle the top with chopped walnuts before it sets.
- Double Chocolate Danger: Are you a chocoholic? Use all chocolate chips for the topping, and when you add the peanut butter to the base, also stir in ¼ cup of unsweetened cocoa powder. You get a chocolate-peanut butter base with a pure chocolate shell. You’re welcome.
- SunButter Swap (Allergy-Friendly): Have a nut allergy? No problem! Use SunButter (made from sunflower seeds) instead of peanut butter. It works like a charm and has a similar rich, creamy texture.
Jackson’s Kitchen Notes & Stories
This recipe has seen a lot of iterations in my kitchen. I once, in a moment of what I thought was pure genius, tried to use brown sugar instead of white for a deeper caramel flavor. Let’s just say it created a treat that was… aggressively chewy. We’re talking jaw-workout chewy. Lesson learned: sometimes the classic ratio is classic for a reason!
The beauty of this recipe is its resilience. It’s forgiving. If your topping seizes up a bit, add a tiny teaspoon of coconut oil while melting to smooth it right out. If you press the base a little too hard? It’s fine, you’ll just get a denser, fudgier bite. Trust your instincts, have fun with it, and don’t stress. That’s what cooking—and especially no-bake treats—is all about.
FAQs: Your Questions, Answered
Q: My treats turned out really hard. What did I do wrong?
A: The most common culprit is overcooking the butter-syrup-sugar mixture. Remember, you just need to heat it until the edges are bubbly and the sugar is dissolved, not boil it. Boiling it creates a harder candy-like texture as it cools. Also, make sure you’re using light corn syrup, not molasses or dark corn syrup, which can also lead to a harder product.
Q: Can I use natural peanut butter?
A> You can, but proceed with caution! Natural peanut butters often have oil that separates, which can make your treats greasy and less cohesive. If it’s all you have, make sure you stir the jar incredibly well before measuring. For guaranteed, foolproof gooeyness, a stabilized brand like Jif or Skippy is your best bet.
Q: How long do these stay fresh, and how should I store them?
A> Stored in an airtight container at room temperature, they’ll stay perfectly delicious for 3-4 days. You can stack them with layers of parchment paper in between. I don’t recommend the fridge for long-term storage, as it can dry out the cereal base, but it’s great for speeding up the setting process!
Q: My chocolate topping is thick and hard to spread. Help!
A> No worries! Just pop the bowl back in the microwave for another 15-20 seconds to loosen it up. If it’s still too thick, you can stir in a tiny bit (about ½ teaspoon) of coconut oil or even a sliver of butter to make it more pourable and spreadable.
Let’s Talk Nutrition (The Real Talk)
Look, we’re all friends here. This is a dessert, through and through. It’s a treat meant to be enjoyed for the glorious, sweet, and indulgent experience that it is. I’m not going to pretend it’s a health food.
That said, here’s a rough nutritional breakdown per square (assuming you cut 24 from the pan): Calories: 210 | Carbs: 28g | Fat: 10g | Sugar: 18g | Protein: 2g. The main sources of calories are the sugars and fats from the butter, peanut butter, and chips. The crispy rice cereal provides the carbohydrates. The key, as with all good things, is balance and moderation. Savor one (or two!) with a glass of cold milk, enjoy every single bite, and relish the happiness it brings. That’s the real nutrition.
Your New Go-To Treat Awaits
And there you have it. The recipe for what might just become your most-requested treat. It’s simple, it’s fast, and it delivers a flavor punch that’s way bigger than the effort required. This is the heart of what I do at Food Meld—taking the familiar, adding a bold twist, and showing you how to create something truly unforgettable without any kitchen stress.
I hope this recipe brings as much laughter and satisfaction to your kitchen as it has to mine. So tell me, did you add pretzels? Try the brown butter? I want to hear all about your creations! Tag me on social @FoodMeld or drop a comment on the blog. Now, go on. Get melding. Let’s cook something awesome together.
Happy no-baking,
Jackson


