Your New Go-To Party Starter
Hey friends, Jackson here from Food Meld. Let me paint you a picture. You’ve got people coming over in an hour. The drinks are chilling, the playlist is fire, but you’re staring into the abyss of your fridge, wondering what on earth you can whip up that’s guaranteed to be a hit. You need something easy, cheesy, and so delicious it’ll have your guests hovering around the kitchen, begging for the recipe.
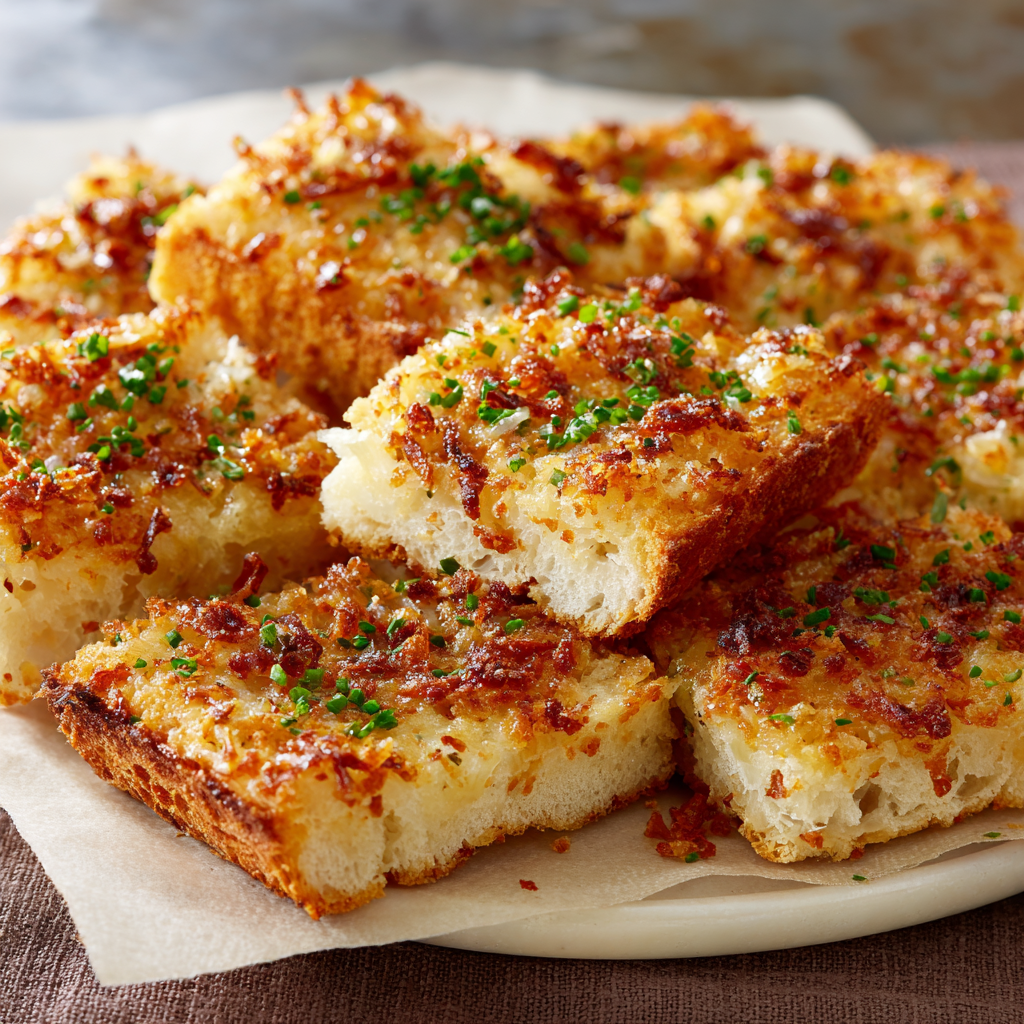
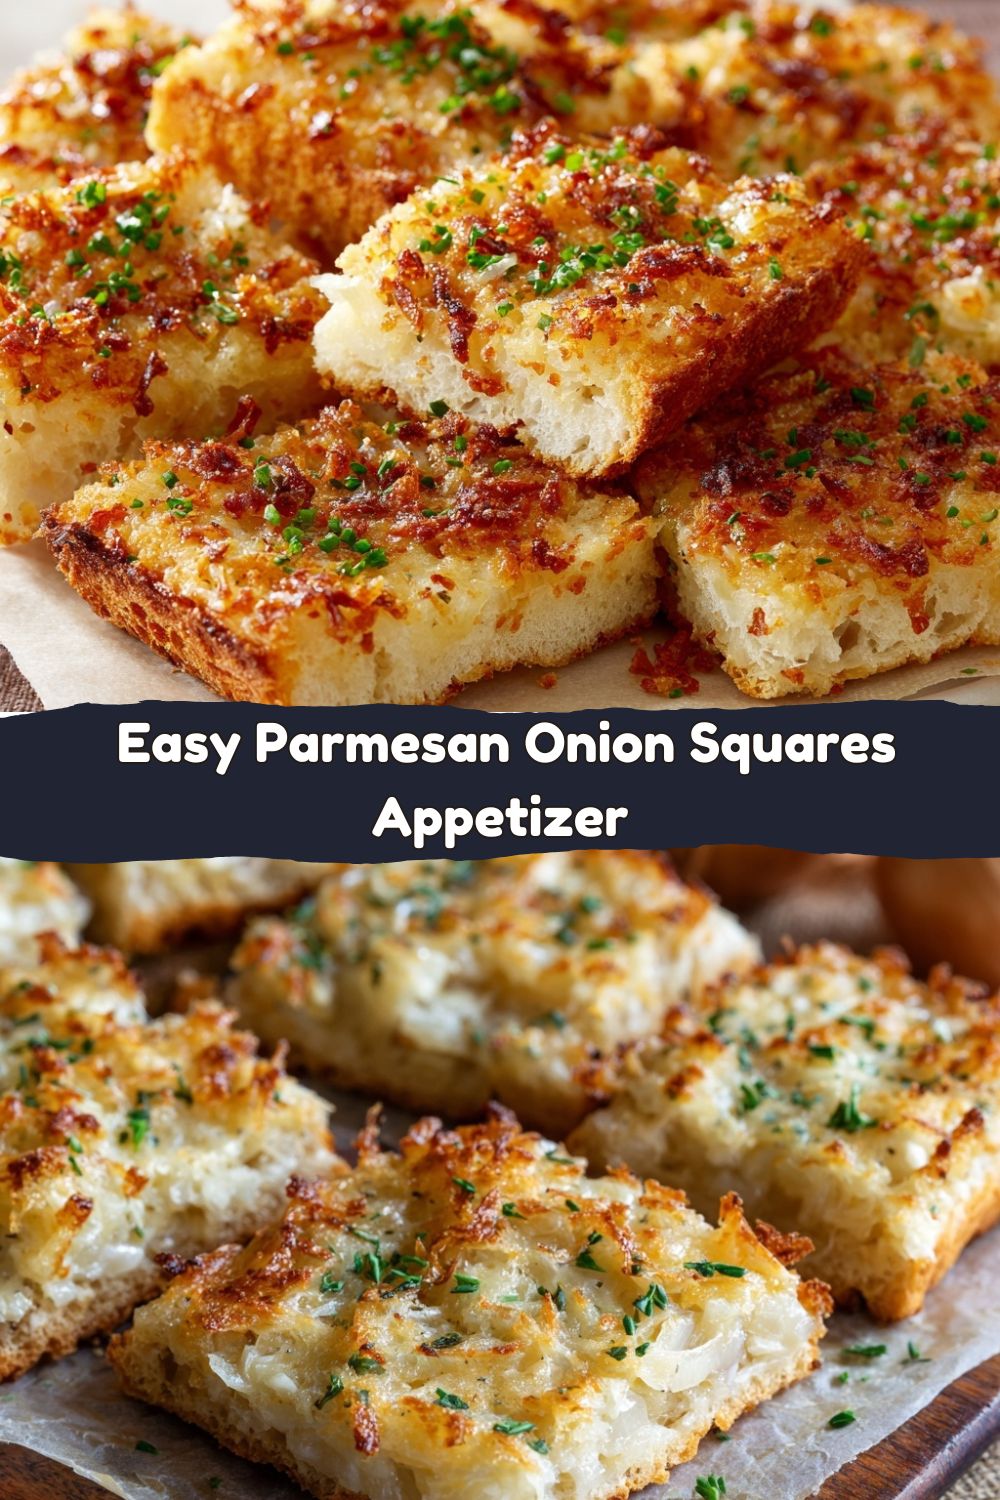
Well, my friend, your appetizer anxiety ends right here, right now. I’m talking about my legendary Parmesan Onion Squares. Imagine this: perfectly toasted bread squares, topped with a creamy, savory, impossibly flavorful mixture of sweet onion and nutty Parmesan, all broiled to golden, bubbly perfection. They’re crispy, they’re rich, and they have this magical way of disappearing from the plate faster than you can say “Food Meld.”
This isn’t just a recipe; it’s your secret weapon. It’s the culinary equivalent of a trusty pair of jeans—reliable, always looks good, and makes you feel like a rockstar. Whether it’s a game day potluck, a last-minute gathering, or just a Tuesday night when you deserve a treat, these little squares deliver maximum flavor with minimal effort. So, tie on your apron, and let’s turn a few simple ingredients into pure, unadulterated snack magic.
The Potluck Hero: A Little Food Meld Memory
This recipe takes me straight back to my first big neighborhood potluck after moving into my first real house. I was determined to impress, to show these folks that the new guy in town knew his way around a kitchen. I agonized over what to make, flipping through cookbooks and family recipes, until my mom cut through the noise with a simple, “Just make those onion squares, Jack. Nobody ever complains about those.”
She was right, of course. I remember whipping up a triple batch, the kitchen smelling like a cozy, cheesy heaven. I showed up to that potluck, platter in hand, and set them down next to the fancy charcuterie boards and intricate casseroles. Within ten minutes, they were gone. I spent the rest of the evening fielding questions from my new neighbors. “What’s in these?” “How do you get them so crispy?” That simple, humble dish was the icebreaker. It wasn’t about showing off fancy techniques; it was about sharing something genuinely delicious and comforting. It was a perfect “Food Meld” moment—bringing people together through bold, unpretentious flavor. That’s the spirit I want to bring to your kitchen today.
Gathering Your Flavor Arsenal
Part of the beauty of this recipe is its simplicity. You probably have most of this stuff already. Let’s break it down, because knowing your ingredients is the first step to making a dish truly yours.
- 1 loaf of sandwich bread (white, wheat, or rye), crusts removed: This is our blank canvas! I often use a good, soft white bread for that classic, comforting texture, but wheat adds a nice nuttiness and rye brings a fantastic, subtle tang. Chef’s Insight: Don’t toss those crusts! Tear them up, toss them with a little oil and garlic powder, and toast them for homemade breadcrumbs.
- 1 cup mayonnaise: This is the glue that holds our dream team together. It creates an incredibly rich and creamy base that gets wonderfully golden under the broiler. Substitution Tip: If you’re not a mayo fan, full-fat Greek yogurt or sour cream can work in a pinch, but the texture and browning will be slightly different.
- 1 1/2 cups shredded Parmesan cheese: We’re talking about the good stuff from the refrigerated section, not the shelf-stable powder. It melts beautifully and gives us that signature salty, nutty punch. Chef’s Insight: For an even deeper flavor, try a half-Parmesan, half-Pecorino Romano blend.
- 1 large sweet onion, finely diced: Sweet onions (like Vidalia or Walla Walla) are key here. They caramelize beautifully and add a mellow sweetness that balances the salty cheese. Pro Tip: A fine dice is crucial so they soften perfectly during the short bake time.
- 1/2 teaspoon garlic powder: We’re using powder instead of fresh garlic here for a reason—it distributes flavor evenly without any risk of burning and turning bitter in the oven.
- 1/2 teaspoon dried Italian herbs or oregano: A little herbal fragrance to tie everything together. Crush the herbs between your fingers as you add them to wake up their oils!
- Fresh ground pepper, to taste: A few cracks of black pepper add a necessary bite. I’m generous with it!
- Optional: chopped chives or parsley for garnish: This isn’t just for looks. A sprinkle of fresh green herbs at the end adds a pop of color and a bright, fresh flavor that cuts through the richness perfectly.
Let’s Build Some Flavor Magic: The Step-by-Step
Alright, team, let’s get our hands dirty. This is where the fun begins. Follow these steps, and you’ll be a Parmesan Onion Square master in no time.
- Preheat & Prep: Fire up that oven to a nice 375°F (190°C). While it’s heating, line a standard baking sheet with parchment paper. Chef’s Hack: The parchment paper isn’t just for easy cleanup; it prevents the bottoms from getting too dark and ensures an even, golden toast on every single square. Trust me on this one.
- Square Up Your Bread: Take your loaf of bread and carefully slice off all the crusts. Then, cut each slice into halves or quarters to create neat little squares. Arrange them in a single layer on your prepared baking sheet. Little Tip: Give them a tiny bit of space between each square so the hot air can circulate and crisp up all the edges.
- Create the “Magic Mixture”: Grab a medium-sized mixing bowl. Plop in the mayonnaise, the glorious pile of shredded Parmesan, your finely diced sweet onion, the garlic powder, dried herbs, and a good amount of fresh black pepper. Now, mix it all together until it’s fully combined. Commentary: Don’t be shy here—get in there with a spatula and fold it until every ingredient is happily coated and distributed. You’ll know it’s ready when it looks like the most delicious, chunky, savory spread you’ve ever seen.
- The Art of the Spread: Using a spoon or a small offset spatula, scoop a generous amount of the Parmesan-onion mixture onto each bread square. Spread it right to the edges. Pro Move: I like to press down just a little as I spread, which helps anchor the topping to the bread and creates a beautifully even layer that will cook uniformly.
- Bake to Golden Perfection: Slide that loaded baking sheet into your preheated oven and bake for 10-12 minutes. You’re looking for the edges of the bread to get toasty and the topping to be hot and set. But we’re not done yet!
- The Grand Finale: The Broil: This is the secret to the perfect finish. Switch your oven to broil (keep a close eye on it!). Let them broil for just 1-2 minutes, until the tops are speckled with dark golden brown spots and are bubbling ferociously. Chef’s Warning: The line between perfectly bronzed and tragically burnt is thin under the broiler. Do not walk away! Stand guard like the proud chef you are.
- Serve with Style: Carefully remove the baking sheet from the oven. Let them cool for just a minute—they are molten lava hot! If you’re using them, sprinkle with those fresh chives or parsley for a gorgeous finish. Then, transfer to a serving platter and watch them vanish.
How to Serve These Cheesy Wonders
Presentation is part of the fun! You’ve just created a masterpiece, so let’s show it off. I love piling these warm, bubbly squares high on a rustic wooden board or a simple white platter to let that gorgeous golden-brown color really pop. Tuck a few sprigs of fresh rosemary or thyme around the edges for a touch of elegant, fragrant greenery.
While they are absolutely stellar all on their own, I love turning them into the star of a larger appetizer spread. Pair them with something bright and acidic to cut through the richness—a bowl of marinated olives, a tangy bruschetta, or some crisp, chilled crudité with a lemony dip. They’re also the ultimate companion to a big, hearty bowl of tomato soup for the coziest lunch you’ve ever had. And let’s be real, they pair perfectly with a cold beer or a crisp glass of Sauvignon Blanc. However you serve them, just make sure they’re warm. That’s when the flavor is at its absolute peak.
Make It Yours: Creative Twists & Swaps
This recipe is a fantastic foundation for your own culinary experiments. Once you’ve mastered the classic, feel free to get creative and mix it up! Here are a few of my favorite ways to play with the formula:
- The “Everything Bagel” Twist: Stir 1-2 tablespoons of everything bagel seasoning into the mayonnaise mixture before spreading. Top with a few extra sesame seeds and a sprinkle of flaky sea salt after they come out of the oven.
- Bacon & Chive Delight: Because bacon makes everything better. Fold ½ cup of finely chopped, cooked bacon into the mixture. The smoky, salty crunch takes these to a whole new level of amazing.
- Spicy ‘Nduja Kick: For my fellow heat-seekers, try adding a tablespoon or two of soft ‘nduja sausage or a few teaspoons of Calabrian chili paste to the mix. It adds a incredible, spreadable heat and a deep red color.
- Mushroom & Thyme Elegance: Sauté ½ cup of finely chopped mushrooms with a clove of garlic until golden and all their liquid has evaporated. Let them cool, then fold them into the mixture along with a teaspoon of fresh thyme leaves.
- Gluten-Free / Low-Carb Version: No problem! Use slices of a sturdy gluten-free bread or, for a low-carb option, use halved, hollowed-out cherry tomatoes or thick slices of zucchini as your base. The baking time might need a slight adjustment, so keep an eye on them.
Jackson’s Kitchen Notes
This recipe has been a part of my life for so long, it feels like an old friend. I’ve learned a few things along the way. For instance, I used to be lazy and not remove the crusts, but I found the crusts can sometimes get unpleasantly tough in the oven. Taking that extra minute makes a world of difference in the final, delicate crunch. I also had a hilarious kitchen fail once where I used a baking sheet without parchment, and let’s just say I spent more time scrubbing the pan than I did eating the squares. Learn from my mistakes!
The beauty of this recipe is its evolution. It started as a rigid family recipe card, but over the years, it’s become a canvas for whatever flavors I’m feeling—a little smoked paprika, a dash of hot sauce, a different blend of cheeses. Don’t be afraid to make it your own. That’s what cooking is all about.
Your Questions, Answered!
I’ve gotten a lot of questions about this recipe over the years. Here are the most common ones to help you nail it every single time.
- Q: Can I make these ahead of time?
A: Absolutely! You can assemble the squares completely (spread the mixture on the bread) up to a day in advance, cover the baking sheet tightly with plastic wrap, and keep it in the fridge. When you’re ready, just pop them straight from the fridge into the preheated oven. You might need to add an extra minute or two to the bake time since they’ll be cold.
- Q: My topping is a little loose/oily. What did I do wrong?
A: This usually comes down to the mayonnaise brand. Some are just more oily than others. If your mixture seems too loose, try adding an extra tablespoon or two of Parmesan cheese to help thicken it up. Also, make sure you’re using a real, block-style Parmesan you shred yourself, as the pre-shredded stuff often has anti-caking agents that can affect texture.
- Q: Why did my bread get soggy?
A: Sogginess is the enemy! The two main culprits are: 1) Spreading the mixture on the bread too far in advance, which gives the mayo time to soak in. Assemble just before baking, or if prepping ahead, keep the mixture and bread separate until the last minute. 2) Not baking them long enough. Make sure your oven is fully preheated and that you see those edges getting truly crisp.
- Q: Can I use a different cheese?
A: You bet! While Parmesan is non-negotiable for its flavor, you can swap out half of it for another sharp, hard cheese. Asiago, aged Gouda, or even a sharp white cheddar would be fantastic. I’d avoid super soft, melty cheeses like mozzarella by themselves, as they can make the topping a bit heavy.
Nutritional Info (For Your Info!)
Hey, I’m all about balance. Enjoying indulgent, cheesy appetizers is part of a happy life! Here’s a rough breakdown per square (assuming the recipe makes about 24 squares). Remember, this is just an estimate and can vary based on the specific brands of ingredients you use.
- Calories: ~110
- Carbohydrates: ~8g
- Fat: ~7g
- Protein: ~4g
Prep Time: 10 minutes | Cook Time: 12–14 minutes | Total Time: 25 minutes
This is a treat, and it’s meant to be enjoyed as such! The key is sharing them with good company, which spreads the joy (and the calories) around.
You’ve Got This!
And there you have it. You’re now armed with the knowledge to create one of the most crowd-pleasing, flavor-packed, deceptively simple appetizers in the game. This is more than just a recipe; it’s a reminder that the best food doesn’t have to be complicated. It’s about bold flavors, a little bit of fun, and the joy of sharing something you made with your own two hands.
I have no doubt that your Parmesan Onion Squares are going to be a massive hit. They’re going to be the talk of the party, the thing your family requests for movie night, and your new favorite secret weapon. So, go forth and melt some flavor! And when you make them, I’d love to see your creation. Tag me on social with #FoodMeld so I can cheer you on.
Until next time, keep cooking with curiosity and eating with joy.
– Jackson


