Oreo Truffles: Your New Secret Weapon for Easy, Insanely Good Desserts
Hey friends, Jackson from Food Meld here! Let’s be real for a second. We all have those moments. The school bake sale notice that came home yesterday, the potluck you totally forgot about, or that sudden midnight chocolate craving that just won’t quit. You need something incredible, fast, and you definitely don’t want to turn on the oven. I’ve been there more times than I can count, and that’s exactly why this recipe is my absolute go-to.
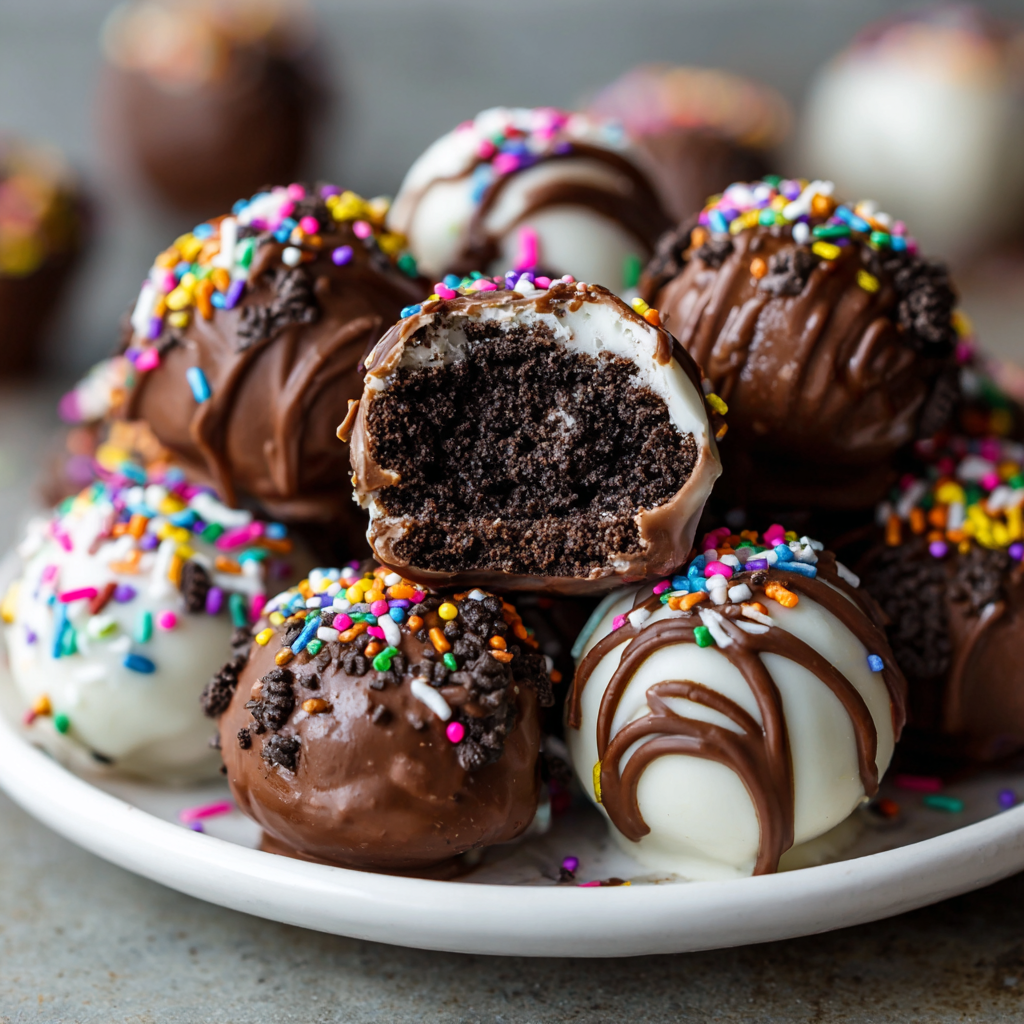
I’m talking about Oreo Truffles, and if you’ve never made them, you are in for the happiest little shock of your life. Imagine this: the classic, crunchy-chocolatey perfection of an Oreo, whirled into a luxuriously smooth, creamy filling, all enveloped in a crisp shell of melted chocolate. They’re like the most decadent truffle you’d buy from a fancy chocolatier, but they’re shockingly simple to make right on your kitchen counter.
This is the kind of recipe that embodies everything I love about Food Meld: big, bold flavor without the big, complicated process. It’s approachable, it’s fun (get the kids involved—seriously, they’ll love it!), and the “wow” factor is through the roof. People will beg you for the recipe, and you’ll get to just smile and say, “Oh, it’s a little something I whipped up.” So, let’s ditch the stress and cook up some of this creamy, crunchy, chocolate-dipped perfection together. Trust me, your future self (and everyone you share these with) will thank you.

A Potluck Savior and the Birth of a Tradition
I’ll never forget the first time I stumbled upon the magic of an Oreo truffle. It was years ago, right after I moved to a new city. A neighbor was throwing a huge block party potluck, and I, wanting to make a good impression, signed up to bring dessert. Then, of course, I got swamped with work and completely forgot until the morning of. Panic mode: engaged.
I raided my pantry and found a lone package of Oreos, a block of cream cheese I’d bought for bagels, and some leftover chocolate chips from a previous baking adventure. Out of sheer desperation, I threw them together. I remember thinking, “This will either be a total disaster or… kinda genius.” I rolled these little lumpy balls, dipped them haphazardly, and tossed them on a plate, fully expecting to be the laughingstock of the street.
Friends, they were the first thing to disappear. People were hunting me down, asking what they were and where I’d bought them. I confessed my kitchen hack, and it became the story of the party. That dish, born from a near-catastrophe, taught me a huge lesson: the best food isn’t always the most complicated. It’s about flavor, joy, and a little bit of “what if?” energy. Now, I always keep the ingredients on hand. You just never know when you’ll need to create a little magic.
Gathering Your Truffle Toolkit: It’s All About Quality
Here’s the beautiful part: the ingredient list is shorter than a grocery list for a cup of tea. But each component plays a starring role, so let’s break it down.
- 1 package (14 oz) Oreo cookies – This is your flavor base! I use the classic original because that nostalgic chocolate taste is unbeatable. Chef’s Insight: Don’t skimp here—the store-brand versions often have a different texture and sugar content that can throw off the filling. And whatever you do, do NOT remove the cream filling! That’s your secret weapon for sweetness and structure.
- 8 oz cream cheese, softened – This is what transforms crunchy cookies into that luscious, melt-in-your-mouth filling. Pro Tip: “Softened” is key! Leave it on the counter for a good 30-45 minutes before you start. If it’s still cold, you’ll have lumpy truffle mixture and a serious arm workout. If you’re in a pinch, you can microwave it for 10-15 seconds, but just to take the chill off, not to melt it!
- 12 oz semi-sweet or white chocolate (for coating) – This is your truffle’s elegant suit of armor. Substitution Tip: You can use chocolate chips, but I highly recommend using high-quality baking chocolate bars (like Ghirardelli or Baker’s) that you chop yourself. They contain more cocoa butter and melt into a much smoother, thinner, and shinier coating that’s perfect for dipping. For a shortcut, candy melts (like Wilton’s) also work well and come in a rainbow of colors, but they have a slightly different, sweeter taste.
- Optional: crushed Oreos, sprinkles, or drizzle for garnish – This is where you make them yours! Have fun with it. Crushed peppermint for the holidays, colorful sprinkles for a birthday, or a zig-zag of contrasting chocolate to make them look professionally decorated.
Let’s Get Rolling: The Foolproof Process
Okay, team. Aprons on! This process is a breeze. We’re going to crush, mix, chill, dip, and decorate. Easy as… well, truffles.
- Crush the Oreos into Fine CrumbsDump the entire package of Oreos (creme filling and all!) into a food processor. Pulse it until you have a fine, uniform crumb. You want it to look like dark, sandy soil. No food processor? No problem! This is the old-school way: toss the cookies into a large zip-top bag, press all the air out, and seal it. Then, grab a rolling pin, a heavy pan, or even a wine bottle and go to town! Roll over it until you’ve got those same fine crumbs. It’s a fantastic way to get out a little frustration.
- Mix the Filling Until It’s SmoothIn a medium-sized bowl, combine your gorgeous black cookie crumbs with the softened cream cheese. Now, get in there with a sturdy spoon or spatula and mix it until it’s completely combined. It will go from streaky to a cohesive, thick, black dough. You can also use a hand mixer on low to medium speed to make it extra smooth and save your arm, but I often just enjoy doing it by hand. You’ll know it’s ready when there are no white streaks of cream cheese left.
- Shape & Chill Your TrufflesThis is the fun part! Using a small cookie scoop (a melon baller or even a tablespoon works too), portion out the mixture. I aim for about 1 tablespoon per truffle. Roll each portion between your palms to form a smooth ball. Chef’s Hack: If the mixture is sticking to your hands like crazy, lightly dampen your palms with water. It creates a barrier and makes rolling infinitely easier. Place each finished ball on a baking sheet lined with parchment paper. Once they’re all rolled, pop the entire tray into the refrigerator for at least 30 minutes, or into the freezer for 15. This step is NON-NEGOTIABLE. A cold truffle is a firm truffle, and a firm truffle won’t fall apart in the melted chocolate.
- Melt the Chocolate Like a ProPlace your chopped chocolate (or chips) in a microwave-safe bowl. Microwave on high in 20-second bursts, stirring vigorously after each interval. Why? Because chocolate holds its shape even when melted, and stirring distributes the heat to avoid scorching. Stop when it’s almost all melted and just a few lumps remain—keep stirring off the heat, and the residual warmth will melt those last bits perfectly. Pro Tip: For an even smoother coating, you can add a teaspoon of coconut oil or vegetable shortening to the chocolate before melting. This thins it out slightly, making dipping a dream and giving you a gorgeous, professional-looking snap when you bite into it.
- Dip & Decorate with FlairRemove your truffles from the fridge/freezer. Using a fork (or dipping tools if you have them), drop a truffle into the melted chocolate. Use the fork to gently roll it around until it’s completely coated. Lift it out, let the excess chocolate drip off by gently tapping the fork on the edge of the bowl, and then carefully slide it back onto the parchment-lined tray. Chef’s Hack: If you get a little “foot” of chocolate pooled at the bottom, use a toothpick to gently swirl it away right after placing it on the tray. Immediately, while the chocolate is still wet, add your garnishes! Sprinkle on some crumbs, jimmies, or a pinch of sea salt. If you wait, the chocolate will set and nothing will stick.
Plating Your Masterpieces: How to Serve These Gems
You’ve created something amazing, so let’s show it off! Once the chocolate coating has fully set (you can speed this up with another 10 minutes in the fridge), it’s time to serve.
For a casual gathering, a simple rustic platter works perfectly. Pile them high and let people dig in. For something a bit more elegant, place each truffle in a mini paper candy cup (you can find these at any craft store) and arrange them on a beautiful cake stand or a slate board. It instantly makes them look like they came from a boutique chocolatier.
These are rich, so a little goes a long way. Serve them alongside a cup of strong coffee, a cold glass of milk (the ultimate Oreo partner!), or even a glass of red wine—a Cabernet Sauvignon pairs beautifully with the dark chocolate. They are the perfect ending to a dinner party, a wonderful homemade gift tucked into a cute box, or your new favorite secret snack hidden in the back of the fridge. No judgment here.
Mix It Up! Creative Flavor Twists
The basic recipe is a blank canvas for your creativity. Here are a few of my favorite ways to play with the formula and make it uniquely yours:
- Mint Chocolate Chip: Use a package of Mint Oreos and add ½ teaspoon of peppermint extract to the filling. Dip in dark chocolate and garnish with a tiny sprinkle of crushed candy cane.
- Peanut Butter Paradise: Use Peanut Butter Oreos or, if you can’t find them, add 2-3 tablespoons of smooth peanut butter to the filling with the original Oreos. Dip in milk chocolate and drizzle with a little extra peanut butter.
- Red Velvet Elegance: Use a package of Red Velvet Oreos. The creamy filling is already slightly tangy, which pairs perfectly with a glossy white chocolate coating. They look stunning for Valentine’s Day or Christmas.
- Salted Caramel Delight: Use regular Oreos, but after dipping in chocolate, immediately sprinkle with a flaky sea salt (like Maldon). The sweet-salty combo is incredible.
- Birth Cake Bling: Use Golden Oreos for a vanilla-base truffle. Dip in white chocolate and immediately cover with colorful rainbow sprinkles. Perfect for a birthday party!
Jackson’s Kitchen Notes: Lessons from the Trenches
This recipe has evolved in my kitchen over the years. I used to be so impatient with the chilling step, and I’d end up with truffle mush floating in my chocolate. Learn from my mistakes! Patience is your best ingredient here.
Another funny story: I once tried to quadruple the recipe for a huge event and used the biggest bowl I owned. My kitchen looked like a crime scene from a cookie monster. Black mixture was everywhere! My advice? If you’re making a big batch, mix in stages or use a stand mixer with the paddle attachment to contain the chaos. And always, always lick the spoon. It’s the chef’s reward.
FAQs: Your Questions, Answered
Q: My truffle mixture is too soft to roll. What did I do wrong?
A: This usually means your cream cheese was too warm, or you didn’t crush the cookies finely enough. Pop the whole mixture into the fridge for 20-30 minutes to firm up, and it should be much easier to handle.
Q: Why is my chocolate coating clumpy and thick?
A: This is called “seizing,” and it usually happens if a tiny drop of water or steam gets into the melting chocolate. Always make sure your bowls and tools are completely dry. If it happens, you can sometimes save it by stirring in a teaspoon of coconut oil or vegetable shortening until it smooths out again.
Q: Can I make these ahead of time?
A: Absolutely! They are the perfect make-ahead treat. Store them in an airtight container in the refrigerator for up to a week, or you can freeze them for up to 2 months. Just thaw in the fridge before serving.
Q: Can I use low-fat cream cheese?
A: You can, but the texture and flavor won’t be quite as rich and luxuriously smooth. Full-fat cream cheese really gives you that decadent truffle experience.

Oreo Truffles
- Total Time: 55 minutes
- Yield: 36 Truffles 1x
Description
With just three ingredients, these no-bake truffles deliver big flavor and irresistible texture. Smooth, chocolatey, and completely addictive, they’re a go-to treat for holidays, parties, or just because.
Ingredients
1 package (14 oz) Oreo cookies
8 oz cream cheese, softened
12 oz semi-sweet or white chocolate (for coating)
Optional: crushed Oreos, sprinkles, or drizzle for garnish
Instructions
Crush the Oreos
In a food processor, pulse cookies into fine crumbs. (No processor? Place in a zip-top bag and crush with a rolling pin.)
Mix the filling
Combine crushed Oreos with softened cream cheese in a bowl. Mix until fully combined and smooth.
Shape & chill
Scoop and roll mixture into 1-inch balls. Place on a parchment-lined tray and refrigerate for at least 30 minutes or freeze for 15 minutes.
Melt the chocolate
In a microwave-safe bowl, melt chocolate in 20-second intervals, stirring until smooth.
Dip & decorate
Dip each chilled ball into melted chocolate, coat fully, and place back on tray. Add toppings while wet. Let set at room temp or in the fridge.
Flavor Twists
Minty Oreo: Use mint Oreos + a drop of peppermint extract
Peanut Butter: Add 2 tbsp peanut butter to the filling
Red Velvet: Use red velvet Oreos + white chocolate coating
Holiday Glam: Use gold dust, edible glitter, or crushed peppermint
- Prep Time: 25 minutes
- Chill Time: 30 minutes
Nutrition
- Calories: 110 / Truffle
- Fat: 6g / Truffle
- Carbohydrates: 12g / Truffle
- Protein: 1g / Truffle
Nutritional Information*
Okay, let’s be real—these are a treat, through and through. But it’s always good to know what you’re enjoying! This estimated breakdown is for one truffle (based on a batch of 36, using semi-sweet chocolate).
Estimated per truffle: ~110 kcal | 6g fat | 12g carbs | 1g protein
*Please note: This is an estimate generated using a nutrition calculator and will vary slightly based on specific ingredient brands and any substitutions you make. The information provided should not be considered a substitute for professional nutritional advice.
Final Thoughts: Your New Go-To Recipe
And there you have it! The legendary Oreo Truffle, demystified. This recipe is more than just a list of steps; it’s a passport to confidence in the kitchen. It proves that you don’t need fancy equipment or a culinary degree to make something that feels truly special.
I hope you’ll give these a try. Make them for your friends, your family, or just for yourself. Get messy, experiment with the flavors, and have fun with it. That’s what cooking is all about. Remember, at Food Meld, we’re all about taking simple, beloved flavors and turning them into something unforgettable. You’ve totally got this.
Now, I’d love to hear from you! Did you try a crazy flavor twist? Did your kids have a blast rolling the truffles? Snap a picture and tag me @FoodMeld on Instagram so I can see your delicious creations. Let’s cook something awesome together!
Happy cooking,
Jackson


