The Only No-Fail Sugar Cookie Recipe You’ll Ever Need
Hey friends, Jackson from Food Meld here. Let’s get real for a second. Is there anything more universally loved, yet secretly intimidating, than the classic sugar cookie? We’ve all been there: you find a recipe that promises “perfection,” you spend an hour carefully cutting out reindeer and stars, only to pull a puddle of melted, shapeless blobs from the oven. The dough spreads, the edges burn, and your holiday spirit deflates faster than a failed soufflé. I feel your pain. I’ve been in that kitchen, staring at a tray of cookie casualties.
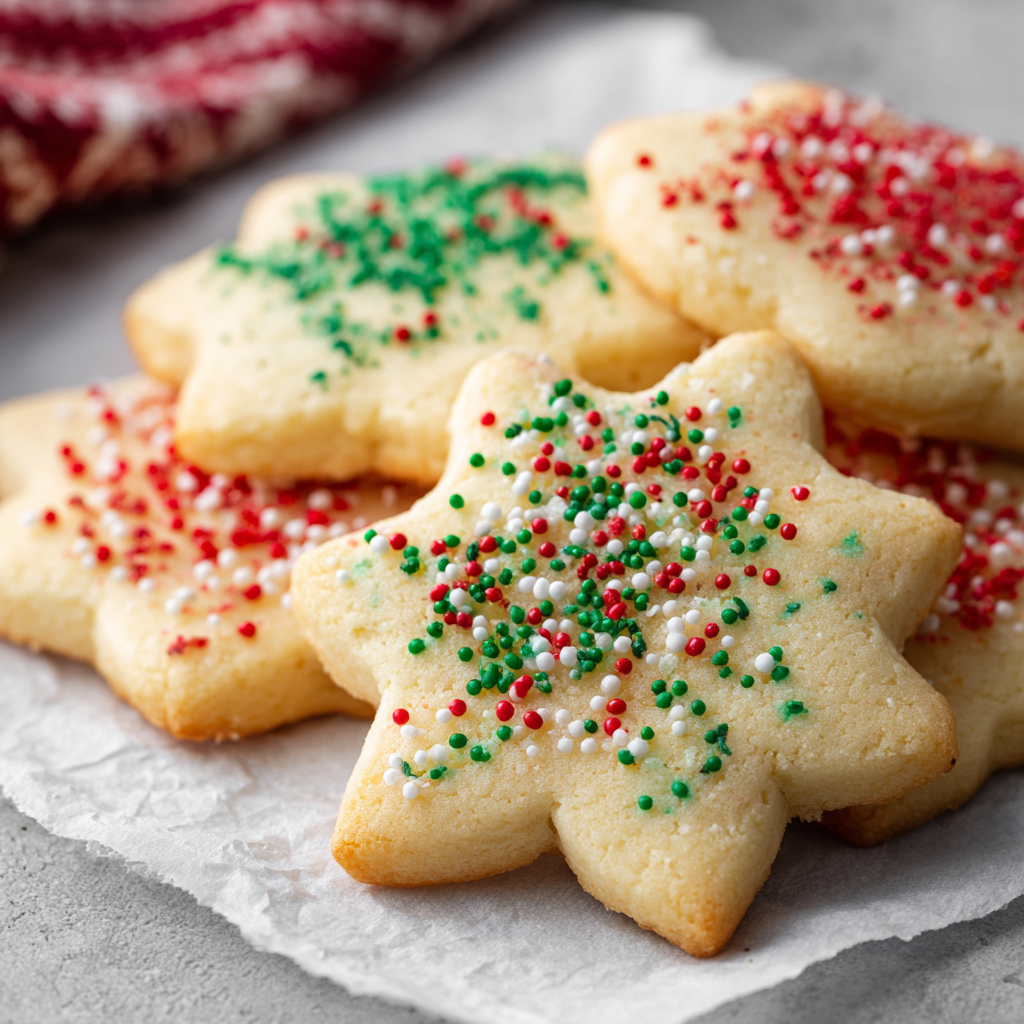
But what if I told you that your search for the ultimate sugar cookie ends right here, right now? This is the recipe I’ve honed, tested, and absolutely fallen in love with. We’re talking about a cookie that’s soft and tender in the center, with a delicate, buttery crumb that just melts in your mouth. The edges are just firm enough to give you that satisfying little resistance before you hit the soft, cakey perfection inside. And the best part? They hold their shape like a champion. No chilling required, no dramatic spreading, just pure, unadulterated cookie joy.
Whether you’re a baking newbie looking for a confidence boost or a seasoned pro who wants a reliable go-to, this recipe is your new best friend. It’s the blank canvas for your wildest decorating dreams, but it’s also so darn good that you’ll be perfectly happy eating them plain, maybe with a cold glass of milk. So, preheat those ovens, grab your favorite apron (the messy one is the best one), and let’s cook something awesome together. Welcome to cookie nirvana.
A Sprinkle of Nostalgia: My Grandma’s Cookie Jar
This recipe always takes me right back to my Grandma Eleanor’s kitchen. It wasn’t a fancy kitchen—heck, the countertops were this wild 70s floral pattern—but it was the heart of her home. And in the center of it all, perched on the counter, was her iconic ceramic cookie jar, shaped like a plump, smiling pig.
My brother and I would burst through her screen door after school, and the first thing we’d do was lift that pig’s head to see what treasure was inside. Nine times out of ten, it was these sugar cookies. She never bothered with fancy cutters; she’d just roll the dough into little balls, flatten them with the bottom of a glass dipped in sugar, and bake them until the edges were just barely kissed with gold. They were simple, they were buttery, and they tasted like pure, uncomplicated love. That’s the feeling I’ve tried to bottle up in this recipe. It’s not about perfection; it’s about the joy of creating something simple and wonderful with your own two hands. It’s about making your own kitchen smell like a happy memory.
Gathering Your A-Team: The Ingredients
Simple ingredients, incredible results. That’s the Food Meld motto. Here’s everything you’ll need to make magic happen. Don’t just measure—understand why each ingredient is here. It’s the first step to becoming a kitchen boss.
- 1 cup (2 sticks) unsalted butter, softened: This is the superstar, the flavor foundation. Using unsalted lets you control the salt level perfectly. “Softened” is key here! It should be cool to the touch but yield easily when you press it. Think “still cool, but pliable,” not “melty and oily.” This is our number one secret for achieving that light, fluffy texture.
- 1 cup granulated sugar: Sweetness and structure. Creaming it with the soft butter is what creates those tiny air pockets that give the cookie its lovely, tender lift.
- 1 large egg: Our binding agent. It brings the dough together and adds richness and structure. Make sure it’s at room temperature to play nicely with the butter and prevent the dough from seizing up.
- 1½ tsp vanilla extract: The flavor enhancer. Don’t be shy here! A good quality vanilla adds a warm, aromatic depth that takes these cookies from “good” to “can-I-have-the-recipe-now” great.
- 2½ cups all-purpose flour: The backbone. It gives the cookies their structure. I always fluff my flour with a spoon before gently scooping and leveling it off with a knife. No packing it down!
- 1 tsp baking powder: Our leavening hero! This is what gives the cookies their slight rise and that perfect soft, almost cake-like center. It’s the reason we don’t need to chill the dough.
- ½ tsp salt: The flavor booster. Salt is not the enemy of sweet! It actually enhances all the other flavors and cuts through the richness, making the buttery, vanilla notes really sing.
Let’s Get Baking: The Foolproof Steps
Ready to make some magic? Follow these steps, and you’ll be a sugar cookie superstar in no time. I’m throwing in my favorite chef hacks along the way to make the process even smoother.
- Preheat and Prep: Fire up your oven to 350°F (175°C). Line your baking sheets with parchment paper. Chef Hack: Parchment paper is a non-negotiable for me. It prevents sticking AND ensures the bottoms of your cookies bake evenly without burning. No parchment? A silicone baking mat works wonders too.
- The Creaming Method: In a large bowl, beat the softened butter and granulated sugar together on medium-high speed for a full 2-3 minutes. We’re not just mixing here; we’re “creaming.” You’ll know it’s ready when the mixture turns pale yellow and becomes light and fluffy. This step is CRUCIAL for that perfect texture, so don’t rush it! You’re literally whipping tiny air bubbles into the fat, which will expand in the oven.
- Incorporate the Wet Team: Scrape down the sides of the bowl with a spatula (a good habit to get into!). Add the room-temperature egg and vanilla extract. Mix on medium until everything is completely smooth and well-combined. The mixture might look a little curdled at first, but just keep mixing—it’ll come together beautifully.
- Whisk the Dry Goods: In a separate bowl, whisk together the flour, baking powder, and salt. Chef Insight: Whisking is a quick and easy way to evenly distribute the baking powder and salt throughout the flour, so you get a consistent rise and flavor in every single bite.
- Bring It All Together: Gradually add the dry ingredients to the wet ingredients, mixing on low speed just until the flour disappears and a soft dough forms. I like to add the flour in two or three batches to avoid a white flour cloud erupting in my kitchen! The moment you no longer see dry flour, STOP MIXING. Over-mixing at this stage can lead to tough cookies.
- Roll and Cut: Lightly flour your work surface and rolling pin. Roll the dough out to about ¼ inch thick. Pro Tip: If the dough feels a tiny bit sticky, just dust it with a little more flour. It’s very forgiving! Now, press your cookie cutters straight down and lift straight up—no twisting! Twisting can seal the edges and prevent the cookies from rising properly.
- Bake to Perfection: Place the cut-out cookies about 1 inch apart on your prepared baking sheets. They don’t spread much, so you can crowd them a little. Bake for 8-10 minutes. You’re looking for the edges to be set and maybe, maybe, just barely starting to turn a faint golden brown. The centers should still look soft and underdone. This is the secret to a soft cookie! They will continue to cook on the hot baking sheet as they cool.
- The Patience Test: Let the cookies cool on the baking sheet for 5 minutes before transferring them to a wire rack to cool completely. I know it’s hard to wait, but this step allows them to set up properly. If you try to move them too soon, they might fall apart.
Sharing the Love: How to Serve These Beauties
Okay, the hard part is over (and it wasn’t even hard!). Now for the fun part: serving. These cookies are incredibly versatile.
For a classic, no-fuss treat, just pile them high on a cute plate. They speak for themselves. If you’re feeling decorative, let them cool completely and then go to town with your favorite royal icing or a simple glaze (just mix powdered sugar with a little milk or cream). Sprinkles are always a good idea—always.
My personal favorite way to enjoy them? Slightly warm from the oven (if I can’t wait for the whole batch to cool) with a tall, ice-cold glass of whole milk. It’s a simple pleasure that never gets old. For a dinner party, you can serve them alongside a scoop of high-quality vanilla bean ice cream for a next-level ice cream sandwich vibe.
Make It Yours: Creative Twists & Swaps
This recipe is your playground! Don’t be afraid to mix it up and add your own signature spin. Here are a few of my favorite variations:
- Lemon Zest Sunshine: Add the zest of one large lemon to the butter and sugar during the creaming step. The bright, citrusy flavor cuts through the sweetness beautifully.
- Almond Elegance: Swap out the vanilla extract for almond extract (or use 1 tsp vanilla and ½ tsp almond). It gives the cookies a wonderfully warm, bakery-style flavor.
- Funfetti Party: After you’ve mixed the dough, gently fold in ½ cup of rainbow sprinkles. Instant celebration in every bite!
- Chocolate Dip: Melt some high-quality dark or semi-sweet chocolate, dip half of each cooled cookie in it, and let it set on parchment paper. Elegant and delicious.
- Spiced Sugar: Add 1 tsp of ground cinnamon and a pinch of nutmeg to the dry ingredients for a cozy, snickerdoodle-esque twist.
Jackson’s Kitchen Notes
This recipe has been a labor of love. The first time I made it, I was so paranoid about spreading that I over-floured the dough, and the cookies were a bit tough. Lesson learned: a light hand with the flour during rolling is all you need! Over the years, I’ve found that the brand of baking powder can sometimes affect the rise, so if you haven’t used yours in a while, give it a sniff—it should be fizzy and potent, not clumpy and inert.
The best part? This dough is a dream to work with. It doesn’t tear easily, and you can re-roll the scraps without the cookies becoming tough. My kitchen is always a glorious mess of flour and cookie cutters when I make these, and I wouldn’t have it any other way.
Your Questions, Answered!
Q: My dough is too sticky to roll! What did I do wrong?
A: Don’t panic! This usually means you measured the flour a little lightly, or your kitchen is just a bit humid. No biggie. Just add a tablespoon of flour at a time to the dough until it’s manageable. It’s very forgiving!
Q: Can I make this dough ahead of time?
A: Absolutely! While you don’t *need* to chill it, you can. Just wrap the disk of dough tightly in plastic wrap and refrigerate for up to 2 days. When you’re ready to bake, let it sit on the counter for 15-20 minutes to soften up a bit before rolling.
Q: Why are my cookies puffy and cake-like instead of flat?
A> This is likely due to the baking powder. Make sure it’s fresh! Also, be sure you’re rolling the dough to a true ¼-inch thickness. If you roll it thicker, you’ll get a puffier, more cake-like cookie (which is also delicious, just different!).
Q: How do I store these cookies?
A> Once completely cool, store them in an airtight container at room temperature. They’ll stay soft and delicious for up to 5 days. You can also freeze the baked and cooled cookies for up to 3 months!

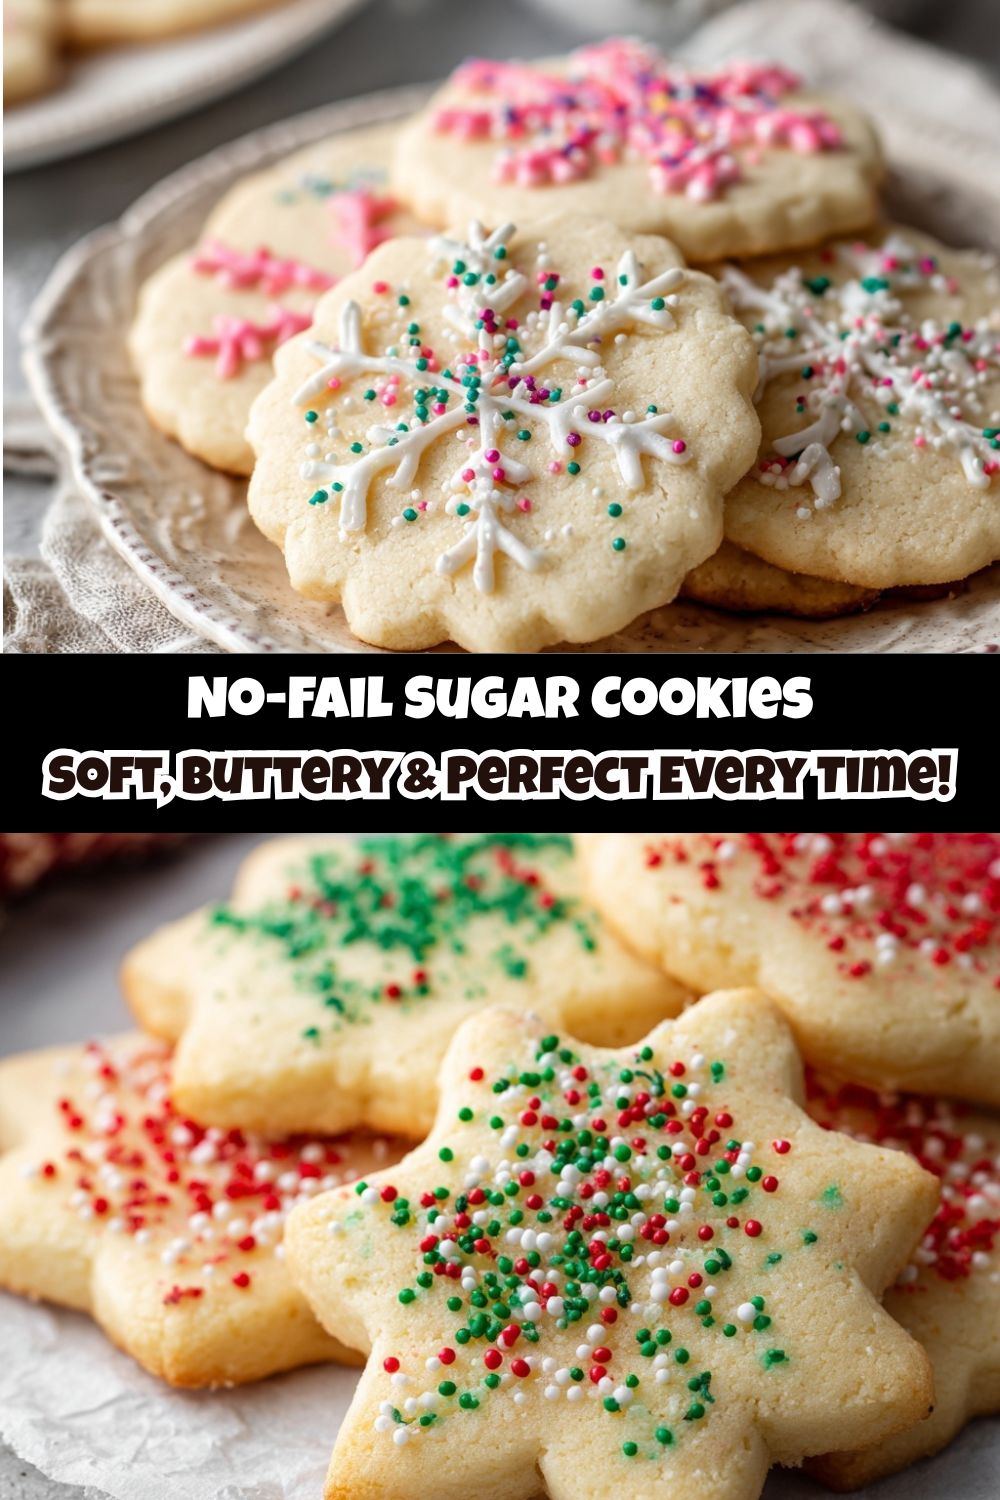
No-Fail Sugar Cookies : Soft, Buttery & Perfect Every Time
- Total Time: 25 minutes
- Yield: ~30 cookies
Description
These no-fail sugar cookies are buttery, soft in the center, and hold their shape beautifully—perfect for decorating or enjoying plain. Whether it’s for holidays, birthdays, or just because, this foolproof recipe delivers delicious results every single time. No chilling, no spreading, just sweet cookie perfection.
Ingredients
1 cup unsalted butter, softened
1 cup granulated sugar
1 large egg
1½ tsp vanilla extract
2½ cups all-purpose flour
1 tsp baking powder
½ tsp salt
Instructions
Preheat oven to 350°F (175°C) and line baking sheets with parchment paper.
Cream butter and sugar in a large bowl until light and fluffy.
Add egg and vanilla, mixing until smooth.
Whisk dry ingredients in a separate bowl. Gradually add to wet mixture until a soft dough forms.
Roll out dough on a floured surface to about ¼ inch thick. Cut into desired shapes.
Place cookies on prepared sheets about 1 inch apart.
Bake 8–10 minutes, until edges are just barely golden.
Cool completely before decorating or storing.
- Prep Time: 15 minutes
- Cook Time: 10 minutes
Nutrition
- Calories: 110 / Cookie
- Sugar: 6g / Cookie
- Fat: 5g / Cookie
- Carbohydrates: 14g / Cookie
- Protein: 1g / Cookie
Nutritional Information*
Alright, let’s talk about the good stuff. Here’s a rough breakdown per cookie (based on a yield of 30 cookies). Remember, this is a treat, so enjoy it mindfully and deliciously!
- Calories: 110
- Carbohydrates: 14g
- Fat: 5g
- Sugar: 6g
- Protein: 1g
*Please note that this is an estimate generated using a nutritional calculator. Values can vary based on specific ingredients and portion sizes.
Final Thoughts from My Kitchen to Yours
And there you have it, friends. Your new secret weapon for buttery, soft, picture-perfect sugar cookies. This recipe is a testament to my core belief: that cooking and baking should be fun, approachable, and always, always packed with flavor. It’s not about being perfect; it’s about the joy of creating something with your hands and sharing it with people you love.
So, I hope you’ll give this recipe a try. I hope your kitchen fills with the incredible smell of baking butter and vanilla. And I really hope you experience that proud, happy feeling of pulling a tray of gorgeous, golden cookies out of your own oven. You’ve got this.
If you make them, I’d love to see your creations! Tag me on social @FoodMeld and use the hashtag #FoodMeld. Now, go on and bake something awesome. Talk soon!


