No-Bake White Chocolate Peanut Clusters: Your New Favorite Kitchen Escape
Hey friends, Jackson from Food Meld here. Let’s get real for a second. Some days, you just need a win in the kitchen. Something that doesn’t involve preheating an oven, sifting flour, or wondering if your cake is going to rise. You want a recipe that feels more like a high-five than a homework assignment. You want something fun, fast, and guaranteed to make people smile.
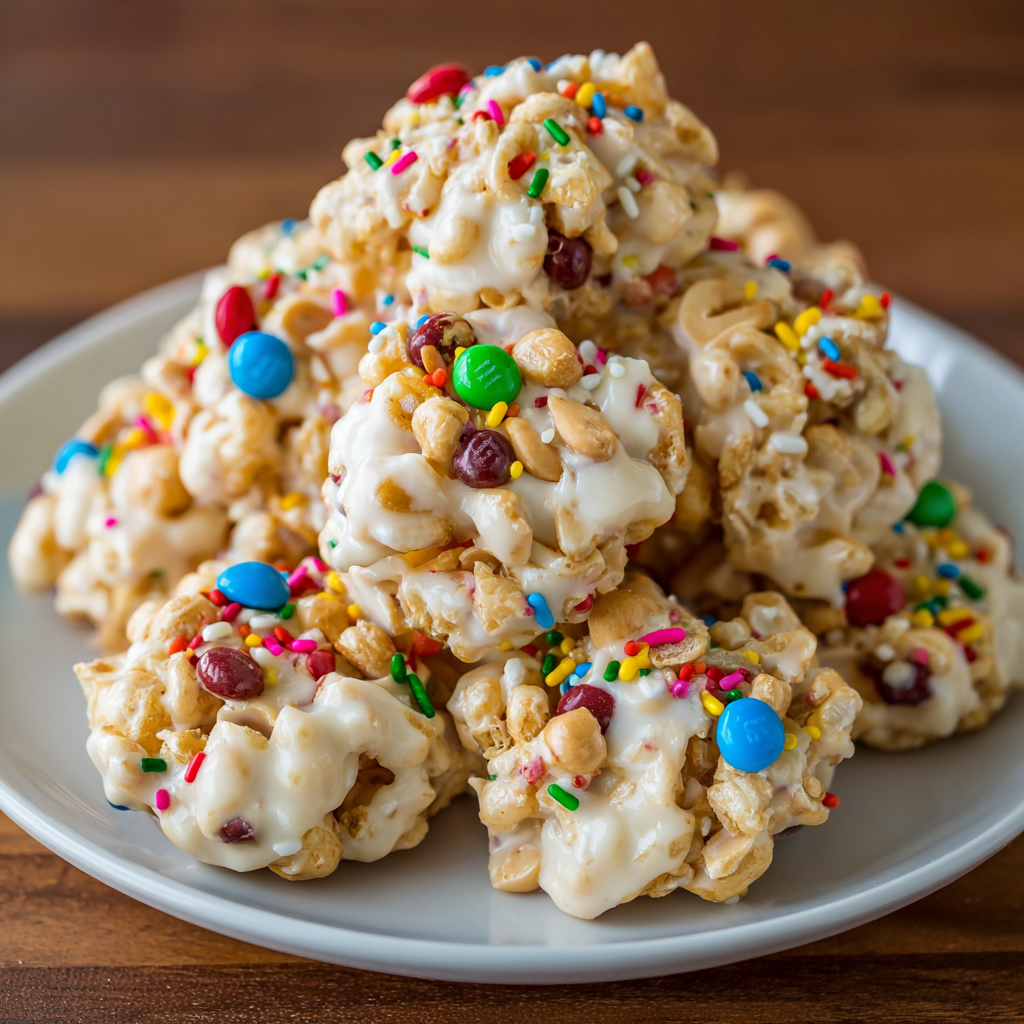
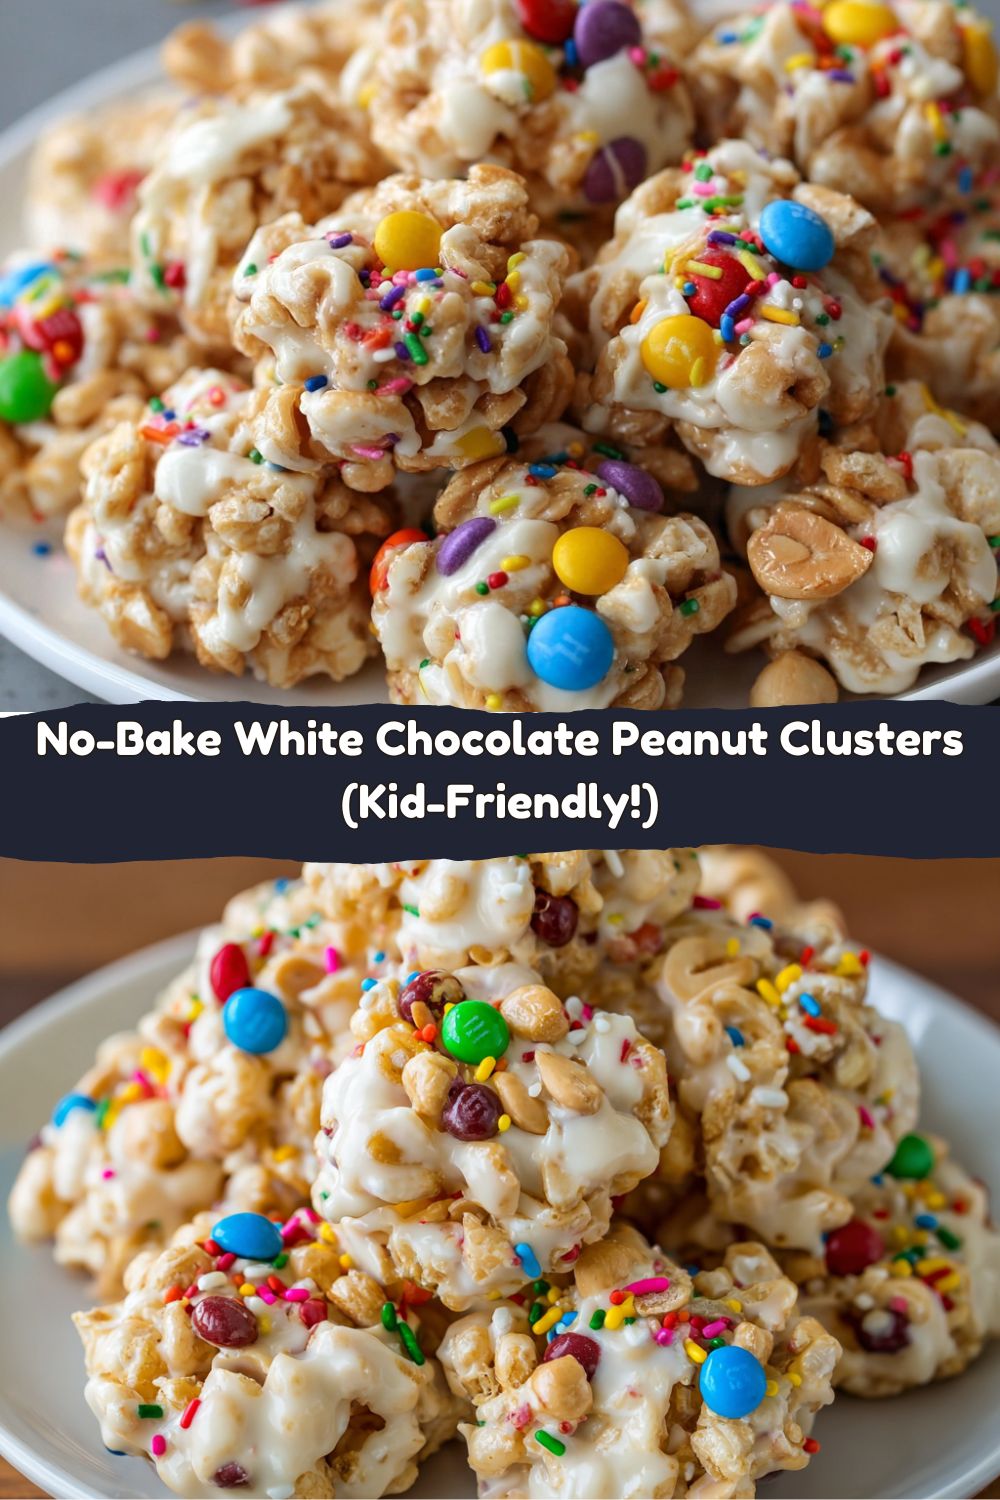
Well, my friend, you’ve just found it. These No-Bake White Chocolate Peanut Clusters are my go-to for instant kitchen joy. They’re the ultimate sweet-and-salty crunch bomb, and they’re seriously impossible to mess up. We’re talking rich, creamy white chocolate, a swirl of peanut butter, and a party-in-your-mouth mix of crunchy peanuts, crispy cereal, colorful M&Ms, and a confetti explosion of sprinkles. Every bite is a texture adventure.
The best part? This is more of a kitchen activity than a rigid recipe. It’s the perfect project to rope in the kids, your partner, or a friend who claims they “can’t cook.” There’s no baking, no fancy equipment—just a couple of bowls, a spoon, and a whole lot of deliciousness waiting to happen. So, let’s ditch the stress and cook up some fun. These clusters are about to become your secret weapon for lunchbox treats, party snacks, or just a darn good reason to celebrate Tuesday.
A Little Story: Why These Clusters Feel Like Home
This recipe always takes me right back to my grandma’s linoleum-floored kitchen. She wasn’t a fancy baker, but she was a master of what she called “stir-togethers.” On rainy afternoons, she’d call me over, clear the table, and pull out this big yellow bowl. There was no recipe card—it was all in her head. She’d melt chocolate on the stovetop, and my job was to measure out the “crunchies and colors.”
I’d pour in the peanuts, dump the cereal, and always, always sneak a handful of the candy-coated chocolates before they even made it into the mix. She’d pretend not to notice, but she’d give me that knowing wink. That’s the magic of a recipe like this. It’s not just about the final product (though, trust me, it’s incredible). It’s about the laughter, the little fingers sneaking tastes, and the simple joy of creating something together. That’s the spirit I want to bring to your kitchen today.
Gather Your A-Team: The Ingredients
Here’s the dream team that makes these clusters so unforgettable. I’ve included some of my favorite chef insights and easy swaps so you can make this recipe your own.
- 1 block white almond bark (about 16 oz): This is our superstar. Almond bark (or candy coating) melts like a dream and sets up firm without getting temperamental. Chef’s Tip: If you can’t find it, you can use high-quality white chocolate chips, but add a teaspoon of coconut oil to help them melt smoothly and set properly.
- ½ cup creamy peanut butter: This adds a deep, nutty richness and helps bind everything together. Swap It: Feel free to use crunchy PB for extra texture, or any other nut or seed butter like almond or sunflower butter for a different flavor profile.
- 4 cups Rice Krispies cereal: The secret weapon for that incredible, airy crunch! They lighten up the whole cluster so it’s not too dense.
- 2 cups dry roasted peanuts: Salty, crunchy, and the perfect partner to the sweet white chocolate. Chef’s Insight: Using salted peanuts creates that addictive sweet-and-salty balance. If you only have unsalted, just add a tiny pinch of sea salt to the mix!
- ½ cup mini M&Ms: These little guys bring pops of chocolatey flavor and a whole lot of fun color. Fun Twist: Use seasonal M&M colors to match any holiday!
- 2 tbsp rainbow sprinkles: Don’t you dare skip the sprinkles! They’re pure joy in a jar and make these clusters look like a party.
Let’s Make Some Magic: The Step-by-Step
Alright, team, it’s go time. This is where the fun happens. I’ll walk you through every step with a few of my favorite kitchen hacks to ensure your clusters are perfect.
- Melt & Mix Like a Pro. Grab a large, microwave-safe bowl and break the almond bark into it. Microwave on high in 30-second bursts, stirring well after each one. Why? We want gentle, even heat to avoid seizing the chocolate. Once it’s mostly melted, keep stirring—the residual heat will melt the rest. Now, plop in that peanut butter and stir until the mixture is one smooth, velvety, irresistible pool. Little Chef Hack: If you’re nervous about microwaves, you can do this step in a heatproof bowl set over a pot of simmering water (a double boiler). It’s a bit more hands-on, but it gives you total control.
- Combine the Dry Crew. In a separate, even larger bowl (trust me, you’ll want the space), combine your Rice Krispies, dry roasted peanuts, mini M&Ms, and rainbow sprinkles. Give it a gentle stir to distribute all the colors and crunchies evenly.
- The Big Coat. Here comes the satisfying part! Pour your gorgeous, melted white chocolate and peanut butter mixture over the dry ingredients. Now, grab a sturdy spatula and start folding. Go slow at first, then get in there and make sure every single piece of cereal and peanut gets coated in that deliciousness. Pro Tip: Work relatively quickly here, as the chocolate will start to set. But don’t stress—you’ve got plenty of time.
- Scoop & Set. Line a baking sheet with parchment paper or a silicone baking mat. Using a tablespoon, a small cookie scoop, or just your hands (lightly greased with cooking spray to prevent sticking), drop mounds of the mixture onto the sheet. Don’t worry about making them perfectly round—rustic and homemade-looking is what we’re going for! Fun Idea: Let the kids do this part! It’s a fantastic (and delicious) way for them to get involved.
- The Patience Game. Now, we let science do its thing. You can let the clusters set at room temperature for about 30-45 minutes, or if you’re as impatient as I am, pop the whole baking sheet into the fridge for 15-20 minutes to speed things up. They’re ready when they’re firm to the touch.
How to Serve These Bad Boys
Okay, they’re set. They’re gorgeous. Now what? Presentation is half the fun! Pile these clusters high on a fun, colorful platter for your next game day gathering or potluck. They’re an instant crowd-pleaser. For a lunchbox surprise, toss a couple into a small container—they’re the perfect after-lunch treat that’ll make you the hero of the day.
My personal favorite way to serve them? On a big plate with a tall glass of cold milk for dipping. The combination of the cool milk and the sweet, crunchy cluster is a little bite of heaven. They also make a fantastic homemade gift. Stack them in a cellophane bag, tie it with a ribbon, and you’ve got a present that’s straight from the heart (and the kitchen).
Mix It Up! Creative Twists on the Classic
This recipe is a fantastic canvas for your creativity. Don’t be afraid to play with the flavors! Here are a few of my favorite variations to get those “what if we tried this?” gears turning.
- Trail Mix Twist: Swap out the M&Ms for a mix of dried cranberries, chopped pretzel pieces, and sunflower seeds. It’s a next-level sweet, salty, and tangy situation.
- Tropical Escape: Use chopped macadamia nuts instead of peanuts, and mix in some chopped dried pineapple and coconut flakes. It’ll taste like a vacation in a cluster.
- Double Chocolate Delight: For the chocoholics, use chocolate almond bark and swap the peanut butter for Nutella. You’re welcome.
- Festive Fun: Customize the mix-ins for any holiday! Red and green M&Ms for Christmas, pastel ones for Easter, or candy corn and candy pumpkins for Halloween.
- Allergy-Friendly Version: Use sunflower seed butter instead of peanut butter, and swap the peanuts for pumpkin seeds. Make sure to use allergy-friendly chocolate and candies, and you’re good to go!
Jackson’s Chef Notes & Kitchen Confessions
This recipe has seen a lot of iterations in my kitchen. I once tried to get fancy and add orange zest and cardamom. Let’s just say my nephew was not impressed. He looked me dead in the eye and asked, “Uncle Jack, where are the sprinkles?” It was a humbling moment and a good reminder: never underestimate the power of sprinkles and simplicity.
The beauty of this recipe is in its flexibility. I’ve made it with every nut and cereal I have in my pantry, and it’s never once failed me. It’s a forgiving, feel-good recipe that’s meant to be played with. So, have fun with it! The only real rule is to make it yours.
Your Questions, Answered!
I’ve gotten a lot of questions about this recipe over the years, so I’ve compiled the big ones right here for you.
- Q: My chocolate seized and got clumpy! What do I do?
A: Don’t panic! This usually happens if a tiny bit of water or steam gets into the melting chocolate. You can sometimes save it by immediately stirring in a tablespoon of solid vegetable shortening (like Crisco) until it smooths out. If it’s too far gone, just start over—it happens to the best of us! - Q: Can I use honey or maple syrup instead of peanut butter to bind it?
A: I wouldn’t recommend it for this particular recipe. The peanut butter adds fat and structure that helps the clusters set firmly. Liquid sweeteners will make the mixture sticky and prevent it from holding its shape. - Q: How can I make these clusters firmer faster?
A: The fridge is your best friend! 15-20 minutes in the fridge will have them perfectly set. You can even give the freezer a try for about 10 minutes if you’re in a real hurry. - Q: Why did my M&M colors bleed?
A: This can happen if the chocolate mixture is still very hot when you stir them in. To keep those colors vibrant, let the melted chocolate and PB mixture cool for a minute or two before combining it with the dry ingredients.
Let’s Talk Nutrition & Prep (The Nitty-Gritty)
I’m all about keeping it real, and that includes being transparent about what we’re eating. These clusters are a treat, and they’re meant to be enjoyed as such! Here’s the lowdown per cluster (based on making about 36):
- Calories: 130
- Protein: 3g
- Fat: 7g
- Carbs: 14g
- Sugar: 9g
- Fiber: 1g
Prep & Storage Info:
Prep Time: 10 minutes
“Cook” Time: 5 minutes (melting only)
Set Time: 30-45 minutes
Total Time: ~1 hour
Servings: 36 glorious clusters
Storage: Keep these guys happy in an airtight container at room temperature for up to 1 week. If your kitchen runs warm, or you want them to last a bit longer, you can refrigerate them for up to 2 weeks. They also freeze beautifully for up to 3 months!
Final Thoughts: You’ve Got This!
And there you have it. Your new favorite no-fuss, no-bake, all-flavor treat. This recipe is proof that you don’t need fancy skills or all day to create something truly special and delicious in the kitchen. It’s about the experience, the laughter, and the sheer satisfaction of making something with your own two hands.
So, what are you waiting for? Raid that pantry, call over your favorite little helpers (or just treat yourself!), and let’s make a memory. I can’t wait to see what you create. Tag me on social @FoodMeld with your cluster masterpieces—it absolutely makes my day.
Until next time, keep it simple, keep it real, and always keep it flavorful. Let’s cook something awesome together.
– Jackson


