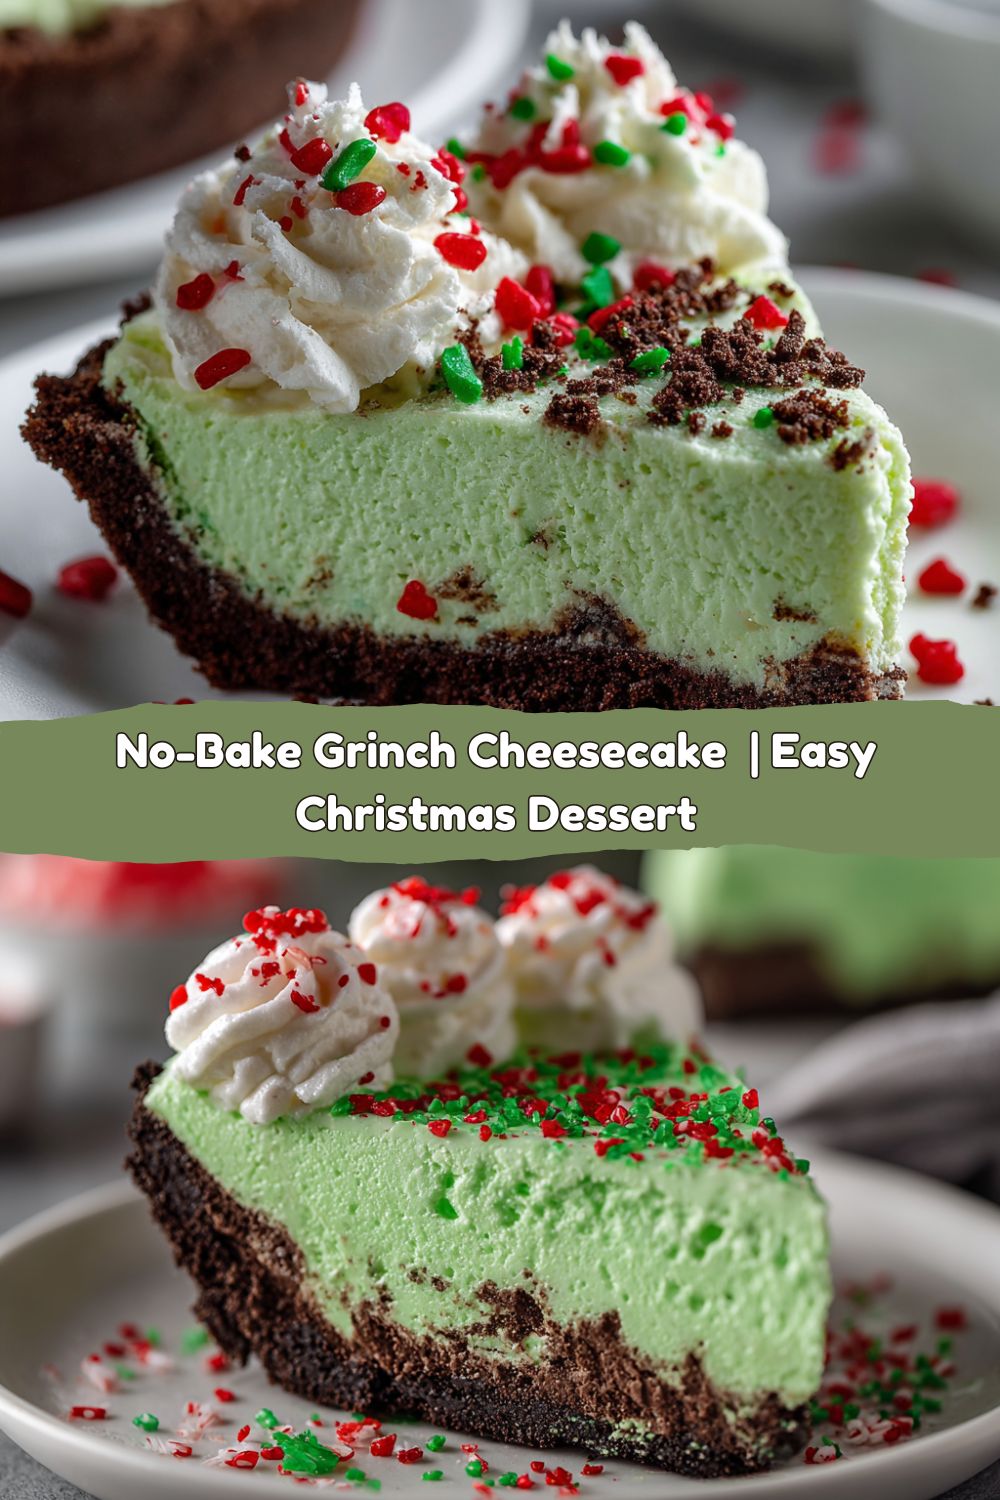
Unleash Your Inner Whoville: The No-Bake Grinch Christmas Cheesecake
Hey friends, Jackson from Food Meld here! Is there anything better than that moment in the kitchen when you create something so ridiculously good, so visually stunning, that your family’s eyes just go wide? That’s the magic we’re cooking up today. I’m talking about a dessert that’s pure, unadulterated holiday joy—a vibrant, creamy, no-bake Grinch Christmas Cheesecake that’s about to become the star of your festive table.
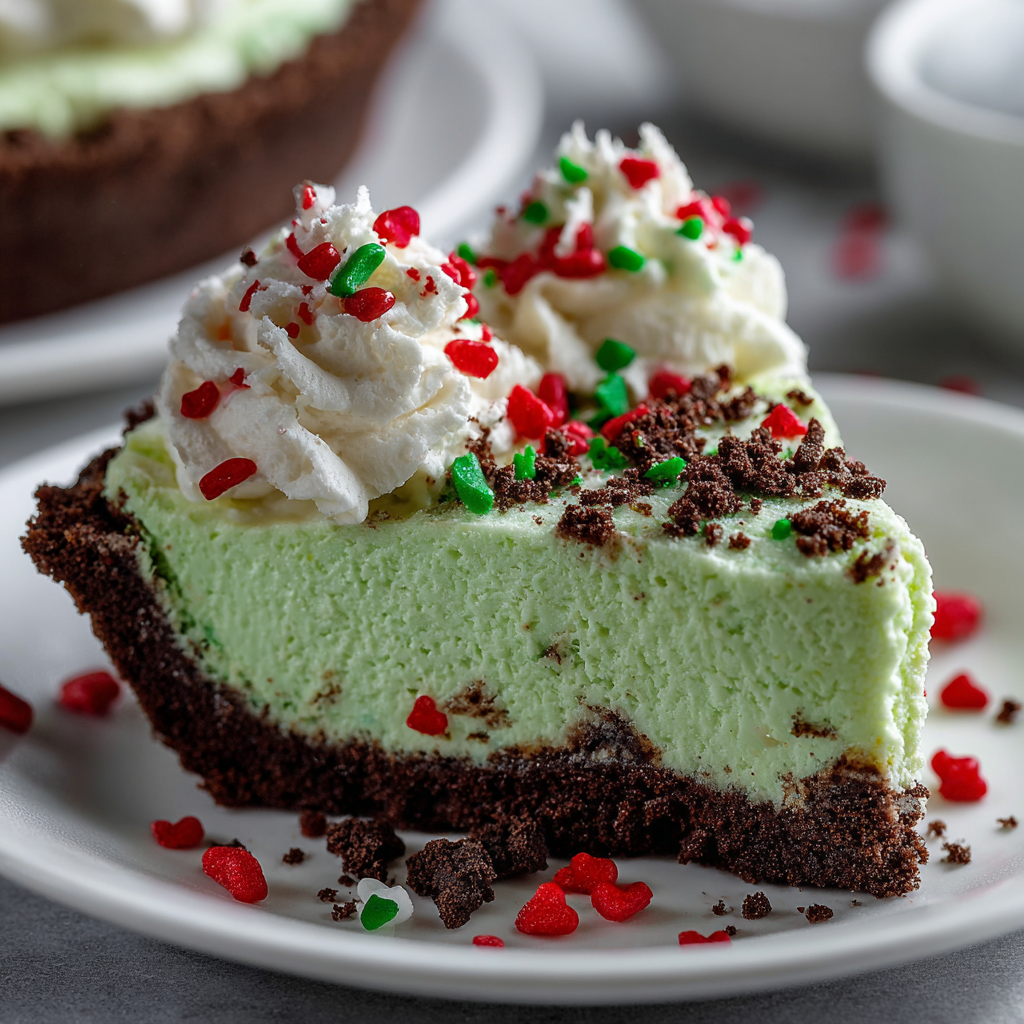
Now, I know what some of you might be thinking: “Jackson, a cheesecake? From scratch? That sounds… intense.” But trust me on this one. This isn’t a fussy, water-bath, crack-on-top kind of situation. This is my kind of cooking: bold, comforting, and seriously simple. We’re skipping the oven entirely for a foolproof, mix-and-chill masterpiece. It’s packed with that iconic, mischievous Grinch green, sits on a chocolatey Oreo crust, and is finished with a sweet little red heart candy on top. It’s fun, it’s festive, and it’s guaranteed to make everyone from the littlest kids to the grumpiest uncles smile (and ask for seconds). So, grab your favorite mixing bowl, and let’s cook something awesome together that’s full of flavor and fun.
A Story of Stolen Treats and Growing Hearts
This recipe takes me right back to my grandma’s linoleum-floored kitchen, the year I was maybe seven. It was Christmas Eve, and the whole house smelled like pine and peppermint. My grandma, a woman who believed desserts should be as colorful as her personality, had made a simple green Jell-O pie. To my young eyes, it was the most magical thing I’d ever seen—this shimmering, emerald creation. I was so captivated that I “helped” myself to a slice… or three… before dinner was even called. Let’s just say I got caught, red-handed (and green-mouthed), and my heart grew three sizes that day from the laughter that followed, not the scolding I expected. That’s the spirit I wanted to capture here: that pure, childlike wonder and the shared laughter that makes the holidays so special. This cheesecake is my grown-up, way-more-delicious homage to that memory—a treat so good you’ll want to sneak a bite, but so beautiful you’ll be proud to serve it to the whole family.
Gathering Your Whoville-Worthy Ingredients
Here’s the lineup for our double-batch masterpiece. This makes a big 9×13 pan, perfect for a party. Don’t be intimidated by the quantities—this is a “go big or go home” kind of dessert!
For the Chocolate Cookie Crust:
- 72 Oreo Cookies (about 2 standard packages), finely crushed: Don’t you dare scrape out the cream! That sweet, vanilla-y filling is our secret weapon. It adds flavor and helps bind the crust. If you’re in a pinch, any chocolate sandwich cookie will work, but Oreos are the gold standard here.
- 1 cup (2 sticks) Unsalted Butter, melted: This is the glue. Using unsalted lets us control the salt level. For a little chef’s hack, brown your butter first for a deep, nutty flavor that plays amazingly well with the chocolate. Just let it cool slightly before mixing!
For the Grinch Green Filling:
- 4 (8 oz) packages Cream Cheese, softened: This is non-negotiable. FULL FAT, and SOFTENED. Leave it on the counter for a few hours. If it’s cold, you’ll get lumpy filling, and we’re going for cloud-like creaminess. This is the foundation of our no-bake wonder.
- 4 cups Powdered Sugar: We use powdered sugar instead of granulated for two reasons: it dissolves instantly for a smooth texture, and the bit of cornstarch in it helps the filling set up beautifully.
- 32 oz Cool Whip, thawed (or an equal amount of homemade whipped cream): This is what gives our cheesecake its incredible light, airy texture. If you’re a purist, homemade whipped cream (just heavy cream and a little sugar whipped to stiff peaks) is fantastic. But Cool Whip is a fantastic, stable, and easy shortcut. Your call!
- Neon Green Gel Food Coloring: Liquid food coloring will work in a serious pinch, but gel is the way to go. It’s more potent, so you use less, and it won’t water down your filling. We’re going for that perfect, bold “Grinch who stole Christmas” green.
- ½ teaspoon Mint Extract (our fun twist!): This is my “what if we tried this?” energy in action. A tiny hint of mint makes this taste like a festive candy cane, tying the whole Christmas theme together. It’s optional, but highly recommended!
For the Decoration:
- Red Heart Sprinkles or Red Sixlet Candies: The final touch! This represents the Grinch’s heart that grows three sizes. It’s cute, thematic, and delicious.
Crafting Your Cheesecake Masterpiece: Step-by-Step
Alright, team, let’s get our hands dirty. This is the fun part. I’ll walk you through every step with my favorite kitchen hacks to ensure perfection.
- Prepare the Crust: In a large bowl, combine your finely crushed Oreos and melted butter. Mix it until it looks like dark, wet sand and every crumb is moistened. Here’s a pro tip: dump your Oreos (creams and all) into a large zip-top bag and use a rolling pin to crush them. It’s therapeutic and mess-free! Pour the mixture into your 9×13-inch pan (or two 9-inch pie plates) and press it down firmly and evenly. I like to use the bottom of a flat measuring cup to really pack it in—this prevents a crumbly crust later. Pop this into the fridge to chill and set while we make the magic happen with the filling.
- Make the Filling – The “Creamy Cloud” Stage: In the bowl of a stand mixer fitted with the paddle attachment (a large bowl and a hand mixer work great too!), beat your softened cream cheese on medium-high speed for a good 2-3 minutes. We want it completely smooth, no lumps in sight. Scrape down the sides and the bottom of the bowl—this is crucial! Now, gradually add the powdered sugar with the mixer on low so you don’t get a sugar cloud in your face. Once it’s incorporated, crank it back up to medium-high and beat for another 2 minutes until it’s fluffy and smooth. Scrape the bowl again. You’re doing great!
- The Fold-In: Now, switch to a large spatula. We’re going to gently fold in the thawed Cool Whip. Why fold? We’ve worked hard to incorporate all that air into the cream cheese, and aggressive mixing will deflate it. Be gentle, turning the mixture over itself until no white streaks remain. Now, add your neon green food coloring and the mint extract (if using). Start with a little gel color; you can always add more. Fold until you achieve that perfect, iconic Grinch hue.
- Assemble & Chill: Pull your crust out of the fridge. Dollop the beautiful green filling all over the crust, then gently spread it out into one even, gorgeous layer. Smooth the top with your spatula. Now, the hardest part: patience. Cover the pan with plastic wrap and refrigerate for at least 4 hours, but ideally overnight. This isn’t a suggestion—it’s mandatory for that perfect, sliceable texture.
- The Grand Finale – Decorate! Right before you’re ready to serve, scatter those red heart sprinkles or candies across the top. It’s the perfect, heartwarming finish.
How to Serve This Show-Stopping Dessert
Presentation is part of the fun! For clean slices, take your sharp knife and run it under very hot water. Wipe it dry, then make your cut. Repeat for every slice—it’s a game-changer for getting those pristine, picture-perfect pieces. Serve this up on a simple white platter to really let that vibrant green pop. A little extra dollop of Cool Whip or a sprinkle of crushed Oreo crumbs on the side never hurts. This is a rich dessert, so a small slice goes a long way (but I won’t judge if you go back for more). Pair it with a cold glass of milk, a hot coffee, or even a glass of sparkling dessert wine for the adults. It’s the ultimate festive finale to any holiday meal.
Make It Yours: Fun Flavor Twists & Swaps
The best recipes are the ones you can make your own. Here are a few ways to mix it up:
- Fruity Grinch: Not a mint fan? Swap the mint extract for a teaspoon of vanilla extract and fold in a cup of finely chopped green strawberries or kiwi for a fresh, fruity twist.
- Graham Cracker Crust: If you’re not a chocolate person (no hard feelings!), use 5 cups of graham cracker crumbs mixed with the same amount of melted butter for a classic crust.
- “Grinch’s Evil Plan” Version: Make a swirl! Prepare the filling as directed, but set aside about a cup of the plain white mixture before adding the green coloring. After spreading the green filling into the pan, dollop the white filling on top and use a knife to swirl it dramatically.
- Boozy Adult Twist: Add a tablespoon of peppermint schnapps along with the extract for a little extra holiday spirit.
- Dairy-Free Delight: Use dairy-free cream cheese and butter alternatives, and swap the Cool Whip for a whipped coconut cream. It’ll work like a charm!
Jackson’s Chef Notes & Kitchen Stories
This recipe has evolved so much since I first tested it. The first time, I used liquid food coloring and my entire family’s mouths were green for two days. Gel for the win, people! I also learned the hard way that cold cream cheese is the enemy of a smooth filling. I’ve been there, staring at a bowl of lumpy cheese, so learn from my mistakes! The mint extract was a happy accident—I reached for the vanilla, saw the mint next to it, and thought “why not?” It was the best “mistake” I ever made. Cooking is all about those little experiments. Don’t be afraid to play with your food.
Your Questions, Answered (FAQs & Troubleshooting)
Q: My filling is runny and didn’t set. What happened?
A: The most common culprit is not beating the cream cheese and sugar long enough, or the cream cheese wasn’t fully softened. Also, ensure you’re chilling it for the full 4 hours, preferably overnight. If you’re in a real pinch, 30-60 minutes in the freezer can help firm it up quickly before serving.
Q: Can I make this ahead of time?
A: Absolutely! This is the perfect make-ahead dessert. It will keep beautifully, covered, in the fridge for up to 3 days. I’d wait to add the heart sprinkles until just before serving so they don’t bleed color.
Q: Why is my crust crumbling when I cut a slice?
A: You probably didn’t press it firmly enough into the pan. Really pack it down! Also, make sure you’re using enough butter—it’s the essential binder.
Q: Can I freeze the Grinch cheesecake?
A: You can! Wrap the whole pan or individual slices tightly in plastic wrap and then aluminum foil. It will freeze for up to 2 months. Thaw overnight in the refrigerator before serving.
No-Bake Grinch Christmas Cheesecake
- Total Time: 4 hours 20 minutes
- Yield: 24–30 1x
Description
This vibrant green no-bake cheesecake brings the holiday cheer with creamy layers, a chocolate cookie crust, and playful Grinch-inspired color. With a double batch for a crowd and a few fun twists like mint extract and festive sprinkles, it’s a merry dessert that’s as easy as it is eye-catching.
Ingredients
For the Crust:
72 Oreo cookies, finely crushed
1 cup unsalted butter, melted
For the Cheesecake Filling:
4 (8 oz) packages cream cheese, softened
4 cups powdered sugar
32 oz Cool Whip (or homemade whipped cream)
Neon green food coloring (adjust to get that perfect Grinch hue)
½ teaspoon mint extract (optional twist)
Red heart sprinkles or red candies (for Grinch hearts)
Instructions
Prepare the Crust: In a bowl, combine crushed Oreos and melted butter. Press firmly into a 9×13-inch pan (or two 9-inch pie pans) to form an even crust. Chill in the fridge while you make the filling.
Make the Filling: Beat softened cream cheese until smooth. Add powdered sugar and continue mixing until fluffy.
Fold in Cool Whip, food coloring, and mint extract if using. Mix until well combined and vibrantly green.
Assemble: Spread the cheesecake mixture evenly over the chilled crust. Smooth the top.
Chill: Refrigerate for at least 4 hours, or until set.
Decorate: Just before serving, top with red heart sprinkles or candies to give it that Grinchy touch.
- Prep Time: 20 minutes
- Cook Time: 4 hours
Nutrition
- Calories: 320 / Serving
- Sugar: 23g / Serving
- Fat: 22g / Serving
- Saturated Fat: 14g / Serving
- Carbohydrates: 30g / Serving
- Protein: 3g / Serving
Nutritional Information*
Alright, let’s keep it real. This is a celebratory dessert, meant to be enjoyed in the spirit of the season! Here’s a rough estimate per slice (assuming 24 servings):
- Calories: ~320
- Fat: 22g
- Saturated Fat: 14g
- Carbohydrates: 30g
- Sugar: 23g
- Protein: 3g
*Please note: This is an estimate generated from the ingredients used and will vary based on specific brands and any substitutions you make. It’s all about balance, friends! Enjoy a slice, savor it, and maybe go for an extra walk to look at the Christmas lights.
Final Thoughts
There you have it, my foodie friends! A dessert that’s bursting with flavor, fun, and total holiday magic. This No-Bake Grinch Cheesecake is more than just a treat; it’s a conversation starter, a memory maker, and a guaranteed crowd-pleaser. It proves that you don’t need fancy techniques or hours of labor to create something truly unforgettable. You just need a few simple ingredients, a willingness to have a little fun, and a belief that everyone’s heart can grow three sizes with the right dessert. I’d love to see your creations! Tag me on social @FoodMeld so I can share in your holiday kitchen adventures. From my kitchen to yours, Merry Christmas, Happy Holidays, and let’s cook something awesome together!
Jackson Walker


