Why This No-Bake Easter Cake is Your New Holiday Hero
Hey friends, Jackson here from Food Meld. Can we talk about Easter for a second? It’s one of those holidays that’s all about joy, family, and… a whole lot of kitchen chaos. Between prepping the main event (looking at you, glorious ham), wrangling kids on a sugar high from their morning basket haul, and trying to actually enjoy the day, the last thing you need is a fussy, complicated dessert.
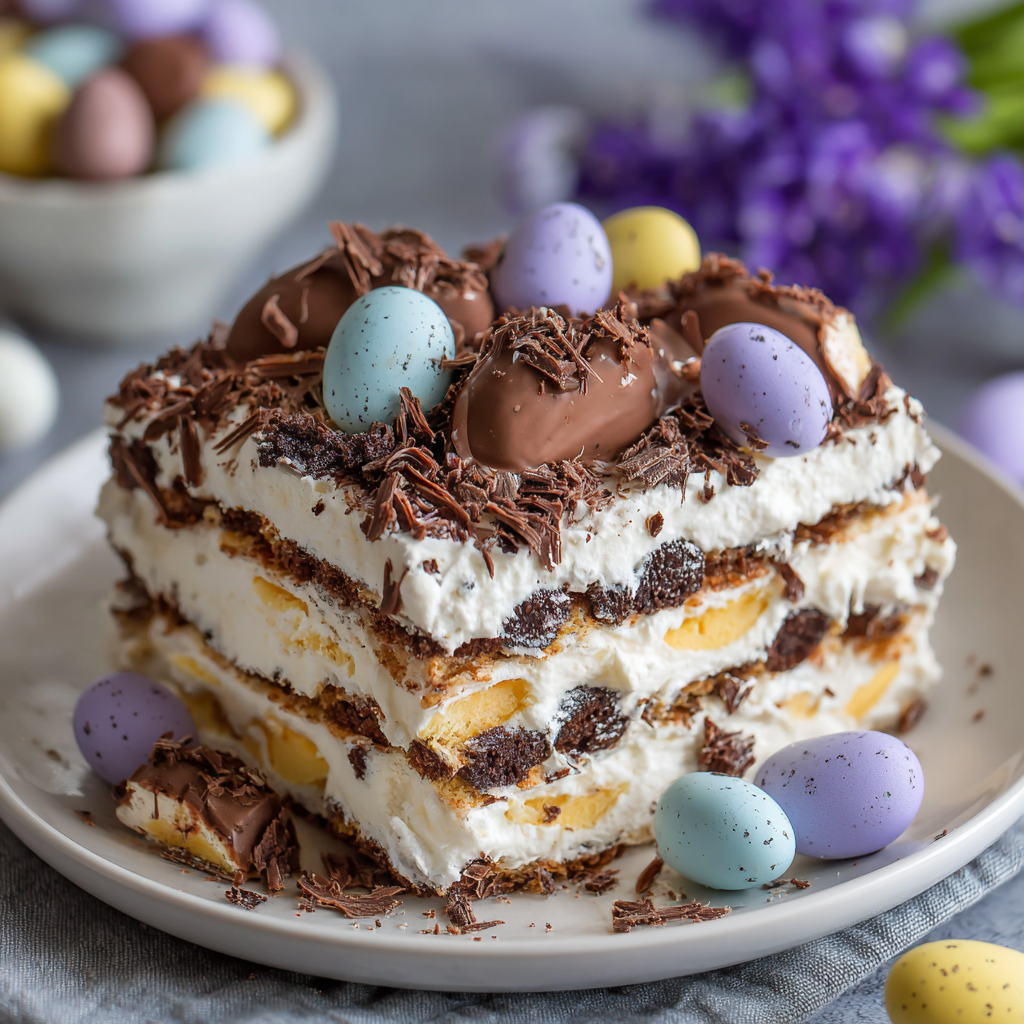
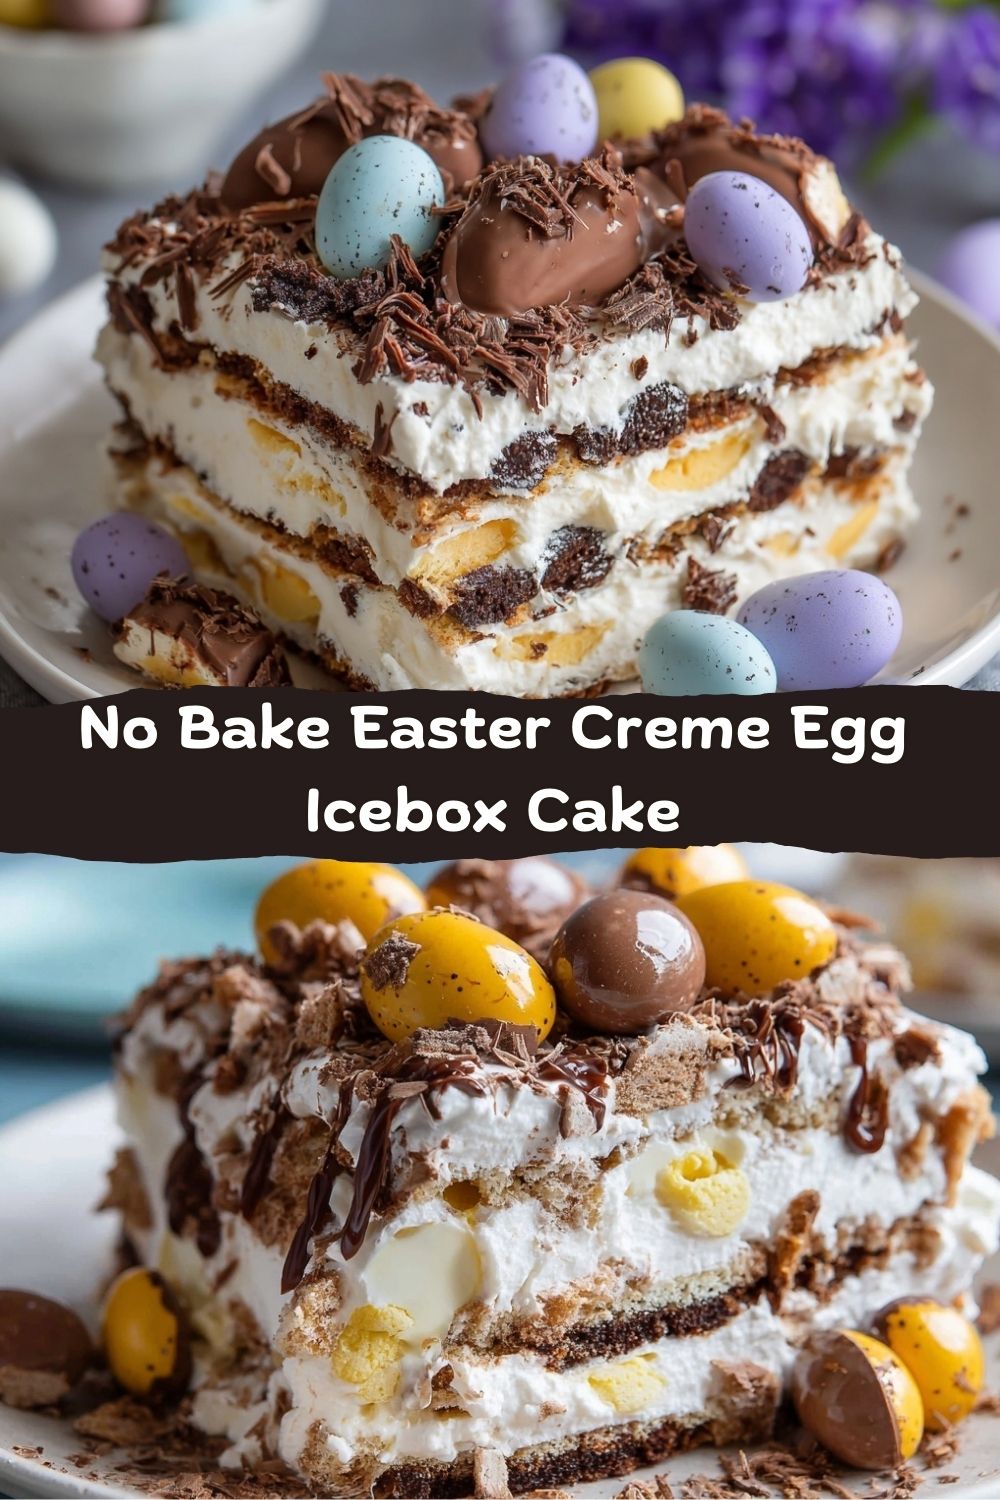
That’s exactly why I created this No-Bake Easter Creme Egg Icebox Cake. This isn’t just a dessert; it’s a lifesaver. Imagine the creamiest, dreamiest layers of fluffy vanilla cream and rich chocolate biscuits, all studded with pockets of gooey Cadbury Creme Eggs. It’s a showstopper that looks like you slaved over it, but the magic happens quietly in your fridge while you’re doing, well, anything else.
This recipe is for anyone who believes the best moments are spent around the table, not stuck at the stove. It’s for the beginner baker who gets nervous about oven temperatures, and for the seasoned pro who just wants a delicious win without the cleanup. We’re taking that iconic Easter candy and turning it into a sliceable, shareable, unforgettable celebration cake. Zero baking required. Maximum flavor and fun guaranteed. Let’s dive in and build something awesome together.
The Creme Egg Epiphany: A Sticky, Sweet Memory
This recipe was born from a very specific, slightly messy childhood memory. Every Easter, my brother and I would have a very serious, unspoken competition: who could hoard the most Cadbury Creme Eggs from our shared basket. We’d stash them in desk drawers, jacket pockets, you name it. The goal wasn’t just to eat them; it was to have a secret sugar reservoir long after the holiday passed.
One particularly warm spring, I learned a hard lesson about thermodynamics and chocolate. Let’s just say the jacket pocket stash did not survive. I was devastated, looking at the sticky, foil-clad mess. But my grandma, the ultimate kitchen wizard, saw an opportunity. She scooped that soft, creamy filling and melty chocolate into a bowl, folded it into some whipped cream, and layered it with graham crackers. A few hours later, we had the most primitive, glorious icebox cake imaginable. It taught me that kitchen “failures” are often just the first step to a delicious discovery. This cake is my polished, grown-up homage to that happy accident—a way to capture that magic deliberately, without the ruined jacket.
Gathering Your Flavor Building Blocks
Here’s everything you’ll need to create this cool, creamy masterpiece. I’ve included my best tips and swaps so you can make this cake your own.
- 300 g Chocolate Biscuits or Graham Crackers: This is our structure! I love using a slightly darker chocolate biscuit (like chocolate Leibniz or even Oreos without the filling) for a deeper flavor contrast. Chef’s Insight: Graham crackers are the classic, forgiving choice. If your biscuits are very thick, give them a quick bash in the bag to a more uniform size for easier layering.
- 400 ml Heavy Whipping Cream (at least 36% fat): Non-negotiable for volume and stability. This is the cloud-like base of our filling. Pro Tip: Chill your bowl and beaters in the freezer for 10 minutes before whipping. Cold equipment is the secret to getting stiff, glorious peaks faster.
- 250 g Mascarpone or Full-Fat Cream Cheese: Mascarpone is my winner here for its luxurious, silky texture and mild, sweet tang. Full-fat block cream cheese works beautifully too—just ensure it’s at room temperature to avoid lumps. Substitution: For a lighter version, you can use all cream, but the mascarpone adds a richness that makes the cake slice cleanly.
- 80 g Powdered Sugar (Icing Sugar): Sweetens and stabilizes. Its fine texture dissolves instantly, unlike granulated sugar which can leave a graininess.
- 1 tsp Pure Vanilla Extract: The flavor enhancer. It rounds out the sweetness and makes the whole cream layer taste more complex.
- 6–8 Cadbury Creme Eggs, chopped: The star of the show! Chop them roughly—you want some big chunks and some smaller bits for distribution. Fun Twist: Freeze them for 15 minutes before chopping to minimize sticking to your knife.
- Chocolate Shavings, Mini Eggs, or Sprinkles for topping: This is where you get to play. A shower of dark chocolate shavings cuts the sweetness, while pastel mini eggs scream Easter.
Let’s Build Some Layers: Your Foolproof Guide
This is the fun part. Put on some music, clear a space in the fridge, and let’s assemble.
- The Cream Dream: In your chilled bowl, whip the heavy cream to soft peaks. You’ll know it’s ready when the beaters leave trails that slowly sink back into the mixture. Set this aside for a moment. Chef’s Hack: Don’t over-whip here! Soft peaks are perfect because we’re going to fold it later.
- The Flavor Base: In a separate, large bowl, beat the room-temperature mascarpone (or cream cheese), powdered sugar, and vanilla extract together until it’s completely smooth, creamy, and lump-free. This should take about 2 minutes with an electric mixer. Scrape down the sides of the bowl to make sure everything is incorporated.
- Marrying the Creams: Now, using a large rubber spatula, gently fold the whipped cream into the mascarpone mixture. “Folding” means you cut down through the center, sweep across the bottom, and fold over the top. Repeat just until no white streaks remain. Be gentle—we want to keep all that air we whipped in! This is your luscious blanket for the biscuits.
- Layer 1 – The Foundation: Grab your serving dish (a 9×9 square or a 7×11 rectangle dish works perfectly). Spread a very thin layer of the cream mixture on the bottom. This just acts as “glue” for your first layer of biscuits.
- Layer 2 – The Crunch: Place a single, snug layer of chocolate biscuits over the cream, breaking them to fit any gaps like a tasty puzzle. You’ll hear a satisfying click as they settle in.
- Layer 3 – The Fun Part: Now, dollop a generous amount of cream (about a third of it) over the biscuits. Use your spatula to spread it into an even layer, making sure to reach the edges. Take a handful of your chopped Creme Eggs and scatter them evenly over the cream. Press them in lightly so they stick.
- Repeat & Conquer: Do it all again! Biscuits, cream, Creme Eggs. You’ll likely get 2-3 full layers. Finish with a final, beautiful layer of the cream mixture on top. Smooth it out or create pretty swirls with the back of a spoon.
- The Grand Finale (Decoration): This is your canvas. Decorate the top with more chopped Creme Eggs, chocolate shavings, mini eggs, or a dusting of cocoa. Get creative!
- The Most Important Step – The Chill: Cover the dish tightly with cling film and refrigerate for at least 6 hours, but ideally overnight. This is non-negotiable. This time allows the biscuits to soften from crisp to a perfect, cake-like tenderness that slices like a dream. Trust the process!
How to Serve This Showstopper
When it’s time to serve, you have options! For clean, elegant slices, use a sharp knife dipped in hot water and wiped dry between each cut. It glides right through. For a more rustic, family-style vibe, just grab a big spoon and dig in straight from the dish—no judgment here.
I love serving this on a platter with a few extra whole Creme Eggs and maybe some fresh berries (raspberries are fantastic) scattered around for a pop of color and a hit of freshness to balance the richness. A dollop of extra whipped cream on the side never hurt anybody either. Remember, the beauty of this cake is its make-ahead magic. It can sit happily in your fridge for up to 24 hours before the big reveal, making you the calm, cool, collected host.
Make It Your Own: 5 Tasty Twists
Once you’ve mastered the base, the flavor playground is open! Here are some of my favorite riffs:
- Salted Caramel Swirl: Fold ½ cup of thick salted caramel sauce into the cream mixture after folding. Use chocolate biscuits and top with a drizzle of extra caramel and sea salt flakes.
- Orange Zest Infusion: Add the zest of one large orange to the mascarpone mixture. The citrus cuts through the sweetness and pairs amazingly with chocolate and Creme Eggs. Top with candied orange peel.
- Cookie Butter Bliss: Replace half the mascarpone with 125g of smooth speculoos (cookie butter). Use plain graham crackers. The spiced, warm flavor is insanely good.
- Peanut Butter Paradise: Swirl ½ cup of smooth peanut butter into the cream. Chop up peanut butter cups instead of (or alongside!) the Creme Eggs. A dream for PB lovers.
- Dairy-Free & Lighter Options: Use chilled full-fat coconut cream (the solid part from a can) whipped with powdered sugar for the cream layer. For the cheese element, a thick, plain dairy-free cream cheese works. Check labels for vegan biscuits and use your favorite vegan chocolate eggs.
Jackson’s Kitchen Notes & Stories
This recipe has been my Easter secret weapon for years, and it’s evolved with every batch. The first time I tested it for the blog, I got a little *too* creative and added a layer of raspberry jam. Sounds good in theory, right? Well, the jam made the biscuits underneath it disintegrate into a soggy layer. Delicious, but structurally… a landslide. Lesson learned: keep wet additions like jam or curd as a swirl within the cream, not directly on the biscuits!
I’ve also learned that the type of biscuit truly changes the game. A sturdier, drier biscuit holds up longer for a make-ahead dessert, while a softer one becomes cake-like faster. My advice? Use what you love and trust the chill. This cake is wonderfully forgiving. The real story is in the layers you build with your own two hands, and the smiles it creates. That’s the Food Meld spirit.
Your Questions, Answered
Q: My biscuits are still crunchy/hard after chilling. What happened?
A: This usually means they needed more time or moisture. First, ensure you chilled it for the full 6+ hours, preferably overnight. Also, make sure your cream layers are generous and spread to the edges, fully contacting the biscuits. The steam from the cream is what softens them. If you’re in a dry climate, you can very lightly spritz the biscuit layer with milk before adding the cream, but this isn’t usually necessary.
Q: Can I make this more than a day ahead?
A: I recommend a maximum of 24-36 hours ahead. While it’s still safe to eat after that, the biscuits can become overly soft and the texture might be less ideal. It’s truly perfect as a make-the-day-before marvel.
Q: My cream mixture is runny/won’t hold stiff peaks. Help!
A: Two likely culprits: 1) Your cream, bowl, or beaters weren’t cold enough. Pop everything back in the fridge for 20 minutes and try again. 2) You may have accidentally over-whipped, causing the fat to separate (it starts looking grainy). If this happens, sadly, you need to start with fresh cream. To avoid it, whip on medium speed and watch it closely as it thickens.
Q: Can I use a different candy?
A> Absolutely! This is a fantastic template. Try with chopped peanut butter cups for Halloween, peppermint patties for Christmas, or just chopped-up chocolate bars any time of year.
Nutritional Information (Approximate)
Let’s be real—this is a celebratory treat, meant to be enjoyed fully and shared. This information is an estimate per serving (based on 10 slices) to help you make informed choices. Remember, ingredients and specific brands can cause variations.
- Calories: ~420 kcal
- Carbohydrates: 38 g
- Sugars: 26 g
- Fat: 28 g
- Saturated Fat: 16 g
- Protein: 5 g
- Sodium: 210 mg
The majority of the sugars and saturated fats come from the cream, cheese, and the Creme Eggs themselves. For a slightly lighter version, you can reduce the powdered sugar by 20g and use a light sprinkle of candy on top rather than mixed throughout the layers.
Let’s Celebrate the Easy Wins
And there you have it, friends—your ticket to the easiest, most impressive Easter dessert on the block. This No-Bake Creme Egg Icebox Cake is more than a recipe; it’s a reminder that the best food doesn’t have to be complicated. It’s about that moment when you bring it to the table, see the eyes light up, and hear the collective “oooooh.” It’s about making memories, not just meals.
So this holiday, give yourself the gift of time. Whip up this cake, let the fridge do its thing, and spend those precious extra moments hiding eggs, sipping coffee, or just relaxing. You deserve a dessert that works as hard as you do. I hope this recipe becomes a sticky, sweet, cherished part of your own family traditions. Now, go on and meld some flavor and fun in your kitchen. And don’t forget to save me a slice!
Happy Easter, and happy cooking,
Jackson


