Mom’s Medium Soft Gingersnap Cookies: A Bite of Holiday Magic
Hey friends, Jackson from Food Meld here. Let’s talk about a smell that can stop you in your tracks and transport you straight to the best moments of your life. For me, that smell is the warm, spicy, slightly sweet aroma of gingersnap cookies baking in the oven. It’s the unofficial scent of the holidays in my family, a signal that good things—no, great things—are about to happen.
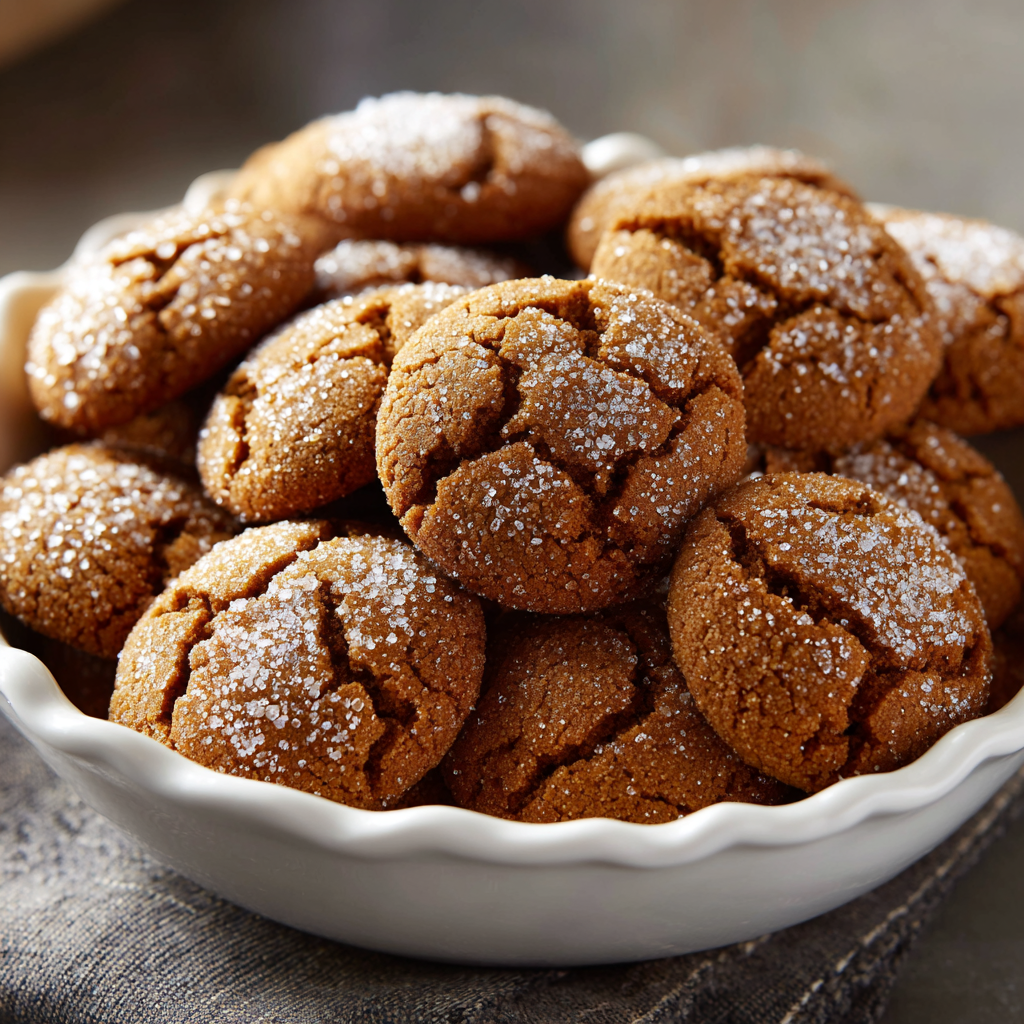
But we’re not just making any gingersnaps today. We’re making my Mom’s Medium Soft Gingersnaps. The name says it all. They’re not rock-hard “snaps” that threaten to break a tooth, and they’re not cake-soft. They are the absolute perfect middle ground: a slightly crisp, sugar-crackled exterior that gives way to a tender, chewy, and profoundly spiced center. They’re the kind of cookie that makes you close your eyes after the first bite. The kind that makes you instinctively reach for a second before you’ve even finished the first.
I’ve made these cookies for holiday parties, for friends feeling down, and just because it’s Tuesday. They are my ultimate comfort food, my edible hug. And the best part? They are incredibly simple to make. No fancy equipment, no hard-to-find ingredients, no intimidating techniques. Just you, a bowl, and a whole lot of flavor waiting to happen. So, preheat that oven, grab your favorite mixing spoon, and let’s cook up some memories together.

The Cookie Jar Standoff & The Recipe’s First Lesson
I must have been about seven years old, and the mission was clear: secure a gingersnap from the giant Tupperware container on the counter without getting caught. I executed a perfect commando crawl across the linoleum, past the kitchen table, and made it to the base of the counter. I reached up, my small fingers just brushing the cool plastic, when a voice behind me said, “I suppose you’ll be wanting a glass of milk with that, huh?”
Busted. It was Mom. But instead of a scolding, she just smiled, pulled out two glasses, and sat with me at the table. As we dunked our cookies, she told me the story behind the recipe. It wasn’t from a fancy cookbook; it was from her grandmother, who called them “medium soft” because her own husband didn’t like them too hard or too cakey. It was a recipe born from love and compromise. That was the first time I realized that the best recipes aren’t just lists of ingredients; they’re stories. They’re a little piece of someone’s history, passed down through flour-dusted index cards and shared over stolen cookies. Every time I bake these, I think of that moment—the smell of molasses in the air, the cold milk, and the warm, knowing smile of my mom. It’s a feeling I bake into every single batch.
Gather Your A-Team: The Ingredients
Simple ingredients, incredible results. That’s the Food Meld promise. Here’s everything you’ll need to make about three dozen little pieces of heaven.
- 1 cup white sugar – This is our main sweetener, and it’s going to do double duty. In the dough, it provides sweetness, and we’ll roll the dough balls in it to create that iconic, crackly, sparkling top.
- 1 large egg – Our binding agent! It brings everything together and adds structure and richness. Make sure it’s at room temperature for a smoother, easier-to-mix dough.
- ¾ cup margarine (or softened butter) – Here’s a little chef insight from Mom’s playbook. She always used margarine, and it gives these cookies a specific, nostalgic texture and helps them stay softer longer. Chef’s Swap: If you’re a butter purist, softened unsalted butter works beautifully and adds a rich, decadent flavor. The choice is yours! Just make sure it’s properly softened to room temp for perfect creaming.
- ¼ cup molasses – This is the soul of the gingersnap. It provides that deep, robust, almost smoky sweetness and is responsible for the cookie’s beautiful dark color. Don’t skip it! For an even deeper flavor, look for “robust” or “dark” molasses.
- 2 tsp ground ginger – The star of the spice show! This gives the cookie its signature “zing” and warmth. Don’t be shy with it.
- 2 tsp baking soda – Our leavening agent. This is what gives the cookies their perfect little rise and that tender, airy crumb.
- 1 tsp ground cinnamon – Ginger’s best friend. Cinnamon adds a sweet, woody warmth that rounds out the spice profile and makes the whole kitchen smell like Christmas.
- 2 cups all-purpose flour – The foundation of our cookie. It gives the dough structure. I like to fluff my flour with a spoon before measuring it, then level it off with a knife for the most accurate results.
- Extra white sugar for rolling – This is the secret to that classic, sparkly, crackled top. It’s a non-negotiable, trust-me-on-this-one step.
Let’s Get Baking: The Step-by-Step Magic
Ready to make some magic? Follow these steps, and you’ll be a gingersnap hero in no time. I’ve packed in all my favorite chef hacks to ensure your success.
- Preheat your oven to 375°F. Now, here’s a little insider tip from my kitchen to yours. My mom’s original recipe calls for 375°F, which gives you a cookie with a slightly crisper edge and a super chewy center. If you want a uniformly softer, cakier cookie, preheat to 350°F. We’ll adjust the baking time accordingly. This one choice lets you customize the texture to your exact preference!
- In a large bowl, cream together the sugar, egg, margarine (or butter), and molasses until smooth. I like to use a hand mixer for this, but a sturdy wooden spoon and some elbow grease work just fine. You’re looking for a pale, fluffy, and perfectly homogeneous mixture. This is the base of your flavor, so take a minute here to get it right. Pro Tip: If your molasses is being stubborn and sticking to the measuring cup, give the cup a quick spritz of cooking spray first. It’ll slide right out!
- Mix in the ginger, cinnamon, baking soda, and flour until fully combined. I usually switch to a spatula at this point to avoid overmixing. You just want to see no more streaks of flour. The dough will be soft and a little sticky, and that’s exactly what we want. Chef’s Hack: Feeling adventurous? This is the perfect moment to add a pinch of black pepper or a dash of cardamom for an extra layer of warm, complex spice. Just a pinch!
- Roll the dough into walnut-sized balls. We’re aiming for about 1 inch in diameter. The dough might be a bit sticky, and that’s okay—it makes for a moister cookie. If it’s really hard to handle, you can pop it in the fridge for 15-20 minutes to firm up slightly.
- Dip the tops of the dough balls into the extra white sugar. Don’t just roll them; I find a firm dip into a small bowl of sugar gives you the perfect sugary crust on top. Place them sugar-side-up on an ungreased or parchment-lined baking sheet about 2 inches apart. And here is the most important step: DO NOT FLATTEN THEM. They will spread and crack beautifully all on their own in the oven. I promise.
- Bake for 9 minutes at 375°F (or 12 minutes at 350°F). They might look a tiny bit underdone when you pull them out, but this is the key to a soft center! They will continue to cook on the hot baking sheet for a minute after you take them out. You’re looking for set edges and a puffed, crackled top.
- Remove immediately from the tray and transfer to a cooling rack. Don’t let them sit on the hot baking sheet for more than a minute, or they’ll keep cooking and get crunchier. Use a spatula to swiftly move them to a cooling rack. This stops the cooking process and helps them set up with that perfect medium-soft texture.
How to Serve These Spiced Beauties
Okay, the hard part is over (waiting for them to cool). Now, how do we serve these masterpieces?
The classic, and my personal favorite, is with an ice-cold glass of milk. There’s something sacred about the dunk. But let’s get creative! Crumble these gingersnaps over a bowl of vanilla bean ice cream or warm apple crisp for an incredible texture contrast. They are also fantastic alongside a cup of strong coffee or a chai latte—the spices play so well together.
For the holidays, I love stacking them high on a vintage cake stand or piling them into a rustic wooden bowl. They look beautiful and inviting. And if you really want to impress, make a gingersnap ice cream sandwich with cinnamon or eggnog ice cream. You’re welcome.
Mix It Up: Your Gingersnap, Your Rules
Once you’ve mastered the classic, it’s time to play. Here are a few of my favorite twists on this timeless recipe.
- The Citrus Zest Twist: Add the zest of one orange to the dough when you’re creaming the wet ingredients. The bright, sunny citrus cuts through the warm spice in the most magical way.
- The “Spicy Snap” Upgrade: Add ¼ teaspoon of freshly ground black pepper and a pinch of cayenne pepper along with the other spices. It adds a subtle, sophisticated heat that builds with each bite.
- The Gluten-Free Friend: You can easily swap the all-purpose flour for a 1:1 gluten-free baking blend. I’ve had great results with Bob’s Red Mill and King Arthur blends. The texture is nearly identical!
- The Chocolate Chip Surprise: Because chocolate makes everything better. Fold in ¾ cup of semi-sweet or dark chocolate chips after you’ve mixed in the flour. It’s a fusion my sweet tooth can’t resist.
- The “Ginger-Joy” Roll: Instead of rolling in plain sugar, mix the sugar with a tablespoon of unsweetened cocoa powder for a chocolatey crust. It’s a next-level move.
Chef’s Notes: A Few Kitchen Confessions
This recipe has evolved in tiny ways over the years, mostly through happy accidents. I once accidentally used melted butter instead of softened, and while the cookies spread more, they had an amazing lace-like crisp edge that was delicious. Another time, I was out of molasses and used maple syrup in a panic—they were a completely different (but still tasty) cookie! It taught me that baking is resilient.
The biggest lesson, though, is to trust your instincts and your oven. All ovens run a little different. Your first batch is your test batch. If they spread too much, your butter might have been too warm. If they didn’t spread enough, your dough might have been too cold. It’s not a failure; it’s data collection for the perfect second batch! Baking is a journey, not a destination.
FAQs & Troubleshooting: Your Questions, Answered
Q: My cookies came out flat and spread too much. What happened?
A: This is almost always a temperature issue. Your margarine or butter was likely too warm when you creamed it. Next time, make sure it’s just softened (you can leave a slight indent when you press it) but not melty. Chilling the dough for 20-30 minutes before baking can also help prevent excess spreading.
Q: Can I make the dough ahead of time?
A: Absolutely! You can cover the bowl and refrigerate the dough for up to 2 days. Let it sit at room temperature for 15-20 minutes before rolling so it’s easier to handle. You can also freeze the rolled, unsugared dough balls on a tray, then transfer them to a freezer bag. Bake straight from frozen, adding 1-2 minutes to the baking time.
Q: My cookies are too hard/crunchy. How do I get them softer?
A> First, make sure you’re not over-baking them. Remember, they continue to cook on the hot tray. Try the 350°F oven method for a softer cookie. Also, storing them in an airtight container with a piece of bread or a single slice of apple will work miracles. The cookies will absorb the moisture from the bread/apple and soften up beautifully.
Q: What’s the difference between using margarine and butter?
A> Margarine, with its higher water content and different fat structure, often yields a softer, puffier cookie that stays soft longer. Butter provides a richer, more classic flavor but can result in a slightly crispier, thinner cookie. Both are fantastic; it just depends on your texture and flavor preference!
Quick Nutritional & Prep Info
Let’s be real, we’re not eating cookies for their health benefits, but it’s always good to know what you’re enjoying! Here’s the breakdown (approximate, per cookie):
- Prep Time: 15 minutes
- Bake Time: 9–12 minutes
- Total Time: ~25 minutes
- Calories: ~95 kcal
- Fat: 4 g
- Carbohydrates: 14 g
- Sugar: 8 g
- Protein: 1 g
- Contains: Egg, gluten (may contain dairy if using butter)
Final Thoughts: Share the Love
And there you have it, friends. My heart, in cookie form. This recipe is more than just a list of ingredients; it’s a connection to my past, a staple in my present, and one I hope becomes a part of your future. It proves that you don’t need complicated techniques or exotic ingredients to create something truly unforgettable. All you need is a little time, a little spice, and a whole lot of love.
I’d love to hear how your gingersnaps turn out! Did you add a twist? Did your kitchen smell amazing? Tag me on social @FoodMeld with your creations. Sharing our kitchen stories and successes is my favorite part of this whole journey.
Now go forth, bake with confidence, and enjoy every single delicious, spiced, perfectly medium-soft bite. Until next time, keep mixing it up!
– Jackson


