Forget the Loaf Pan: Why Mini Meatloaf Muffins Are Your New Weeknight Hero
Hey friends, Jackson here from Food Meld. Let’s talk about a classic. That humble, hearty, soul-warming dish we all know: meatloaf. Just saying the word probably conjures up memories of cozy family dinners, right? The rich, savory smell filling the kitchen, the promise of a thick slice next to a mountain of buttery mashed potatoes… it’s the definition of comfort food.
But here’s the thing. As much as I love a good old-fashioned meatloaf, sometimes I don’t love the hour-plus bake time, or the slightly-dry-ends-versus-perfect-center slice debate. And let’s be real, getting a weeknight dinner on the table can feel like a race against time and a hungry crowd. That’s where a little “what if we tried this?” energy comes in.
What if we took all that incredible, nostalgic flavor and packed it into adorable, personal-sized portions? What if they cooked in HALF the time? And what if they were so perfectly freezer-friendly that you could have a hot, homemade dinner on the table in minutes, any night of the week?
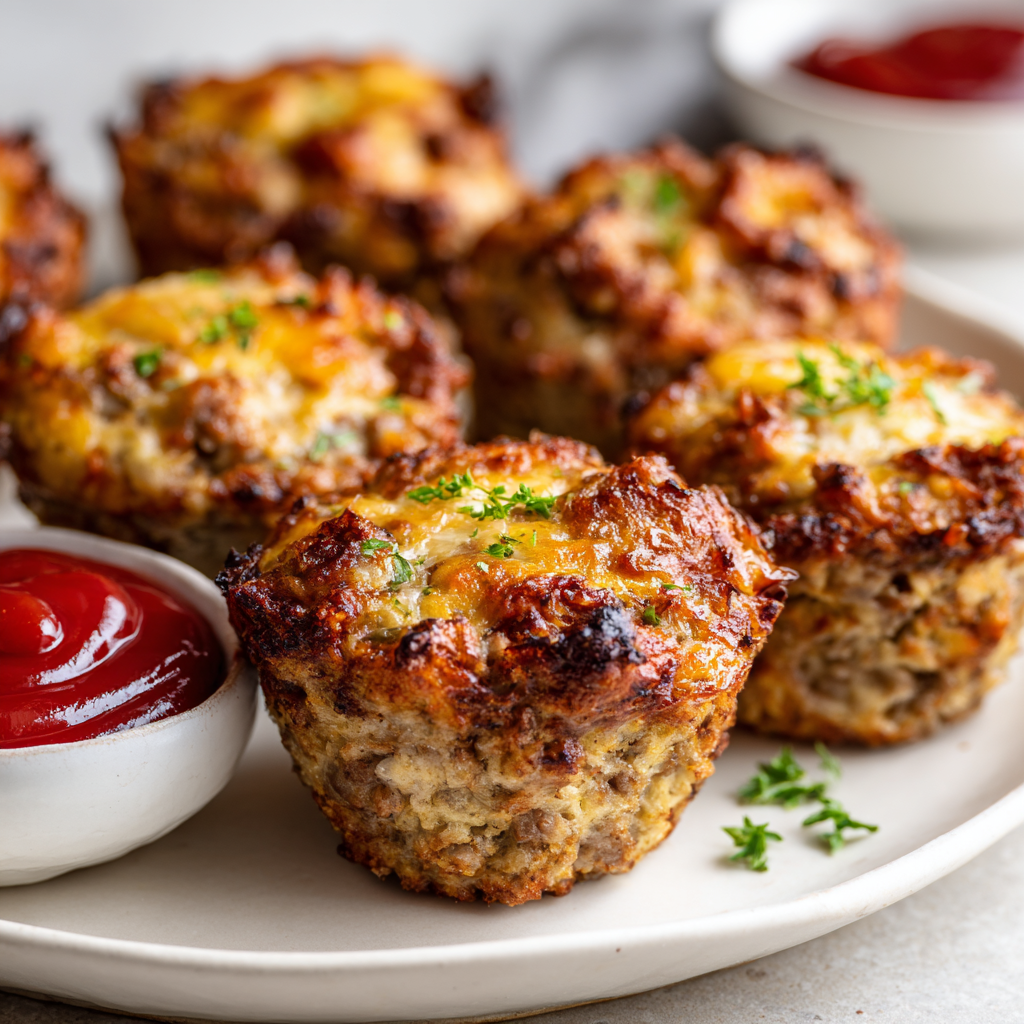
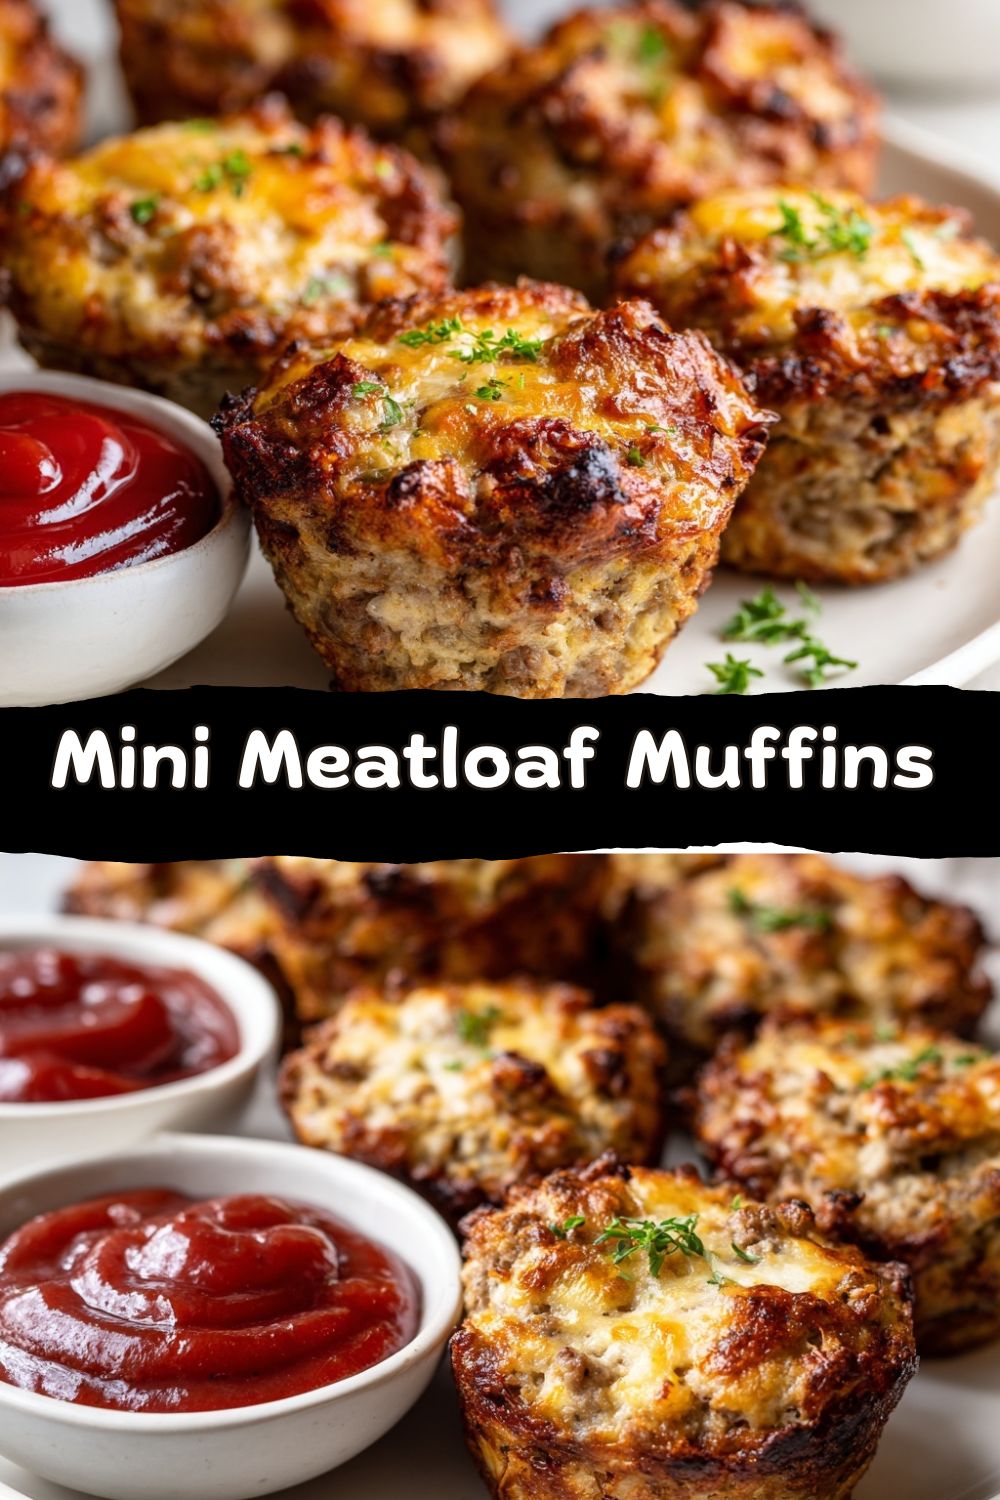
Friends, meet your new secret weapon: Mini Meatloaf Muffins. This isn’t just a recipe; it’s a game-changer. We’re taking that beloved classic, shrinking it down, and baking it in a muffin tin for the most genius combo of crispy edges, juicy centers, and zero fuss. They’re fun to make, even more fun to eat (especially for kids!), and they deliver that big, bold flavor I’m all about. So, tie on your apron, grab your favorite mixing bowl, and let’s turn comfort food into convenient, portion-perfect magic. Let’s cook something awesome together.
From My Grandma’s Table to My Muffin Tin: A Meatloaf Memory
My love for meatloaf is deep-rooted, and it all starts with my grandma. Her kitchen wasn’t fancy, but it was always warm and smelled like heaven. Her meatloaf was a Sunday night staple—a glorious, glazed brick of beefy goodness that she’d serve with green beans from her garden and potatoes she’d mashed by hand. The rule was simple: you got one perfect, center-cut slice. As a kid, I’d eye that loaf, wondering how I could possibly get *more* of those coveted crispy, saucy edges.
Years later, when I was a broke college student trying to cook in a tiny apartment kitchen, I wanted to recreate that feeling. But my oven was sketchy, my time was limited, and my roommates’ schedules were all over the place. One night, staring at a pound of ground beef and a muffin tin (destined for cornbread that never happened), I had my lightbulb moment. What if I made meatloaf… but *mini*? Individual servings meant everyone could eat when they were hungry. The muffin tin promised maximum crispy edges for everyone (my childhood dream come true!). And best of all, they’d cook in a fraction of the time.
That first batch was a revelation. They were fun, they were fast, and they tasted just like home. It was the perfect “Food Meld” moment—taking a Southern classic, applying a simple, creative twist, and making life a whole lot easier and more delicious. Every time I pull a tray of these golden-brown cuties out of the oven, I think of my grandma. I think she’d approve of the mess, the innovation, and most of all, the fact that now, everyone gets the best bite.
Gathering Your Flavor Arsenal: What You’ll Need
Here’s where we build our flavor foundation. Don’t just think of this as a list—think of it as a team of ingredients, each bringing its own special skill to the party. I’ll give you the why behind each one and how you can swap things in or out to make it your own.
- 1 lb ground beef (80/20 blend) or ground turkey: The star! An 80/20 beef blend gives you the perfect balance of flavor and juiciness. Leaner beef can work but might be slightly drier. Ground turkey is a fantastic lighter option—just go for 93/7 or a mix of dark and light meat for best results.
- ½ cup breadcrumbs (plain): Our binder and texture-builder. They soak up the juices and keep our muffins tender. Chef’s Insight: No plain breadcrumbs? Panko works great, or crush up plain crackers, saltines, or even quick oats in a pinch.
- 1 large egg: The glue that holds the team together. It ensures our muffins don’t crumble when you pop them out of the tin.
- ¼ cup milk (any kind): This is our secret for ultra-tender, moist meatloaf. It hydrates the breadcrumbs and creates a softer texture. Dairy-free? Any unsweetened plant-based milk works perfectly.
- ½ small onion, finely chopped: Sweet, aromatic depth. Chopping it fine ensures it cooks through and blends seamlessly. Hate chopping onions? A tablespoon of onion powder is a totally fair swap on a busy night.
- 2 garlic cloves, minced: Non-negotiable for savory backbone. Fresh is best, but ½ teaspoon of garlic powder will do in a pinch.
- 1 tbsp Worcestershire sauce: The flavor booster! It adds a complex, umami-rich, slightly tangy kick that makes the meat taste “meatier.” Vegan? Use a soy sauce or coconut aminos blend with a splash of vinegar.
- 2 tbsp ketchup (plus more for topping): Sweetness, tang, and it helps with browning. This is our mixing sauce. For the topping, feel free to swap in BBQ sauce, steak sauce, or even a mix of ketchup and hot sauce.
- 1 tsp Italian seasoning: My favorite all-in-one herb blend. It’s oregano, basil, thyme, and rosemary all in one shake. No Italian blend? Use ½ tsp dried oregano and ½ tsp dried thyme.
- Salt & pepper, to taste: Start with ¾ tsp kosher salt and ½ tsp black pepper. You can always adjust!
- Optional: ½ cup shredded cheddar or mozzarella cheese: For a melty, gooey surprise in the last few minutes of baking. Because cheese makes everything better.
Let’s Get Building: Your Step-by-Step Guide to Muffin Magic
This is the fun part—getting our hands dirty (metaphorically, mostly) and building these flavor bombs. Follow these steps, and you’ll be a mini meatloaf pro in no time.
- Prep Your Arena. Preheat your oven to 375°F (190°C). This is the sweet spot—hot enough to cook them through and get a nice crust, but not so hot they burn. Now, grab your standard 12-cup muffin tin. Give it a generous spray with non-stick cooking spray. I mean it, get in all the nooks and crannies! This is the single most important step for easy, clean removal later. Chef’s Hack: If you’re really worried about sticking, you can use paper muffin liners for zero-cleanup, but you’ll lose some of the crispy exterior.
- The “Meld” in the Bowl. In a large mixing bowl, add your ground meat, breadcrumbs, egg, milk, onion, garlic, Worcestershire, ketchup, Italian seasoning, salt, and pepper. Now, here is the GOLDEN RULE: use your hands. Yes, get in there! But mix gently, just until everything is evenly combined. Over-mixing is the enemy of tender meatloaf—it can make the texture dense and tough. Think of it as gently folding the ingredients together, not kneading bread dough.
- Portion with Panache. Using a spoon, a cookie scoop, or your hands (lightly dampened with water to prevent sticking), divide the mixture evenly among the 12 muffin cups. I like to aim for about a heaping ¼ cup per cup. Don’t press it down super hard—just gently shape it into a little mound. They don’t need to be perfectly smooth; rustic is charming!
- The Flavor Glaze & Bake. This is where the magic happens in the oven. Take a small spoon and add just a dollop (about ½ tsp) of ketchup or your chosen sauce to the top of each muffin. Use the back of the spoon to spread it gently. This creates that iconic, slightly caramelized topping. Pop the whole tray into the center of your preheated oven and set that timer for 20 minutes.
- The Finish Line. After 20 minutes, check them. They should be firm to the touch and the juices should run clear. If you’re using a meat thermometer, you’re looking for 160°F in the center. Want cheese? Now’s the time! Sprinkle a little over each muffin and bake for another 3-5 minutes until the cheese is bubbly and the meatloaves are perfectly cooked through. Let them cool in the tin for about 5 minutes—this lets them set up. Then, carefully run a butter knife around the edges to loosen, and pop them out!
Plating Up the Perfect Bite: How to Serve These Little Gems
Okay, you’ve got a tray of gorgeous, golden-brown mini meatloaf muffins. Now what? The beauty is in their versatility. Here are a few of my favorite ways to turn them into a complete, Instagram-worthy (but more importantly, belly-satisfying) meal.
The Classic Comfort Plate: This is my go-to. Place 2-3 muffins on a plate next to a giant scoop of my Creamy Garlic Mashed Potatoes (recipe coming soon!). Drizzle a little extra gravy or sauce over everything. Add a side of simple steamed green beans or roasted broccoli. Instant nostalgia, zero fuss.
The “Fun & Interactive” Spread: Perfect for casual dinners or game day! Pile the warm muffins on a platter in the center of the table. Surround them with small bowls of different dipping sauces: extra ketchup, BBQ, honey mustard, ranch, even a spicy sriracha mayo. Let everyone build their own perfect bite.
The Lunchbox or Meal Prep Star: Let the muffins cool completely, then pack 2-3 in a container with some veggie sticks, a handful of cherry tomatoes, and a little cup of sauce for dipping. They reheat beautifully in the microwave for about 60 seconds. Dinner tonight = lunch tomorrow. Done and done.
Make It Your Own: 5 Tasty Twists on the Theme
The basic recipe is a flawless blueprint, but where’s the fun in stopping there? Here are a few of my favorite ways to mix it up. Don’t be afraid to play with your food!
- BBQ Cheddar Smash: Swap the ketchup in the mix and on top for your favorite smoky BBQ sauce. In the last 5 minutes of baking, top each muffin with a cube of sharp cheddar cheese and let it melt into gooey perfection.
- Italian-Style “Meatball” Muffins: Replace the Worcestershire with 1 tbsp of balsamic glaze. Use ½ cup grated Parmesan cheese in the mix instead of the optional topping cheese. Top with a spoonful of marinara sauce and a little shredded mozzarella before baking. Serve with spaghetti or on a sub roll!
- Buffalo Turkey: Use ground turkey. Add ¼ cup of finely chopped celery to the mix. Replace the ketchup and Worcestershire with 3 tbsp of buffalo sauce and 1 tbsp of blue cheese crumbles (mixed right in!). Top with a drizzle of ranch after baking.
- Veggie-Packed & Lighter: Sneak in more veggies! Add ½ cup of finely grated zucchini (squeezed dry) or finely chopped mushrooms to the mix. You might need an extra tablespoon of breadcrumbs to absorb the moisture. A great way to add nutrition and stretch the meat further.
- Gluten-Free & Paleo-Friendly: Easy! Swap the breadcrumbs for ½ cup of almond flour or gluten-free quick oats. Use coconut aminos instead of Worcestershire sauce. You’re good to go!
Jackson’s Kitchen Notes: The Inside Scoop
This recipe has evolved in my kitchen more times than I can count. I once accidentally used vanilla almond milk (it was all I had!) and was shocked that you couldn’t really taste it—just a hint of sweetness that actually worked. My biggest “fail” turned into a win when I forgot the breadcrumbs entirely. They were a bit denser, but still tasty, proving this recipe is forgiving!
My pro tip? Double the batch. Always. The work is the same whether you’re making one pound of meat or two. Bake one tray for dinner tonight, and let the second tray cool before popping the muffins into a freezer bag. Future-you, on that night you don’t want to cook, will thank past-you profusely. They freeze for up to 3 months and reheat straight from frozen in the microwave or a 350°F oven until hot. This is the real weeknight superpower.
Your Questions, Answered: FAQs & Troubleshooting
Q: Can I make these ahead of time and refrigerate them before baking?
A: Absolutely! You can assemble the raw mixture in the muffin tin, cover it tightly with plastic wrap, and refrigerate for up to 24 hours. Just let the tin sit on the counter for 15-20 minutes before baking, as a cold tin can affect cooking time. This is a fantastic party-prep strategy.
Q: Why are my mini meatloaves tough or dense?
A: The #1 culprit is over-mixing. When you work the meat mixture too much, the proteins tighten up. Mix gently and just until combined. Also, make sure you’re not packing the meat into the cups too tightly—a gentle press is all you need.
Q: My muffins are swimming in grease. What happened?
A: This usually means your ground meat had a higher fat content (like 85/15 or 80/20) and it all rendered out. It’s not a failure! Just carefully remove the muffins from the tin and place them on a paper-towel-lined plate for a minute to drain. For next time, you can use a leaner meat or a mix of beef and turkey.
Q: How do I know for sure they’re cooked through?
A: The best tool is an instant-read thermometer. Insert it into the center of a middle muffin (they take the longest). You’re looking for 160°F for beef or 165°F for turkey/poultry. Visually, they’ll be nicely browned and firm, with no pink juice running out.
Nutritional Info (For Your Info!)
Here’s a general estimate per mini meatloaf muffin, based on using 80/20 ground beef and no added cheese. As always, exact values will vary depending on brands and swaps.
Calories: ~165
Protein: 13g
Fat: 11g
Carbohydrates: 6g
Fiber: 1g
Sugar: 2g
Sodium: ~320mg
If you use ground turkey, low-fat milk, or add veggies like zucchini or mushrooms, you’ll lighten these numbers even more. Pair a few muffins with vegetables or a fresh salad, and you’ve got a balanced, satisfying meal that still feels indulgent.
Final Thoughts: Small Packages, Big Comfort
Mini Meatloaf Muffins are proof that sometimes the smartest kitchen upgrades aren’t about fancy ingredients—they’re about rethinking the format. By ditching the loaf pan and going bite-sized, you get faster cook times, better texture, built-in portion control, and a freezer-friendly dinner hero that works just as well on a hectic Tuesday as it does for meal prep Sunday.
These little guys deliver everything we love about classic meatloaf—savory, cozy, familiar—but with way more flexibility and zero stress. They’re kid-approved, crowd-friendly, endlessly customizable, and honestly just fun to eat. And that’s the kind of food I want on my table.
So whether you’re feeding a busy family, stocking your freezer, or just craving a nostalgic dinner without the wait, I hope these mini meatloaf muffins earn a permanent spot in your rotation. Make them once, tweak them twice, and then start dreaming up your own versions—that’s the Food Meld way.
Until next time,
Cook boldly, embrace shortcuts that make sense, and never underestimate the power of a muffin tin.


