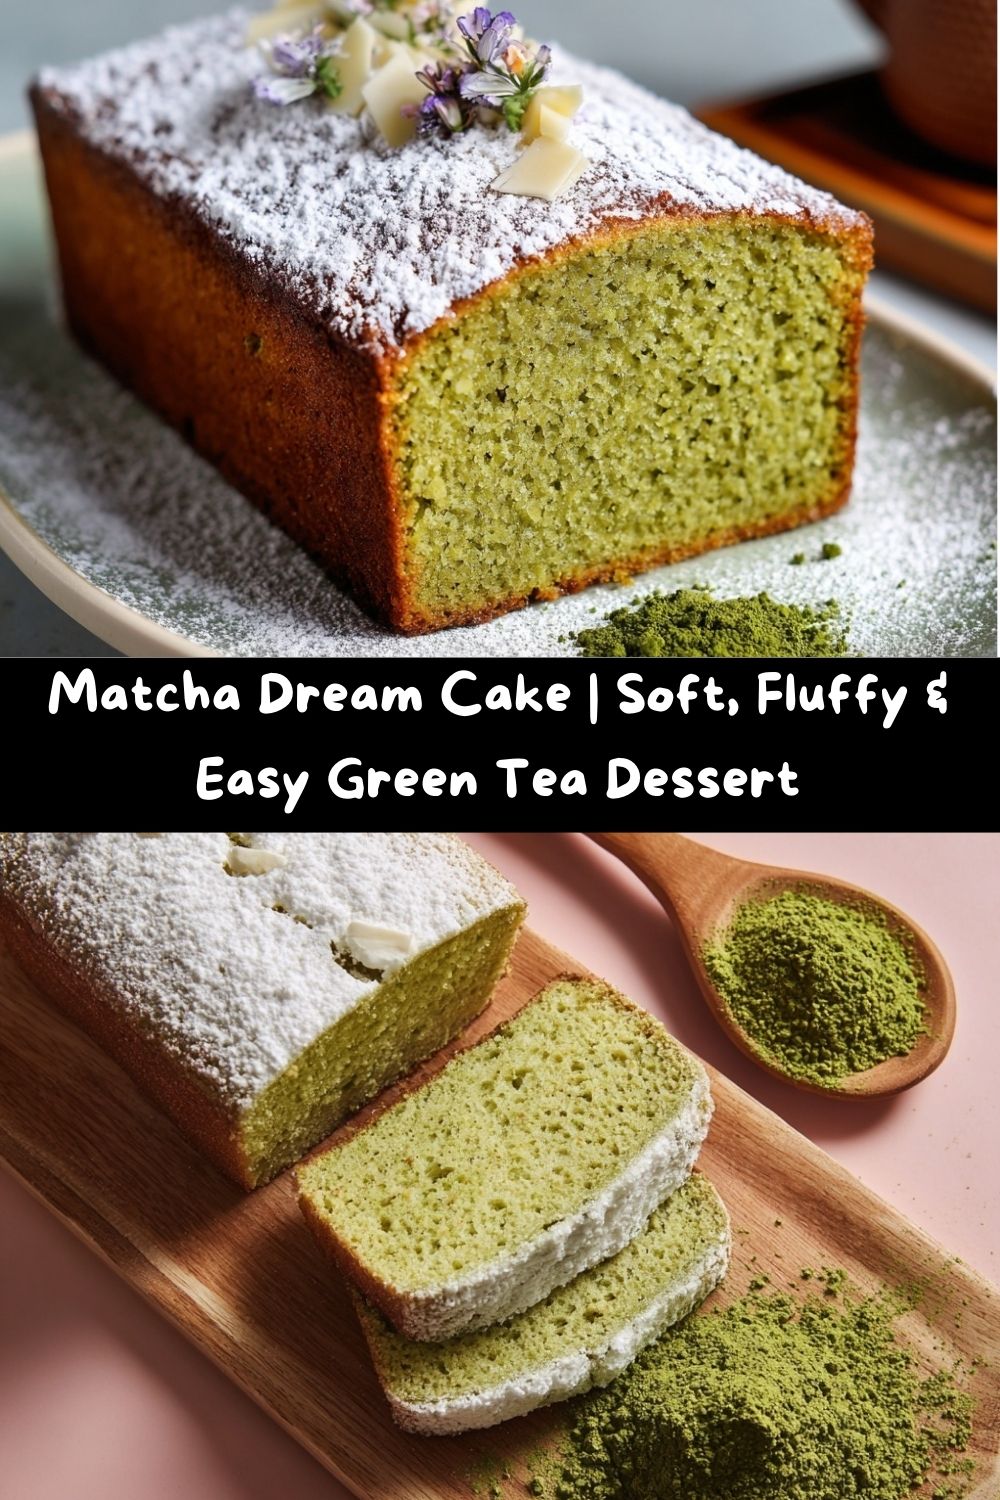
Matcha Dream Cake: Your New Go-To Slice of Zen
Hey friends, Jackson here from Food Meld. Let’s get one thing straight: I’m all about bold, comforting flavors that hug you from the inside out. But sometimes, comfort isn’t a big, loud, spicy skillet meal. Sometimes, comfort is quiet. It’s serene. It’s that moment you sneak for yourself with a perfect cup of tea and a slice of something special that just… makes you pause. That’s the exact vibe we’re baking into existence today with this incredible Matcha Dream Cake.
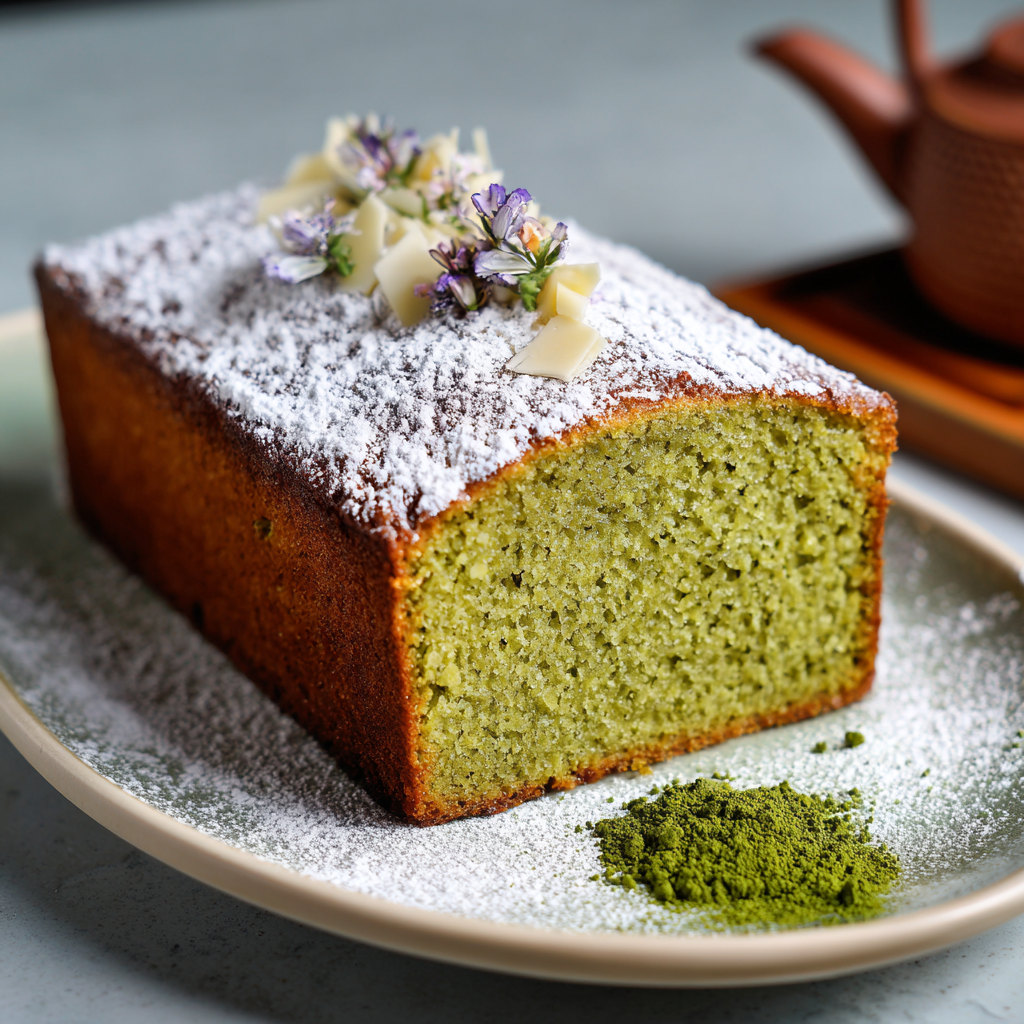
This cake is the opposite of intimidating. It’s soft, it’s fluffy, and it has this beautiful, earthy elegance from the matcha that’s balanced by a subtle sweetness. We’re talking about a crumb so tender it practically melts on your tongue, with little surprises folded in to keep every bite interesting. It’s the kind of dessert that makes people’s eyes go wide before they even take a bite, and then immediately ask, “Okay, what is in this? And can I have the recipe?” Spoiler alert: you’re getting the recipe, and it’s easier than you think.
So, whether you’re a matcha newbie curious about the hype or a seasoned fan looking for your new favorite treat, this cake is for you. We’re mixing my love for a little global inspo (hello, Japanese tea ceremonies!) with my Southern-rooted belief that a good cake should always feel like a warm welcome. Let’s ditch the complicated techniques and create some “you’ve gotta try this” magic together. Get your bowls ready, because we’re about to bake a dream.
My First Sip of Green Gold
My journey with matcha didn’t start in a fancy patisserie. Nope. It started in a cramped, steamy, hole-in-the-wall tea shop during a rain-soaked trip to San Francisco years ago. I was cold, tired, and just wanted something to warm me up. The barista, seeing my shivering state, handed me a vibrant green latte and said, “Trust me. This is more than just tea.”
That first sip was a revelation. It wasn’t just “green tea.” It was deep, almost buttery, with a subtle bitterness that made the sweetness feel earned. It was complex and simple all at once. I was hooked. I started buying my own matcha, experimenting with it in everything—smoothies, cookies, even a wild matcha-rubbed chicken phase (we don’t talk about that). But the moment it truly clicked was when I folded it into a simple vanilla cake batter. The way the earthy matcha melded with the sweet, buttery cake… it was a “Food Meld” moment before Food Meld even existed. It was the perfect balance, and I knew I had to share it. This cake is that memory, baked into every fluffy, delicious slice.
Gathering Your Dream Team: The Ingredients
Here’s the lineup for our Matcha Dream Cake. Don’t just think of these as ingredients; think of them as the cast of characters that are going to make this cake unforgettable. I’ve included some chef insights and easy swaps so you can make it your own.
- 3 cups all-purpose flour: This is the backbone of our cake, giving it that classic, soft structure. For a slightly lighter crumb, you can swap in 1 cup of cake flour, but all-purpose works perfectly.
- 2 cups granulated sugar: Sweetness to balance the earthy matcha. It also helps create a tender texture.
- 4 tsp baking powder: Our leavening superstar! This is what gives the cake its incredible, cloud-like lift. Make sure yours is fresh for the best rise.
- 1 tsp salt: Never, ever skip the salt in baking. It’s the flavor enhancer that makes all the other ingredients pop and prevents the cake from tasting flat.
- 1 cup unsalted butter, softened: The key to richness and that melt-in-your-mouth texture. “Softened” means it should give easily when you press it. Don’t melt it! If you only have salted butter, just reduce the added salt to 1/2 tsp.
- 4 large eggs: They bind everything together and add incredible moisture and structure. Take them out of the fridge about 30 minutes before you start.
- 1 cup milk: Whole milk will give you the richest flavor, but any milk you have on hand will work beautifully.
- 4 tbsp matcha powder (ceremonial grade preferred): The star of the show! Ceremonial grade has a smoother, less bitter flavor than culinary grade, which makes a huge difference here. Look for a vibrant green color—that’s a sign of quality.
- 2 tsp vanilla extract: The perfect partner for matcha, adding a warm, aromatic sweetness that ties everything together.
- 1/2 tsp almond extract (optional for depth): This is my secret weapon. It doesn’t make the cake taste like almond; it just adds a mysterious, incredible depth of flavor that makes people go, “Wow, what is that?” Trust me on this one.
- 1/2 cup white chocolate chips (optional, folded into batter): A little surprise in every bite! They melt into pockets of creamy sweetness that complement the matcha perfectly.
- Powdered sugar for dusting: For that simple, elegant, snow-dusted finish. No fussy frosting required!
Let’s Build This Dream: Step-by-Step Instructions
Ready to see some magic happen? Follow these steps, and you’ll have a perfect Matcha Dream Cake in no time. I’m walking you through every step with my favorite chef hacks to ensure success.
Step 1: Preheat and Prep. Get that oven roaring to a nice 350°F (175°C). Now, take your 9×13-inch pan or two 8-inch round pans and give them a good greasing and flouring. I like to use a little softened butter on a paper towel to grease, then a spoonful of flour that I shake and tilt around the pan until it’s fully coated. Tap out the excess. This is your insurance policy for a clean release! Chef Hack: For extra-easy removal, line the bottom of your greased pan with a little parchment paper. It’s a game-changer.
Step 2: The Dry Team Assembles. In a large bowl, grab your whisk. We’re going to whisk together the all-purpose flour, granulated sugar, baking powder, salt, and that gorgeous matcha powder. Whisk it really well! You want zero streaks of matcha and everything to be a uniform, pale green color. This ensures the flavor is even throughout the entire cake. Chef Insight: Whisking the dry ingredients first aerates the flour, which contributes to a lighter, fluffier cake. Don’t just dump and stir!
Step 3: The Wet Team Gets Creamy. In a separate bowl (I use my stand mixer, but a hand mixer works great), beat the softened butter on medium speed until it’s smooth and creamy. Now, add your eggs one at a time, beating well after each one. This is important for building structure and emulsification. Once the eggs are in, mix in the milk, vanilla extract, and that magical almond extract. It might look a little curdled at this point—don’t panic! That’s totally normal and will all come together in the next step.
Step 4: The Grand Meld. Now, with your mixer on low speed, gradually add the dry ingredients to the wet ingredients. I do this in about three parts to avoid a flour explosion. Mix just until the flour disappears and the batter is smooth. No overmixing! Overmixed batter leads to a tough cake, and we’re going for clouds, remember? Chef Hack: Stop mixing when you still see one or two little streaks of flour, and finish folding by hand with a spatula. This prevents overworking the gluten.
Step 5: The Fun Fold-In. If you’re using the white chocolate chips, now’s the time! Add them to the batter and use your spatula to gently fold them in until they’re evenly distributed. This is where the “surprise” pockets of flavor come from.
Step 6: Pan and Smooth. Pour that beautiful green batter into your prepared pan(s). Use your spatula to spread it evenly into the corners and smooth out the top. This helps it bake uniformly.
Step 7: Bake to Perfection. Slide the pan into the center of your preheated oven and bake for 30-35 minutes. You’re looking for a golden edge pulling away from the pan and the top springing back lightly when touched. The true test? A toothpick inserted into the center should come out clean or with a few moist crumbs attached. Chef Insight: Avoid opening the oven door for the first 25 minutes! The rush of cold air can cause the cake to fall. Be patient, you’ve got this.
Step 8: The All-Important Cool Down. Once baked, transfer the cake to a wire rack and let it cool in the pan for about 15 minutes. Then, run a knife around the edges and carefully invert it onto the rack to cool completely. A warm cake is a fragile cake, so let it chill out before you dust it. This patience prevents a gummy, dense texture.
Step 9: The Elegant Finish. Once your cake is completely cool, place it on your serving plate. Grab a fine-mesh sieve, put a tablespoon or two of powdered sugar in it, and give it a gentle tap over the cake for that beautiful, snowy, professional-looking finish.
How to Serve Your Slice of Zen
This cake is a star all on its own, but a little presentation goes a long way! For a simple teatime treat, I love serving modest squares on a vintage plate with a fork. The simplicity is part of the charm.
If you’re feeling a little fancy for dessert, you can gild the lily—just a bit. A dollop of freshly whipped cream or a scoop of vanilla bean ice cream on the side is absolute heaven. The cold, creamy sweetness against the earthy, warm cake is a textural dream. For a pop of color and a tart contrast, a few fresh raspberries or sliced strawberries on the plate are just perfect.
And let’s talk drinks! This cake was born to be paired with a hot cup of tea. A classic sencha or even a robust English Breakfast tea are fantastic. But if you really want to lean into the matcha moment, serve it with a small, frothy cup of unsweetened matcha on the side. It’s a next-level experience that true matcha lovers will adore.
Make It Yours: Recipe Variations
One of my favorite parts of cooking is taking a great recipe and making it your own. Here are a few fun twists on this Matcha Dream Cake to play with:
- Lemon-Matcha Zest: Add the zest of one large lemon to the wet ingredients. The bright, citrusy notes cut through the earthiness of the matcha in the most refreshing way.
- Black Sesame Swirl: Mix 2 tablespoons of black sesame paste with 1 tablespoon of sugar and swirl it through the batter with a knife before baking. You get a stunning visual and a wonderful nutty flavor.
- Dairy-Free & Vegan Friendly: Use vegan butter sticks, flax eggs (1 tbsp ground flax + 3 tbsp water per egg), and your favorite plant-based milk (oat or soy work great). The result is still incredibly moist and fluffy!
- Matcha Latte Cake: Replace the white chocolate chips with 1/2 cup of cooled, strongly-brewed espresso or coffee. Fold it in at the end for a subtle mocha-matcha situation. It’s a grown-up flavor bomb.
- Berry Bliss: Swap the white chocolate chips for 1/2 cup of freeze-dried raspberries or strawberries, crushed into small pieces. They add a beautiful tartness and a pop of color.
Jackson’s Chef Notes & Kitchen Stories
This recipe has seen a few… *experiments* in the Food Meld test kitchen. The first time I made it, I was so excited I dumped the matcha right into the wet ingredients. Big mistake. It clumped up like crazy, and I had little bitter green specks throughout the cake. Lesson learned: always sift your matcha with the other dry ingredients! It makes all the difference for a smooth, even flavor and color.
Over time, the almond extract and white chocolate chips became the “secret ingredients” after a happy accident. I mistakenly grabbed the almond instead of the vanilla once, and the result was so good it stuck. The cake has evolved from a simple green tea cake into this layered, complex, but still super easy treat that it is today. Don’t be afraid of your own happy accidents in the kitchen—that’s where the best recipes are born!
FAQs & Troubleshooting: Your Questions, Answered
Q: My matcha cake turned out bitter. What happened?
A: This usually points to one of two things: the quality of your matcha or over-baking. Lower-grade culinary matcha can be quite astringent, which is why I recommend a good ceremonial grade. Also, be sure to set a timer and check for doneness a few minutes early. An over-baked cake can bring out bitter notes.
Q: Can I make this into cupcakes?
A: Absolutely! This batter makes fantastic cupcakes. Line a muffin tin with papers and fill them 2/3 full. Bake at the same temperature (350°F) for 18-22 minutes, or until a toothpick comes out clean. You’ll get about 24 perfect little Matcha Dream Cupakes.
Q: My cake is dense and didn’t rise much. Why?
A: The most common culprit here is old baking powder. If your leavener has been in the pantry for over 6 months, it’s likely lost its power. The second suspect is overmixing the batter, which develops too much gluten and leads to a tough, dense texture. Mix just until combined!
Q: How should I store this cake?
A: Because it’s not heavily frosted, it’s easy! Just keep it in an airtight container at room temperature for up to 3 days. For longer storage, you can wrap it tightly and freeze it for up to 2 months. Thaw at room temperature and give it a fresh dusting of sugar before serving.
Nutritional Info (A Quick Look)
Hey, I’m all about balance. Life’s too short not to enjoy cake, but it’s always good to know what you’re enjoying! Here’s a general breakdown per serving (based on 12 servings). Remember, these are estimates and can vary based on specific ingredients and brands you use.
- Calories: ~320
- Protein: 5g
- Carbohydrates: 45g
- Fat: 14g
This cake gets its energy from the carbs (for that delightful sweetness and structure) and fats (for that rich, moist texture). The matcha itself is a powerhouse of antioxidants. So, while this is definitely a treat, it’s one you can feel good about savoring mindfully.
Final Thoughts: Let’s Keep the Conversation Going!
If you’ve made it this far, friend, you’re officially part of the Matcha Dream Cake fan club—and trust me, it’s a delicious place to be. This cake isn’t fussy. It isn’t complicated. It’s just honest, earthy flavor wrapped in the softest, fluffiest crumb you’ll ever sink a fork into. It’s the kind of dessert that invites you to slow down for a second, take a breath, and enjoy something beautiful and simple.
That’s what I love most about baking recipes like this—they’re little reminders that comfort doesn’t always come roaring in like a pot of jambalaya on the stove. Sometimes, comfort is quiet. It’s green. It’s peaceful. It’s a slice of cake enjoyed by the window while the world moves a little too fast outside.
So whether you make this cake for a weekend treat, a potluck, a tea party, or just because your soul needs a soft moment in the middle of a busy week, I hope it brings you that same sense of calm that it brought me the first time I baked it.
And hey—if you bake this, you must let me know how it goes. Snap a pic, tag Food Meld, or drop your twist in the comments. Your ideas always spark new inspiration in my kitchen, and who knows—your version of this cake might end up in the next test round. You’re part of this creative journey, and I’m so glad you’re here.
Until next time, keep baking boldly, keep experimenting fearlessly, and keep savoring those small, sweet moments.
Your friend in food,
Jackson


