The Nacho Revolution Starts Now: Meet Your New Favorite Snack
Hey there, friend. Jackson here. Let me paint a picture for you: It’s game day, movie night, or just a regular Tuesday that deserves a little celebration. You’ve made a giant, beautiful tray of nachos. They’re a masterpiece of melty cheese, perfectly seasoned meat, and all the good stuff. You set it in the middle of the table with a triumphant grin. And then… it begins. The Great Nacho Dilemma.
Someone goes for that one perfect chip in the corner, loaded with everything, and the whole structural integrity of the nacho kingdom collapses. You’re left with a pile of bare chips on one side and a soggy, topping-heavy mess in the center. The double-dipping debates start. It’s chaos. Delicious chaos, but chaos nonetheless.
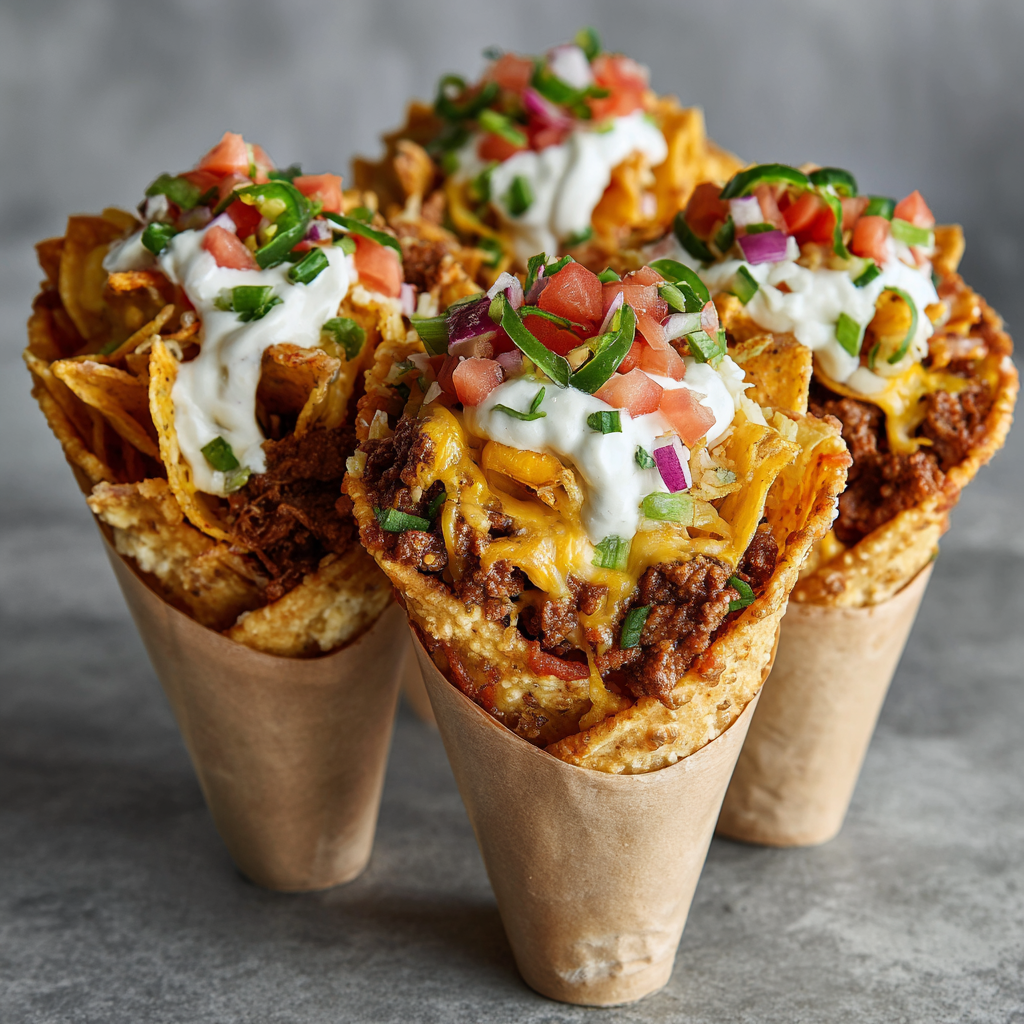
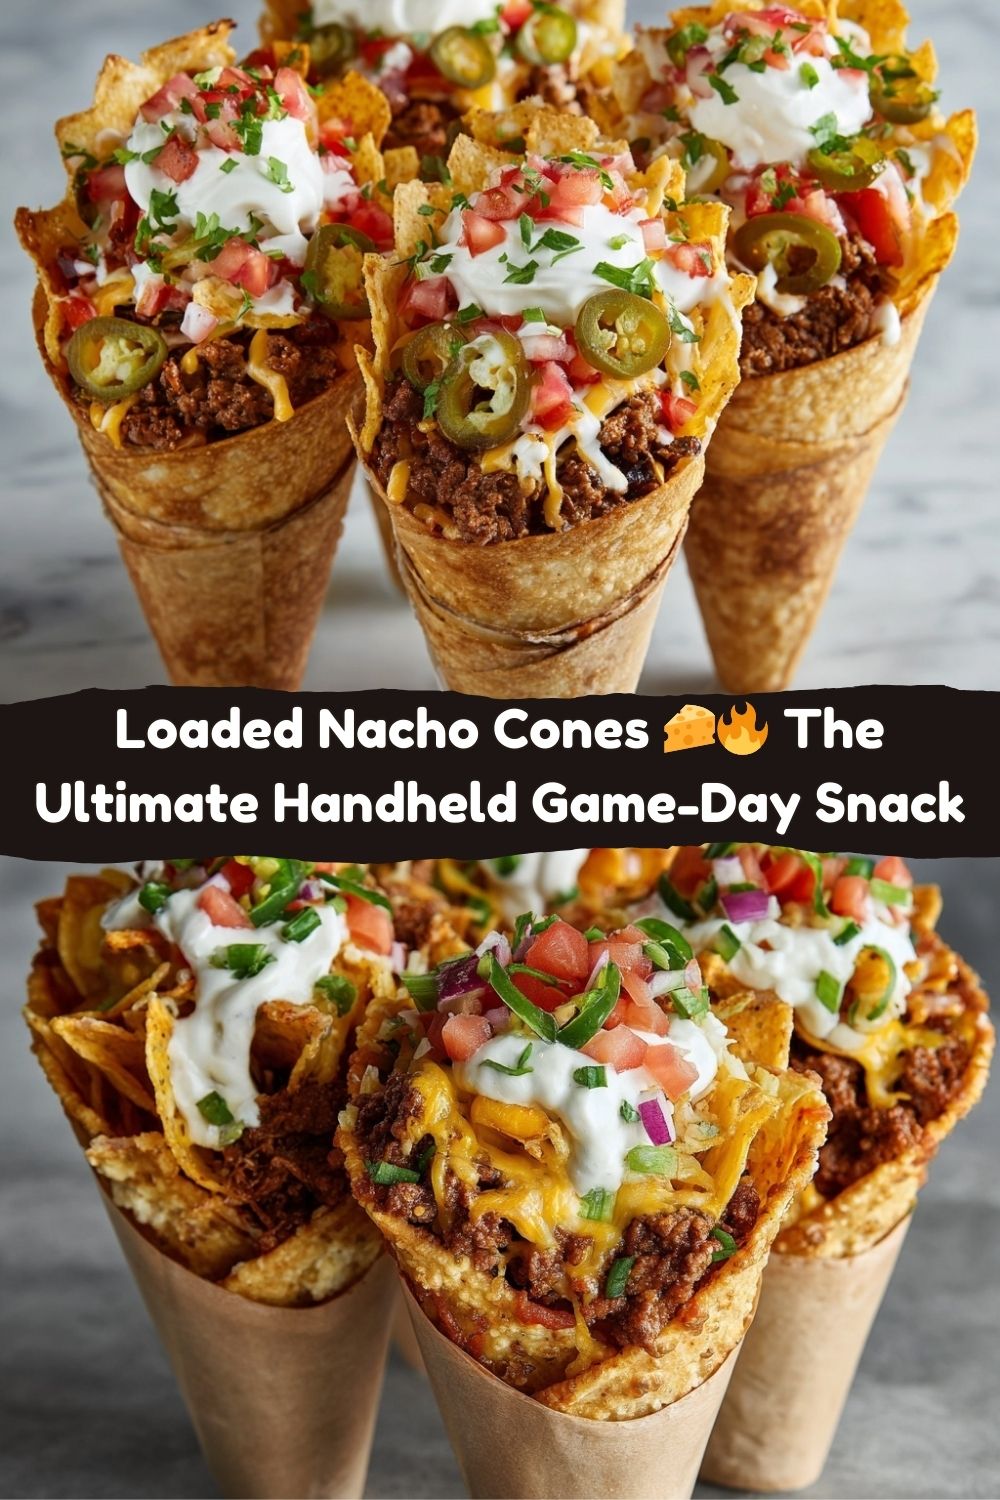
What if I told you there’s a better way? A way where every single bite is perfectly balanced, there’s no fighting over the “good chips,” and you can walk around without needing a plate? Enter: Loaded Nacho Cones. This isn’t just a recipe; it’s a handheld hack that’s about to change your snack game forever. Imagine all the epic flavor of fully-loaded nachos, packed into a personal, crispy, drippy, glorious paper cone. No soggy bottoms. No sharing germs. Just pure, unadulterated nacho joy, right in your hand. It’s fun, it’s easy, and it’s got that “you’ve gotta try this” energy I live for. So, let’s ditch the tray and cook something awesome—and wonderfully messy—together.
How a Messy Tailgate Sparked a Genius Idea
This idea didn’t come to me in some pristine test kitchen. Oh no. It was born in a parking lot, surrounded by roaring fans, the smell of charcoal in the air, and me, holding a paper plate of nachos that was literally falling apart at the seams. I was at a big tailgate with friends, trying to juggle a drink, chat, and eat these amazing, over-the-top nachos all at once. It was a losing battle. Cheese and beans were headed for my shirt, and my favorite chip, the one with the perfect meat-to-guac ratio, had been tragically lost to the astroturf.
As I looked around at everyone else having the same struggle, I saw my buddy’s kid happily eating ice cream out of a cone. It was neat, contained, and all his. And the lightbulb went off. What if nachos were like that? What if we could have all the communal, loaded-up fun of nachos, but in a personal, portable, no-fuss package? I spent the next few game days experimenting—rolling tortillas into cones (too tricky), using store-bought waffle cones (sweet and savory is a bridge too far for purists), until I landed on the simple, beautiful solution: paper cones and broken chips. It was a “Food Meld” moment for sure: taking my Southern love for big, shareable flavors and fusing it with a street-food style hack. Now, it’s my go-to for any gathering. The messy tailgate failure? Totally worth it.
Gathering Your Flavor Arsenal
Here’s the beautiful part: you probably have most of this already. We’re building layers of texture and taste, so every component plays a star role. Let’s break it down.
- 2 cups tortilla chips, gently broken: The foundation! I use sturdy restaurant-style chips—they hold up better. Don’t pulverize them; you want pieces that still have some crunch. Chef’s Insight: For a next-level move, toss the broken chips with a tiny drizzle of oil and a pinch of salt and warm them in the oven for 5 minutes before building. Extra crispiness is never wrong.
- 1 cup seasoned ground beef or shredded chicken: The heartiness. For beef, I brown it with my go-to blend: chili powder, cumin, smoked paprika, garlic powder, and a pinch of salt. For chicken, a shredded rotisserie chicken tossed in enchilada sauce or taco seasoning is a lifesaver. Sub Tip: Ground turkey, plant-based crumbles, or even just a can of well-seasoned black beans make fantastic swaps.
- 1 cup warm queso or nacho cheese: The glue (and let’s be real, the main event). A good, melty queso dip from the dairy aisle works perfectly. Want to go homemade? Melt together a block of American cheese and a splash of milk or cream with a handful of diced green chiles. Chef’s Insight: Keeping this warm is KEY. I often use a small slow cooker or a heatproof bowl set over a pot of simmering water.
- 1/2 cup pickled jalapeño slices: The tangy kick. Pickled are my favorite because they add bright acidity that cuts the richness. Sub Tip: Fresh jalapeños work too! For less heat, remove the seeds and ribs.
- 1/4 cup sour cream or Mexican crema: The cool, creamy finish. Crema is slightly thinner and tangier than sour cream, which makes it perfect for drizzling. To make a quick crema, thin sour cream with a squeeze of lime juice or a little milk.
- Paper cones or small cups for serving: The vessel! You can find paper “pointy” cones online or at party stores. No cones? Small paper cups, like 5oz bathroom cups, work just as well. They’re the ultimate edible dish.
- The “What If” Toppings (Optional but encouraged): This is where you make it yours. Diced tomatoes, thin-sliced green onions, a spoonful of guacamole, a sprinkle of cilantro, a few black beans, or crumbled cotija cheese. The world is your nacho oyster.
Building Your Masterpiece, Layer by Layer
This is less about cooking and more about assembly-line artistry. Get all your components lined up, warm, and ready to go. I call it “The Nacho Cone Station.” Put on some music and have fun with it.
- Prep Your Station: This is the most important step for smooth sailing. Have your meat hot, your queso warm and flowing, your toppings diced and in little bowls, and your cones standing upright. I use a muffin tin or a bowl filled with dry rice or beans to hold the cones steady while I fill them. It’s a total game-changer.
- The Foundation Layer: Into each cone, drop a small handful of your broken chips. Don’t pack it tight—you need room for the good stuff to flow down! Think of this as creating a crispy lattice that will catch all the cheese and toppings.
- The Cheesy Cascade: Here’s my favorite trick: spoon a generous tablespoon of warm queso right into the center of the chip layer. Let it cascade down through the chips. This isn’t just topping; this is mortar. It starts bonding everything together and ensures cheesy goodness in every single bite, not just at the top.
- Heart of the Matter: Immediately add a scoop of your warm seasoned meat or beans. The heat from the meat and cheese will slightly soften the chips touching it, creating an amazing textural contrast with the still-crispy chips at the top and sides. It’s a feature, not a bug!
- Top It Off & Repeat: Now, get creative with your jalapeños, tomatoes, onions, or beans. Then, if your cone has room, repeat the layers! More chips, another cheesy pour, another sprinkle of toppings. Most cones can handle 2-3 solid layers. The goal is a delicious, striated look when someone takes a bite.
- The Grand Finale: Finish with a zig-zagging drizzle of your cool crema or sour cream right over the top. This not only looks professional but adds that essential cool creaminess. A final sprinkle of cilantro or green onion adds a pop of color.
- Serve with Flair: Keep them standing tall in their holder! Hand them directly to friends or line them up on a platter. The “wow” factor is instant. Pro-Tip: For a crowd, set up the station and let everyone build their own. It’s interactive and guarantees everyone gets their perfect combo.
How to Serve These Showstoppers
Presentation is half the fun with these. You’re not just serving food; you’re serving an experience. Ditch the plates. Seriously. The cone is the plate. I like to present them standing at attention in a holder. A tall glass, a mason jar, or even a wide vase filled with dried beans or rice makes a perfect display stand. For a party, arrange a whole “forest” of nacho cones on a tray or a lazy Susan.
What to serve them with? They’re a complete meal in your hand, but if you’re going big, keep the sides simple and dippable. A big bowl of extra queso or guacamole for those who want to go deeper, and maybe a crisp, light salad to balance the richness. And drinks? Ice-cold Mexican beer, a classic margarita, or even just sparkling limeade are perfect partners. The beauty is in the grab-and-go ease. No utensils needed, just napkins—plenty of napkins.
Mix It Up: Your Nacho Cone, Your Rules
The core concept is your playground. Here are a few of my favorite “What if we tried this?” spins:
- Breakfast Nacho Cones: Swap the chips for crispy tater tots or hash browns. Use scrambled eggs or chorizo as your “meat,” and top with warm cheese sauce, pico de gallo, and a drizzle of hot sauce. Game-changing brunch move.
- Fully Loaded Veggie: Skip the meat and go for a rainbow. Layer in seasoned black beans, roasted corn, sautéed peppers and onions, and creamy avocado slices. A chipotle-lime crema ties it all together.
- Korean BBQ Fusion: This is a Food Meld special. Use crushed kimchi-flavored chips or plain chips. Top with bulgogi-style beef or spicy gochujang chicken, a Korean cheese sauce (think melted mozzarella with a gochujang swirl), and quick-pickled cucumber slices. Finish with sesame seeds and green onion.
- Buffalo Chicken Cone: Use shredded buffalo chicken (rotisserie chicken tossed in hot sauce and butter) as your protein. The “queso” becomes a warm blue cheese or ranch dip. Top with celery sticks and a extra drizzle of ranch. It’s your game-day wings, transformed.
- Mediterranean Twist: Use pita chips. Layer with spiced ground lamb or chickpeas, tzatziki sauce instead of queso, and top with diced cucumber, tomato, red onion, and a sprinkle of feta cheese. A fresh, totally different vibe.
A Few Things I’ve Learned in the Trenches
This recipe has seen some iterations. My first try, I was so excited I overfilled the cone immediately. The bottom blew out, and I had a cheesy disaster on my hands. Lesson learned: start with less than you think. You can always add more on top. Also, the type of cone matters! The sturdier the better. I’ve had great luck with the ones meant for popcorn or candy.
The biggest evolution? The layering technique. I used to just pile everything on top, which led to all the toppings falling off with the first bite. The “cheese as mortar” method was the breakthrough. It seems simple, but it’s what makes each bite cohesive. And don’t stress about perfection. If some cheese drips down the side, or a jalapeño falls off, who cares? It’s part of the fun. This is meant to be messy, memorable, and downright delicious.
Your Questions, Answered
Q: My cones are getting soggy too fast. What am I doing wrong?
A: Timing and temperature are everything! Make sure your chips are room-temp or slightly warm (not cold from the bag) when the hot queso hits them. The sudden temp change can create condensation. Also, assemble just before serving. If you need to prep ahead, have all your components ready and do a quick assembly line when guests arrive.
Q: Can I make these ahead of time for a party?
A: You can do 90% of the work ahead! Cook and season your meat, make your queso and keep it warm in a slow cooker, dice all your toppings, and set up your station. Then, let guests assemble their own fresh cones. It keeps things interactive and ensures maximum crispiness.
Q: What’s the best substitute if I can’t find paper cones?
A: No stress! Small (5oz) paper bathroom cups are my #1 backup. They’re sturdy, easy to find, and work just as well. You can even roll parchment paper into a cone shape and staple or tape it. It’s rustic and totally works.
Q: The cheese is clumping and not drizzling nicely. Help!
A: Your queso might be too thick or cooling down. Keep it over a very low heat or in a warm vessel. If it gets thick, whisk in a splash of milk, cream, or even the liquid from the pickled jalapeños jar to loosen it back up. A runnier consistency is actually better for this application!
Nutritional Info & Prep Details
Let’s be real: this is a treat, a celebration food. But part of enjoying food is knowing what’s in it. Here’s the breakdown for one loaded cone (using lean ground beef, a standard queso, and light sour cream). Remember, these numbers can swing based on your specific ingredients and how generous you are with the cheese (no judgment here!).
Prep Time: 15 minutes | Cook Time: 10 minutes (for meat) | Total Time: 25 minutes | Servings: 6 cones
Per cone (approximate): 220 Calories | 12g Fat | 18g Carbohydrates | 10g Protein
To lighten things up if you want: use baked tortilla chips, lean ground turkey or chicken, a lighter cheese sauce, and load up on veggie toppings like tomatoes, onions, and jalapeños. The fiber from black beans also makes it more filling. But sometimes, you just gotta go for the full, glorious, melty experience—and that’s 100% okay too.
Let’s Keep the Fun Going
And that’s it, friends! The humble nacho, reimagined. I love this recipe because it takes something familiar and makes it new, fun, and social again. It breaks the routine. It gets people laughing, building their own, and definitely asking for the recipe.
I want you to take this and run with it. Make it your own. Try a wild variation. Mess it up, laugh about it, and try again. That’s what Food Meld is all about—where flavor meets fun, and there are no mistakes, just delicious discoveries.


