When a Cookie Craving Hits, You Gotta Answer the Call
Hey friends, Jackson here from Food Meld. Let’s get real for a second. We’ve all been there. It’s 4 PM on a Tuesday, the day is dragging, and a monster of a chocolate chip cookie craving comes out of nowhere. Or maybe you get a last-minute text: “Game night at my place, can you bring something sweet?” Your heart sinks. You want to make something homemade, something that tastes like a warm hug, but the thought of creaming butter and sugar, chilling dough, and scooping out two dozen individual cookies feels like a mountain you just don’t have the energy to climb.
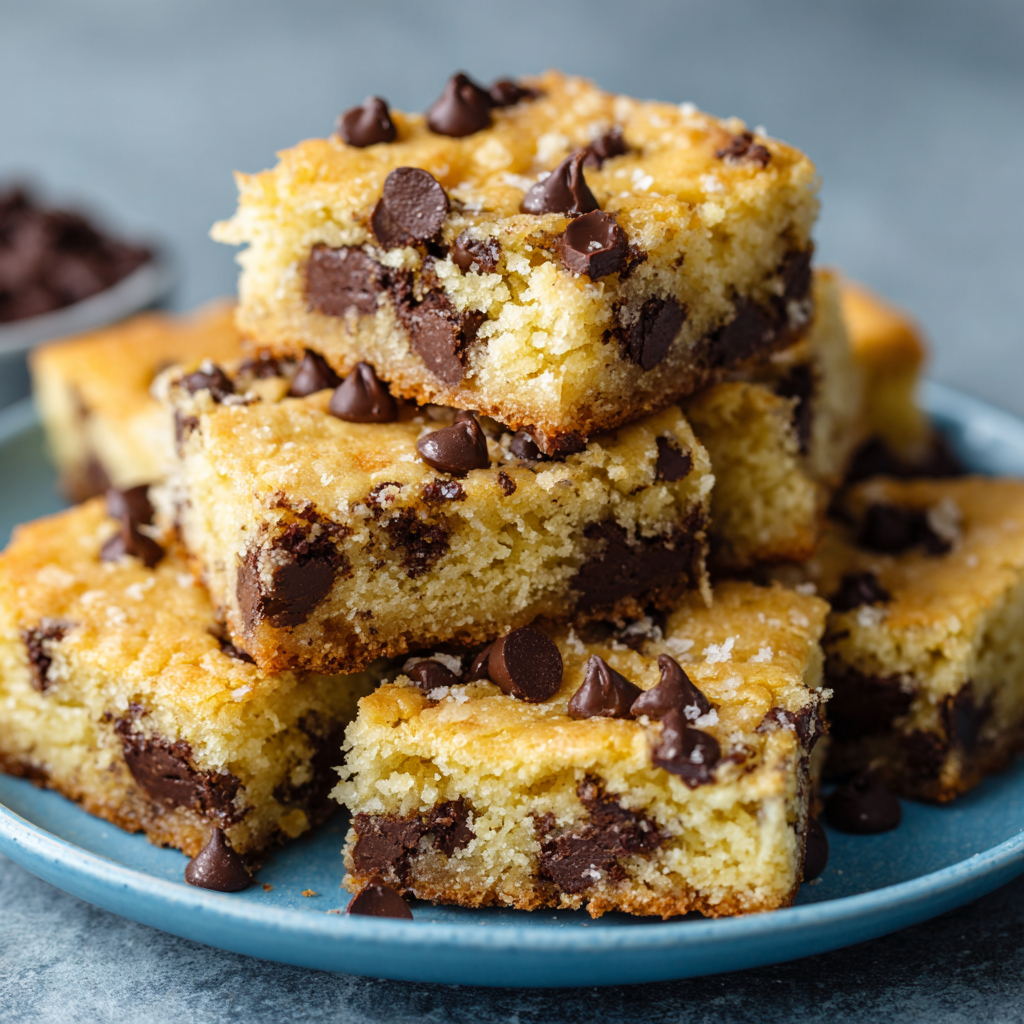
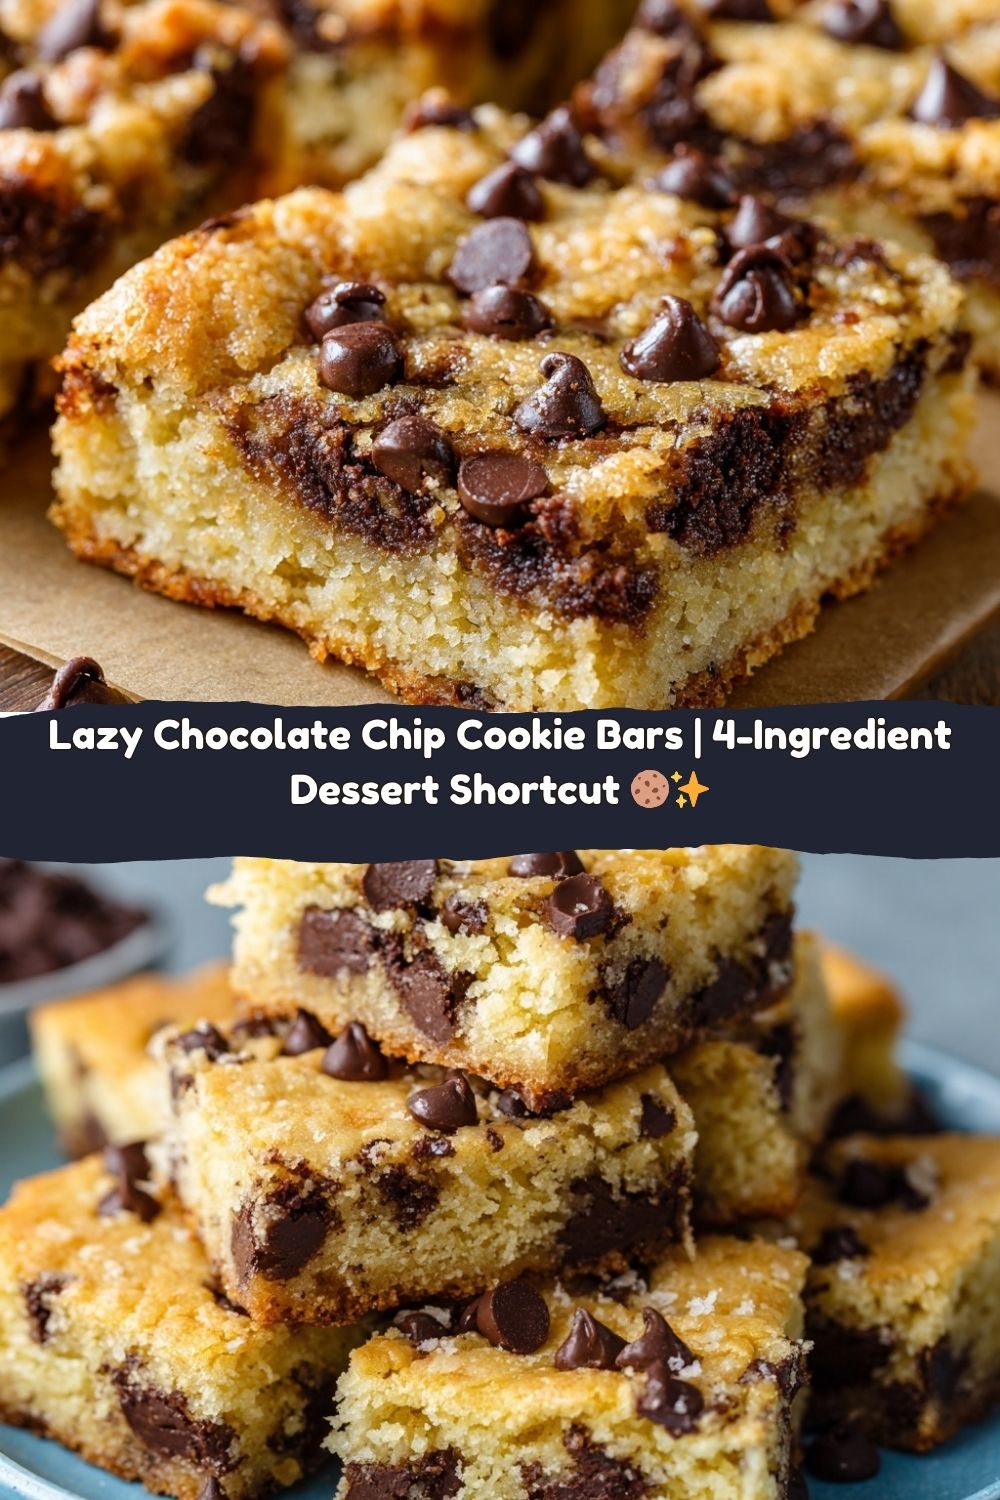
Sound familiar? I feel you. That’s exactly why I’m obsessed with this recipe. This isn’t just another cookie recipe. This is your kitchen superhero moment. We’re talking about the most insanely easy, ridiculously delicious Lazy Chocolate Chip Cookie Bars you’ll ever make. With just four simple ingredients and one bowl, you’re about 30 minutes away from a pan of buttery, gooey, golden perfection that tastes like you spent the whole afternoon baking.
This is the kind of dessert shortcut I live for at Food Meld. It’s bold in flavor, comforting in every bite, and has that creative “why didn’t I think of that?” twist. We’re using a simple boxed cake mix as our secret weapon, and the result is a chewy, soft bar packed with pools of melted chocolate in every single bite. So, tie that apron on, grab a single bowl, and let’s turn a simple craving into an unforgettable treat. No fuss, no stress, just pure, unadulterated flavor. Ready? Let’s get mixing!
The Accidental Hero: A Story of Desperation and Genius
I have to confess, this recipe was born out of a near-catastrophic kitchen emergency. Picture this: It was my niece’s 8th birthday party, and I, the “cool uncle who cooks,” had promised my famous triple-chunk brownies. I had the whole production line set up—melting chocolate, sifting flour, the works. Then, disaster struck. My dog, Biscuit (yes, the irony is not lost on me), decided the stick of butter on the counter was a personal challenge and, in one graceful leap, turned my pre-measured flour into a snowy wonderland all over the kitchen floor.
Panic mode. The party was in an hour. I had no time to run to the store. I was staring into the abyss of my pantry, praying for a miracle, when my eyes landed on a lonely box of yellow cake mix. A crazy idea sparked. I melted some butter, cracked a couple of eggs, stirred in the mix and a whole bag of chocolate chips, pressed it into a pan, and crossed my fingers.
Twenty minutes later, I pulled out a pan of golden, fragrant bars that looked and smelled like heaven. I sliced them up, arranged them on a platter, and brought them to the party with a nervous smile. You know what happened? They were the first thing to disappear. Kids were asking for seconds, and parents were quietly asking me for the recipe. That’s when I knew I’d stumbled onto something special. Sometimes, the best recipes aren’t born from perfection, but from a little chaos and a whole lot of “what if we tried this?” energy.
Your Shortcut to Sweet Victory: The 4-Ingredient Lineup
Here’s the beautiful part. You only need four things to make magic happen. I’ll break down why each one is a star player and give you some easy swaps if you’re in a pinch.
- 1 stick (½ cup) Unsalted Butter, melted – This is our flavor and moisture base. Melting the butter gives these bars a chewier, denser texture compared to creamed butter, which is exactly what we want. Chef’s Insight: Using unsalted lets you control the salt level, but if salted butter is all you have, just go for it! It’ll add a nice salty-sweet kick.
- 2 Large Eggs – Our binding agents! They bring everything together and give the bars structure so they hold their shape when you cut them. Make sure they’re at room temperature if you can—it helps them incorporate into the dough more smoothly.
- 1 box (approx. 15.25 oz) Yellow Cake Mix – The ultimate shortcut! This pre-mixed wonder gives us the perfect blend of flour, sugar, and leavening agents in one fell swoop. Substitution Tip: Feel free to experiment! A butter recipe cake mix or even a vanilla mix works beautifully. This is your canvas.
- 1 bag (12 oz) Semi-Sweet Chocolate Chips – The heart and soul of the operation. I love semi-sweet for that perfect balance against the sweet dough, but this is where you can get creative. Chef’s Insight: Don’t just stir them in; fold them gently at the end to avoid breaking them up. More on that in the steps!
Optional Twist: Want to level up? Add ½ cup of chopped walnuts for a fantastic crunch, or swirl in a few generous tablespoons of peanut butter into the dough for the ultimate sweet-and-salty indulgence.
Let’s Build These Bars: Your Foolproof Blueprint
This is where the fun begins. I’ll walk you through each step, and I’ll be right there with you, sharing my little hacks to make sure your bars are absolutely perfect.
- Preheat & Prep: Fire up that oven to 350°F (175°C). While it’s warming up, grab a 9×13-inch baking dish and give it a good greasing with butter or a spritz of non-stick spray. Chef’s Hack: For super easy removal, line the pan with parchment paper, leaving a little overhang on two sides. You’ll be able to lift the entire slab of cookie bar out once it’s cooled, making for picture-perfect cuts!
- Melt the Butter: In a large, microwave-safe bowl, melt your stick of butter. About 45 seconds to 1 minute should do it. You just want it melted, not boiling hot. Chef’s Tip: Let the melted butter cool for a minute or two before adding the eggs. We don’t want to accidentally cook them!
- Whisk in the Eggs: Crack those two eggs right into the bowl with the melted butter. Grab a whisk and go to town until the mixture is smooth, yellow, and perfectly combined. You’re creating the rich, liquid base for our dough.
- Stir in the Cake Mix: Now, dump in the entire box of yellow cake mix. Switch from a whisk to a sturdy spatula or a wooden spoon. It’ll seem thick at first, but keep stirring. You’re looking for a soft, slightly sticky dough to form. Don’t overmix! Just stir until no dry streaks of cake mix remain.
- The Grand Finale: Fold in the Chocolate! Here comes the best part. Pour in that entire bag of glorious chocolate chips. Now, use a folding motion with your spatula to incorporate them. Chef’s Secret: “Folding” instead of vigorously stirring ensures the chips stay whole and don’t get smashed, giving you those beautiful, distinct pockets of melted chocolate.
- Press it In: Transfer your dough to your prepared pan. It will be thick! Use your spatula, or better yet, lightly greased fingers, to press the dough into an even layer across the bottom of the pan. Getting it even is key for consistent baking.
- Bake to Golden Perfection: Pop the pan into your preheated oven. For a 9×13 pan, bake for about 20-22 minutes. If you’re using a smaller pan (like an 8×8 or 9×9) for thicker, denser bars, you’ll need 25-28 minutes. You’ll know they’re done when the edges are a deep golden brown and the center looks just *set*. It might still look a tiny bit soft in the middle—that’s what we want for a gooey center! Chef’s Hack: Do the toothpick test not in the center, but about an inch from the edge. It should come out with a few moist crumbs, not wet batter.
- The Hardest Part: Let Them Cool! I know, the smell is intoxicating and the wait is agony. But trust me on this one. You MUST let the pan cool completely on a wire rack before you even think about cutting. This allows the bars to set up, making them easy to slice and giving them that perfect chewy texture. Rushing this step leads to crumbly bars. Be strong!
How to Serve Up These Sweet, Simple Bars
Okay, they’re cooled, they’re cut, and you’re ready to serve. Here’s how to make them look as incredible as they taste.
For a classic bake-sale look, just slice them into neat squares and arrange them on a simple platter. They speak for themselves. But if you want to get a little fancy for your friends, here are my go-to moves:
- À La Mode is Always a Good Idea: Serve a warm bar (you can gently microwave a cooled one for 10 seconds) with a scoop of high-quality vanilla ice cream melting over the top. The contrast of hot and cold is a game-changer.
- The Drizzle Effect: Melt a little extra peanut butter or even some salted caramel and drizzle it artistically over the top of the whole pan before slicing. It looks professional and adds another layer of flavor.
- Garnish & Go: A light dusting of flaky sea salt right after they come out of the oven elevates the chocolate like you wouldn’t believe. Or, for a party, place a small dollop of whipped cream and a single chocolate chip on top of each bar.
However you serve them, just be prepared to share the recipe. It’s practically a guarantee.
Make It Yours: 5 Fun Twists on the Classic
The basic recipe is a solid 10/10, but this is where we get to have some real “Food Meld” fun. Think of this dough as your playground. Here are a few of my favorite ways to mix it up:
- Peanut Butter Cup Bliss: Swap out the chocolate chips for a bag of peanut butter chips, or chop up a bunch of Reese’s Peanut Butter Cups and fold them in. It’s a classic combo for a reason.
- S’mores Slam Dunk: Use a chocolate cake mix instead of yellow. Fold in a cup of semi-sweet chips and a cup of mini marshmallows. In the last 2 minutes of baking, scatter a few more marshmallows on top and pop it back in until they’re toasted and puffy.
- M&M Funfetti: Perfect for birthdays! Use a vanilla or funfetti cake mix and fold in a bag of M&Ms instead of chocolate chips. The colorful candy shells make everything more festive.
- Gluten-Free & Dairy-Free Friendly: You can absolutely make this work for dietary needs! Use a certified gluten-free yellow cake mix. Swap the butter for a plant-based alternative (melted coconut oil works too!), and use your favorite dairy-free chocolate chips.
- Salty Pretzel Crunch: For that ultimate sweet-and-salty hit, fold in ½ cup of crushed pretzel pieces along with the chocolate chips. The pretzels stay a little crunchy and it’s just… *chef’s kiss*.
Jackson’s Kitchen Confidential
Over the years, this recipe has become my go-to for pretty much every potluck and last-minute gathering. It’s evolved from that initial panic-induced experiment into a truly customizable staple. One time, I even added a sprinkle of instant espresso powder to the dough to deepen the chocolate flavor, and it was a revelation.
The funniest part? I still get more requests for these “lazy” bars than I do for my from-scratch, complicated recipes. It just goes to show that amazing food doesn’t have to be difficult. It’s about the joy it brings and the memories you make around the table. So don’t be afraid to get a little messy and make it your own. That’s what cooking is all about.
Your Questions, Answered!
I’ve made these bars a zillion times, and I’ve heard all your questions. Here are the answers to the most common ones.
- My bars came out really cakey and puffy. What happened? This usually means you overmixed the dough after adding the cake mix. When you work the dough too much, you develop the gluten in the flour, leading to a tougher, more cake-like texture. Just mix until combined—no longer!
- Can I use a hand mixer or stand mixer? You can, but I actually recommend against it for this recipe. It’s so easy to overmix with a machine. The dough is thick, and a little arm workout with a spatula gives you more control and guarantees that perfect chewy, dense texture we’re after.
- Why did my bars turn out greasy? If you used a larger, deeper pan than a 9×13, the bars will be thicker and take longer to bake, which can sometimes cause the butter to separate. Stick to the recommended pan size, and make sure you’re using a standard 15.25 oz cake mix, not a “family size” or larger one.
- How should I store leftovers? Ha! “Leftovers.” That’s a good one. But seriously, keep them in an airtight container at room temperature for up to 4 days. They also freeze incredibly well! Just wrap individual bars in plastic wrap and pop them in a freezer bag for up to 3 months. A 30-second thaw in the microwave and they taste fresh-baked.
Let’s Talk Nutrition (The Fun Kind)
Look, we’re all friends here. This is a dessert, and it’s meant to be enjoyed as a treat! But I believe in being transparent, so here’s a general breakdown based on a standard 24-bar yield from a 9×13 pan. Remember, these are estimates and can vary based on the specific brands of ingredients you use.
- Calories: ~200
- Fat: 10g
- Carbohydrates: 26g
- Sugar: 17g
- Protein: 2g
- Fiber: 1g
My philosophy? Life is about balance. Enjoy a bar with your afternoon coffee, share a plate with friends, and savor every single bite without guilt. Good food is one of life’s greatest pleasures.
You’ve Just Unlocked a Kitchen Superpower
And there you have it. From my kitchen chaos to yours, a recipe that’s going to save the day more times than you can count. These Lazy Chocolate Chip Cookie Bars are proof that you don’t need a pantry full of fancy ingredients or a whole day to spare to make something truly special. You just need a little know-how and a willingness to embrace the simple, joyful act of baking.
This is what Food Meld is all about—taking the intimidation out of cooking and replacing it with fun, flavor, and a whole lot of “you’ve gotta try this” energy.


