Let’s Get Cozy: Your New Favorite Holiday Treat is Here!
Hey friends, Jackson from Food Meld here! Is there anything better than wrapping your hands around a warm mug of hot chocolate on a chilly day? That rich, chocolatey steam hitting your face, the pile of marshmallows slowly melting into a gooey cloud… it’s pure comfort in a cup. But what if I told you we could take that entire feeling and turn it into a completely edible, adorable, and downright magical dessert? Enter: the Hot Chocolate Cookie Cup.
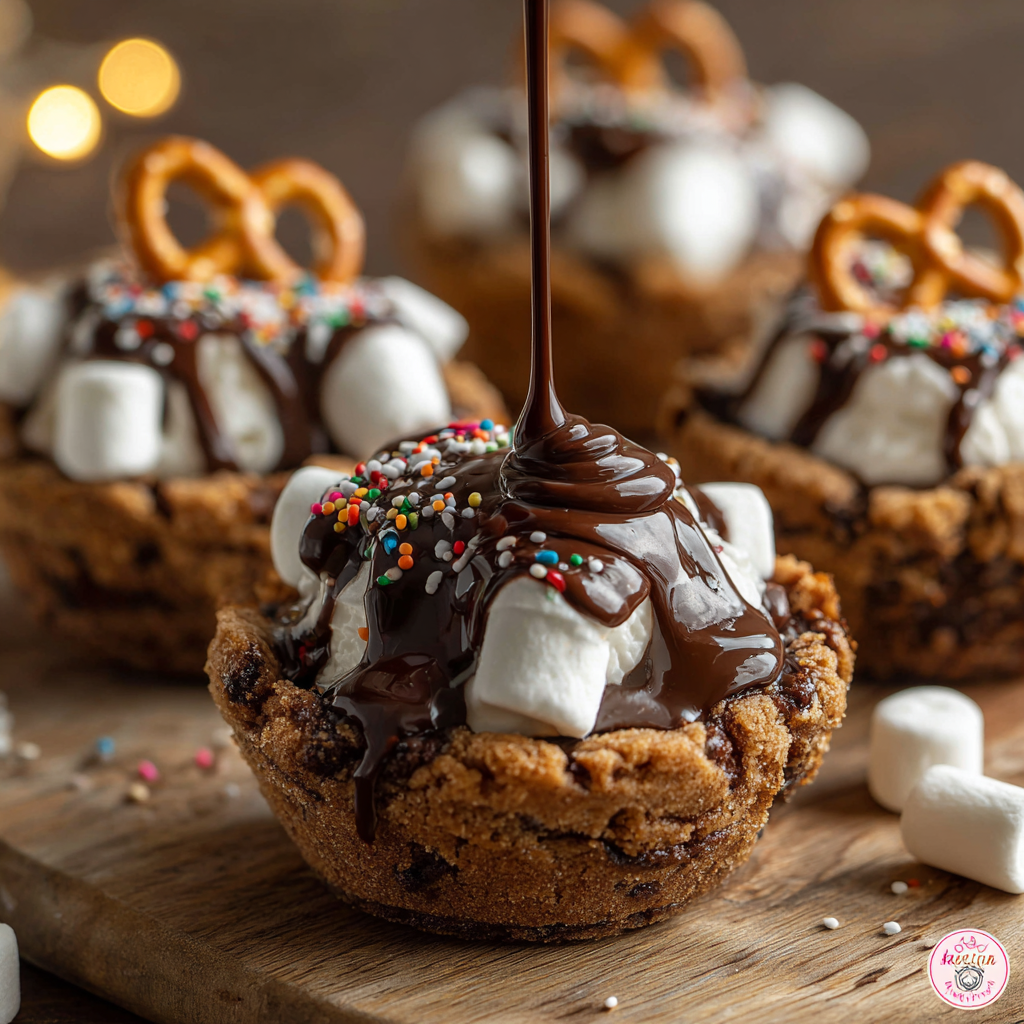
Imagine this: a soft, chewy sugar cookie, molded into a perfect little mug. It’s filled to the brim with a silky-smooth chocolate ganache that mimics the richest hot cocoa you’ve ever tasted. On top, a fluffy dollop of marshmallow (or whipped cream, no judgment here!) and the cutest little pretzel handle you ever did see. It’s a dessert, a conversation starter, and a seriously fun project all rolled into one bite-sized package. These little guys are a total showstopper at holiday parties, a blast to make with kids, and honestly, they’re way easier than they look. So, grab your favorite mixing bowl and let’s cook something awesome together. We’re about to melt some faces (and some chocolate)!

A Sweet Memory: Where This Recipe Came From
This recipe takes me right back to my grandma’s kitchen. She wasn’t a fancy chef, but man, could she make magic with a bag of chocolate chips and some love. Every Christmas Eve, after the main feast, she’d whip up a big pot of from-scratch hot chocolate—the kind you have to stir for ten minutes straight so the chocolate doesn’t scorch. My job, as the eager-to-please grandkid, was to be the Official Marshmallow Placer. I’d pile them so high you could barely see the chocolate underneath.
One year, I had the “brilliant” five-year-old idea to dunk my sugar cookie right into the mug. The cookie got soft, the hot chocolate got everywhere, but the flavor… oh, the flavor was a revelation. That messy, beautiful combination of chewy cookie, rich chocolate, and melty marshmallow is the soul of this recipe. These Hot Chocolate Cookie Cups are my grown-up, slightly less messy, tribute to that memory. They capture that perfect bite every single time. It’s my way of sharing a little bit of that kitchen-table magic with you.
Gathering Your Flavor Arsenal
Here’s the lineup for these incredible edible mugs. The beauty of this recipe is its simplicity—we’re using a few key players to create maximum impact.
- 1 package (16 oz) refrigerated sugar cookie dough (or your favorite homemade sugar cookie dough) – This is our “mug”! The store-bought stuff works perfectly here because it’s designed to hold its shape. Chef’s Insight: If you’re going homemade, make sure your dough is on the stiffer side, not too greasy, so it can form a sturdy cup.
- 1 cup milk chocolate chips – This is for our “hot chocolate” ganache. I love milk chocolate for its creamy, nostalgic flavor. Substitution Tip: Feel like going dark? Swap in semi-sweet or dark chocolate chips for a deeper, less sweet cocoa vibe. White chocolate chips would make a killer “white hot chocolate” version, too!
- ½ cup heavy cream – The key to a luscious, pourable ganache. The fat content in heavy cream is non-negotiable for that silky texture. Substitution Tip: In a real pinch, full-fat coconut milk can work for a dairy-free ganache, though the flavor will be slightly different.
- Mini marshmallows – The classic topper! They’re adorable and toastable. Substitution Tip: No minis? Tear up large marshmallows! Or, use a dollop of freshly whipped cream for a decadent, creamy finish.
- Pretzel twists – Our ingenious edible handle! The salty crunch is an amazing contrast to all the sweet. Chef’s Insight: Look for the smaller, daintier twists—they’re the perfect scale for our mini cups.
- Holiday sprinkles (optional) – Because why not? A little sparkle and color make everything more festive. Let your kids (or your inner kid) go wild here.
Let’s Build Some Edible Mugs: Your Step-by-Step Guide
Okay, team, let’s fire up the oven and get creating. Follow these steps and you’ll be a cookie cup pro in no time. I’ve packed this section with all my best hacks to ensure your success!
Step 1: Preheat & Prep
Preheat your oven to 350°F (175°C). This is crucial for even baking. Now, take your mini muffin tin and give it a really good coat of non-stick cooking spray. I’m talking get into every nook and cranny. These cookie cups need to pop out easily after baking, and we don’t want any casualties! Chef’s Hack: If you’re paranoid about sticking (like I am!), you can use mini muffin liners. Just peel them off after baking for a super smooth exterior.
Step 2: Form the Cookie Cups
If you’re using store-bought dough, slice it or break it into 24 equal pieces. Roll each piece into a ball. Place one ball into each prepared mini muffin cup. Now, here’s the important part: use your fingers or a small, narrow tool (like a shot glass or the end of a wooden spoon) to press the dough down and up the sides, forming a well. You want to create a little cup shape, making sure the dough goes almost all the way to the top of the muffin cup. This well is what will hold all our delicious chocolate later! Chef’s Tip: Try to make the dough thickness as even as possible around the sides and bottom to ensure even baking.
Step 3: Bake to Perfection
Slide that tin into your preheated oven and bake for 10-12 minutes. You’re looking for lightly golden edges. They might look a little puffed up in the middle—that’s totally normal! As soon as you pull them out of the oven, take the back of a small spoon or a melon baller and immediately press down gently into the center of each cookie cup. This re-forms that well we made and ensures we have plenty of room for our ganache. Chef’s Hack: Work quickly while the cookies are still hot and pliable!
Step 4: The Patient Part (Cooling!)
This is the hardest step: let the cookie cups cool completely in the pan. I’m serious! Don’t try to remove them while they’re warm. They are fragile and will break. Letting them cool sets their structure and makes them strong enough to handle. Go fold some laundry, check your email, maybe taste-test the chocolate chips… just give them a solid 20-30 minutes.
Step 5: Make the Magic Ganache
While the cups are cooling, make your “hot chocolate.” Place your chocolate chips in a heat-proof bowl. Heat the heavy cream in a small saucepan over medium heat until it’s just beginning to simmer—you’ll see little bubbles form around the edges. Don’t let it boil! Immediately pour the hot cream over the chocolate chips, making sure they’re all submerged. Let it sit for 2-3 minutes without touching it. This allows the heat to gently melt the chocolate. Then, take a whisk and stir slowly from the center outward until you have a smooth, glossy, beautiful ganache. Chef’s Insight: If you have any stubborn lumps, a 10-second blast in the microwave will usually take care of them.
Step 6: Assemble Your Masterpiece
Once the cookie cups are completely cool, carefully pop them out of the tin. Use a small spoon to fill each cup with the chocolate ganache, almost to the top. Now for the fun stuff: top with a few mini marshmallows, a swirl of whipped cream, or both! If you’re feeling fancy, you can use a kitchen torch to lightly toast the marshmallows for that authentic campfire feel. Add a few sprinkles for festive flair. Finally, take a pretzel twist and dip one end into a tiny bit of leftover melted ganache (or use a dot of frosting) and gently press it onto the side of the cookie cup to form the handle. Hold it for a few seconds to let it set.
How to Serve These Little Cups of Joy
Presentation is half the fun with these treats! For a holiday party, I love arranging them on a large platter or a rustic wooden board. Scatter a few extra pretzels and chocolate chips around to fill in the gaps and create a cozy, wintery vibe. They’re the perfect finger food dessert—no plates or forks needed!
If you’re serving them as a special family treat, line them up on a plate and serve them with a fresh pot of actual hot chocolate for the ultimate meta-dessert experience. The combination is next-level. For kids, let them customize their own with different sprinkle colors and marshmallow amounts. It makes the whole process even more interactive and memorable.
Mix It Up: Creative Twists on the Classic
Once you’ve mastered the basic recipe, the flavor world is your oyster! Here are a few of my favorite ways to mix it up:
- Peppermint Twist: Add ¼ teaspoon of peppermint extract to your ganache along with the cream. Top with a mini marshmallow and a tiny piece of crushed candy cane. It’s like a Christmas party in your mouth!
- Salted Caramel Delight: Before adding the ganache, spoon a tiny bit of store-bought caramel sauce into the bottom of the cookie cup. Then add the chocolate ganache and top with a flaky sea salt like Maldon. The sweet-salty combo is incredible.
- Cookies & Cream: Use a chocolate cookie dough instead of sugar cookie dough for your cup. For the ganache, use white chocolate chips instead of milk chocolate. Top with a mini marshmallow and a small piece of an Oreo cookie.
- Spiced Mexican Hot Chocolate: Infuse your heavy cream with a pinch of cayenne pepper and ½ a teaspoon of cinnamon while heating it. Strain it over the chocolate chips to make a subtly spicy, warm ganache.
- Nutty Buddy: Stir 2 tablespoons of smooth peanut butter into your warm ganache until combined. Top with a marshmallow and a single peanut for a PB&J-less sandwich treat.
Jackson’s Chef Notes & Kitchen Stories
I can’t tell you how many test batches of these we went through at Food Meld HQ (aka my kitchen). The first time, I used a cookie dough that was too buttery and they completely melted into puddles—delicious puddles, but not cups! Another time, I got overzealous with the ganache and filled them so full that when you took a bite, it shot out the other side. My dog, Biscuit, loved that round of testing. The key is finding that balance: a sturdy dough, a perfectly timed press-down, and a ganache that’s thick enough to set. This version here is the goldilocks recipe—just right. It’s evolved into a foolproof crowd-pleaser, and I hope it becomes a new tradition in your home, just like my grandma’s hot chocolate is in mine.
FAQs: Your Questions, Answered
Q: My cookie cups stuck to the pan! How can I prevent this?
A: Oh no, the dreaded stick! First, make sure you’re using a really good non-stick spray. If they are stubborn, let the pan cool a bit more—sometimes they release easier when they’re not stone-cold. You can also gently run a small offset spatula or a butter knife around the edges to loosen them. For next time, those mini muffin liners are a lifesaver for guaranteed non-stick success.
Q: Can I make these ahead of time?
A> Absolutely! You can bake the cookie cups up to 2 days in advance. Store them in an airtight container at room temperature. I’d recommend making the ganache and assembling them the day you plan to serve them for the freshest taste and texture. The pretzel handles are best added right before serving so they stay crunchy.
Q: My ganache is too runny/thick. What did I do wrong?
A> This is a common one! If it’s too runny, it means your cream-to-chocolate ratio might have been off, or the cream was too hot. Pop the whole bowl into the fridge for 10-15 minutes, stirring every 5 minutes, and it will thicken up. If it’s too thick and pasty, it means the chocolate was too hot or you stirred too vigorously and seized it. whisk in a teaspoon of warm cream at a time until it smooths back out.
Q: Can I use a different kind of cookie dough?
A> You can experiment! A gingerbread dough would be amazing for the holidays. Chocolate chip cookie dough could work, but the chips might make it harder to form a smooth cup. Just avoid doughs that are overly greasy or designed to spread flat.

Hot Chocolate Cookie Cups
- Total Time: 35 minutes
- Yield: 24 mini cups 1x
Description
Adorable, cozy, and delicious—these cookie cups look like mini mugs of hot chocolate but are completely edible. A chewy cookie base holds melted chocolate “cocoa,” topped with marshmallows or whipped cream for the perfect festive treat. Fun to make with kids and guaranteed to impress at holiday parties.
Ingredients
1 package sugar cookie dough (or homemade sugar cookie dough)
1 cup milk chocolate chips
½ cup heavy cream
Mini marshmallows (or whipped cream)
Pretzel twists (for mug handles)
Holiday sprinkles (optional)
Instructions
Preheat oven to 350°F (175°C). Grease a mini muffin tin.
Scoop cookie dough into each cup, pressing up the sides to form a well. Bake 10–12 minutes until lightly golden.
Immediately press the center down with a spoon to keep the cup shape. Cool completely in the pan before removing.
Heat heavy cream until warm, pour over chocolate chips, and stir until smooth to make ganache.
Spoon ganache into cooled cookie cups.
Top with mini marshmallows or whipped cream, then decorate with sprinkles.
Attach a pretzel twist “handle” to the side with a little melted chocolate.
Let set before serving.
- Prep Time: 20 minutes
- Cook Time: 15 minutes
Nutrition
- Calories: 140 / mini cup
- Sugar: 12g / mini cup
- Fat: 7g / mini cup
- Carbohydrates: 18g / mini cup
- Protein: 2g / mini cup
Nutritional Info (A Rough Estimate!)
Okay, let’s be real: these are a dessert treat. But here’s a rough estimate per cookie cup (assuming a yield of 24) so you can indulge knowingly. Remember, these values can vary based on the specific brands of ingredients you use.
- Calories: ~140 kcal
- Protein: 2g
- Fat: 7g
- Carbohydrates: 18g
- Fiber: 0g
- Sugar: 12g
These are a perfect little bite of sweetness to satisfy a craving without going overboard. Everything in moderation, especially during the holidays!
Final Thoughts: Let’s Keep the Fun Going!
And there you have it! Your guide to creating the most adorable, delicious, and conversation-starting dessert on the block. These Hot Chocolate Cookie Cups are more than just a recipe; they’re an experience. They’re about the joy of creating something with your hands, the laughter that happens in the kitchen when marshmallows go flying, and the pure delight of sharing something you made with people you love.
I hope this recipe brings a little bit of that Food Meld magic—bold flavor, simple methods, and a whole lot of fun—into your kitchen. If you make them (and I really hope you do!), tag me on social @FoodMeld with your creations. I love seeing your kitchen wins! Now get out there and cook something awesome.
Until next time,
Jackson


