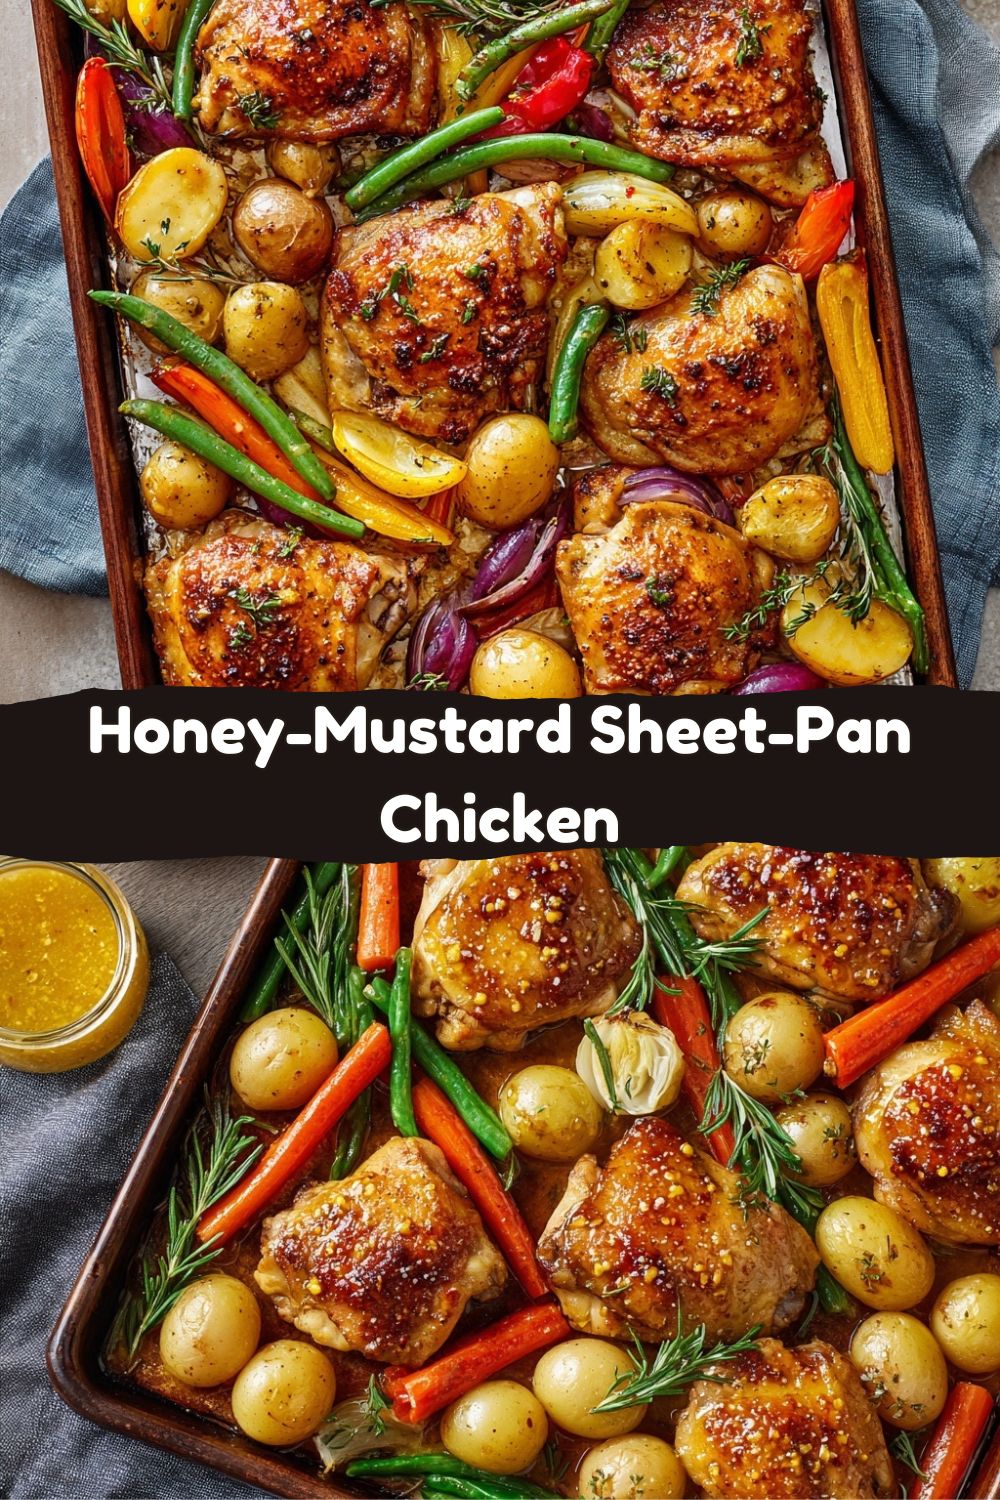
Honey-Mustard Sheet-Pan Chicken: Your New Go-To “No-Fuss, All-Flavor” Dinner
Hey friends, Jackson here from Food Meld. Let’s talk about dinner magic. You know the kind I mean. That glorious moment when you pull a sizzling, caramelized, smells-too-good-to-be-true pan out of the oven, and you realize… you only dirtied one dish. That, my friends, is the sheer, unadulterated joy of a sheet-pan meal.
But here’s my Food Meld philosophy: “easy” should never mean “boring.” We’re not about plain baked chicken and steamed broccoli. We’re about BIG flavor. We’re about sauces that cling and caramelize, veggies that roast in those glorious chicken drippings, and a dinner that makes everyone at the table put their phones down and ask, “What is that smell?”
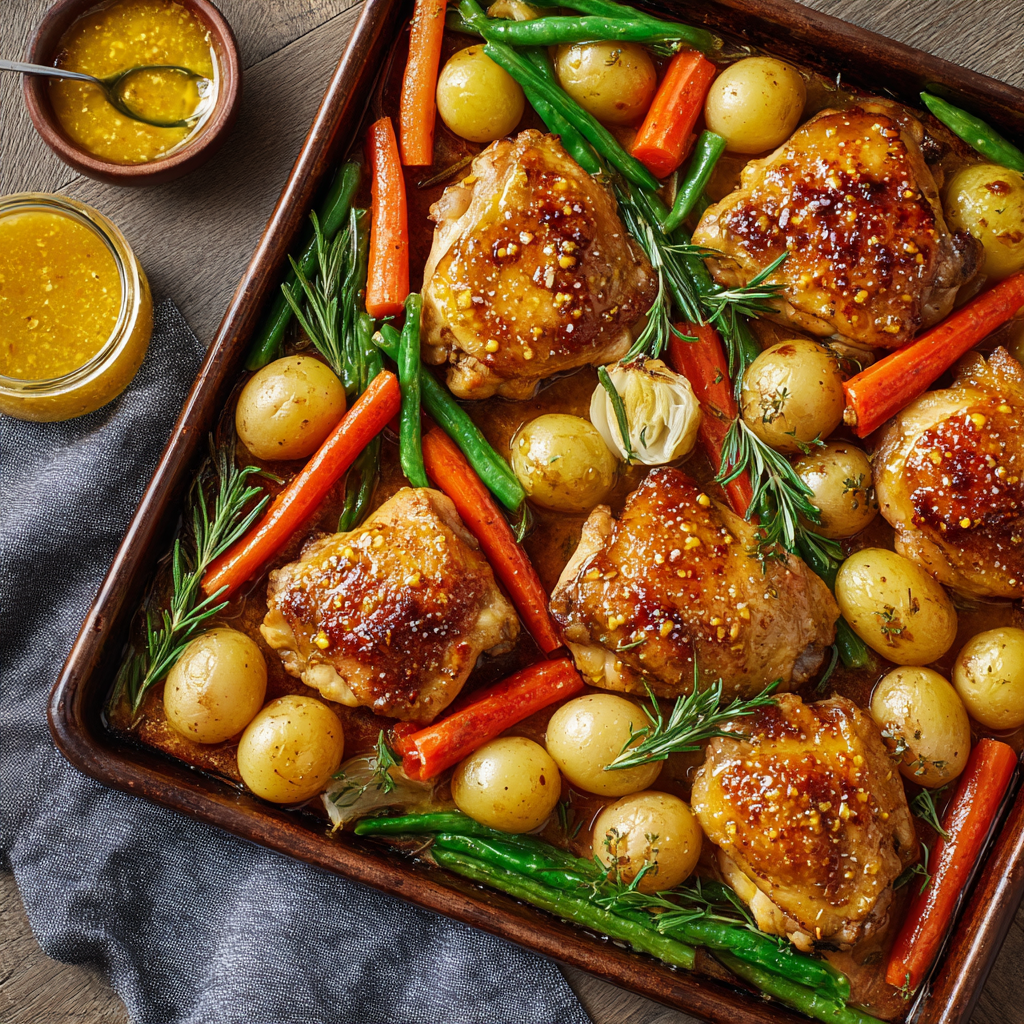
This Honey-Mustard Sheet-Pan Chicken is that dinner. It’s my weeknight warrior, my meal-prep MVP, and my secret weapon for feeding a crowd without breaking a sweat. We’re talking juicy, crispy-skinned chicken thighs and hearty veggies, all glazed in a sweet, tangy, garlicky sauce that transforms into sticky, finger-licking goodness in the oven. It’s the perfect blend of comfort and excitement—familiar enough for the kids, but with that gourmet twist that makes you feel like a kitchen rockstar.
So, tie on your apron, grab your biggest sheet pan, and let’s turn a simple Tuesday into a flavor celebration. This is cooking that’s fun, messy in the best way, and 100% guaranteed to deliver those “you’ve gotta try this” moments.
The BBQ Sauce Incident & The Birth of a Glaze
This recipe’s soul comes straight from my Southern roots, but it took a happy little kitchen accident to really bring it to life. Picture this: a much younger me, tasked with “helping” at a family barbecue. My job was the sauce. I was whisking away, a little too enthusiastically, and I knocked over a nearly full jar of honey into the tangy mustard-based base my granddad had started.
I was mortified. But Granddad just looked at the gloppy, sweet mess, gave it a stir, and said, “Well now, let’s just see what happens.” He brushed it on some chicken thighs and threw them on the grill. What happened was pure magic. That extra honey didn’t ruin it—it caramelized into this glossy, sweet-and-savory armor that had everyone fighting for the crispy bits.
This sheet-pan version is my ode to that “happy accident.” It captures that same sticky-sweet, tangy magic but makes it foolproof for any night of the week, rain or shine. It reminds me that the best flavors often come from a little improvisation and a whole lot of “what if we tried this?” energy. Every time I make it, I get a little nostalgic for that smoky backyard and the lesson that sometimes, the best recipes are the ones you don’t see coming.
Gathering Your Flavor Arsenal
Here’s everything you need to build this flavor bomb. I’ve added my chef notes because knowing your ingredients is the first step to making a recipe your own!
- 6 bone-in, skin-on chicken thighs: This is my non-negotiable for maximum flavor and juiciness. The bone keeps the meat moist, and the skin gets incredibly crispy. Chef’s Insight: If you must use boneless, reduce the cook time by 5-7 minutes to avoid dryness.
- 3 tbsp Dijon mustard: The tangy, sophisticated backbone of our glaze. It adds depth without being overly sharp.
- 2 tbsp honey: For that beautiful sweetness and caramelization. Sub Tip: Maple syrup or agave nectar work great for a different flavor profile or if you’re vegan!
- 1 tbsp whole grain mustard (optional): I always add this. Those little mustard seeds give amazing texture and pops of flavor. Don’t skip it if you have it!
- 2 tbsp olive oil: Helps the sauce emulsify and coat everything evenly. Also ensures the veggies don’t stick.
- 1 tbsp apple cider vinegar or lemon juice: The acid is crucial! It brightens the whole sauce and balances the sweetness. Chef’s Insight: I often use half of each for a more complex tang.
- 3 garlic cloves, minced: Because… garlic. Always more garlic. Fresh is best here.
- Salt & pepper to taste: Season with confidence! This is how you build layers of flavor from the start.
- 1 lb baby potatoes, halved: They roast up creamy on the inside and golden on the outside, soaking up all the pan juices. Sub Tip: Sweet potato chunks are a fantastic, vitamin-rich swap.
- 2 cups carrots or green beans, chopped: Carrots get sweet and roasty. Green beans stay vibrant with a slight char. Use what you love or have on hand!
- Fresh rosemary or thyme (optional garnish): A sprinkle of fresh herbs at the end makes it look and smell restaurant-worthy.
Let’s Build This One-Pan Wonder: A Step-by-Step Dance
Ready? This is where the fun happens. I’ll walk you through each step with my favorite hacks to ensure perfection.
- Preheat & Prep Your Stage. Crank that oven to 425°F (220°C). This high heat is the secret to crispy skin and roasted, not steamed, veggies. Line a large, rimmed sheet pan with parchment paper or foil. Chef’s Hack: A light spray of oil on the parchment prevents any sticky glaze from adhering.
- Create the Magic Elixir. In a medium bowl, grab a whisk and get ready to emulsify. Whisk together the Dijon, honey, whole grain mustard, olive oil, vinegar, minced garlic, and a big pinch of salt and pepper. Taste it! This is your power move. Adjust it to your liking—a bit more honey, a squeeze more lemon. You’re the boss of this sauce.
- The Great Coating. Pat your chicken thighs dry with a paper towel. This is KEY for crispy skin. Place the chicken and all your prepped veggies in a large bowl (or even right on the sheet pan to save a dish). Pour about half of your honey-mustard sauce over everything. Get in there with your hands (the best tool in the kitchen!) and massage that sauce onto every nook and cranny of the chicken and veggies. Ensure everything is lovingly coated.
- Arrange for Success. Spread everything out on your prepared pan in a single, uncrowded layer. Give the chicken and veggies some personal space. Chef’s Tip: Place the chicken skin-side up and nestle the veggies around it. This lets the chicken fat render down and flavor the potatoes and carrots as they roast. That’s free flavor, folks!
- Roast & Baste. Slide the pan into your hot oven. Set a timer for 20 minutes. When it goes off, pull the pan out (carefully!). Use tongs to flip and stir the veggies so they roast evenly. Now, take that reserved sauce you’ve been saving and brush a generous layer onto the chicken thighs. This double-glaze builds incredible flavor and sheen. Pop it back in for another 15-20 minutes.
- The Final Crisp. Is the chicken cooked through (165°F internal temp) and the veggies tender? Perfect. Now, if you want next-level crispness, switch your oven to BROIL for just 2-3 minutes. Watch it like a hawk! This blitz of high heat will bubble and darken the glaze and make the skin impossibly crispy. It’s a game-changer.
- Rest & Garnish. Let the pan sit for 5 minutes after it comes out. This lets the juices redistribute in the chicken. Then, scatter over some fresh chopped rosemary or thyme. The heat will wake up the herbs’ oils, and the smell will be incredible.
How to Serve It Up Like a Pro
Part of the beauty is the rustic, “bring-the-pan-to-the-table” vibe. I love setting the whole sheet pan on a trivet right in the middle of the table and letting everyone dig in family-style. The communal feel just makes it taste better.
If you want to plate it up, here’s my method: Use a big spoon to scoop up a portion of those gorgeous, glazed veggies and potatoes onto the plate. Place a chicken thigh right on top, skin-side up so it stays crispy. Be sure to drizzle over any of those sticky, concentrated pan juices that are left behind—that’s liquid gold!
This dish is a complete meal, but if you want to stretch it or add a fresh element, here are my favorite pairings:
- A simple, crisp green salad with a lemony vinaigrette to cut the richness.
- A hunk of crusty bread to mop up every last bit of sauce.
- For a Southern twist, a side of creamy coleslaw or quick-pickled onions adds a great crunch and tang.
Make It Your Own: 5 Flavor Twists to Try
Once you master the base recipe, the “meld” part really begins! Here are some of my favorite ways to riff on this classic:
- Spicy Sweet Heat: Add 1 tsp of smoked paprika and 1/2 tsp of cayenne (or a big spoonful of sriracha) to the glaze. The sweet, tangy, spicy combo is unbelievable.
- Mediterranean Sunshine: Swap the herbs for dried oregano. Add halved cherry tomatoes and sliced red onion to the veggie mix. Crumble a little feta cheese over everything after roasting.
- Cozy Apple & Sage: Perfect for fall! Use apple cider instead of vinegar in the glaze. Toss in some chunks of firm apple (like Honeycrisp) with the veggies, and use fresh sage as your garnish.
- Protein Swap – Salmon: This glaze is incredible on fish! Use skin-on salmon fillets and quick-roasting veggies like asparagus or zucchini. Roast at 400°F for 12-15 minutes.
- Vegan/Vegetarian Power Bowl: Replace chicken with extra-firm tofu (pressed and cubed) or big chunks of cauliflower steaks. You’ll want to lightly oil and roast them first for 15 minutes, then add the sauce and quicker-cooking veggies (like bell peppers) for the final 15.
Jackson’s Kitchen Notes & Stories
This recipe has been a workhorse in my kitchen for years, and it’s evolved in funny ways. One time, I was out of Dijon and had to use yellow mustard. It worked in a pinch, but the flavor was much sharper and less complex—a good lesson in why Dijon is worth it! Another time, a friend asked if they could use chicken breasts. I said yes, but to brine them first for 30 minutes in saltwater to keep them from drying out. She reported back that it was a total success.
The biggest evolution? I used to mix all the sauce with everything at the start. But I found that saving half to brush on later gives you that beautiful, glossy, restaurant-quality finish. It’s a tiny extra step with a massive visual and textural payoff. Remember, cooking is about progress, not perfection. Burned a potato? Call it “extra caramelized.” Sauce too thick? Thin it with a splash of warm water. You’ve got this.
Your Questions, Answered
Q: My veggies aren’t cooked through when the chicken is done. What happened?
A: No worries! This usually means your veggie pieces were too large or crowded. The fix is simple: chop veggies into uniform, bite-sized pieces. If it happens, just transfer the chicken to a plate to rest, spread the veggies out, and pop them back in the oven for another 5-10 minutes until tender.
Q: Can I make this ahead for meal prep?
A: Absolutely. This is a meal-prep superstar. Let everything cool completely, then portion into airtight containers. It will keep in the fridge for up to 4 days. Reheat in the microwave, or for best results, in a 350°F oven until warmed through to re-crisp the skin a bit.
Q: My glaze burned during the broil step. Help!
A> It happens to the best of us! Honey burns quickly. The key is vigilance and distance. Make sure your oven rack is in the middle position, not too close to the broiler element. And set a timer for 2 minutes—don’t walk away. If you’re unsure, you can skip the broil; the chicken will still be delicious, just slightly less glossy.
Q: Is there a way to make the sauce thicker?
A> For a thicker, more glaze-like sauce, try simmering the reserved half of the sauce in a small saucepan for 3-4 minutes before brushing it on the chicken. It will reduce and thicken beautifully. Just let it cool slightly so it doesn’t cook the chicken when you brush it on.
Nutritional Info (Because We Like to Be in the Know!)
Here’s a rough breakdown per serving (based on 4 servings). Remember, these are estimates, and your exact numbers will depend on the specific ingredients and brands you use.
- Calories: ~410
- Protein: 28g (Chicken thighs are a fantastic source of protein and iron.)
- Carbohydrates: 24g (Mostly from the nutrient-dense potatoes and carrots, providing fiber and vitamins.)
- Fat: 22g (The majority comes from the chicken skin and olive oil—this is where all that flavor and crispy texture lives! Using skinless thighs will lower this significantly.)
This meal is a great balance of macronutrients that will keep you satisfied. The protein and fats from the chicken provide staying power, while the complex carbs from the veggies and potatoes give you energy. It’s a wholesome, home-cooked meal you can feel great about serving.
Final Thoughts: Let’s Keep Meldin’!
And that’s it, folks! Your passport to an incredibly delicious, stupidly easy dinner. This Honey-Mustard Sheet-Pan Chicken embodies everything I love about cooking: bold flavors, simple processes, and the kind of result that makes you want to cook again tomorrow.
I hope this recipe becomes a trusted friend in your kitchen rotation, a blank canvas for your own experiments, and a reminder that awesome food doesn’t have to be complicated. The best meals are the ones shared, so gather your people, pile food onto plates, and enjoy the messy, flavorful, beautiful moment.
Did you try a twist? Burn something spectacularly? Have a victory? I want to hear all about it! Tag me on social @FoodMeld or drop a comment on the blog. Because at Food Meld, we’re not just following recipes—we’re building a community of flavor lovers, one sheet pan at a time.
Now go on. Cook something awesome. I’ll be right here with you.
– Jackson


