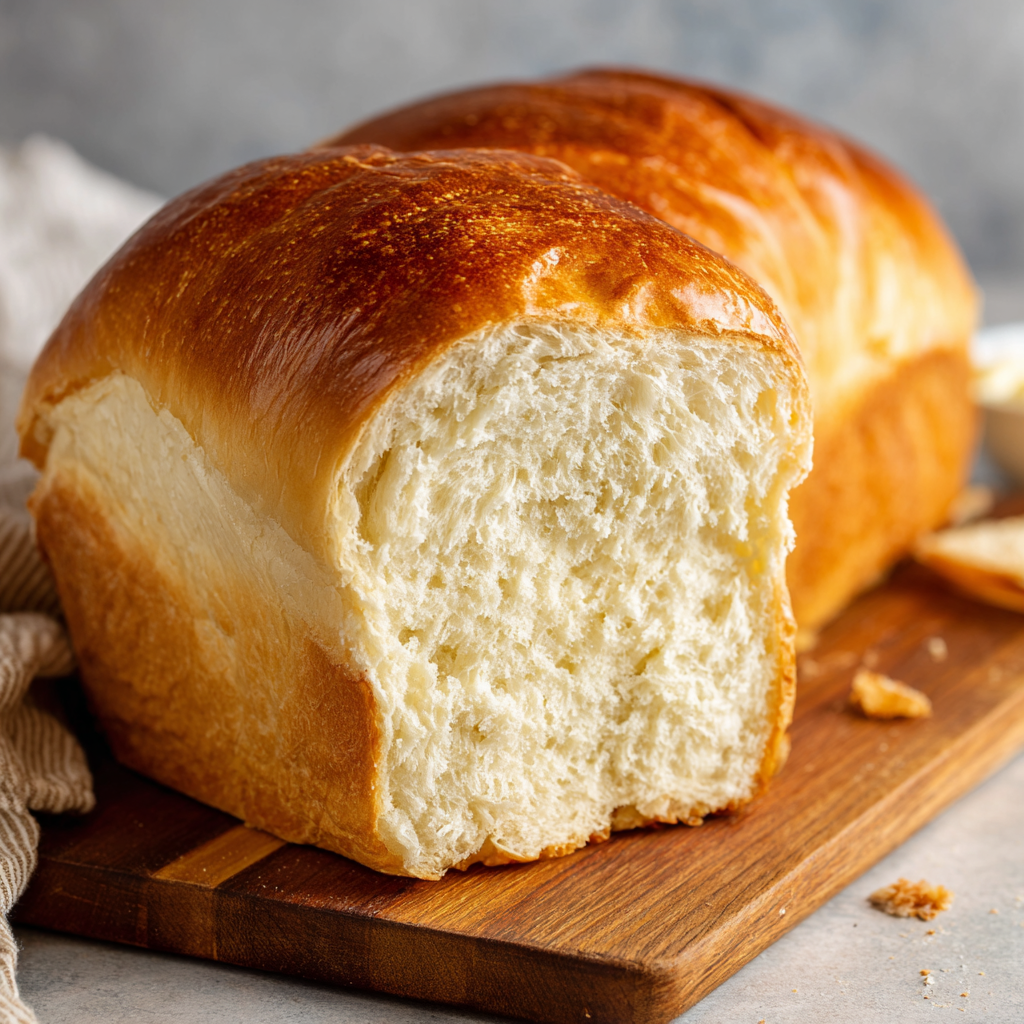
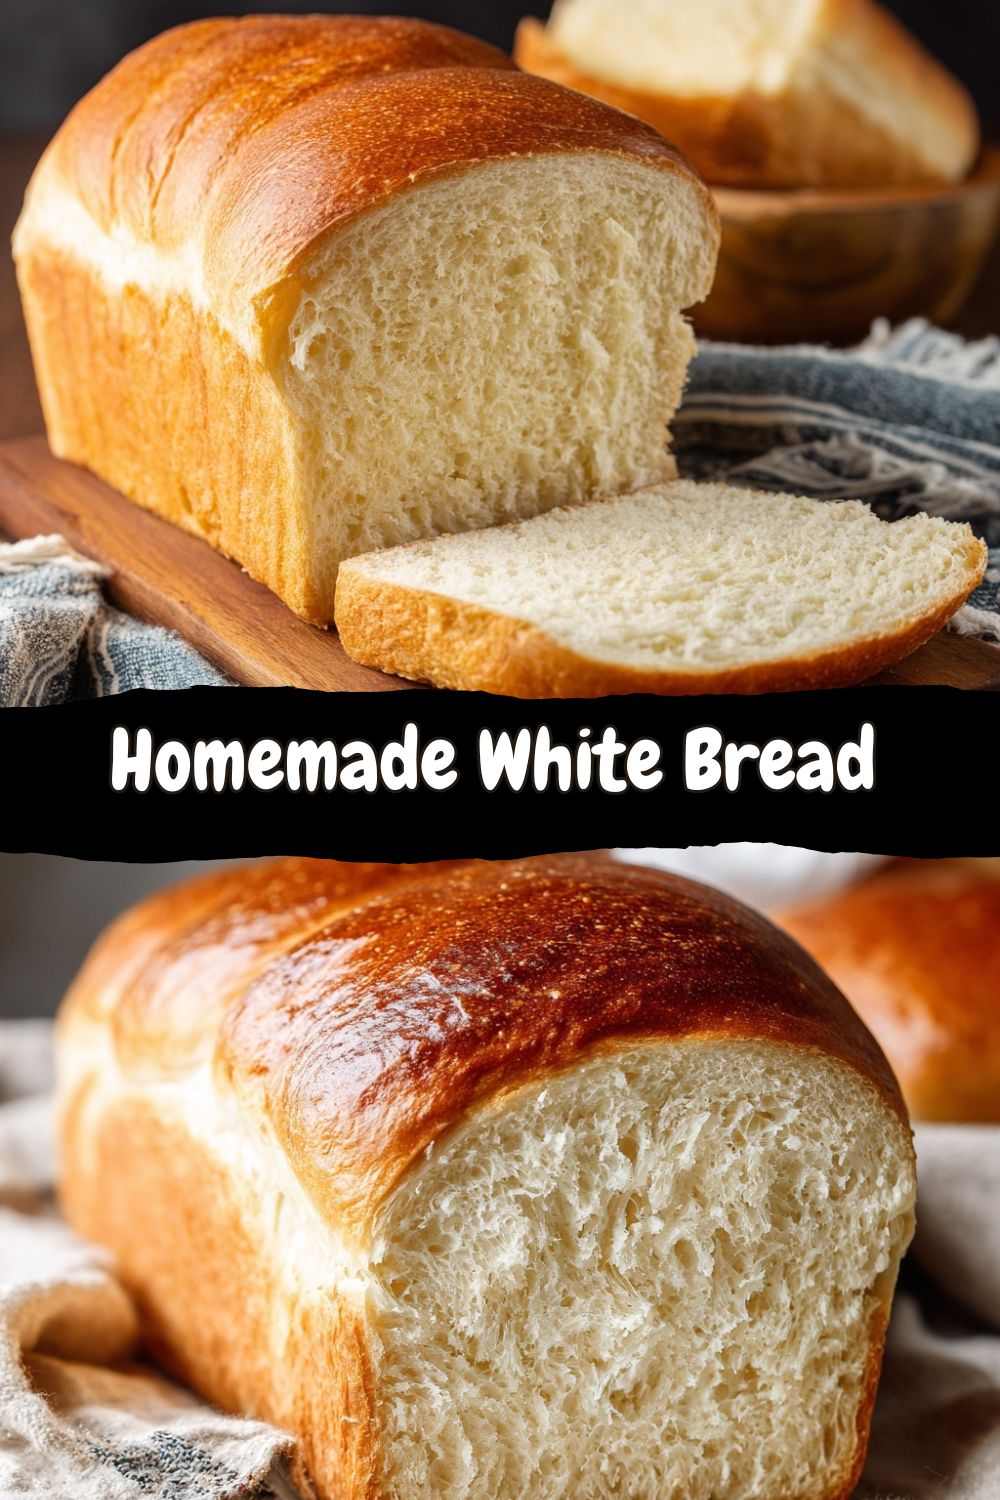
The Simple, Soulful Magic of Homemade White Bread
Hey there, friend. Come on in—the kitchen’s warm, there’s flour on the counter, and that unmistakable, heavenly scent is just starting to fill the air. You know the one I’m talking about. It’s the smell of promise, of comfort, of something truly real coming to life in your oven. That’s the magic of homemade white bread.
Now, I know what you might be thinking. “Jackson, bread? That’s for expert bakers with fancy starters and years of experience.” But let me stop you right there. I’m here to show you that this isn’t just any bread recipe—this is your new kitchen superpower. This is the loaf that will make you feel like a wizard, a sculptor, and a comfort-food hero all at once. We’re talking about a cloud-soft, slightly sweet, golden-crusted masterpiece that you made with your own two hands. The kind of bread that turns simple butter into a celebration and makes a Tuesday night sandwich feel like a feast.
This recipe is my go-to, my forever favorite, the one I’ve made so many times I could probably do it in my sleep. It’s deceptively simple, built on pantry staples, and the process itself is a form of therapy. There’s something incredibly grounding about turning flour, water, and yeast into a living, breathing, beautiful loaf. So, whether you’re a total beginner ready for your first dough or a seasoned cook looking for that perfect, reliable white bread, you’re in the right place. Grab your favorite mixing bowl, and let’s turn some simple ingredients into pure, unforgettable comfort. Let’s cook something awesome together.
Grandma’s Countertop and the First Loaf I Ever Loved
My love for this bread didn’t start in a fancy culinary school. It started in a sun-drenched farmhouse kitchen in Georgia, standing on a wobbly step-stool next to my grandma. She didn’t use a stand mixer or a digital thermometer. She used a giant yellow bowl, her hands, and what she called “feel.” I was her “official flour duster,” which mostly meant I got more of it on the floor and my overalls than in the bowl.
I remember watching, utterly fascinated, as her knobby, strong hands turned a shaggy mess into a smooth, springy ball. She’d give it a pat, tuck it into that yellow bowl with a clean dish towel over the top, and park it on the sunny windowsill above the radiator. “We’re lettin’ it take a nap, Jack,” she’d say. To my six-year-old self, the fact that this dough would actually wake up bigger was nothing short of a miracle. When it finally came out of the oven, she’d never let it cool completely. Still warm, she’d saw off the heel with her bread knife, slather it with freshly churned butter that would melt into golden pools, and hand it to me. That first bite—the crisp, delicate crust giving way to a feather-soft, steaming interior—was my first real understanding of what “love” tasted like. It wasn’t just food; it was patience, care, and a shared secret between us. Every time I make this loaf, I’m right back on that step-stool, covered in flour and full of wonder.
Gathering Your Flavor Allies: The Ingredient Lineup
Here’s the beautiful part: greatness comes from simplicity. Every single one of these ingredients plays a starring role. Let’s break it down.
- 3 cups (360g) All-Purpose or Bread Flour: The backbone! All-purpose flour works beautifully and is what I use most often. If you have bread flour, its higher protein content will give you a slightly chewier, taller loaf. Chef’s Insight: Fluff your flour in the bag, spoon it lightly into your measuring cup, and level it off. Don’t scoop and pack it—that’s the #1 way to end up with dry, dense bread!
- 2 ¼ teaspoons (1 packet) Active Dry Yeast: Our tiny, magical living organism. This is what makes our bread rise and gives it that beautiful airy texture. Make sure your packet isn’t past its expiration date for the best results.
- 1 cup (240ml) Warm Water (about 110°F/43°C): The yeast’s wake-up call. Think “baby bottle warm”—warm to the touch but not hot. Too hot and you’ll kill the yeast; too cold and it’ll sleep in. If you don’t have a thermometer, it should feel comfortably warm on your wrist.
- 2 tablespoons Granulated Sugar: The yeast’s favorite food! This little bit of sugar gets the yeast party started and also contributes to a tender crumb and a gorgeous golden crust. It doesn’t make the bread taste sweet, just perfectly balanced.
- 2 tablespoons Butter, softened: Our secret weapon for tenderness and flavor. The fat in the butter coats the flour proteins, resulting in a softer crumb and a richer taste. I use unsalted, but salted works in a pinch (just maybe ease up a teeny bit on the added salt).
- 1 teaspoon Fine Sea Salt or Table Salt: The flavor enhancer. Salt does more than just season; it strengthens the gluten structure and controls the yeast’s activity. Never add it directly on top of your unmixed yeast—always mix it with the flour first.
Let’s Get Our Hands Doughy: The Step-by-Step Magic
Ready to create? Follow these steps, but don’t stress—bread is forgiving. Let’s walk through it together.
- Wake Up the Yeast (The “Proof”): In a small bowl or your liquid measuring cup, combine the warm water and sugar. Stir it around until the sugar starts to dissolve. Now, sprinkle the yeast over the top. Give it one gentle stir, then walk away for 5-10 minutes. You’re looking for a creamy, foamy layer on top—this tells you your yeast is alive, happy, and ready to work! Chef’s Hack: No foam? Your water was likely too hot, too cold, or your yeast is old. Start over with a new packet. It happens to everyone!
- Bring the Dough Together: In a large mixing bowl, whisk together your flour and salt. Make a well in the center. Pour in the foamy yeast mixture and add the softened butter. Using a sturdy wooden spoon or a dough whisk, stir from the center outward, gradually incorporating the flour. It will look shaggy and messy. That’s perfect! Keep mixing until no dry patches of flour remain.
- The Knead (Embrace the Rhythm): Lightly flour your clean countertop. Turn the dough out onto it—it will be sticky. Start kneading: push the dough away from you with the heel of your hand, fold it back over itself, give it a quarter turn, and repeat. Add only the tiniest sprinkles of flour if it’s sticking to your hands like glue. You’re looking for smooth, elastic dough that springs back when you gently poke it, about 8-10 minutes of kneading. Stand Mixer Friends: Use the dough hook on medium-low speed for 5-6 minutes. Don’t walk away—watch it come together into a smooth ball that cleans the sides of the bowl.
- First Rise (The “Nap”): Lightly grease the now-empty mixing bowl (or a new one) with a drizzle of oil or butter. Place your smooth dough ball inside, turning it once to coat it lightly. Cover the bowl tightly with plastic wrap or a damp, clean kitchen towel. Place it in a warm, draft-free spot. My favorite trick? Turn your oven on to its lowest setting for 1 minute, then TURN IT OFF. It creates the perfect cozy incubator. Let the dough rise until doubled in size, 1 to 1.5 hours.
- Punch & Shape (The Satisfying Part): Gently punch your fist into the center of the risen dough to deflate it—this releases the large gas bubbles. Turn it out onto a lightly floured surface. Shape it into a rectangle roughly the length of your loaf pan. Roll it up tightly like a jelly roll, pinching the final seam closed. Tuck the ends under. Place the loaf seam-side down into a greased 9×5 inch loaf pan.
- Second Rise (The Final Proof): Cover the loaf pan with that same towel or loosely with plastic wrap. Let it rise again in that warm spot until it’s peeking over the top of the pan by about an inch, 30-45 minutes. Meanwhile, preheat your oven to 375°F (190°C).
- Bake to Golden Perfection: Once risen, place the loaf pan in the center of your preheated oven. Bake for 25-30 minutes. You’ll know it’s done when the top is a deep, golden brown, the loaf sounds hollow when you tap it on the top, and the internal temperature reads 190°F (88°C) if you use a thermometer.
- The Crucial Cool Down: This is the hardest part! Immediately turn the loaf out of the pan onto a wire cooling rack. Let it cool completely, at least an hour, before slicing. I know, I know—but slicing into hot bread steams it and makes it gummy. Trust me, the wait is worth it for the perfect texture.
Sharing the Love: How to Serve Your Masterpiece
Okay, it’s cooled. The moment of truth! Here’s how to make the most of your beautiful loaf.
For that classic experience, use a serrated bread knife and saw gently to get clean slices. The heel (the end piece) is the chef’s reward—toast it immediately with a generous smear of good butter and a flake of sea salt. Pure heaven.
This bread is your ultimate canvas. It makes incredible toast (my favorite is with mashed avocado, red pepper flakes, and a fried egg). It’s the absolute best for sandwiches, from peanut butter and jelly to a towering BLT. Tear off chunks to sop up soup or stew. Or, do as my grandma did: simply slice, pile on a plate, and let everyone help themselves alongside a big family meal. It’s the star of the table, no fancy plating required.
Make It Your Own: Fun Twists & Swaps
Once you’ve mastered the classic, the world is your oyster! Here are a few of my favorite ways to play with this recipe.
- Herb & Garlic Swirl: After the first rise, roll the dough out into a rectangle. Brush with olive oil and sprinkle with minced fresh rosemary, thyme, and grated garlic. Roll up, seal, and proceed. The aroma is insane.
- Honey Whole Wheat Blend: Substitute 1 cup of the all-purpose flour with whole wheat flour. Replace the white sugar with an equal amount of honey (add it to the warm water with the yeast). You’ll get a heartier, nuttier loaf with a touch of natural sweetness.
- Everything Bagel Loaf: Before the second rise, brush the shaped loaf with an egg wash (1 egg + 1 tbsp water). Generously sprinkle with everything bagel seasoning. You get all the flavor in sliceable form!
- Dairy-Free & Vegan: Easy! Use a plant-based milk (like almond or oat) warmed to 110°F instead of water. Swap the butter for an equal amount of vegan butter or refined coconut oil. The sugar is already vegan.
- Cinnamon Raisin Breakfast Bread: During the shaping step, roll the dough out and sprinkle with a mixture of 1/3 cup sugar + 1 tbsp cinnamon and a handful of plumped raisins. Roll, seal, and bake. Perfect with your morning coffee.
Jackson’s Kitchen Notes: A Few Bread Truths
This recipe has been with me for years, and it’s evolved through a lot of happy accidents. I once forgot the salt entirely (a sad, bland lesson). I’ve also learned that bread baking is as much about the day as the recipe. Humid days might need a touch more flour; cold, dry days might need a splash more water. Use the recipe as a guide, but trust your instincts and the “feel” of the dough.
The biggest game-changer for me was getting an instant-read thermometer. Taking the guesswork out of the “is it done?” question built my confidence tenfold. And remember, your first loaf might not be bakery-perfect, but I promise it will be delicious. Every loaf tells a story, and yours is just beginning. Don’t be afraid of the mess, enjoy the process, and always, always eat the warm heel of the bread.
Your Questions, Answered: Bread Troubleshooting 101
Q: My dough didn’t rise much. What happened?
A: The most common culprits are old/expired yeast, water that was too hot (which killed the yeast) or too cold (which put it to sleep), or a drafty, cold rising environment. Ensure your yeast is fresh and your water is baby-bottle warm. Try the “warm oven” trick for a consistent rise.
Q: My bread is dense and heavy. Why?
A: This usually points to not enough kneading (the gluten didn’t develop), killing the yeast with hot water, or not letting it rise long enough. Also, check your flour measurement—packing too much flour into the cup is a major cause of density. Next time, try the “spoon and level” method!
Q: Can I make this by hand without a mixer?
A: Absolutely! I actually prefer it. Kneading by hand is therapeutic and gives you the best feel for the dough’s texture. Just clear a space on the counter, put on some music, and enjoy the rhythm of it.
Q: How do I store homemade bread so it stays fresh?
A> Homemade bread, without preservatives, is best eaten within 2-3 days. Store it at room temperature in a bread box or a paper bag (plastic bags make the crust soft). For longer storage, slice and freeze it in a freezer bag. Pop frozen slices straight into the toaster!
Nutritional Information (A Quick Note)
Let’s keep it real: this is homemade comfort food, not a diet food. But the beauty of making it yourself is you control exactly what goes in—no weird preservatives or unpronounceable additives. A typical slice from this loaf (based on 12 slices) contains roughly: 130-150 calories, 2-3g of fat, 25g of carbohydrates, 1g of fiber, 3-4g of protein, and about 150mg of sodium. It’s a source of energy and joy! For specific dietary needs, please use your preferred nutrition calculator with your exact brands and measurements.
Final Thoughts: You Did It!
Look at you, you magnificent baker! You took flour, water, yeast, and a little patience and created something truly wonderful. That sense of accomplishment you’re feeling? That’s the real secret ingredient. I hope this loaf brings as much joy to your kitchen as it has to mine over the years. Remember, Food Meld is all about mixing it up, making it yours, and enjoying every single bite. So slice that bread, share it with someone you love, and soak in the compliments. You’ve earned them.


