
Forget Store-Bought: Let’s Make Legendary Maple Nut Goodies
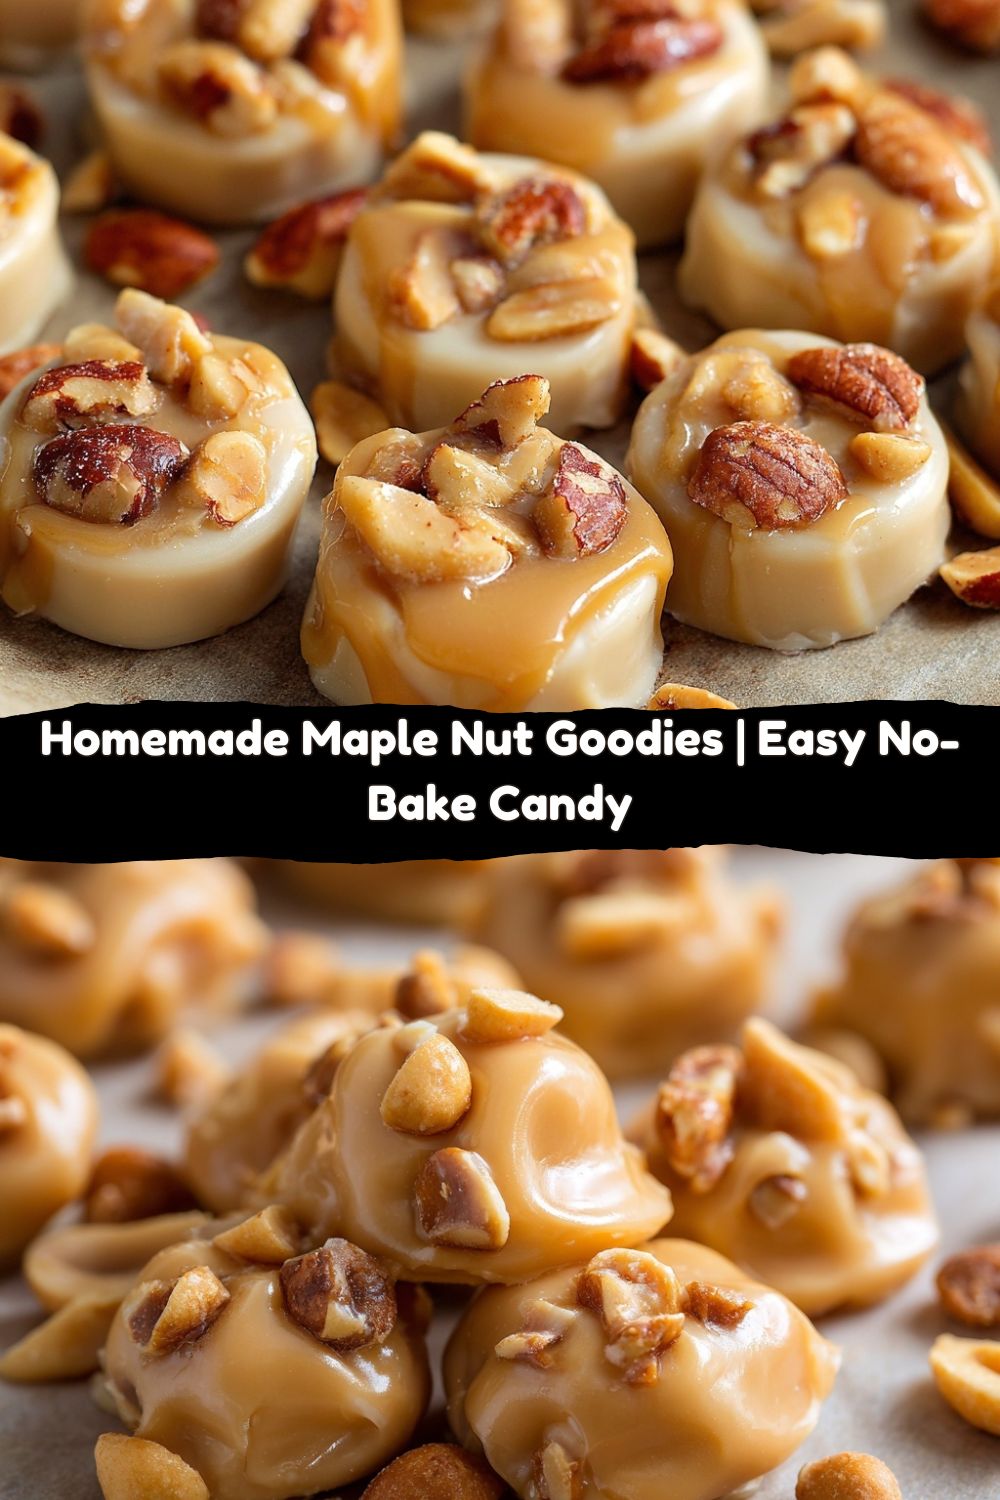
Hey friends, Jackson here from Food Meld. Let me ask you a question: have you ever bitten into one of those little square candies—the ones with the creamy, melt-in-your-mouth maple shell and the perfectly salty, crunchy peanut center? The ones that instantly transport you to a cozy, happy place? That’s the magic of the classic Maple Nut Goodie, and I’m here to tell you with 100% confidence: you can make them even better in your own kitchen.
I see you over there, maybe thinking that candy-making is some kind of culinary sorcery best left to the pros. I get it. But trust me, this isn’t a complicated sugar thermometer situation. This is a “dump, melt, stir, and scoop” kind of situation. It’s the kind of fun, messy, and incredibly rewarding kitchen project that I live for. We’re taking a handful of simple, beautiful ingredients and transforming them into little bites of pure, unadulterated joy. They’re perfect for holiday trays, for surprising your coworkers, for stashing in a secret jar for yourself (no judgment here), or just for that “I deserve a treat” Tuesday afternoon.
So, are you ready to create some “you made these?!” moments? Let’s ditch the waxy, overly-sweet store-bought versions and cook something awesome together. Welcome to your new favorite candy recipe.
A Sticky-Fingered Memory & The Taste of Nostalgia
This recipe always takes me right back to my Grandma Shirley’s kitchen. She wasn’t a fancy baker, but boy, could she make candy. Every Christmas, her countertops would become a landscape of tins and trays, but the one I’d beeline for was always the one holding her Maple Nut Goodies. She’d use this big, old, slightly scorched saucepan, and I’d perch on a stool, watching her stir with a wooden spoon, the air thick with the smell of melting butter and that incredible, warm maple scent.
My job was “official taste-tester,” which really just meant I got to lick the spoon and bowl. I can still feel the thrill of that first taste—the way the sweet, creamy mixture would cling to my fingers and the roof of my mouth, punctuated by the salty crunch of a peanut. It was pure, uncomplicated happiness. Making this recipe now, I still feel that same kid-like excitement. It’s more than just candy; it’s a connection, a sweet little thread tying my kitchen today to hers all those years ago. And that, my friends, is the best flavor of all.
Gathering Your Flavor Arsenal
One of the best things about this recipe? The ingredient list is short, sweet, and to the point. Here’s what you’ll need to make about 30 pieces of pure bliss.
- 2 cups white chocolate chips: This is the base of our creamy candy shell. It gives us that smooth, sweet foundation that plays so nicely with the maple. Chef’s Insight: I recommend a good quality brand for the best melt and flavor. The cheaper ones can sometimes be a little grainy.
- 1/2 cup butterscotch chips: This is our secret weapon! The butterscotch adds a deep, rich, almost buttery note that keeps the candy from being one-dimensionally sweet. It’s the “what if we tried this?” energy that makes this recipe a Food Meld classic.
- 2 tbsp butter: For that unmistakable, luxurious richness and a silkier texture. Use unsalted to control the saltiness, but salted works great too for a little salty-sweet punch.
- 1/2 cup sweetened condensed milk: This is the magic glue that holds it all together and gives us that wonderfully soft, fudgy bite. Don’t substitute evaporated milk—it’s not the same!
- 1 tsp maple extract: This is where the signature flavor comes alive! Substitution Tip: You *can* use vanilla extract in a pinch, but you’ll lose that classic maple taste. For a more natural, nuanced flavor, you could use 2 tablespoons of real maple syrup, but be aware it will make the final candy a bit softer.
- 1 1/2 cups roasted peanuts: The “nut” in Nut Goodie! I love the textural contrast they provide. Chef’s Insight: I almost always use salted peanuts. That hit of salt against the sweet maple is a game-changer. If you only have unsalted, just add that optional pinch of salt to the mix.
- Pinch of salt (optional): As mentioned, if your peanuts are unsalted, this is non-negotiable. But even with salted nuts, a tiny pinch can elevate all the other flavors beautifully.
Let’s Get Cooking: Your Foolproof Candy-Making Steps
Ready? This is where the fun happens. Put on some good music, grab your favorite saucepan, and let’s do this.
- Line a baking sheet with parchment paper. Do this first! Trust me, you do not want to be scrambling for this while your candy mixture is hot and ready to scoop. A baking sheet with a rim is perfect. Chef’s Hack: A tiny dab of the mixture under each corner of the parchment paper will help it stick to the pan and stay put.
- In a medium saucepan over LOW heat, combine the white chocolate chips, butterscotch chips, and butter. I’m putting “LOW” in all caps because it’s that important. We are melting gently, not cooking. Stir constantly with a silicone spatula or wooden spoon. Be patient! Rushing this with high heat is the number one way to end up with a seized, grainy mess. We’re going for smooth and silky.
- Once the mixture is completely smooth and melted, stir in the sweetened condensed milk. Keep that low heat going and stir, stir, stir until everything is fully blended into one gorgeous, creamy dream. You’ll notice the texture become super cohesive. This should only take a minute or two.
- Remove the pan from the heat. Seriously, take it off the burner. The residual heat is all we need from here on out.
- Immediately stir in the maple extract and the peanuts. Go ahead, take a big whiff. That’s the smell of success, my friend. Make sure the peanuts are evenly distributed throughout the mixture.
- Drop by spoonfuls onto your prepared baking sheet. I use a small cookie scoop (about 1 tablespoon size) for perfectly uniform candies, but two teaspoons work just fine. Don’t worry about making them look perfect—their rustic, homemade charm is part of their appeal!
- Let them cool and set. You can let them firm up at room temperature for a few hours, but if you’re as impatient as I am, pop the whole baking sheet into the refrigerator for about an hour. They’ll set up perfectly.
Sharing the Sweetness: How to Serve Your Masterpiece
Okay, they’re set, they’re beautiful, and you’ve probably already taste-tested three. Now what? Here are a few of my favorite ways to enjoy and share these Maple Nut Goodies.
The Simple Snack: Honestly, just pile them into a beautiful bowl and leave them on the counter. Watch how quickly they disappear. It’s the ultimate casual treat.
The Giftable Goodie: These make incredible homemade gifts! Layer them in a cute cellophane bag or a small gift box between sheets of parchment paper. Tie it with a ribbon, and you’ve got a present that says “I really like you” more than any store-bought card ever could.
The Holiday Showstopper: Create a epic candy tray for your next gathering. Pair these with some dark chocolate truffles, a few pieces of peppermint bark, and some classic fudge. They add that perfect touch of nostalgic, nutty goodness that balances out a rich dessert spread.
With Your Coffee: My personal favorite. A couple of these alongside my morning cup of coffee is a little slice of heaven. The sweet maple and the bitter coffee are a match made in flavor heaven.
Mix It Up! Creative Twists on the Classic
Once you’ve mastered the base recipe, the “what if we tried this?” fun begins. Here are a few of my favorite ways to mix it up.
- Double Chocolate Maple: Swap out the butterscotch chips for an equal amount of semi-sweet or dark chocolate chips. You’ll get a richer, more decadent candy that chocolate lovers will go crazy for.
- The Nutty Professor: Don’t limit yourself to just peanuts! Try a mix of roasted almonds, pecans, and cashews. Each bite will be a little different and wonderfully complex.
- Maple Sea Salt: After you drop the spoonfuls onto the baking sheet, immediately give each one a tiny sprinkle of flaky sea salt. It amplifies the salty-sweet contrast in the most elegant way.
- Peanut Butter Swirl: Before the candies set, warm up a couple tablespoons of peanut butter and drizzle it over the top. Use a toothpick to swirl it in gently for a marbled, PB-loving masterpiece.
- Bourbon Maple: For the adults, add a tablespoon of bourbon along with the maple extract. It adds a warm, smoky depth that is absolutely unforgettable.
Jackson’s Chef Notes & Kitchen Confessions
This recipe has been a staple in my kitchen for years, and it’s evolved in little ways. I originally made it with just white chocolate, but adding the butterscotch chips was a total “aha!” moment that I had after a batch turned out a little too sweet for my taste. It’s now my non-negotiable twist.
A funny story: I once decided to “toast my own peanuts” for an extra layer of flavor. I got distracted by a boiling-over pot of pasta (classic kitchen chaos), and I completely burned them. The whole house smelled like a campfire for hours. My partner still teases me about it. The moral of the story? Sometimes, store-bought roasted peanuts are just perfect as they are. Don’t overcomplicate it if you don’t have to!
Finally, the mixture will be thick and a little hard to stir by the time you’re adding the last of the peanuts. That’s totally normal! Just muscle through it—it means you’re on the right track to the perfect, non-runny consistency.
Your Questions, Answered!
I’ve made these a zillion times, so I’ve probably run into any issue you might have. Here are the answers to the most common questions.
- My mixture is grainy/oily. What happened? This almost always means the heat was too high when melting the chips. Chocolate is delicate and can “seize” or separate if it gets too hot. Next time, keep it on the absolute lowest setting and be patient. If it’s just a little oily, you can often stir it vigorously off the heat to bring it back together.
- Can I use vanilla extract instead of maple? You can, but they’ll just be “Vanilla Nut Goodies,” which are still delicious! The maple flavor is really the star here, so I highly recommend seeking out the real deal (maple extract) for that authentic taste.
- How should I store these, and how long do they last? Store them in an airtight container in the refrigerator. They’ll stay perfect for up to 2 weeks… if they last that long! The cool temperature keeps them firm and creamy. You can also freeze them for up to 3 months.
- My candy is too soft, even after chilling. Help! This could be due to a few things: high humidity, not enough peanuts, or using a liquid sweetener like real maple syrup. You can try popping them back in the fridge for longer, or next time, add an extra 1/4 cup of peanuts to help firm up the structure.
A Quick Note on Nutrition
Look, we’re making candy here. It’s a treat, and it’s meant to be enjoyed as such! I’m a big believer in enjoying real, delicious food without guilt. That said, I know many of you like to keep track, so here’s a general breakdown per piece (assuming you make about 30 candies). Remember, these are estimates and can vary based on your specific ingredients.
Per Piece (approx.):
Calories: 130 | Fat: 8g | Carbs: 12g | Sugar: 10g | Protein: 2g
The peanuts provide a little protein and healthy fats, which is a nice bonus. The key, as with any good thing, is simply to enjoy them mindfully. Savor each bite instead of inhaling them straight from the container (a skill I am still personally working on!).
You Did It! Now, Go Enjoy the Fruits of Your Labor
And there you have it! You’ve just created a batch of unforgettable, homemade candy that’s packed with flavor, nostalgia, and a whole lot of love. See? I told you candy-making didn’t have to be intimidating. It’s fun, it’s messy, and the reward is a whole tray of little “you’ve gotta try this!” moments.
I am so proud of you for taking the time to cook something awesome for yourself and the people you love. That’s what Food Meld is all about. Now, go grab one of those Maple Nut Goodies, pour yourself a glass of cold milk or a hot coffee, and savor that perfect combination of sweet, creamy, and crunchy. You’ve earned it.
If you make them (and I really hope you do!), tag me on social @FoodMeld so I can see your beautiful creations! Until next time, friends—keep your spoons ready and your flavor sense curious.
Happy cooking,
Jackson


