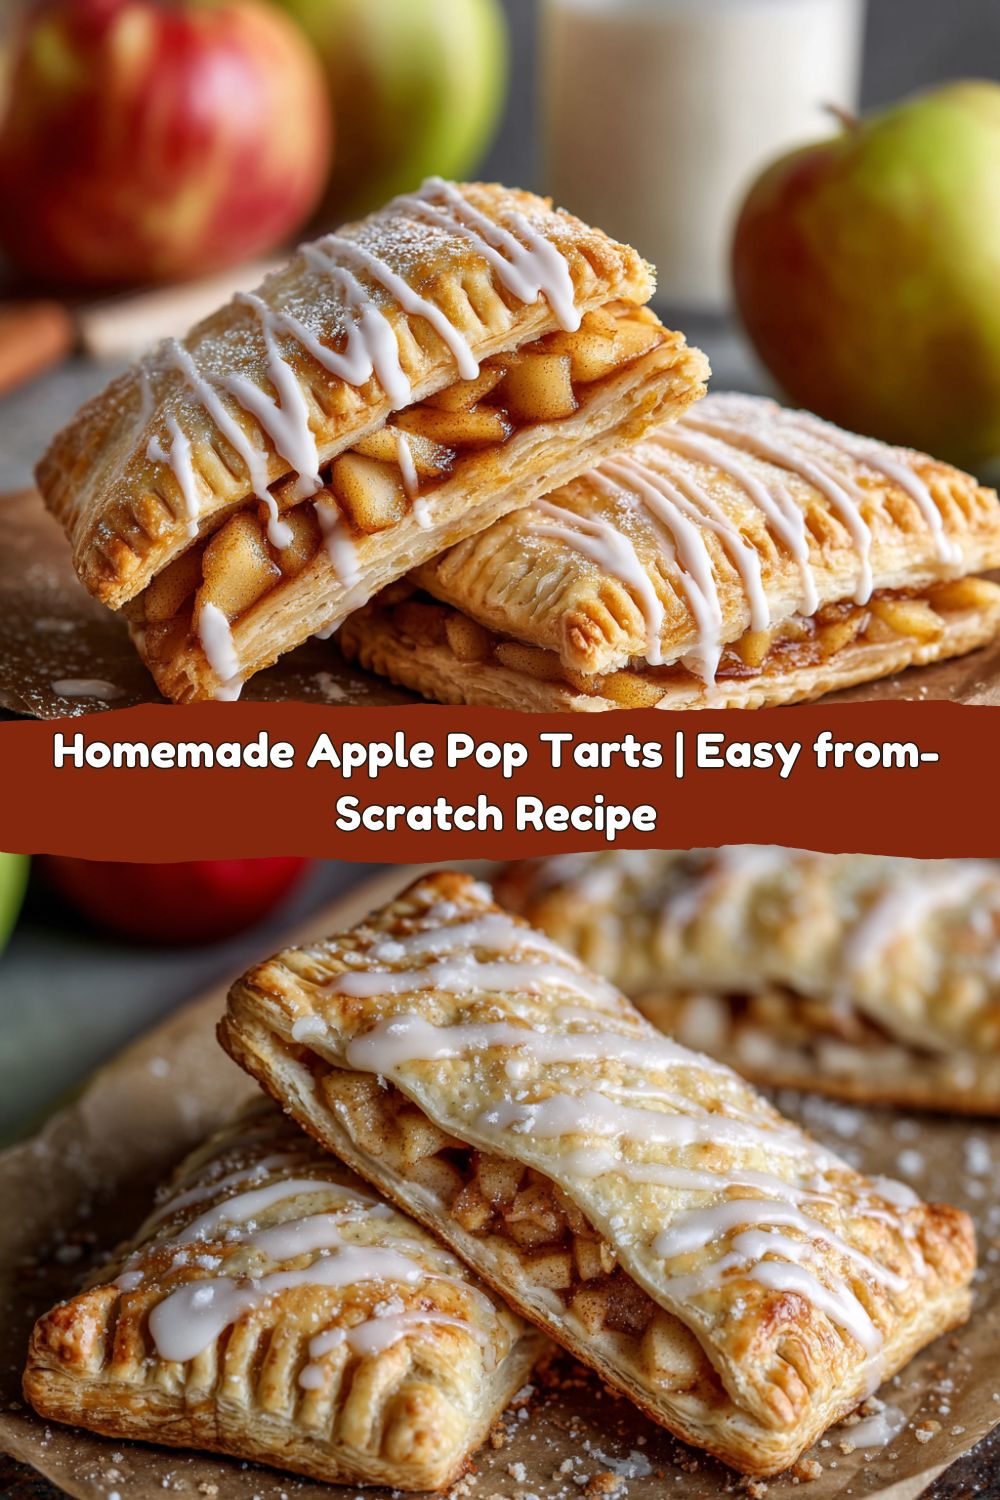
Homemade Apple Pop Tarts: Your New Favorite Breakfast Ritual
Hey friends, Jackson from Food Meld here! Let’s cut right to the chase: remember that feeling of tearing into a foil-wrapped, frosting-toasted rectangle of joy as a kid? The one that promised a sweet start to the day and usually involved a race to catch the crumbs? Yeah, we all do. But what if I told you that the magic of a perfect pop tart isn’t reserved for the grocery aisle? That you can create something a hundred times more flavorful, flakier, and packed with real, warm, spiced apple filling right in your own kitchen? And the best part? It’s seriously, shockingly easy.
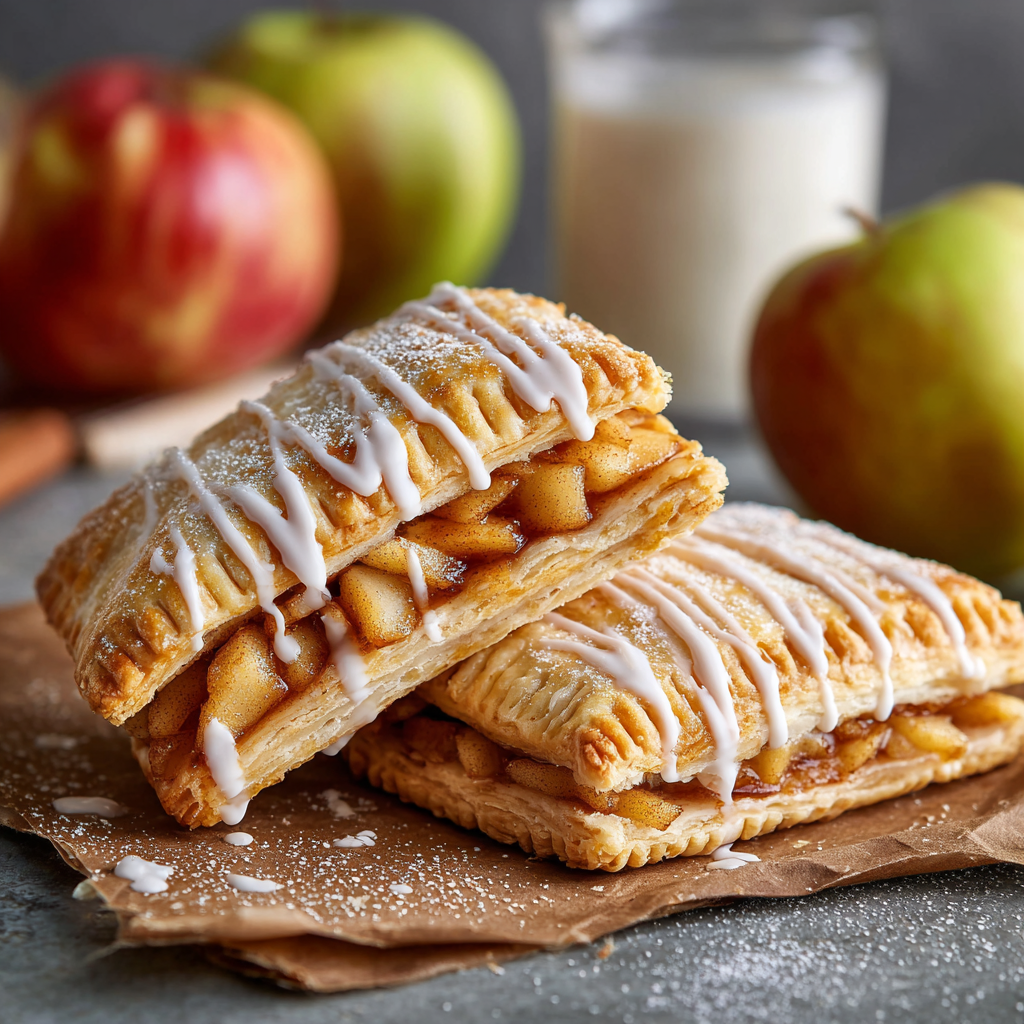
This isn’t about being a pastry chef; it’s about reclaiming that simple joy and making it unforgettable. We’re talking golden, buttery, flaky pastry that shatters with every bite, giving way to a gooey, cinnamon-kissed apple center that actually tastes like… well, apples! Topped with a simple sweet glaze that ties it all together, these homemade apple pop tarts are a game-changer. They’re the perfect project for a lazy weekend morning, a surefire way to impress your family, and the ultimate “I-made-this-from-scratch” flex. So, grab your favorite apron, put on some tunes, and let’s cook something awesome together. Welcome to your new favorite breakfast (or dessert… or snack) ritual.
The Pop-Tart Pact: A Dorm Room Discovery
This recipe takes me right back to my freshman year of college. My roommate, Leo, and I had a 8 a.m. history lecture that felt like a special kind of punishment. Our only solace was the toaster in the common room. We’d stumble in, half-awake, and pop in those classic frosted pastries. It was our little ritual. But one weekend, after a late-night study session (or maybe it was a movie marathon, who remembers?), we looked at the box and had a simultaneous “what if we tried this?” moment. We were broke, but we had some apples from the dining hall, a roll of pre-made pie crust my mom had suspiciously sent in a care package, and a whole lot of ambition.
What we created that night was… a mess. The filling leaked everywhere, the shapes were bizarre, and we used a weird orange juice glaze because we were out of milk. But biting into those warm, homemade, decidedly imperfect pastries at 2 a.m. felt like a revelation. It was a hundred times better than the original because we made it. That messy, fun, collaborative energy is exactly what I want to bring to you with this recipe. We’ve refined it since the dorm days, but the soul—the fun of creating something delicious from simple ingredients—is exactly the same.
Gathering Your Flavor Arsenal
Here’s the beautiful part: the ingredient list is short, sweet, and probably already in your pantry. This is about quality and a few little chef secrets to make each component sing.
For the Pastry:
- 2 refrigerated pie crusts: This is our ultimate kitchen hack for flaky layers without the fuss. Sure, you can make your own if you’re feeling fancy, but the store-bought stuff works incredibly well. Just let it sit at room temp for 15 minutes before unrolling—it prevents cracking!
- 1 egg, beaten: This is our magic glue and golden brown paint. The egg wash is what seals the edges shut to prevent filling explosions and gives the pastry that gorgeous, glossy, bakery-worthy finish.
For the Apple Filling:
- 2 medium apples, peeled and diced: Use a firm, sweet-tart variety like Granny Smith, Honeycrisp, or Braeburn. They hold their shape and give the filling a fantastic texture and balance. This is where the real “apple” flavor comes from, friends!
- 2 tbsp brown sugar: Adds a deeper, molasses-like sweetness that pairs perfectly with the warm spices. Light or dark brown works great.
- 1/2 tsp cinnamon: The quintessential cozy spice. Don’t be shy with it.
- 1 tbsp flour: This is our secret weapon! It thickens the apple juices as it bakes, so you get a luscious, gooey filling instead of a runny, leaky one. Cornstarch works too.
- 1 tbsp lemon juice: A bright splash to balance the sweetness and keep the apples from browning.
- Optional twist: A pinch of nutmeg or a splash of vanilla extract takes this from great to “can I have the recipe?!” levels of good.
For the Glaze:
- 3/4 cup (85g) powdered sugar: The base of our simple, sweet drizzle.
- 1–2 tbsp milk: Whole milk or even cream makes it extra rich. Add one tablespoon at a time until you get a thick but drizzle-able consistency.
- Optional: A 1/4 tsp of cinnamon mixed into the sugar, or a drizzle of caramel sauce on top after glazing. Yes, please!
Let’s Build Some Pastry Magic: A Step-by-Step Guide
Ready to create? Follow these steps, and you’ll be a pop-tart pro in no time. I’ve packed this with all my best tips to ensure your success.
Step 1: Fire Up the Oven & Prep the Pan. Preheat your oven to 375°F (190°C). This is crucial for getting that pastry to puff up and crisp immediately. Line a baking sheet with parchment paper. Not foil, not just grease—parchment is your best friend for non-stick, easy cleanup bliss.
Step 2: Cook the Filling. In a small skillet over medium heat, combine your diced apples, brown sugar, cinnamon, flour, and lemon juice (and nutmeg/vanilla if using). Cook, stirring often, for about 5-7 minutes until the apples have softened slightly and the mixture has thickened. You’re not making applesauce; you want them tender but with a bit of bite. Spread this mixture onto a plate and let it cool completely. Chef’s Hack: Rushing this step with warm filling will melt the pastry dough and cause a leak! Patience is key.
Step 3: Roll & Cut the Dough. Unroll your first pie crust onto a lightly floured surface. Use a rolling pin to gently smooth it out and even the thickness. Using a knife, pizza cutter, or a pastry wheel for fun fluted edges, cut the dough into rectangles about 3×4 inches. Don’t stress about perfection! Re-roll the scraps to get as many rectangles as you can. Repeat with the second crust. You should get 6-8 rectangles from each crust, for 12-16 total (which means 6-8 finished pop tarts).
Step 4: Fill & Seal. Place half of your rectangles on the prepared baking sheet. These are the bottoms. Spoon a generous tablespoon of the cooled apple filling onto the center of each rectangle, leaving a clear 1/2-inch border around the edges. Now, take your beaten egg and brush it all around that bare border—this is the glue! Carefully place a top dough rectangle over each filled bottom. Use your fingers to press the edges together, then go around again with the tines of a fork, crimping firmly to create a tight seal. Chef’s Hack: Press hard with that fork! A good seal is the #1 way to prevent filling leakage.
Step 5: Vent & Brush. Take a sharp knife or a toothpick and poke 3-4 small holes in the top of each pop tart. This lets steam escape so they don’t puff up like little balloons. Give the tops a generous brush with the remaining egg wash—this is what gives them that beautiful golden color.
Step 6: Bake to Golden Perfection. Slide your beautiful creations into the preheated oven and bake for 20-25 minutes. You’re looking for a deep, golden brown color and a flaky-looking pastry. Rotate the pan halfway through for even browning. Your kitchen will smell absolutely incredible.
Step 7: Cool & Glaze. Let the pop tarts cool on the baking sheet for at least 10-15 minutes. They need this time to set up; the filling is molten lava right out of the oven! While they cool, whisk together your powdered sugar and milk until smooth. Drizzle this glorious glaze over the warm (not hot) pop tarts. The warmth will help the glaze set slightly.
How to Serve These Homemade Beauties
Okay, you could just grab one and eat it over the sink (no judgment, I’ve been there). But for that full “wow” effect, let’s plate it up!
For a breakfast spread, stack two pop tarts on a vibrant plate next to a hot cup of coffee or a cold glass of milk. The contrast is just *chef’s kiss*. For a dessert vibe, get fancy! Place one pop tart on a plate, add a small scoop of vanilla bean ice cream right on top (the melty ice cream pooling into the glaze is a religious experience), and maybe even an extra little drizzle of warm caramel sauce. Garnish with a few thin apple slices or a sprinkle of cinnamon. It transforms this nostalgic treat into a restaurant-quality dessert that will have everyone begging for your secret.
Mix It Up: Your Pop-Tart, Your Rules!
The fun doesn’t stop with apple! This recipe is a blank canvas for your creativity. Here are a few of my favorite twists:
- Brown Sugar Cinnamon: The classic! Swap the apple filling for a mixture of 1/2 cup brown sugar, 1 1/2 tsp cinnamon, and 1 tbsp flour. So simple, so good.
- Mixed Berry Bliss: Use about 3/4 cup of your favorite berry jam (raspberry and strawberry are winners). Just make sure it’s a thick jam, not a runny jelly, and maybe mix in a teaspoon of flour to help thicken it further.
- S’mores Galore: A layer of chocolate chips and a few mini marshmallows inside. Pro tip: freeze the marshmallows first so they don’t completely melt away.
- Savory Spin: Yes, really! Fill with sharp cheddar cheese and a little cooked bacon or sausage for a mind-blowing breakfast sandwich situation. Skip the glaze, obviously, and maybe brush with everything bagel seasoning.
- Vegan-Friendly: Use a vegan pie crust (many store-bought ones are accidentally vegan!). For the egg wash, just use a plant-based milk or aquafaba. The filling is already plant-based, and the glaze can be made with almond or oat milk.
Chef’s Notes: A Few Stories from My Kitchen
This recipe has come a long way since the dorm room days of orange juice glaze. I’ve learned a few things the hard way so you don’t have to. The biggest lesson? Let the filling cool. I cannot stress this enough. I’ve had more than one batch turn into puddles of apple syrup because I was impatient. Now, I sometimes even make the filling the night before and stash it in the fridge.
Another fun evolution: the shape. We used to make circles, triangles, even one attempt at a star that failed spectacularly. The rectangle is classic for a reason—it’s easy to seal! But if you have cookie cutters, feel free to get creative. Just remember, the more intricate the shape, the trickier the seal. Embrace the rustic, homemade look. It means they were made with love (and maybe a little mess).
FAQs & Troubleshooting: Your Questions, Answered
Q: My filling leaked everywhere! What did I do wrong?
A: Welcome to the club! This usually boils down to three things: 1) The filling was too warm when you assembled, melting the fat in the pastry. 2) You didn’t leave enough of a border or seal it tightly enough with the fork. 3) You didn’t poke steam vents. Next time, ensure a cool filling, a good 1/2-inch border, a firm fork press, and those crucial holes! A little leakage is normal and tastes great, though.
Q: Can I make these ahead of time?
A: Absolutely! You have two great options. 1) Unbaked: Assemble the pop tarts, place them on a parchment-lined sheet, and freeze until solid. Then transfer to a freezer bag. Bake straight from frozen, adding 3-5 extra minutes. 2) Baked: Let them cool completely, then store in an airtight container at room temp for 2 days or freeze for up to 3 months. Reheat in a toaster oven or a regular oven at 350°F until warm and crisp.
Q: My pastry is pale and not flaky. Help?
A: This almost always means your oven wasn’t hot enough. Oven thermostats can be liars! I highly recommend using an inexpensive oven thermometer to check the real temperature. Also, make sure you’re using a cold pastry dough, not one that’s been sitting out and getting soft.
Q: Can I use homemade pie crust?
A: Of course! My favorite all-butter pie crust would be phenomenal here. Just make sure you roll it out to about the same thickness as the store-bought kind (about 1/8-inch thick) and keep it chilled until the moment you’re ready to assemble.

Homemade Apple Pop Tarts
- Total Time: 45 minutes
- Yield: 6 - 8 pop tarts 1x
Description
Flaky pastry, warm apple filling, and a sweet glaze—these apple pop tarts are a nostalgic treat with a homemade upgrade. They’re crisp on the outside, gooey inside, and easy to customize with spice or drizzle. Breakfast, snack, or dessert—they deliver fall flavor in every bite.
Ingredients
Pastry
2 refrigerated pie crusts (or homemade equivalent)
1 egg, beaten (for sealing and brushing)
Filling
2 medium apples, peeled and diced
2 tbsp brown sugar
1/2 tsp cinnamon
1 tbsp flour
1 tbsp lemon juice
Optional twist: Add 1/4 tsp nutmeg or a splash of vanilla
Glaze
3/4 cup (85g) powdered sugar
1–2 tbsp milk
Optional: 1/4 tsp cinnamon or drizzle of caramel
Instructions
Preheat oven to 375°F (190°C). Line a baking sheet with parchment.
In a pan, cook apples with brown sugar, cinnamon, flour, and lemon juice until soft (5–7 minutes). Cool.
Roll out pie dough and cut into rectangles (about 3×4 inches).
Spoon filling onto half the rectangles, leaving edges clear. Brush edges with egg wash.
Top with remaining rectangles and seal edges with a fork. Poke holes in the top.
Brush tops with egg wash and bake for 20–25 minutes, until golden.
Cool slightly, then glaze.
- Prep Time: 20 minutes
- Cook Time: 25 minutes
Nutrition
- Calories: 280 / Pop Tart
- Sugar: 22g / Pop Tart
- Fat: 12g / Pop Tart
- Carbohydrates: 38g / Pop Tart
- Fiber: 1g / Pop Tart
- Protein: 2g / Pop Tart
Nutritional Info (Because Knowledge is Power!)
Okay, let’s be real: this is a treat. But a homemade treat means you control the ingredients! This info is per pop tart (assuming the recipe makes 8). Compared to the store-bought version, you’re getting real fruit, no preservatives, and you can adjust the sugar to your liking.
Per Serving (1 pop tart): Approximately 280 calories, 12g fat, 38g carbohydrates, 2g protein, 1g fiber, 22g sugar.
Remember, these are estimates and can vary based on the specific brands of ingredients you use and the size of your pop tarts. The beauty of cooking from scratch is enjoying the process and the product, guilt-free!
Final Thoughts: You’ve Got This!
Look at you! You’re ready to conquer the world of homemade pastries. This recipe is all about breaking down barriers and having a blast in the kitchen. It’s not about perfection; it’s about the joy of creating something delicious with your own two hands. It’s about the smell of cinnamon and baked apples filling your home. It’s about that moment you break open a warm pop tart and see that steamy, perfect filling inside.
So whether you’re making these for a special weekend breakfast, packing them in lunchboxes, or indulging in a late-night snack, I hope you feel that same spark of fun and discovery that Leo and I felt all those years ago. Don’t forget to tag me @FoodMeld if you share a picture—I love seeing your creations! Now, go forth and melt some flavor.
Until next time, keep cooking boldly!
– Jackson


