High-Protein Quesadilla Skillet – All the Flavor, None of the Fuss
Hey friends, Jackson here from Food Meld. Let’s talk about a universal truth: we all have those nights. You know the ones. Your stomach is rumbling, your energy is dipping, and the siren call of takeout menus is getting louder by the minute. But then, you remember the stack of dishes from last night and the fact that your wallet (and probably your body) is begging for something better. You’re stuck in the dreaded dinner gap—caught between wanting something delicious and not having the bandwidth for a whole culinary production.
What if I told you the solution is literally one pan away? And it involves all the gooey, savory, crispy satisfaction of a quesadilla, but even easier? Enter my High-Protein Quesadilla Skillet. This isn’t just another recipe; it’s your weeknight superhero. We’re taking everything you love about a loaded quesadilla—the melty cheese, the flavorful filling, the crisp tortilla edges—and we’re baking the magic right into a single skillet. No flipping, no fussing, just layer, cover, and let the pan do the work.
This skillet is my love letter to busy people who still want to eat awesome food. It’s packed with lean protein to keep you fueled, it comes together in about 25 minutes flat, and it’s endlessly customizable. It’s the kind of meal that feels indulgent but is secretly smart. So, grab your favorite skillet and let’s turn that “what’s for dinner?” panic into a “wow, I made that?” victory. Welcome to flavor town, population: you and this incredibly easy, incredibly tasty skillet.
The Quesadilla That Started It All
This recipe takes me straight back to my first apartment. You know, the one with the linoleum floors that somehow always felt sticky and the oven that only had two working settings: “Off” and “Inferno.” My kitchen arsenal consisted of one decent knife, a wobbly pot, and a trusty cast-iron skillet my grandma insisted I take. I lived on a tight budget, but I had a serious appetite and friends who’d show up hungry.
One night, a few buddies came over after a long shift, and the mission was clear: feed the masses with what we had. Ground turkey, a lone onion, some tired tortillas, and the last of a block of cheddar. The idea of standing at the stove assembling and flipping individual quesadillas for everyone felt impossible. So, I looked at my skillet, had a “what if we tried this?” moment (my favorite kind), and threw it all in together. I browned the meat, tossed in the tortilla pieces like edible puzzle pieces, blanketed it in cheese, and covered it. What emerged was a communal, cheesy, glorious mess. We ate it straight from the pan with spoons, laughing and scraping up every last crispy bit. It was a hit. That messy, thrown-together meal became a blueprint. It taught me that the best food isn’t about perfection; it’s about flavor, fun, and feeding the people you care about without stressing yourself out. This skillet is that spirit, perfected.
Gather Your Flavor Arsenal
Here’s everything you need to build your flavor fortress. Don’t stress about exact brands—this is about using what you have and what you love.
- 1 lb lean ground turkey or chicken: Our high-protein powerhouse. I love the 93/7 lean-to-fat ratio here—it keeps things light but still juicy. Chef’s Insight: If you’re using chicken, go for thigh meat if you can find it ground; it has a bit more flavor and stays moist.
- 1/2 cup diced onion: The sweet, aromatic foundation. Yellow or white onion works great.
- 1/2 teaspoon ground cumin: This is the warm, earthy soul of so many incredible dishes. It adds instant depth.
- 1/2 teaspoon chili powder: Not just heat, but a complex blend of spices that brings a smoky, rounded flavor. Sub Tip: If you only have cayenne, use a 1/4 teaspoon so you don’t bring too much pure heat.
- Salt and black pepper to taste: Your flavor amplifiers. Always season in layers!
- 1/2 cup salsa or diced tomatoes: This is our moisture and tang. A chunky medium salsa adds great texture. Chef’s Hack: If your salsa is very liquidy, drain it a bit so your skillet doesn’t get soggy.
- 3 high-protein tortillas, cut into triangles: The crispy, carby vessel. I use the “street taco” size or small flour tortillas. Cutting them into triangles lets them nestle into every nook and cranny for maximum coverage and crispiness.
- 3/4 cup shredded cheese: The glorious, melty glue. I’m a fan of a Monterey Jack and sharp cheddar mix. Pro Move: Always shred your own cheese if you have an extra minute! Pre-shredded bags contain anti-caking agents that can make the melt less smooth.
- Optional toppings (the party starters!): A dollop of Greek yogurt (my protein-packed sour cream swap), sliced avocado, chopped green onions, pickled jalapeños, fresh cilantro, or a squeeze of lime juice. This is where you make it yours.
Let’s Build That Skillet! (Step-by-Step)
Ready? This is where the magic happens, and it’s so simple. I’ll walk you through every step with my favorite kitchen hacks sprinkled in.
- Heat your skillet and sauté the onion. Grab your largest oven-safe skillet (a 10 or 12-inch works perfectly) and place it over medium heat. You don’t need oil if your meat has a little fat, but a quick spritz of cooking spray or a teaspoon of olive oil works. Add your diced onion and let it cook for 2-3 minutes. We’re not looking for full caramelization, just to soften it and take that raw edge off. You’ll smell that sweet aroma—that’s your signal.
- Brown the meat and build the flavor. Add the ground turkey or chicken to the skillet with the onions. Now, get in there with your wooden spoon or spatula and break it up into crumbles. This is key for texture. As it starts to turn from pink to white, that’s when you add your cumin, chili powder, salt, and pepper. Why now? Toasting the spices in the meat’s fats wakes up their oils and infuses every single bite. Cook until the meat is fully browned and no pink remains, about 5-7 minutes.
- Simmer with salsa. Pour in your salsa or diced tomatoes. Stir everything together and let it simmer for 2-3 minutes. This allows the flavors to meld and any excess liquid to cook off slightly, preventing a soggy tortilla situation later. Give it a taste! This is your last chance to adjust seasoning. Need more salt? A pinch more cumin? Now’s the time.
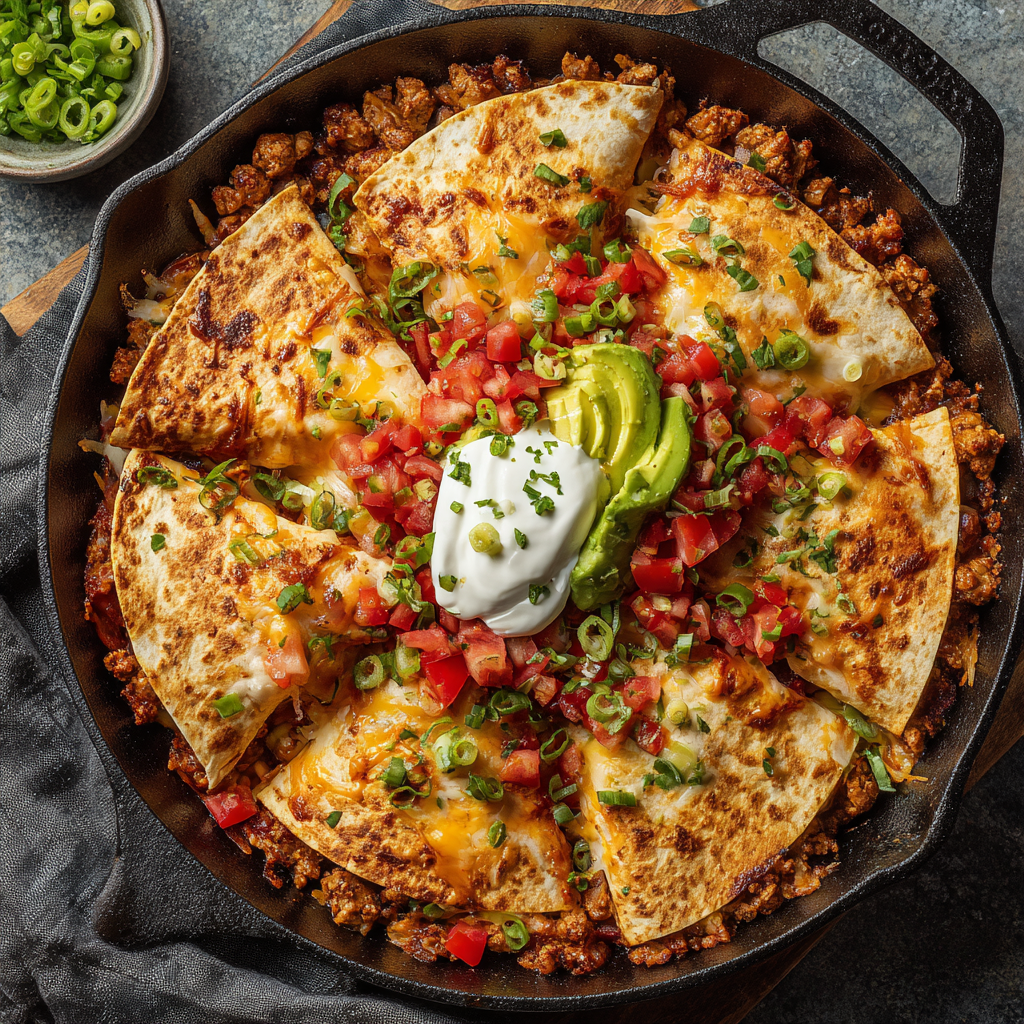
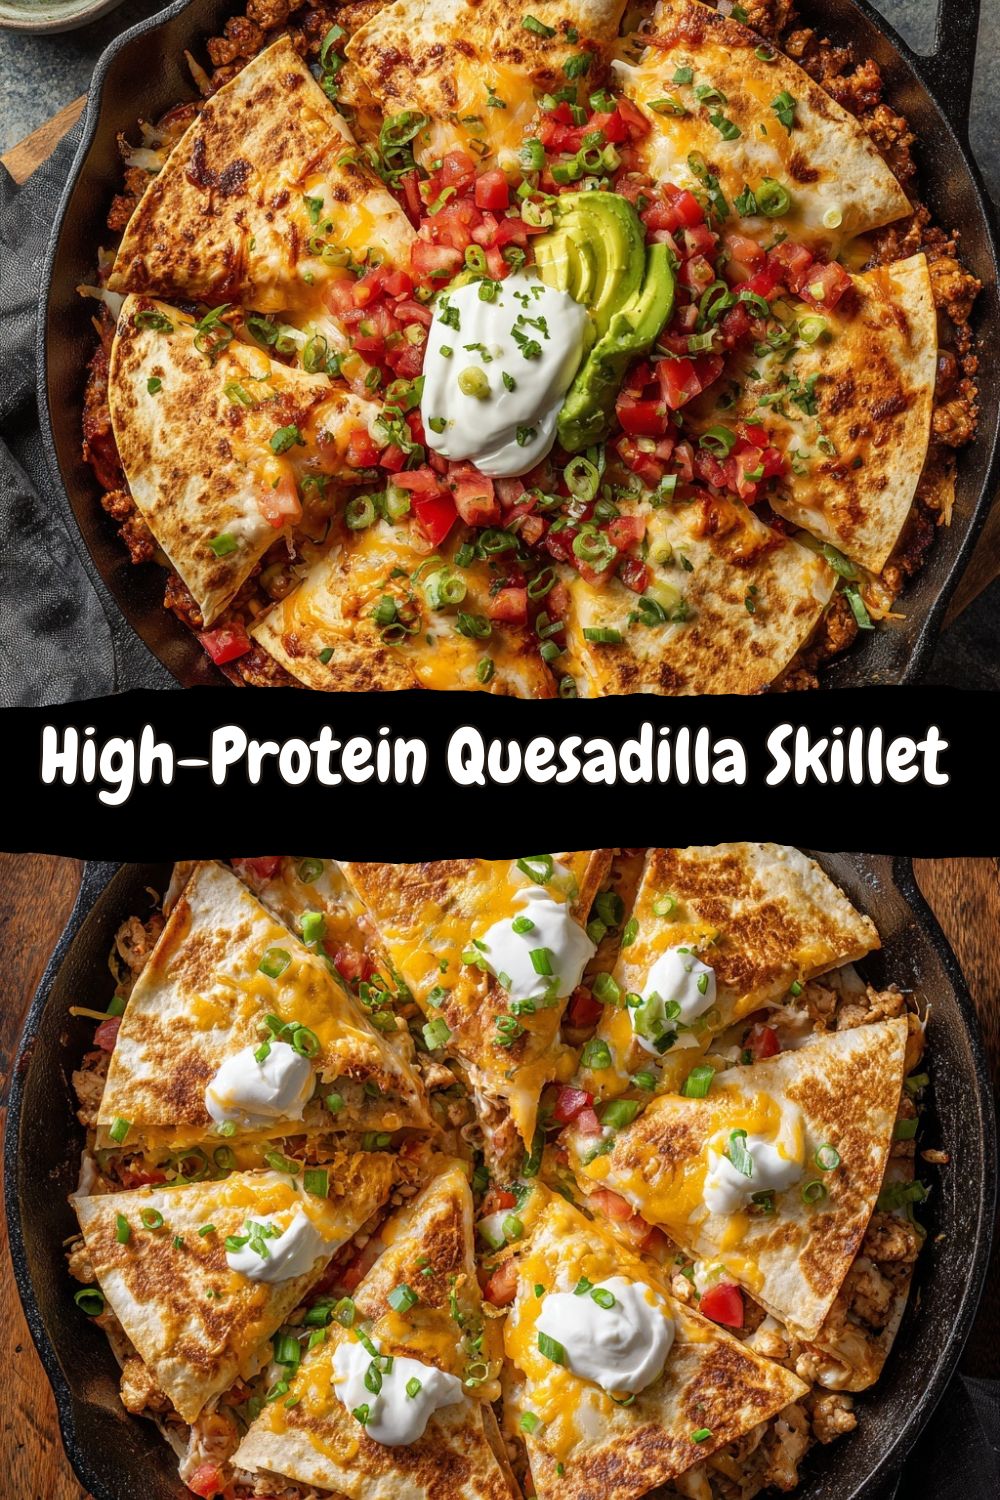
- Create the tortilla mosaic. Turn off the heat for a second. Take your tortilla triangles and start layering them over the meat mixture, overlapping slightly like shingles on a roof or pieces of a puzzle. You want most of the meat covered. This creates pockets for the cheese to drip into and gives you a perfect mix of crispy and soft tortilla bits.
- The cheesy blanket. Sprinkle your shredded cheese evenly over the entire surface of the tortillas. Don’t be shy—get it all the way to the edges for those incredible, crispy cheese fricos.
- Melt to perfection. Here’s the easy part. Cover the skillet with a lid (or a large baking sheet if you don’t have one). Turn the heat back to medium-low. Let it cook for 2-4 minutes. You’re waiting for that beautiful sound: the faint sizzle that tells you the tortillas on the bottom are crisping up and the cheese on top is fully melted into a gooey, irresistible layer. Peek under the lid—if the cheese is bubbly, you’re done!
Serving It Up with Style
Presentation is half the fun, even for a casual meal like this. I like to bring the whole skillet straight to the table—it’s a showstopper and means fewer dishes to wash. Garnish the top with a handful of fresh chopped cilantro or green onions for a pop of color.
Then, set out your topping bar: a bowl of creamy avocado slices, a dish of spicy jalapeños, that tangy Greek yogurt, and maybe some extra salsa. Let everyone dig in and customize their own perfect bite. I serve it with a simple side salad of romaine and lime juice or just eat it straight from the pan with a big spoon, savoring the contrast of the crisp bottom layer, the savory middle, and the molten cheese top. It’s a texture and flavor party in every scoop.
Make It Your Own: Creative Twists
The beauty of this skillet is its flexibility. Here are a few of my favorite ways to mix it up:
- “Fajita” Style: Before adding the meat, sauté a thinly sliced bell pepper and a poblano pepper with the onion. Use smoked paprika in place of the chili powder for a deeper, smokier vibe.
- Breakfast-for-Dinner Skillet: Swap the ground meat for a pound of cooked, crumbled breakfast sausage (turkey or pork). Use a cup of frozen hash browns (thawed) instead of half the tortillas. Top with cheese, cover to melt, and then finish with a few fried eggs on top after it comes off the heat.
- Full Veggie Power: For a plant-based version, use a plant-based ground “meat” or a can of drained and rinsed black beans + a cup of corn. Amp up the spices a bit and consider adding a handful of fresh spinach wilted into the salsa step.
- “Buffalo Chicken” Skillet: Use shredded cooked chicken (rotisserie is perfect!). After simmering with the salsa, stir in 1/3 cup of hot sauce (like Frank’s) and a tablespoon of ranch seasoning powder. Proceed with the tortillas and use a blue cheese crumble and mozzarella mix on top.
- Low-Carb Version: Skip the tortillas altogether! After the meat simmers, simply sprinkle the cheese directly on top, cover to melt, and serve over a bed of cauliflower rice or shredded lettuce for a killer, cheesy taco bowl.
Chef’s Notes & Kitchen Stories
This recipe has evolved from that first messy apartment experiment. The biggest lesson? Don’t skip the “cover and melt” step. I tried just throwing it under the broiler once, and while it works, you lose that essential steam that perfectly softens the top tortillas while crisping the bottom. The lid is non-negotiable for the ideal texture.
Also, I’ve learned to embrace the “clean out the fridge” potential. A handful of leftover corn? Toss it in with the salsa. A lonely half can of diced green chiles? Absolutely. Some leftover taco meat from Tuesday? You’re halfway done already. This skillet is less of a rigid recipe and more of a brilliant, cheesy framework for whatever needs using up. It’s saved me from food waste more times than I can count, and it always, always tastes like a victory.
Your Questions, Answered
Q: My skillet isn’t oven-safe. Can I still make this?
A: 100%! Just make sure you have a lid that fits it snugly. The entire recipe happens on the stovetop. If you don’t have a lid, a large piece of foil tightly tented over the top works in a pinch.
Q: It came out a bit soggy. What happened?
A: The usual culprit is too much liquid. Next time, ensure your salsa isn’t overly watery (you can drain it), and let the meat-salsa mixture simmer for the full few minutes to reduce. Also, don’t skip the step of turning off the heat when you layer the tortillas—this prevents them from immediately soaking up steam from the hot pan.
Q: Can I make this ahead of time?
A: You can prep the meat mixture (through step 3) up to 2 days ahead and store it in the fridge. When ready to eat, reheat it in the skillet, then proceed with the tortillas and cheese. It’s best finished fresh for that crisp texture.
Q: What’s the best way to reheat leftovers?
A> To preserve crispiness, reheat in a skillet on the stove over medium-low heat with a lid for a few minutes. The microwave will work in a pinch but will soften everything.
Nutritional Info (A Quick Look)
I’m not a dietitian, but I believe in knowing what fuels your body. Here’s a rough breakdown per serving (about 1/4 of the skillet), calculated with lean ground turkey, store-bought salsa, and pre-shredded cheese. Remember, toppings will change this!
- Calories: ~320
- Protein: ~28g (Hello, muscle fuel! This is what keeps you full and satisfied.)
- Carbohydrates: ~14g
- Fat: ~16g
- Fiber: ~3g
Prep Time: 10 minutes | Cook Time: 15 minutes | Total Time: 25 minutes | Servings: 4
Final Thoughts
At the end of the day, that’s what Food Meld is all about: taking the intimidation out of cooking and replacing it with excitement, flavor, and a whole lot of “you’ve got this.” This High-Protein Quesadilla Skillet is a perfect example. It’s fast, it’s forgiving, and it delivers that incredible “wow” factor we all crave from our food.
So, the next time that dinner-time dilemma hits, I hope you remember this trusty skillet. Don’t just follow the recipe—play with it. Throw in your favorite spices, clean out the veggie drawer, and make it a meal that brings you joy. Then, tag me @FoodMeld when you make it! I love seeing your creations and kitchen victories. Now, go forth and cook something awesome. Talk soon, friends.
– Jackson


